Table of Contents
Advertisement
Quick Links
Advertisement
Table of Contents

Related Manuals for ESI ESU1808


Summary of Contents for ESI ESU1808
- Page 1 18-in/8-out USB 2.0 Hi-Speed External Recording Interface User’s Guide...
- Page 2 ESI - Copyright © 2007 Revision 1, November 2007 www.esi-audio.com...
-
Page 3: Table Of Contents
ESU1808 INDEX 1. Introduction..........................4 1.1 What’s in the box ..............................4 1.2 Key Features ................................ 4 2. Description of ESU1808....................... 5 2.1 Front Panel................................5 2.2 Rear Panel ................................7 3. Hardware Installation ......................... 9 3.1 Minimum system requirements..........................9 3.2 Installation ................................ -
Page 4: Introduction
ESU1808 shows the latest audio interface technology for external usage on notebook and desktop computers. The USB 2.0 Hi-Speed audio interface for Mac & PC shows what is really possible with USB 2.0. ESI's new USB 2 Xtreme technology boosts USB audio to a new level, providing better performance for better results. -
Page 5: Description Of Esu1808
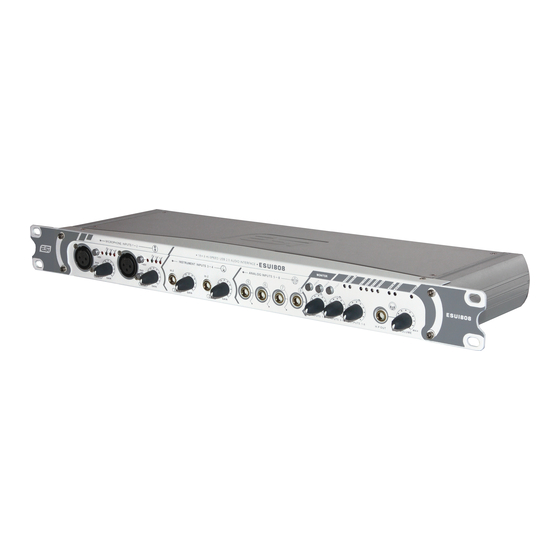
ESU1808 2. Description of ESU1808 2.1 Front Panel Input 1/2 - microphone inputs Input 1/2 are provided as microphone inputs with balanced XLR connectors and independent GAIN control. You can use both inputs for dynamic and condenser microphones. If required, you can activate the +48V phantom power switch. - Page 6 ESU1808 Monitor control section This section allows you to control the monitoring with 3 independent gain knobs and 3 function buttons. INPUTS 1-8 controls the mixed level of all input signals from the front panel. INPUTS 9-16 controls the mixed level of all input signals from the rear panel. OUTPUTS 1-8 controls the mixed level of all playback signals from your audio applications.
-
Page 7: Rear Panel
ESU1808 The MIDI IN and MIDI OUT LEDs show activity of the MIDI I/O ports. The POWER LED is on when ESU1808 is switched on. 2.2 Rear Panel Power section The power section provides the connector for the included external power supply. Make sure to connect the power supply to this port securely. - Page 8 ESU1808 USB 2.0 connection The USB 2.0 connector. Refer to section 3.2 about connecting ESU1808 to your computer. MIX OUT and Output 7/8 The MIX OUT connector is typically used as the main master output, provided with two 1/4" output connectors.
-
Page 9: Hardware Installation
ESU1808 3. Hardware Installation 3.1 Minimum system requirements - Pentium 4 or Athlon 1.4GHz or faster (or 100% compatible) - at least 512MB RAM - at least 1 GB available space on HDD - one available USB 2.0 port - DVD-ROM drive (for Cubase LE 4 installation) - internet connection (for Cubase LE 4 activation) - Windows XP (with Service Pack 2) 32-bit or Windows Vista 32-bit - Power Macintosh G5, Core Solo 1.5GHz or faster... -
Page 10: Driver Installation
4. Driver Installation Before installing the drivers of ESU1808, we recommend to check on the download section of www.esi-audio.com for updated drivers. 4.1 Windows Switch off ESU1808 via the power switch on the rear panel before you install the driver. Then launch setup.exe from the Windows folder of the included driver CD or from a download of a recent... -
Page 11: Mac Os X
When no further message appears, you can finally click Next on the ESI ESU1808 Audio Driver Setup dialog. The installation is now finished. To confirm this, please check if the ESI icon is displayed in the taskbar notification area as shown below. - Page 12 ESU1808 Confirm it with Continue. The next window displays some details about the ESU1808 driver installation. Confirm it with Continue. The following dialog will appear: Under Select a Destination, you can select the destination partition. We strongly recommend to install the ESU1808 driver on your Macintosh HD hard disk. Confirm your selection with Continue and on the following dialog proceed with the installation by clicking Install.
-
Page 13: Esu1808 Control Panel
The main features of ESU1808 are controlled by the control panel that is automatically installed by the driver. All main functions under Windows and Mac OS X are identical. To open the control panel under Windows, double click on the ESI icon in the task notification area. - Page 14 ESU1808 There are three different areas in the panel: A. input section The input section contains input level meters for each input, divided into 3 groups. Analog In 1~8 show incoming signals for the analog inputs on the front panel of ESU1808. Analog In 9~16 show incoming signals for the analog inputs on the rear panel of ESU1808.
-
Page 15: Pull Down Menu (Windows)
ESU1808 5.3 Pull Down Menu (Windows) There are three functions in the pull down menu of the Control Panel under Windows: Config > Factory Default. Use this to restore all ESU1808 settings to the recommended defaults. Config > Samplerate. This sub menu allows you to change the operating sample rate of ESU1808. Config >... -
Page 16: Monitoring Volume For Input Channels
ESU1808 6.2 Monitoring volume for input channels The monitoring section on the front panel of ESU1808 controls two gain knobs (for INPUTS 1-8 and INPUTS 9-16) that allow you to individually control the monitoring volume for each group of inputs. If you do not want to monitor any analog input signals, turn these gain knobs to 0. -
Page 17: Audio Applications
ESU1808 7. Audio Applications This chapter contains basic configuration examples for some popular software applications. Please also refer to the manual of the audio software you use for detailed information. Caution: The driver of ESU1808 allows multiple applications to access the hardware at the same time. - Page 18 ESU1808 directly from the ESU1808 Control Panel. When you launch it, you can setup ESU1808 as your Default Input, Default Output or System Output device – if required. While audio production and editing applications usually provide an option inside their preferences to select ESU1808 as recording and playback device, many general standard applications such as iTunes for example are usually accessing the Default Output device, selectable in the Audio MIDI Setup dialog.
-
Page 19: Cubase Le 4
ESU1808 Although we strongly recommend a Power PC G5 or Intel Macintosh system, this setting would allow you to use ESU1808 under a G4 (equipped with USB 2.0 port) with limited performance. 7.4 Cubase LE 4 ESU1808 ships with a DVD-ROM with Cubase LE 4 from Steinberg. If you are using a different recording software, you can skip this section. - Page 20 ESU1808 Now its time to select the input and output channels. From the Devices menu, select VST Connection. The VST Connections window appears. Select the Inputs tab: For every input channel you are intending to use simultaneously, you need to create a separate bus. Cubase LE 4 allows you add mono or stereo busses –...
-
Page 21: Technical Specifications
ESU1808 8. Technical Specifications Interface Type USB 2.0 Full Speed / High Speed support Firmware Firmware update via USB possible Digital Clock Low jitter due to USB independent PLL 18 audio input channels & 8 audio output channels audio interface I/O Configuration 1 port (16 channels) input &... -
Page 22: General Information
Note: use only the original supplied external power supply. 9. General Information Trademarks ESI and ESU1808 are trademarks of Ego Systems Inc. and ESI Audiotechnik GmbH. Windows is a trademark of Microsoft Corporation. Other product and brand names are trademarks or registered trademarks of their respective companies. - Page 23 ESU1808 Parts of this manual are continually being updated. Please check our web site www.esi-audio.com occasionally for the most recent update information.