Table of Contents
Advertisement
Advertisement
Table of Contents

Related Manuals for AEG Electrolux FAVORIT 35085 VI


Summary of Contents for AEG Electrolux FAVORIT 35085 VI
-
Page 1: Instruction Book
FAVORIT 35085 VI Dishwasher Instruction book PERFEKT IN FORM UND FUNKTION... - Page 2 Dear customer, Please read this User Information carefully and keep it to refer to at a later date. Pass it on to any subsequent owner of the appliance. The following symbols are used in the text: Safety instructions Warning! Notes that concern your personal safety. Attention! Notes that show how to avoid damage to the appliance.
-
Page 3: Table Of Contents
Economical and ecological dishwashing Description of the appliance The control panel Audible signals Prior to using for the first time The water softener Filling with dishwasher salt Rinse aid In daily use Loading cutlery and dishes The lower basket The cutlery basket... -
Page 4: Operating Instructions
Care must be taken to ensure that the appliance does not stand on the electrical supply cable. The sides of the dishwasher must never be drilled to prevent damage to hydraulic components. Child safety This appliance is designed to be operated by adults. - Page 5 Long and/or sharp items of cutlery such as carving knives must be positioned horizontally in the upper basket. Ensure that the door of the dishwasher is always closed when it is not being loaded or unloaded. In this way you will avoid anybody tripping over the open door and hurting themselves.
-
Page 6: Disposal
Cardboard packaging is manufactured from recycled paper and should be deposited in the waste paper collection for recycling. As and when you cease to use your dishwasher and withdraw it from service, your should render it unserviceable before having it disposed Warning! Children at play could lock themselves in your dishwasher or otherwise endanger their lives. -
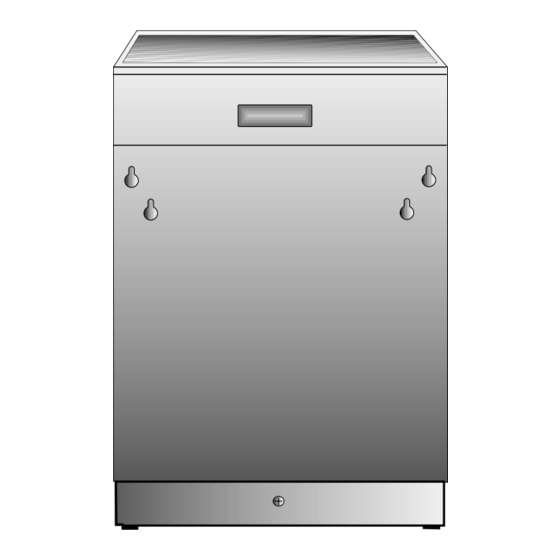
Page 7: Description Of The Appliance
Description of the appliance 1. Upper basket stop 2. Water hardness dial 3. Salt container 4. Detergent dispenser 5. Control panel 6. Rating plate Operating instructions 7. Rinse aid dispenser 8. Filters 9. Lower spray arm 10. Upper spray arm 11. -
Page 8: The Control Panel
(see "Washing programmes" chart). The end of programme indicator light flashes. Once the washing programme has been set, close the dishwasher’s door, the programme will start automatically. With this button it is also possible to:... - Page 9 Indicator lights: have the following meanings: End of programme, illuminates when the washing programme has ended. It also has added functions of visual signalling as: - the setting of the water softener, - deactivation/activation of the audible signals, - intervention of an alarm due to the malfunction of the machine.
-
Page 10: Audible Signals
Deactivation/activation of the audible signals Factory setting: audible signals activated. 1. With the dishwasher switched off, press the On/Off button. The end of programme indicator light flashes (setting mode). In case salt and/or rinse aid refilling is necessary the corresponding indicator lights illuminate. -
Page 11: Prior To Using For The First Time
"Different kinds of detergents". The water softener The dishwasher is equipped with a water softener designed to remove minerals and salts from the water supply, which would have a detrimental or adverse effect on the operation of the appliance. - Page 12 Operating instructions a) Setting manually 1. Open the dishwasher door. 2. Remove the lower basket from the dishwasher. 3. Turn the water hardness dial to position 1 or 2 (see table). 4. Replace the lower basket. The dishwasher is factory set at position 2.
- Page 13 Setting electronically The dishwasher is factory set at level 5. 1. With the dishwasher switched off, press the On/Off button. The end of programme indicator light flashes (setting mode). In case salt and/or rinse aid refilling is necessary the corresponding indicator lights illuminate.
-
Page 14: Filling With Dishwasher Salt
The salt indicator light on the control panel can remain illuminated for 2-6 hours after the salt has been replenished, assuming the dishwasher remains switched on. If you are using salts that take longer to dissolve then this can take longer. The function of the machine is not affected. -
Page 15: Rinse Aid
Clean up any rinse aid spilt during filling with an absorbent cloth to avoid excess foaming during the next wash. Only use branded rinse aid for dishwashers. Never fill the rinse aid dispenser with any other substances (e.g. dishwasher cleaning agent, liquid detergent). This would damage the appliance. - Page 16 Operating instructions Adjusting the dose According to the finish and drying results obtained, adjust the dose of rinse aid by means of the 6 position selector (position 1 minimum dosage, position 6 maximum dosage). The dose is factory set in position 4. Increase the dose if there are drops of water or lime spots on the dishes after washing.
-
Page 17: In Daily Use
In daily use • Check if it’s necessary to refill with dishwasher salt or rinse aid. • Load cutlery and dishes into the dishwasher. • Fill with dishwasher detergent. • Select a wash programme suitable for the cutlery and dishes. - Page 18 Operating instructions For washing in the dishwasher the following cutlery/dishes are not suitable: •Cutlery with wooden, horn, china or mother-of-pearl handles •Plastic items that are not heat resistant •Older cutlery with glued parts that are not temperature resistant •Bonded cutlery items or dishes •Pewter or copper items...
-
Page 19: The Lower Basket
Operating instructions Open the door and slide out the baskets to load the dishes. The lower basket The lower basket is designed to take saucepans, lids, plates, salad bowls, cutlery etc. Serving dishes and large lids should be arranged around the edge of the basket, ensuring that the spray arms can turn freely. -
Page 20: The Cutlery Basket
Operating instructions The cutlery basket Long bladed knives stored in an upright position are a potential hazard. Long and/or sharp items of cutlery such as carving knives must be positioned horizontally in the upper basket. Take care when loading or unloading sharp items such as knives. Forks and spoons should be placed in the removable cutlery basket with the handles facing downwards and the knives with their handles facing upwards. -
Page 21: The Upper Basket
Operating instructions The upper basket The upper basket is designed for plates (dessert plates, saucers, dinner plates of up to 24 cm in diameter), salad bowls, cups and glasses. Arrange items on and underneath the cup racks so that water can reach all surfaces. -
Page 22: Adjusting The Height Of The Upper Basket
Operating instructions Adjusting the height of the upper basket If washing very large plates you can load them in the lower basket after moving the upper basket to the higher position. With upper basket raised With upper basket lowered To move to the higher position proceed as follows: 1. -
Page 23: Use Of Detergent
Use of detergent Only use detergents specifically designed for use in dishwashers. We recommend the use of Finish detergents. Using no more than the correct amount of detergent contributes to reducing pollution. Please observe the manufacturer’s dosing and storage recommendations as stated on the detergent packaging. Fill with detergent 1. -
Page 24: Different Kinds Of Detergent
Operating instructions Different kinds of detergent Detergent tablets Detergent tablets from different manufactures dissolve at different rates. For this reason, some detergent tablets do not attain their full cleaning power during short washing programmes. Therefore please use long washing programmes when using detergent tablets, to ensure the complete removal of detergent residuals. - Page 25 Use of "3 in 1" combi detergents These products are detergents with a combined cleaning, rinsing and salt function. 1. Check whether these detergents are suitable for your water hardness. Follow the manufacturers instructions. NOTE: the refilling of the salt container and the rinse aid dispenser are no longer necessary.
-
Page 26: Washing Programmes
Operating instructions Washing programmes Type of Programme load INTENSIVE Crockery, cutlery, CARE 70° pots and pans Crockery and 30 MIN cutlery Crockery and NORMAL 65° cutlery Crockery and ECO 50° cutlery RINSE AND HOLD 1. INTENSIVE CARE 70° programme is foreseen with Care Plus function, which gives a greater degree of hygiene to dishes and glasses. -
Page 27: Starting A Washing Programme
Once the delay start has elapsed the programme will start automatically. To cancel a "delay start" in progress Open the dishwasher’s door and press the delay start button, the corresponding indicator light turns off. Close the door, the set programme will start automatically. -
Page 28: End Of The Washing Programme
The dishwasher will automatically stop. An audible signal informs you of the end of the washing programme. Open the dishwasher’s door, leave it ajar and wait a few minutes before removing the dishes; in this way they will be cooler and the drying will be improved. -
Page 29: Unloading The Dishwasher
Water may appear on the sides and the door of the dishwasher as the stainless steel will eventually become cooler than the dishes. When the washing programme has finished, it is recommended that the dishwasher is unplugged and the water tap turned off. -
Page 30: Maintenance And Cleaning
Ensure that the seals around the door, the detergent and rinse aid dispensers are cleaned regularly with a damp cloth. We recommend the use of Finish Dishwasher Cleaner every 3 months or run a 65°C wash programme without dishes using detergent. - Page 31 During this process ensure that the flat filter does not protrude above the base of the washing compartment. Attention! Under no circumstances may the dishwasher be used without filters. Incorrect repositioning and fitting of the filters will produce poor washing results.
-
Page 32: Frost Precautions
Operating instructions Prolonged periods of non-operation If you are not using the machine for any period of time you are advised to: 1. Unplug the appliance and then turn off the water. 2. Leave the door ajar to prevent the formation of any unpleasant smells. -
Page 33: Troubleshooting And Fault Codes
...a fault code appears The dishwasher will not start or stops during operation and a sequence of intermittent audible signals are heard. Open the dishwasher’s door... -
Page 34: There Are Problems When Operating The Dishwasher
Operating instructions Once the checks have been carried out, press the programme selection/cancel button and close the dishwasher’s door. The programme will continue from the point at which it was interrupted. If the fault code reappears contact your local Service Force Centre. - Page 35 The dishes are wet and dull Rinse aid was not used. The rinse aid dispenser is empty. There are streaks, milky spots or a bluish coating on glasses and dishes Decrease rinse aid dosing. Water drops have dried onto glasses and dishes Increase rinse aid dosing.
-
Page 36: Service And Spare Parts
Please note that a valid purchase receipt or guarantee documentation is required for in-guarantee service calls. For Customer Service in The Republic of Ireland please contact us at the address below: Electrolux Group (Irl) Ltd Long Mile Road Dublin 12 Republic of Ireland Tel: + 353 (0)1 4090751 Email: service.eid@electrolux.ie... -
Page 37: Customer Care Department
Service Customer Care Department For general enquiries concerning your AEG-Electrolux appliance or for further information on AEG-Electrolux products, please contact our Customer Care Department by letter or telephone at the address below or visit our website at: www.AEG.co.uk Customer Care Department... -
Page 38: Guarantee Conditions
Guarantee Conditions Standard Guarantee Conditions We, AEG-Electrolux, undertake that if within 12 months of the date of purchase this AEG-Electrolux appliance or any part thereof is proved to be defective by reason only of faulty workmanship or materials, we will, at our... -
Page 39: European Guarantee
European Guarantee If you should move to another country within Europe then your guarantee moves with you to your new home subject to the following qualifications: The guarantee starts from the date you first purchased your product. The guarantee is for the same period and to the same extent for labour and parts as exists in the new country of use for this brand or range of products. -
Page 40: Technical Specifications
Width Height Max depth Max depth with open door Information on the electrical connection is given on the rating plate on the inner edge of the dishwasher’s door. Minimum Maximum 59.6 cm 81.8 - 87.8 cm 55.5 cm 114 cm 0,05 MPa (0.5 bar) -
Page 41: Installation Instructions
Remove all packaging before positioning the machine. If possible, position the machine next to a water tap and a drain. Building-in This dishwasher is designed to be fitted under a kitchen counter or worksurface. Attention! Carefully follow the instructions on the enclosed template for building in the dishwasher and fitting the furniture panel. -
Page 42: Water Supply Connections
Installation instructions Water supply connections This dishwasher may be fed with either hot (max. 60°) or cold water. Nevertheless we advise you use a cold water supply. A hot water supply is not always efficient with very soiled crockery as it shortens the washing programmes a lot. -
Page 43: Water Inlet Hose With Safety Valve
Water inlet hose with safety valve After connecting the double-walled water inlet hose, the safety valve is next to the tap. Therefore the water inlet hose is only under pressure while the water is running. If the water inlet hose starts to leak during this operation, the safety valve cuts off the running water. -
Page 44: Water Outlet Hose Connection
(minimum) and 100 cm (maximum) from the bottom of the dishwasher. The drain hose can face either to the right or left of the dishwasher Ensure the hose is not bent or squashed as this could prevent or slow down the discharge of water. -
Page 45: Electrical Connection
Electrical connection WARNING: THIS APPLIANCE MUST BE EARTHED. The manufacturer declines any responsibility should this safety measure not be observed. If the plug that is fitted to your appliance is not suitable for the socket, it must be cut off and the appropriate plug fitted. Important The wires on the mains lead are coloured in accordance with the following code:... - Page 46 A replacement cover/carrier must be obtained from your local Service Force Centre. To isolate the dishwasher from mains, remove the mains plug. Important! The plug must still be accessible after the appliance has been installed.
-
Page 47: Hints For Test Centres
Hints for test centres Testing in accordance with EN 60704 must be carried out with appliance fully loaded and using the test programme (see "Washing programmes" chart). Testing in accordance with EN 50242 must be carried out when the salt dispenser and rinse aid container have been filled with salt and rinse aid respectively and using the test programme (see "Washing programmes"... - Page 48 152 950 74/0 10/06 Subject to change without notice...