
Related Manuals for Electro-Voice ZX5 Series


Summary of Contents for Electro-Voice ZX5 Series
- Page 1 Zx5 Series Loudspeaker Owner’s Manual Zx5-60 Zx5-90 ELECTRO-VOICE ® Zx5 Owner’s Manual...
-
Page 2: Important Safety Instructions
(servicing) instructions in the literature accompanying the appliance. The asterisk within an equilateral triangle is intended to inform the user to necessary installation or removal instructions regarding equipment or hardware use relating to the system. Zx5 series loudspeaker system. This system is the ® ELECTRO-VOICE ®... -
Page 3: Table Of Contents
Table of Contents Important Safety Instructions ... 1 Zx5 Series Owner’s Manual ... 1 Safety First ... 3 Description ... 4 System Features - Zx5 ... 4 System Coverage - Zx5 ... 4 Suspending Zx5 Speaker Systems ... 5 Zx5 Stage Monitor Positions ... 11 Specifications ... -
Page 4: Safety First
· Check that the speaker stand is placed on a flat, stable surface and be sure to fully extend the legs of the stand. Do not try to make the stand “taller” and compromise its structural integrity. -
Page 5: Description
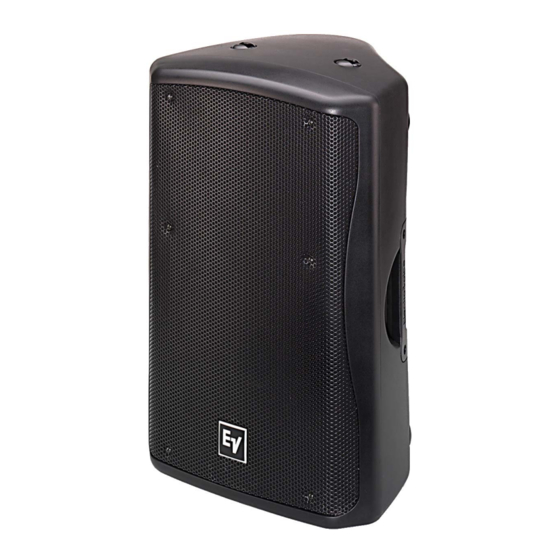
Zx5 is a unique, lightweight package of pro audio performance, versatility and ® aesthetics. You won’t find a speaker system available on the market that offers the unbelievable sound, incredible flexibility and tremendous output capability of the Zx5 anywhere near it’s size and weight. -
Page 6: Suspending Zx5 Speaker Systems
Figure 2. Figure 2: Working Load-Limit Rating of Zx5 Speaker System Prior to each use, inspect the grid assembly or suspension point(s) and associated hardware for any cracks, deformations, broken welds, corrosion, missing or damaged components which could reduce the grid assembly or suspension point(s) strength. - Page 7 (Single-Stud Anchor Plate Removal Required) (2) M8 Suspension Points (Removal of Handle Bolts Required) Figure 3a: Zx5 M8 Suspension Points (Top, Handle, Rear) ELECTRO-VOICE ® Zx5 Owner’s Manual (2) M8 Suspension Points (Decal Removal Required) (2) M8 Suspension Points (Decal Removal Required)
- Page 8 Suspending Zx5 Speaker Systems (cont’) Suspending the Zx5 using optional Electro-Voice Single-Stud Rigging Kits The Zx5 is shipped with three single-stud anchor plates for rigging with single-stud rigging. There are two more locations on the bottom to mount single-stud anchor plates for flying the Zx5 upside- down or horizontally.
- Page 9 Step 1: Remove Handle Bolts Figure 8: Suspending the Zx5 Horizontally from Handle Using Optional Forged Eyebolt Kit Kit Used - EBK-3 Forged M8 Eyebolt Kit (x1) ELECTRO-VOICE ® Zx5 Owner’s Manual Assembling Eyebolts to Handle Step 2: Attach Eyebolts...
- Page 10 HA-5 Handle Adapter Kit (x1) VSA-1 Strong-Arm Mount (x1) Arraying and Suspending the Zx5 using optional Electro-Voice Mounting or Array Brackets Figures 10 and 11 show several applications using EV mounting and array brackets. Carefully follow the instructions in this manual & the user manual packaged with EV brackets, and always use safe rigging practices when suspending Zx5.
- Page 11 Kits Used - CB5 Array Bracket Kit (x2)* SSK-1 Single-Stud Rigging Kit (x2) EBK-3 Forged M8 Eyebolt Kit (x1) *Note - CB5 Array Kits can be used for 60° or 90° Splay Angles ELECTRO-VOICE ® Zx5 Owner’s Manual Kit Used - MB5 Wall/Ceiling Mounting Bracket...
-
Page 12: Zx5 Stage Monitor Positions
It is recommended that the feet be returned to the 45° position for transport. Step 2: Rotate Monitor Feet 180° Figure 12: Figure 13b: Zx5 as Monitor in 55° Position Step 3: Re-attach Monitor Feet and Screws ELECTRO-VOICE ® Zx5 Owner’s Manual... -
Page 13: Specifications
Specifications i n i Half Space measurement. ELECTRO-VOICE ® Zx5 Owner’s Manual l a i i t i t i v l a t ° 0 ° 0 c i t ° 0 ° 0 n i l n i l... -
Page 14: Dimensions
Dimensions Top View Left View Front View Right View Rear View Bottom View Block Diagram Biamp: Passive: ELECTRO-VOICE ® Zx5 Owner’s Manual... -
Page 15: Frequency Response, Beamwidth, And Directivity
Zx5-60, 60° x 60° Coverage Frequency Response & Impedance: Passive Mode, Half Space Biamp Mode, Half Space Impedance 1000 Frequency (Hz) Beamwidth: Directivity: ELECTRO-VOICE ® Zx5 Owner’s Manual Zx5-90, 90° x 50° Coverage Frequency Response & Impedance: 3.16 10000 20000 Beamwidth:... -
Page 16: Zx5 Rigging Accessory Reference Table
Zx5 Rigging Accessory Reference Table l l a l l a , t i , t i n i l , t i n i l , t i , t i ELECTRO-VOICE ® Zx5 Owner’s Manual... -
Page 17: Painting Zx5 Speaker Systems
Rigging Points Masked Grille Masked Zx5 Enclosure WARNING: It is critical to the system’s operation that all transducers and exposed electrical components be masked off prior to painting. Painting View: Painting the Zx5 Enclosure ELECTRO-VOICE ® Zx5 Owner’s Manual... -
Page 18: Notes
Notes ELECTRO-VOICE ® Zx5 Owner’s Manual... - Page 19 Notes ELECTRO-VOICE ® Zx5 Owner’s Manual...
- Page 20 For technical assistance, contact Technical Support at: 866/78 AUDIO Specifications subject to change without notice. All Locations: 952-884-4051 Fax: 952-884-0043 www.electrovoice.com Printed in U.S.A © Telex Communications, Inc. 2/2007 Part Number 38110-355 Rev F Telex Communications, Inc. www.telex.com ELECTRO-VOICE ® Zx5 Owner’s Manual...