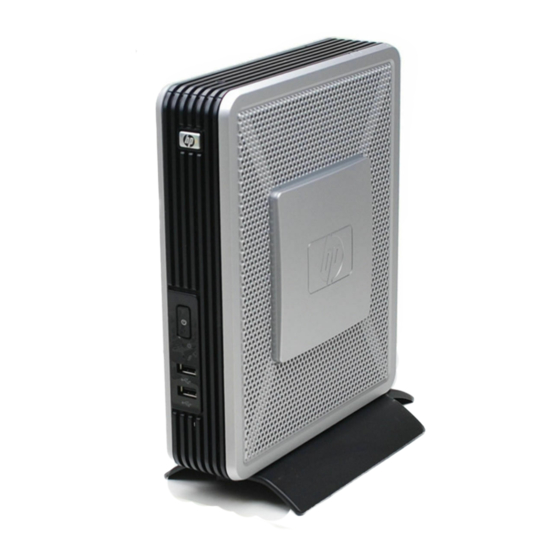
HP T5720 - Compaq Thin Client User Manual
Implementing gemalto smart card for use with hp compaq t5720 and hp cci
Hide thumbs
Also See for T5720 - Compaq Thin Client:
- Quick reference manual (49 pages) ,
- Hardware reference manual (48 pages) ,
- User manual (41 pages)
Table of Contents
Advertisement
Quick Links
Implementing Gemalto Smart Card for Use with HP Compaq
t5720 and HP CCI
Introduction . . . . . . . . . . . . . . . . . . . . . . . . . . . . . . . . . . . . . . . . . . . . . . . . . . . . . . . . . . . . 2
Prerequisites . . . . . . . . . . . . . . . . . . . . . . . . . . . . . . . . . . . . . . . . . . . . . . . . . . . . . . . . . . . . 2
Reference hardware and software . . . . . . . . . . . . . . . . . . . . . . . . . . . . . . . . . . . . . . . . . . . . . 3
Reference Documents . . . . . . . . . . . . . . . . . . . . . . . . . . . . . . . . . . . . . . . . . . . . . . . . . . . . . 4
Installing GemSafe Libraries 5.0 SE to Server and Client PCs (Optional) . . . . . . . . . . . . . . . . . . 5
Installing Microsoft Certificate Services . . . . . . . . . . . . . . . . . . . . . . . . . . . . . . . . . . . . . . . . . 9
Configuring a Certificate Authority (CA) service . . . . . . . . . . . . . . . . . . . . . . . . . . . . . . . . . . 13
Configuring Microsoft Certificate Authority to Issue Smart Card User Certificate . . . . . . . . . . . . 18
Manually issue Smart Card User Certificate . . . . . . . . . . . . . . . . . . . . . . . . . . . . . . . . . . . . . 24
Testing the Smart Card . . . . . . . . . . . . . . . . . . . . . . . . . . . . . . . . . . . . . . . . . . . . . . . . . . . 27
Creating Customized User Install Packages for Clients PCs (Optional) . . . . . . . . . . . . . . . . . . . 30
Additional Information . . . . . . . . . . . . . . . . . . . . . . . . . . . . . . . . . . . . . . . . . . . . . . . . . . . . 36
Using a Smart Card For Windows Network Login . . . . . . . . . . . . . . . . . . . . . . . . . . . . . . 36
Administration of the GemSafe Smart Card . . . . . . . . . . . . . . . . . . . . . . . . . . . . . . . . . . 36
Working with GemSafe Libraries . . . . . . . . . . . . . . . . . . . . . . . . . . . . . . . . . . . . . . . . . 36
Usage cases . . . . . . . . . . . . . . . . . . . . . . . . . . . . . . . . . . . . . . . . . . . . . . . . . . . . . . . . . . . 37
Usage case 1: User authentication from blade PC to Active Directory Domain . . . . . . . . . . 37
Active Directory Server using RDP . . . . . . . . . . . . . . . . . . . . . . . . . . . . . . . . . . . . . . . . . 38
Active Directory Server using HPSAM client . . . . . . . . . . . . . . . . . . . . . . . . . . . . . . . . . . 38
Usage case 4: Accessing secure Web site . . . . . . . . . . . . . . . . . . . . . . . . . . . . . . . . . . . 39
Active Directory Server . . . . . . . . . . . . . . . . . . . . . . . . . . . . . . . . . . . . . . . . . . . . . . . . 40
Usage case 6: User authentication from client device using Citrix server . . . . . . . . . . . . . . 43
Service and Support . . . . . . . . . . . . . . . . . . . . . . . . . . . . . . . . . . . . . . . . . . . . . . . . . . . . . 45
Advertisement
Table of Contents

Related Manuals for HP T5720 - Compaq Thin Client


Summary of Contents for HP T5720 - Compaq Thin Client
-
Page 1: Table Of Contents
Implementing Gemalto Smart Card for Use with HP Compaq t5720 and HP CCI Introduction ............2 Prerequisites . -
Page 2: Introduction
Introduction Smart cards can provide additional security to a corporate network. This paper provides instructions for configuring a smart card with your HP Compaq t5720 thin client and CCI blade PCs. Gemalto delivers secure personal devices, software, and services through innovation and collaboration— thus, enabling our clients to offer trusted and convenient digital services to billions of individuals. -
Page 3: Reference Hardware And Software
•Plug the keyboard cable into the grey extension socket. •Plug the purple connector of the reader into the keyboard port of the PC. • To connect the GemPC Card insert the reader into an available PCMCIA slot. b. Install your reader driver. The identified Gemalto supported cards are managed within the Gemalto libraries 5.0 SE software installation. -
Page 4: Reference Documents
• HP Compaq t5720 series thin client running Microsoft Windows XPe w/HPSAM blade ser- vice installed. • HP desktop PC running Microsoft Windows XP w/HPSAM blade service installed. • Smart Card Readers • HP standard USB Smart Card Keyboard. Driver: HPKBCCID.sys, version 4.30.0.1. •... -
Page 5: Installing Gemsafe Libraries 5.0 Se To Server And Client Pcs (Optional)
Installing GemSafe Libraries 5.0 SE to Server and Client PCs (Optional) Running the GemSafe Libraries 5.0 SE on a server or client for card provisioning is required. It is optional to install GemSafe Libraries 5.0 SE to client systems for user logon. The client install package is customiz- able and created by the Administrator (see “Creating Customized User Install Packages for Clients PCs (Optional)”... - Page 6 6. Click Next to continue; GemSafe Libraries Install Shield Wizard displays the License Agreement win- dow. Read the Gemalto License Agreement and click Yes to continue; the GemSafe Libraries InstallShield Wizard displays the Choose Destination Location window.
- Page 7 8. Click Next to install GemSafe Libraries to the default location or select a different location by using the Browse button. During the GemSafe Libraries installation you will see a series of dialogs similar to the following. These dialogs simply inform you as each of the components are automatically being installed.
- Page 8 9. Click Finish to complete the installation; the GemSafe Libraries InstallShield Wizard displays the Reboot Dialog. 10. Click Yes to restart the system immediately or No to restart your computer later. NOTE: To use GemSafe Libraries you must restart the computer. NOTE: Internet Explorer is automatically configured to work with GemSafe Libraries.
-
Page 9: Installing Microsoft Certificate Services
Installing Microsoft Certificate Services Click Start > Control Panel. Select Add or Remove Programs. In the left panel, select Add/Remove Windows Components. Click Certificate Services, and then click Next. - Page 10 Select Enterprise Root CA, and then click Next. Click Yes to accept the warning.
- Page 11 Type a Common name for this CA, and then click Next. Select Next to accept Certificate Database Settings.
- Page 12 The installation will configure components, as shown in the following screen. Click Yes when prompted to temporarily stop ISS.
-
Page 13: Configuring A Certificate Authority (Ca) Service
Click Finish to complete the installation. Configuring a Certificate Authority (CA) service Configure a CA service. This white paper uses Microsoft Certificate Services to configure certificates. Refer to “Installing Microsoft Certificate Services” on page 9 on installing certificate services. After you install the CA service, perform the following configuration steps: Create a MMC with following snap-ins: •... - Page 14 Create a duplicate template by right-clicking on the Smartcard Logon certificate template, and then selecting Duplicate Template. Type a name for the new template in the Template Display name box. This example uses CCI Smartcard User...
- Page 15 Click the Request Handling tab. Select 1024 in the Minimum key size box. Click the CSPs button. Select Requests can use any CSP available on the subject’s computer. Click the Security tab.
- Page 16 In the Permissions for Authenticated Users area, in the Allow column, select both Read and Enroll. You have created the creation of the template. Copy the CCI SmartCard User certificate template into the Certificates Templates folder under the certificate server. a.
- Page 17 d. Select New > Certificate Template to Issue. Select the template, and then click OK to import the template.
-
Page 18: Configuring Microsoft Certificate Authority To Issue Smart Card User Certificate
Configuring Microsoft Certificate Authority to Issue Smart Card User Certificate Click Start > Administrative Tools > Certification Authority. Expand the defined CA. Right-click Certificate Templates, and then select New. a. Select Certificate Template to Issue. b. Select Enrollment Agent. c. Select OK to add. - Page 19 Launch Internet Explorer and browse to http://localhost/certsrv. Under Select a task, select Request a certificate.
- Page 20 Select advanced certificate request. Select Create and submit request to this CA.
- Page 21 In the Certificate Templates box, select Enrollment Agent. Verify Enrollment Agent Settings in the Key Options section as follows: • Create new key is selected • Microsoft Enhanced Cryptographic Provider v1.0 • Click Submit.
- Page 22 Accept default settings under Additional Options. If a warning message displays about a potential scripting violation, press Yes to continue with the cer- tificate request. Install the Enrollment certificate requested.
- Page 23 Select Yes to Potential Scription Violation. You have successfully generated and installed required Enrollment Certificate, as shown below.
-
Page 24: Manually Issue Smart Card User Certificate
Manually issue Smart Card User Certificate Launch Internet Explorer and browse to http://localhost/certsrv. Select Request a certificate. Select advanced certificate request. - Page 25 Select Request a certificate for a smart card on behalf of another user by using the smart card certificate enrollment station. Select Smartcard User under Enrollment Options.
- Page 26 Define the user to enroll by clicking Select User. Insert Smart Card into Reader, and then select Enroll.
-
Page 27: Testing The Smart Card
Testing the Smart Card 1. Launch the GemSafe Toolbox by selecting Start > All Programs > Gemplus > GemSafe Toolbox. 2. Select Certificates. - Page 28 3. Insert the smart card and type the PIN. This displays the certificates that you manually issued to the card in “Configuring Microsoft Certificate Authority to Issue Smart Card User Certificate” on page 4. Select the Diagnostic/Help tab in the left frame.
- Page 29 5. Select the Smartcard and readers diagnose button. 6. From the Smartcard Diagnostic Utility, select Start.
-
Page 30: Creating Customized User Install Packages For Clients Pcs (Optional)
You should receive the following PASSED response. Creating Customized User Install Packages for Clients PCs (Optional) The GemSafe user install package is not required for Domain logon smart card authentication with a pre- configured smart card that already contains a User certificate. Domain groups or user level policies for smart card login need to be managed and applied by the administrator. - Page 31 For thin client PC installation of the optional GemSafe ToolBox, modify the thin client TEMP and TMP envi- ronmental variables to a location that can support the .msi user installation package size. The environ- mental variables can be changed back to default settings after installation package has been installed and write filter changes committed.
- Page 32 1. Launch the GemSafe Toolbox by selecting Start > All Programs > Gemplus > GemSafe Toolbox. 2. Select Software Administration. 3. Select PIN Policy in the left frame.
- Page 33 4. To store PIN Policy settings, select Save as, and then type a file name. 5. Select GemSafe in the left frame. 6. Define what GemSafe Toolbox functionality will be provided to your users.
- Page 34 To store the user libraries configuration, select Save as, and then type the file name. 8. Select Libraries User Setup in the left frame, and then define Libraries User Setup. NOTE: You must select CSP if you are operating in a Microsoft environment. NOTE: If you planning on implementing on a Citrix or Terminal Services server.
- Page 35 9. To provide a Setup Name for Libraries User Setup, select Create Setup. Be sure to note the setup path. 10. Select OK. The new setup has been created.
-
Page 36: Additional Information
The user package has been successfully created. You can: • Browse to the noted Path where package was created. • Run Setup.exe on designated host. Additional Information Using a Smart Card For Windows Network Login During windows logon, a normal Windows logon prompt should appear with a smart card reader icon on the left. -
Page 37: Usage Cases
NOTE: Adobe Acrobat requires some additional configuration to enhance the security of PDF documents. Instructions on how to do this can be found within Adobe Acrobat Help under “Digitally Signing PDF Doc- uments”. The Administration and User Guide also teaches security basics to help with the overall understanding of how GemSafe Libraries works to enhance your network security policy. -
Page 38: Usage Case 2: User Authentication From Client Device To Blade Pc Or Active Directory Server Using Rdp
Make sure a smart card is installed in the reader. The system requests the smart card PIN. Type the PIN that you assigned. The user is logged into the Active Directory Server Usage case 2: User authentication from client device to blade PC or Active Directory Server using RDP The following steps provides instructions for performing a functional test of the CCI SmartCard Logon cer- tificate:... -
Page 39: Usage Case 4: Accessing Secure Web Site
Open the HPSAM client window and initiate a connection to the blade PC or Active Directory Server. Make sure a smart card is installed in the reader. The system requests the smart card PIN. Type the PIN that you assigned. The user is logged into the blade PC or Active Directory Server. Usage case 4: Accessing secure Web site The following steps provide instructions for accessing a secure Web site using an Gemalto smart card through a blade PC or Active Directory Server. -
Page 40: Usage Case 5: User Authentication Using Vpn Through Firewall To Blade Pc Or Active Directory Server
In Internet Explorer, type the address of a secure Web site. If the system displays security alert messages, click OK. The LED on the card reader indicates when the Web site is accessing the smart card to verify whether the certificate is approved for the site. After the secure Web site displays, a lock icon in the lower right corner of Internet Explorer confirms that you are connected to a secure Web site. - Page 41 In the Company Name box, type the name for the VPN connection (for example, Work), and then click Next. Select Do not dial the initial connection, and then click Next. In the text box, type the host name or IP address of the VPN tunnel, and then click Next. Select Use my smart card, and then click Next.
- Page 42 Right-click on the VPN connection icon and select Properties. You can initiate the VPN connection after setting it up, as follows: Start the VPN connection. In Smart card PIN, type the PIN, and then click OK. While establishing the VPN connection, the system displays Verifying username and password and Authenticated.
-
Page 43: Usage Case 6: User Authentication From Client Device Using Citrix Server
After the connection is established, the network connection icon displays in the system tray. Usage case 6: User authentication from client device using Citrix server 1. Click the Citrix Program Neighborhood desktop shortcut. 2. Click Add ICA Connection to set up a new client connection or to use a pre-existing Citrix connec- tion. - Page 44 3. Select properties for the ICA connection, click the Logon Information tab, select Smart card, and then click OK. 4. Double-click the shortcut to connect to the Citrix server. 5. During logon to the server, the smart card login prompt appears for authorization.
-
Page 45: Service And Support
HP@gemalto.com. Phone: (888)-343-5773. © 2007 Hewlett-Packard Development Company, L.P. The information in this document is subject to change without notice. The only warranties for HP products and services are set forth in the express warranty statements accompanying such products and services.