Xerox 6015/NI User Manual
User guide
Hide thumbs
Also See for 6015/NI:
- Quick use manual (16 pages) ,
- Installation (1 page) ,
- Brochure & specs (4 pages)
Table of Contents
Advertisement
Quick Links
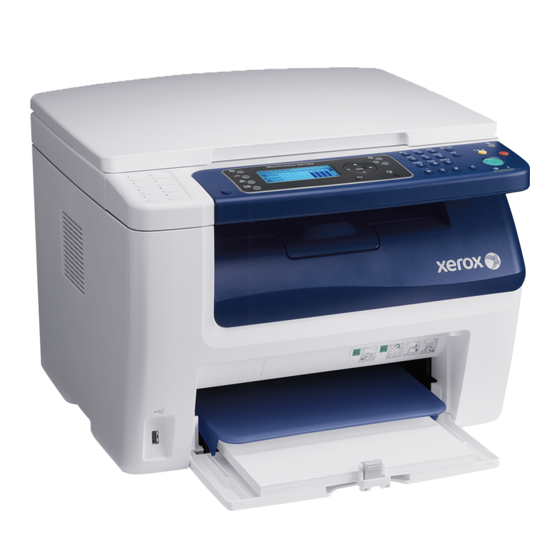
Xerox WorkCentre 6015
Color Multifunction Printer
Imprimante multifonction couleur
Xerox
WorkCentre
®
User Guide
Guide d'utilisation
Italiano
Guida per l'utente
Deutsch
Benutzerhandbuch
Español
Guía del usuario
Português
Guia do usuário
Nederlands
Gebruikershandleiding
Svenska
Användarhandbok
Dansk
Betjeningsvejledning
Čeština
Uživatelská příručka
Polski
Przewodnik użytkownika
Magyar
Felhasználói útmutató
6015
®
Русский
Руководство пользователя
Türkçe
Kullanıcı Kılavuzu
Ελληνικά
Εγχειρίδιο χρήστη
Advertisement
Table of Contents
Troubleshooting

Related Manuals for Xerox 6015/NI


Summary of Contents for Xerox 6015/NI
-
Page 1: User Guide
Xerox WorkCentre 6015 Color Multifunction Printer Imprimante multifonction couleur Xerox WorkCentre 6015 ® ® User Guide Guide d'utilisation Italiano Svenska Användarhandbok Guida per l’utente Русский Руководство пользователя Deutsch Dansk Betjeningsvejledning Türkçe Kullanıcı Kılavuzu Benutzerhandbuch Čeština Español Guía del usuario Uživatelská příručka Ελληνικά... - Page 2 © 2012 Xerox Corporation. All rights reserved. Unpublished rights reserved under the copyright laws of the United States. Contents of this publication may not be reproduced in any form without permission of Xerox Corporation. Copyright protection claimed includes all forms of matters of copyrightable materials and information now allowed by statutory or judicial law or hereinafter granted, including without limitation, material generated from the software programs which are displayed on the screen such as styles, templates, icons, screen displays, looks, and so on.
-
Page 3: Table Of Contents
Setting the Power Saver Timer ........................38 Exiting Energy Saver Mode ..........................38 Administration Features ............................. 39 Information Pages..............................39 CentreWare Internet Services .......................... 39 More Information ................................. 41 ® Xerox Welcome Center ............................. 41 WorkCentre 6015 Color Multifunction Printer User Guide... - Page 4 Contents Installation and Setup Installation and Setup Overview ..........................44 Selecting a Location for the Printer ........................45 Connecting the Printer ..............................46 Selecting a Connection Method ........................46 Connecting to a Wired Network ........................47 Connecting to a Wireless Network ......................... 47 Connecting to a Computer Using USB......................
- Page 5 Contents Selecting Printing Options ............................81 Selecting Printing Defaults in Windows ....................... 81 Selecting Printing Defaults in Windows for a Shared Network Printer ..........81 Selecting Printing Options for an Individual Job in Windows .............. 82 Selecting Printing Options for Macintosh ....................82 Printing Envelopes ................................
- Page 6 Contents Scanning to a Folder on a USB Connected Computer .................. 109 Scanning to a Shared Folder on a Network Computer ................. 110 Sharing a Folder on a Windows Computer....................110 Sharing a Folder Using Macintosh OS X Version 10.5 and Later ............111 Adding a Folder as an Address Book Entry Using CentreWare Internet Services.......
- Page 7 Contents Selecting Fax Options for Single Jobs ......................... 137 Setting the Fax Resolution ..........................137 Making the Image Lighter or Darker ......................137 Turning OnHook On or Off ..........................137 Sending a Delayed Fax ............................. 138 Including a Fax Cover Page ..........................138 Setting Up Polling ...............................
- Page 8 Contents Troubleshooting General Troubleshooting ............................168 Printer Does Not Turn On ..........................168 Printer Resets or Turns Off Frequently ......................168 The Printer Does Not Print ..........................169 Printer is Making Unusual Noises........................169 Condensation has Formed Inside the Printer ................... 170 Paper Jams ..................................
- Page 9 Contents Regulatory Information Basic Regulations ................................ 198 United States FCC Regulations ........................198 Canada ..................................198 European Union ..............................199 Turkey RoHS Regulation ........................... 199 Copy Regulations ................................ 200 United States ................................ 200 Canada ..................................202 Other Countries ..............................202 Fax Regulations ................................
-
Page 11: Safety
Environmental, Health, and Safety Contact Information ................18 Your printer and the recommended supplies have been designed and tested to meet strict safety requirements. Attention to the following information ensures the continued safe operation of your ® Xerox printer. WorkCentre 6015 Color Multifunction Printer User Guide... -
Page 12: Electrical Safety
Safety Electrical Safety This section includes: General Guidelines ................................12 Power Cord ..................................12 Telephone Line Cord ............................... 13 General Guidelines WARNINGS: Do not push objects into slots or openings on the printer. Touching a voltage point or shorting out a part could result in fire or electrical shock. -
Page 13: Power Cord
Safety Power Cord Use the power cord supplied with your printer. Plug the power cord directly into a properly grounded electrical outlet. Ensure that each end of the cord is connected securely. If you do not know if an outlet is grounded, ask an electrician to check the outlet. -
Page 14: Operational Safety
Ozone is heavier than air and is not produced in amounts large enough to harm anyone. Install the printer in a well-ventilated room. For more information in the United States and Canada, go to www.xerox.com/environment. In other ®... -
Page 15: Printer Supplies
Xerox supplies not specified for this printer. The Total Satisfaction Guarantee is available in the United States and Canada. Coverage could vary outside these areas. Please contact your Xerox representative for details. WorkCentre 6015 Color Multifunction Printer User Guide... -
Page 16: Maintenance Safety
Do not attempt any maintenance procedure that is not described in the documentation supplied with your printer. Do not use aerosol cleaners. Clean with a dry lint-free cloth only. ® For more information on the Xerox supplies recycling program, go to: www.xerox.com/gwa WorkCentre 6015 Color Multifunction Printer User Guide... -
Page 17: Printer Symbols
Safety Printer Symbols The following safety symbols appear on the printer. Symbol Description Warning or Caution: Ignoring this warning could cause serious injury or even death. Ignoring this caution could damage property. Hot surface on or in the printer. Use caution to avoid personal injury. Do not burn the item. -
Page 18: Environmental, Health, And Safety Contact Information
Safety Environmental, Health, and Safety Contact Information ® For more information on Environment, Health, and Safety in relation to this Xerox product and supplies, contact the following customer help lines: United States: 1-800 828-6571 Canada: 1-800 828-6571 Europe: +44 1707 353 434 For product safety information in the United States, go to www.xerox.com/environment. -
Page 19: Features
Features This chapter includes: Parts of the Printer ................................20 System Menus ................................... 25 Energy Saver Mode ................................. 38 Administration Features ..............................39 More Information ................................41 WorkCentre 6015 Color Multifunction Printer User Guide... -
Page 20: Parts Of The Printer
Features Parts of the Printer This section includes: Front View ................................... 20 Rear View .................................... 21 Control Panel ..................................21 Front View Bypass Tray Document Glass Width Guides Cleaning Rod Output Tray 10. Power Switch Output Tray Extension 11. -
Page 21: Rear View
Features Rear View Rear Cover Ethernet Connection Available on WorkCentre 6015N/NI Color Transfer Roller Multifunction Printer only. Paper Chute USB Port Registration Roller 10. Line In/Out (fax/telephone) Transfer Belt Available on WorkCentre 6015N/NI Color Fuser Roller Release Levers Multifunction Printer only. Rear Cover Release Lever 11. - Page 22 Features Control Panel Buttons and Indicators 1. One Touch keypad: Use to speed dial a phone 12. Start button: Press to start a copy, scan, or fax job. number. Available on WorkCentre 6015N/NI Color 13. Status indicator: The green or red light indicates Multifunction Printer only.
- Page 23 Features Control Panel Symbols Symbol Name Description Copy Allows you to change job settings for copy jobs. Scan Allows you to change job settings for scan jobs. Print Prints from USB memory. Allows you to change job settings for fax jobs. Available on WorkCentre 6015N/NI Color Multifunction...
- Page 24 Features Symbol Name Description Return Navigates up one menu level. Power Saver Indicates the Energy Saver status. Controls exit from Energy Saver Mode. Stop Stops the current operation. Clear All Clears the current settings for print, copy, scan, or fax job to the default settings.
-
Page 25: System Menus
Features System Menus This section includes: Information Pages ................................26 Billing Meters ..................................26 Admin Menu ..................................28 Default Settings Menu ..............................35 Tray Settings ..................................37 Panel Language ................................37 To access the control panel system menus, press the System button. Menu Functions Information Pages... -
Page 26: Information Pages
Features Information Pages Use the Information Pages to print various reports and lists. Report or List Contents System Settings Printer status, including hardware configuration and network information. Print this report to verify network information and to check page count. Panel Settings Prints settings results for the printer, including default settings, tray settings, network setup, fax settings, and system settings. -
Page 27: Billing Meters
Features Billing Meters The Meter Readings menu shows the number of processed print jobs. The meter is divided according to the color mode. You cannot reset the meter readings; they track the total number of pages printed for the life of the printer. Item Description Total Impressions... -
Page 28: Admin Menu
Features Admin Menu This section includes: Fax Book ....................................28 Network ....................................28 Fax Settings ..................................30 System Setup ..................................31 Maintenance ..................................32 Secure Settings ................................. 33 Scan to Email ..................................34 ... -
Page 29: Wired Network Setup
Features Wired Network Setup This menu provides the selections for setting up the printer for wired Ethernet network connections. Notes: This menu is the default network menu for the WorkCentre 6015N Color Multifunction Printer. This menu appears on the WorkCentre 6015NI Color Multifunction Printer only when the printer is connected to a wired network connection. -
Page 30: Fax Settings
Features Item Description Protocol Select Enable when using the protocol. Select Disable to make the protocol unavailable. LPR: The default setting is Enable. Port9100: The default setting is Enable. WSD: The default setting is Enable. SNMP: The default setting is Enable. ... - Page 31 Features Item Description Line Type Specifies the default line type: PSTN or PBX. Dialing Type Specifies the dialing type. Interval Timer Specifies the interval timer from 3–255 seconds. Number of Redial Specifies the number of attempts made to redial a fax number from 0–9. Redial Delay Specifies the interval between redial attempts from 1–15 minutes.
-
Page 32: System Setup
Features System Setup Use this menu to configure general settings of the printer. For example, time to Energy Saver mode, alarm settings, and so on. Item Description Power Saver Timer Specifies the transitional time for Energy Saver Modes 1 and 2. ... -
Page 33: Secure Settings
Features Maintenance Use this menu to find firmware information, make adjustments, and reset defaults. Item Description F/W Version Displays the latest firmware version. Adjust Paper Type Adjusts the paper type settings to match the paper loaded in the paper tray. Adjust BTR Specifies the bias transfer roller (BTR) voltage for printing on the selected paper type. -
Page 34: Scan To Email
Features Scan to Email Use this menu to enable and disable the ability to edit the From field when an image is scanned to an email address. Item Description Edit From Field Enables or disables the edit From field function. USB Setup Use this menu to configure the USB port. -
Page 35: Default Settings Menu
Features Default Settings Menu This section includes: Copy Defaults ..................................35 Scan Defaults ..................................36 Fax Defaults ..................................36 Print from USB Defaults ..............................37 Use the Default Settings menu to set default behaviors for Copy, Scan, Fax, and Print from USB functions. Copy Defaults Use this menu to set default copying behaviors. -
Page 36: Scan Defaults
Features Scan Defaults Use this menu to set default scanning behaviors. For details, see Adjusting Scanning Settings page 119. Item Description Scan to Network Selects the scan destination: Computer (Network) or Server (FTP). File Format Selects the file type of the scanned image. Color Specifies Black and White or Color output. -
Page 37: Tray Settings
Features Print from USB Defaults Use this menu to set default behaviors for printing from USB. Item Description Layout Specifies the layout options. Tray Settings Tray Settings configures the paper size and paper type settings for the main paper tray. If the type of paper that is loaded is different from the setting, print quality can be reduced or paper jams can occur. -
Page 38: Energy Saver Mode
Features Energy Saver Mode This section includes: Setting the Power Saver Timer............................ 38 Exiting Energy Saver Mode ............................38 You can set the time the printer spends idle in ready mode before it automatically transitions to a lower power level. -
Page 39: Administration Features
Features Administration Features This section includes: Information Pages ................................39 CentreWare Internet Services ............................. 39 Information Pages Your printer has a printable set of information pages. These include configuration and font information, demonstration pages, and more. System Settings Page The System Settings page lists printer information such as default settings, installed options, network settings including IP address, and font settings. -
Page 40: Accessing Centreware Internet Services
Features Accessing CentreWare Internet Services At your computer, open a Web browser, type the IP address of the printer in the address field, then press Enter or Return. If you do not know the IP address of your printer, see Finding the IP Address of Your Printer page 55. -
Page 41: More Information
® Xerox Welcome Center ® If you need assistance during or after printer installation, visit the Xerox website for online solutions and support at www.xerox.com/office/worldcontacts. ® If you require further assistance, contact the experts at the Xerox Welcome Center. If a local representative telephone number was provided during printer installation, record the telephone number in the following space. -
Page 42: Locating The Serial Number
Locating the Serial Number You need the printer serial number to order supplies or to contact Xerox for assistance. The serial number is located on a tag on the rear door of the printer. The serial number also appears in the System Settings Page. -
Page 43: Installation And Setup
Setting the Date and Time ............................58 Installing the Software ..............................59 Setting Up Scanning ............................... 64 See also: Installation Guide packaged with your printer. Online Support Assistant at www.xerox.com/office/WC6015support WorkCentre 6015 Color Multifunction Printer User Guide... -
Page 44: Installation And Setup Overview
Routers, network hubs, network switches, modems, Ethernet cables, and USB cables are not included with your printer and must be purchased separately. Xerox recommends an Ethernet connection because it is typically faster than a USB connection, and it provides access to CentreWare Internet Services. -
Page 45: Selecting A Location For The Printer
Installation and Setup Selecting a Location for the Printer Select a dust-free area with temperatures from 10–32°C (50–90°F), and relative humidity 15–85%. Note: Sudden temperature fluctuations can affect print quality. Rapid heating of a cold room can cause condensation inside the printer, directly interfering with image transfer. Place the printer on a level, solid, non-vibrating surface with adequate strength for the weight of the printer. -
Page 46: Connecting The Printer
Installation and Setup Connecting the Printer This section includes: Selecting a Connection Method ..........................46 Connecting to a Wired Network ..........................47 Connecting to a Wireless Network ..........................47 Connecting to a Computer Using USB ........................51 ... -
Page 47: Connecting To A Wired Network
Installation and Setup Connecting to a Wired Network Note: Available on WorkCentre 6015N/NI Color Multifunction Printer only. To connect the printer to a wired network: Ensure that the printer is turned off. Attach a Category 5 or better Ethernet cable from the printer to the network or router socket. Use an Ethernet hub or router, and two or more Ethernet cables. - Page 48 Installation and Setup Connecting to a Network With a Wi-Fi Protected Setup-Compliant Router Wi-Fi Protected Setup (WPS) is a network standard for setting up a wireless network. The WPS protocols allow you with no wireless network experience to set up devices in a secure wireless network. With a WPS-certified router, you can use tools in the router and the printer to connect the printer to the network.
-
Page 49: Connecting To A Wireless Network Manually
Installation and Setup To select Wireless Setup, press the arrow buttons, then press OK. To select WPS, press the arrow buttons, then press OK. To select PIN Code, press the arrow buttons, then press OK. To select Print PIN, press the arrow buttons, then Press OK. The PIN is printed at the top of the PIN Code Print. - Page 50 Installation and Setup To connect to a wireless network manually from the printer control panel: On the printer control panel, press the System button. To select Admin Menu, press the arrow buttons, then press OK. To select Network, press the arrow buttons, then press OK. To select Wireless Setup, press the arrow buttons, then press OK.
-
Page 51: Connecting To A Computer Using Usb
Installation and Setup 12. Disconnect the Ethernet cable from the printer. 13. Turn off the printer, then turn it on again. When the printer restarts, it uses the information from CentreWare Internet Services to connect with the wireless router. Print a System Settings Page to check the connection information. If the printer does not successfully connect with the wireless network, check your network information and try again. -
Page 52: Configuring Network Settings
Installation and Setup Configuring Network Settings This section includes: About TCP/IP and IP Addresses ..........................52 Assigning the IP Address of the Printer ........................53 Setting Up the Fax Header ............................56 Enabling the Printer for Scanning ..........................57 Note: Available on WorkCentre 6015N/NI Color Multifunction Printer only. -
Page 53: Assigning The Ip Address Of The Printer
Installation and Setup Assigning the IP Address of the Printer This section includes: Assigning the IP Address Automatically ......................... 53 Assigning the IP Address Manually ........................... 53 Finding the IP Address of the Printer ........................55 Changing the IP Address Using CentreWare Internet Services.............. -
Page 54: Assigning The Ip Address Manually
Installation and Setup Assigning the IP Address Manually You can assign a static IP address to your printer from the printer control panel. Once an IP address is assigned, you can change it using CentreWare Internet Services. To assign a static IP address to the printer, you need the following information: ... - Page 55 You are ready to install software. See also: Online Support Assistant at: www.xerox.com/office/WC6015support Finding the IP Address of the Printer To install the print drivers for a network-connected printer, you need the IP address of your printer. You also need the IP address to access the settings of your printer through CentreWare Internet Services. You can view the IP address of your printer from the System Settings Page or on the printer control panel.
-
Page 56: Setting Up The Fax Header
Installation and Setup Changing the IP Address Using CentreWare Internet Services To change the IP address of the printer using CentreWare Internet Services: At your computer, open a Web browser, type the IP address of the printer in the address field, then press Enter or Return. -
Page 57: Enabling The Printer For Scanning
Installation and Setup Identify the country: To select Country, press the arrow button, then press OK. To select your country name, press the arrow button, then press OK. At the Restart System (Are You Sure?) prompt, press the Down Arrow to select Yes, then press To return to the Ready screen, press Return. -
Page 58: Setting The Date And Time
Installation and Setup Setting the Date and Time Set the date and time on the printer before using it to send fax transmissions. It is unlawful to send a fax without the proper Fax Send Header information. For details, see Enabling the Printer for Faxing on page To set the date and time:... -
Page 59: Installing The Software
Macintosh OS X version 10.4 or later Available Print Drivers ® To access special printing options, use a Xerox print driver. The following print drivers are available for various operating systems. To download the latest drivers, go to www.xerox.com/office/WC6015drivers. Print Driver Source Description Windows GDI Driver... -
Page 60: Installing The Print Drivers For A Windows Network Printer
Notes:The following applications are installed on your computer with the print driver: PrintingScout Launcher Express Scan Manager Address Book Editor: Available on WorkCentre 6015N/NI Color Multifunction Printer only. See also: Online Support Assistant at: www.xerox.com/office/WC6015support WorkCentre 6015 Color Multifunction Printer User Guide... -
Page 61: Installing The Print Drivers For A Windows Usb Printer
Notes:The following applications are installed on your computer with the print driver: PrintingScout Launcher Express Scan Manager Address Book Editor: Available on WorkCentre 6015N/NI Color Multifunction Printer only. See also: Online Support Assistant at: www.xerox.com/office/WC6015support WorkCentre 6015 Color Multifunction Printer User Guide... -
Page 62: Installing The Drivers And Utilities For Macintosh Os X Version 10.5 And Later
Insert the Software and Documentation disc into the appropriate drive on your computer. Note: If the Software and Documentation disc is not available, you can download the latest drivers from www.xerox.com/office/WC6015drivers. Double-click WorkCentre 6015 Installer. At the Introduction installer window, click Continue. - Page 63 Scanning on page 105. See also: Online Support Assistant at: www.xerox.com/office/WC6015support Utilities The Address Book Editor and Express Scan Manager are installed automatically when you install the scan driver. For details, see Installing the Drivers and Utilities for Macintosh OS X Version 10.5 and Later page 62.
-
Page 64: Setting Up Scanning
Installation and Setup Setting Up Scanning This section includes: Scanning Setup Overview ............................. 64 Setting Up Scanning to a Shared Folder on Your Computer ................65 Setting Up Scanning to an FTP Server ........................68 Setting Up Scanning to an Email Address ......................68 ... -
Page 65: Setting Up Scanning To A Shared Folder On Your Computer
Installation and Setup Setting Up Scanning to a Shared Folder on Your Computer This section includes: Sharing a Folder Using Windows ..........................65 Sharing the Folder Using Macintosh OS X Version 10.5 and Later ............... 65 Adding the Folder as an Address Book Entry Using the Address Book Editor ........... 67 ... - Page 66 Installation and Setup Sharing the Folder Using Macintosh OS X Version 10.5 and Later To enable a folder on your Macintosh computer for network sharing: From the Apple menu, select System Preferences. From the View menu, select Sharing. From the Services list, select File Sharing. Click the plus icon (+) below the Shared Folders field.
-
Page 67: Adding Folder As Address Book Entry
Installation and Setup Adding the Folder as an Address Book Entry Using the Address Book Editor On your computer select Start > All Programs > Xerox Office Printing > WorkCentre 6015N-NI > Address Book Editor. Double-click the Server icon under the Printer Address Book in the left navigation pane. -
Page 68: Setting Up Scanning To An Ftp Server
Installation and Setup Name of Shared Directory: Enter a name for the directory or folder. For example, if you want the scanned files to go in a folder named scans type /scans. Subdirectory Path: Enter the path of the folder on the FTP server. For example, if you want the scanned files to go in a folder named colorscans inside the scans folder, type /colorscans. -
Page 69: Setting Up Scanning To An Email Address
Installation and Setup Setting Up Scanning to an Email Address Before you can scan to an email address, you must configure the printer to communicate with your SMTP email server. To configure the SMTP server settings: At your computer, open a Web browser, type the IP address of the printer in the address field, then press Enter or Return. -
Page 70: Setting Up Scanning With Usb
Setting Up Scanning to a Folder on Your Computer With USB Start Express Scan Manager: Windows: Click Start > Programs > Xerox. Select your printer from the list. Double-click Express Scan Manager. Macintosh: Navigate to Applications > Xerox. Select your printer from the list. Double-click Express Scan Manager. -
Page 71: Printing
Printing This chapter includes: Supported Paper ................................72 Loading Paper ................................... 75 Selecting Printing Options ............................81 Printing Envelopes ................................83 Using Custom Paper Sizes............................. 86 Printing on Both Sides of the Paper .......................... 89 ... -
Page 72: Supported Paper
Your printer is designed to use various paper and other media types. Follow the guidelines in this section to ensure the best print quality and to avoid jams. ® For best results, use Xerox paper and media recommended for your printer. Recommended Media A list of paper and media recommended for your printer is available at: ... -
Page 73: Paper That Can Damage Your Printer
Warranty, Service Agreement, or Xerox Total Satisfaction Guarantee does ® not cover damage caused by using unsupported paper or specialty media. The Xerox Total Satisfaction Guarantee is available in the United States and Canada. Coverage could vary outside these areas. Please contact your local representative for details. -
Page 74: Supported Standard Paper Sizes
Printing Supported Standard Paper Sizes European Standard Sizes North American Standard Sizes A4 (210 x 297 mm, 8.3 x 11.7 in.) Executive (184 x 267 mm, 7.25 x 10.5 in.) A5 (148 x 210 mm, 8.3 x 5.8 in.) Letter (216 x 279 mm, 8.5 x 11 in.) JIS B5 (182 x 257 mm, 7.2 x 10.1 in.) Legal (216 x 356 mm, 8.5 x 14 in.) C5 envelope (162 x 229 mm, 6.4 x 9 in.) -
Page 75: Loading Paper
Printing Loading Paper This section includes: Loading Paper in the Main Tray ..........................75 Loading Paper in the Bypass Tray ..........................78 Setting Paper Types, Paper Sizes, and Display Screen ..................79 Loading Paper in the Main Tray The main tray holds up to 150 sheets of paper. - Page 76 Printing Pull the length guide forward until it stops. Move the width guides to the edges of the tray. Flex the sheets back and forth and fan them, then align the edges of the stack on a level surface. This procedure separates any sheets that are stuck together and reduces the possibility of jams. Load the paper into the tray with the top edge going into the printer and the print side up.
- Page 77 Printing Adjust the width guides until they touch the edges of the paper. Push in the length guides and slide bar until they stop. Note: Depending on the size of the paper, first push the slide bar toward the printer until it stops. Pinch the length guide and slide it in until it touches the paper edge.
-
Page 78: Loading Paper In The Bypass Tray
Printing 10. If the paper you loaded is not plain, set the correct paper type and size at the control panel and in your print driver. For details, see Setting Paper Types, Paper Sizes, and Display Screen on page 79. Note: If you are printing on custom size paper, define the custom size in the printer properties before printing. - Page 79 Printing Flex the sheets back and forth and fan them, then align the edges of the stack on a level surface. This procedure separates any sheets that are stuck together and reduces the possibility of jams. Load the paper into the tray with the top edge going into the printer and the print side up. Adjust the width guides until they touch the edges of the paper.
-
Page 80: Setting Paper Types, Paper Sizes, And Display Screen
Printing Setting Paper Types, Paper Sizes, and Display Screen After loading paper in the main tray or bypass tray, the printer prompts you to set the paper type and size on the control panel. If you want the control panel message to appear when you load the main tray, turn Display Screen on. -
Page 81: Selecting Printing Options
Printing Selecting Printing Options This section includes: Selecting Printing Defaults in Windows ........................81 Selecting Printing Defaults in Windows for a Shared Network Printer ............81 Selecting Printing Options for an Individual Job in Windows ................. 82 ... -
Page 82: Selecting Printing Options For An Individual Job In Windows
With the document open in your application, click File > Print. Select your printer from the list. ® Select Xerox Features from the Copies & Pages menu. Select the desired printing options from the drop-down lists. Click Print to send the job to the printer. -
Page 83: Printing Envelopes
Warranty, Service Agreement, or Xerox Total Satisfaction Guarantee does ® not cover damage caused by using unsupported paper or specialty media. The Xerox Total Satisfaction Guarantee is available in the United States and Canada. Coverage could vary outside these areas. Please contact your local representative for details. -
Page 84: Loading Envelopes In The Trays
Printing Loading Envelopes in the Trays Use the following procedure to load envelopes in the main tray and bypass tray: Slide open the paper guides. Do one of the following: Insert No. 10, DL, or Monarch envelopes with the print side up, flaps closed and facing down, and the flap side to the right. -
Page 85: Specifying The Main Tray Settings For Printing Envelopes
Printing Specifying the Main Tray Settings for Printing Envelopes On the printer control panel, press the System button. To select Tray Settings, press the arrow buttons, then press OK. At Main Tray, press OK. Select Paper Type using the arrow buttons, then press OK. Select Envelope using the arrow buttons, then press OK. -
Page 86: Using Custom Paper Sizes
Printing Using Custom Paper Sizes This section includes: Defining Custom Paper Sizes ............................86 Printing on Custom Paper Sizes ..........................87 The WorkCentre 6015 Color Multifunction Printer prints on custom paper sizes that are within the minimum and maximum size range supported by the printer. Defining Custom Paper Sizes To print custom paper sizes, define the custom width and length of the paper in the print driver software and on the printer control panel. -
Page 87: Printing On Custom Paper Sizes
Printing Defining a Custom Paper Size for Macintosh In the application you are printing from, select File > Page Setup. From the Format For drop-down list, select the printer. From the Paper Size drop-down list, select Manage Custom Sizes. In the Custom Paper Sizes window, click plus (+) to add the new custom size. For the custom paper size, enter the width and height. - Page 88 Printing Printing on Custom Paper Size Using Macintosh Load the custom-size paper. For details, see Loading Paper on page 75. In the application, click Page Setup. From the Paper Size drop-down list, select the custom paper size. Click OK. In the application, click Print. Click OK.
-
Page 89: Printing On Both Sides Of The Paper
Printing Printing on Both Sides of the Paper This section includes: Setting Up 2-Sided Printing............................89 Loading Paper for Manual 2-Sided Printing ......................90 The WorkCentre 6015 Color Multifunction Printer supports manual 2-sided printing. You can set printing preferences to print your jobs on both sides of the paper. -
Page 90: Loading Paper For Manual 2-Sided Printing
Printing Loading Paper for Manual 2-Sided Printing For manual 2-sided printing, the back sides of the pages are printed first in reverse order. For a six-page document, the pages are printed page 6, page 4, and then page 2. Once the even pages are printed, the paper is reloaded. -
Page 91: Printing From A Usb Flash Drive
Printing Printing From a USB Flash Drive You can print a file stored on a USB Flash drive. The USB port is on the front of the printer. The print from USB function supports .jpg, .pdf, and .tiff file formats. Notes: ... -
Page 93: Copying
Copying This chapter includes: Making Copies ................................... 94 Adjusting Copying Options ............................96 Changing the Default Copy Settings ........................101 Limiting Access to Copying ............................103 WorkCentre 6015 Color Multifunction Printer User Guide... -
Page 94: Making Copies
Copying Making Copies To clear previous control panel copy settings, press the Clear All button. Load your original documents: Use the document glass for single pages or paper that cannot be fed using the automatic document feeder. Lift the automatic document feeder or the document glass cover, then place the original face down in the upper left corner of the document glass. -
Page 95: Automatic Document Feeder Guidelines
Copying Automatic Document Feeder Guidelines Note: Available on WorkCentre 6015N/NI Color Multifunction Printer only. The automatic document feeder accommodates the following originals: Width: 148–216 mm (4.1–8.5 in.) Length: 210–355.6 mm (8.3–14 in.) Weight: 60–105 g/m² (16–28 lb. Bond) Follow these guidelines when loading originals into the automatic document feeder: ... -
Page 96: Adjusting Copying Options
Copying Adjusting Copying Options This section includes: Basic Settings ..................................97 Image-Quality Settings..............................98 Image Layout Adjustments ............................99 Output Adjustments ..............................100 You can adjust numerous options for your copy jobs, specify characteristics of the original documents, and customize the output. -
Page 97: Basic Settings
Copying Basic Settings This section includes: Selecting Color or Black and White Copies ......................97 Specifying the Original Size............................97 Specifying the Original Document Type ......................... 97 Selecting Color or Black and White Copies If the original document contains color, you can create copies in full color or in black and white. The color mode indicators light to show the current setting. -
Page 98: Image-Quality Settings
Copying Image-Quality Settings This section includes: Reducing or Enlarging the Image ..........................98 Making the Image Lighter or Darker ........................98 Adjusting the Sharpness ..............................98 Setting Auto Exposure ..............................99 Reducing or Enlarging the Image You can reduce the image to as little as 25% of its original size or enlarge it as much as 400%. -
Page 99: Image Layout Adjustments
Copying Setting Auto Exposure Paper that is close to white, such as newsprint or parchment, can cause the printer to put toner on the entire page. The Auto Exposure setting removes the light background and only prints the image. To turn Auto Exposure on or off: To select Auto Exposure, press the arrow buttons, then press OK. -
Page 100: Output Adjustments
Copying Adjust the margins from 0.0–2.0 in. using the arrow buttons. Press OK. Repeat the steps for other margins, then press the Return button. Note: The margin left/right settings only apply when copying from the document glass. Output Adjustments Collating Copies You can automatically collate multi-page copy jobs. -
Page 101: Changing The Default Copy Settings
Copying Changing the Default Copy Settings This section includes: Changing the Color Mode ............................101 Changing the Auto Exposure Level ......................... 101 Changing the Color Balance ............................102 Changing the Manual Feed Slot Paper Size ......................102 The printer uses the default copy settings on all copy jobs unless you change them for an individual job. -
Page 102: Changing The Color Balance
Copying Changing the Color Balance The Color Balance control allows you to adjust the print color of your printer. Each of the four primary colors of red, green, blue, and gray balance, have five density settings. The density settings adjust the output based on the level of color saturation. -
Page 103: Limiting Access To Copying
Copying Limiting Access to Copying The Copy Lock options limit access to copying by requiring a password to use the Copy function or to make color copies. You can also turn off copying. To set the copy lock: On the printer control panel, press the System button. To select Admin Menu, press the arrow buttons, then press OK. -
Page 105: Scanning
Scanning This chapter includes: Loading Documents for Scanning ........................... 106 Scanning to a USB Flash Drive ..........................108 Scanning to a Folder on a USB Connected Computer ..................109 Scanning to a Shared Folder on a Network Computer ..................110 ... -
Page 106: Loading Documents For Scanning
Scanning Loading Documents for Scanning Position the original document as shown. Document Glass Automatic Document Feeder Lift the automatic document feeder or Insert originals face up with the top of the page the document glass cover, then place the entering the feeder first. Adjust the paper guides so original face down in the upper left corner they fit against the originals. -
Page 107: Document Glass Guidelines
Scanning Document Glass Guidelines The document glass accommodates original sizes up to 216 x 297 mm (8.5 x 11.7 in.). Use the document glass rather than the automatic document feeder to copy or scan the following types of originals: Paper with paper clips or staples attached ... -
Page 108: Scanning To A Usb Flash Drive
Scanning Scanning to a USB Flash Drive You can scan a document and store the scanned file on a USB Flash drive. The Scan to USB function supports .jpg, .pdf, and .tiff file formats. Before pressing the Scan button or inserting the USB Flash drive, press the Power Saver button, Note: then wait until the Power Saver indicator turns off. -
Page 109: Scanning To A Folder On A Usb Connected Computer
Scanning to a Folder on a USB Connected Computer Start Express Scan Manager: Windows: Click Start > Programs > Xerox. Select your printer from the list. Double-click Express Scan Manager. Macintosh: Navigate to Applications > Xerox. Select your printer from the list. Double-click Express Scan Manager. -
Page 110: Scanning To A Shared Folder On A Network Computer
Scanning Scanning to a Shared Folder on a Network Computer This section includes: Sharing a Folder on a Windows Computer ......................110 Sharing a Folder Using Macintosh OS X Version 10.5 and Later ..............111 Adding a Folder as an Address Book Entry Using CentreWare Internet Services ........111 ... -
Page 111: Sharing A Folder Using Macintosh Os X Version 10.5 And Later
Scanning Sharing a Folder Using Macintosh OS X Version 10.5 and Later From the Apple menu, select System Preferences. From the View menu, select Sharing. From the Services list, select File Sharing. Click the plus icon (+) below the Shared Folders field. A folder list appears. Select the folder you want to share on the network, then click Add. -
Page 112: Adding A Folder As An Address Book Entry Using The Address Book Editor
/colorscans. Click Save Changes. Adding a Folder as an Address Book Entry Using the Address Book Editor On your computer select Start > All Programs > Xerox. Select your printer from the list. Click Address Book Editor. - Page 113 Scanning Select Continue or Cancel the Action. 10. Press OK. The printer scans the documents to the shared folder on your computer. WorkCentre 6015 Color Multifunction Printer User Guide...
-
Page 114: Scanning To An Email Address
Scanning Scanning to an Email Address Before scanning to an email address, you must set up the printer up with the email server information. For details, see Setting Up Scanning to an Email Address on page 68. To scan an image and send it to an email address: On the printer control panel, press the Scan button. -
Page 115: Scanning To An Ftp Server
Scanning Scanning to an FTP Server Before using this feature, you must: Set up an FTP server. Create an address for the printer to use. You can use CentreWare Internet Services or the Address Book Editor. To scan to an FTP server: Load the original on the document glass or in the automatic document feeder. -
Page 116: Scanning Images Into An Application On A Usb Connected Computer
Scanning Scanning Images into an Application on a USB Connected Computer This section includes: Scanning an Image into an Application ....................... 116 Scanning an Image Using Windows XP ........................ 117 Scanning an Image Using Widows Vista or Windows 7 ................. 118 You can import images directly from the scanner into a folder on your computer. -
Page 117: Scanning An Image Using Windows Xp
Scanning an Image Using Windows XP Note: To use this feature, the printer must be connected to the computer with a USB cable. On your computer, select Start > Control Panel. Double-click Scanners and Cameras. Double-click Xerox WC6015. Select an option: Color picture ... -
Page 118: Scanning An Image Using Widows Vista Or Windows 7
To use this feature, the printer must be connected to the computer with a USB cable. On your computer, select Start > All Programs > Windows Fax and Scan. Click New Scan. If the WorkCentre 6015 Color Multifunction Printer is not already selected, click Change, then double-click Xerox WC6015. Select an option: Add Profile ... -
Page 119: Adjusting Scanning Settings
Scanning Adjusting Scanning Settings This section includes: Setting the File Format ..............................119 Setting the Color Mode ..............................119 Setting the Scan Resolution ............................119 Specifying the Original Size............................120 Making the Image Lighter or Darker ........................120 ... -
Page 120: Setting The Scan Resolution
Scanning Setting the Scan Resolution The scan resolution depends on how you plan to use the scanned image. Scan resolution affects both the size and image quality of the scanned image file. Higher scan resolution produces better image quality and a larger file size. To set the scan resolution: To select Resolution, press the arrow buttons, then press OK. -
Page 121: Setting The Margins
Scanning Setting the Margins To select the margin you want to change, press the arrow buttons for: Margin Top/Bottom Margin Left/Right Margin Middle Press OK. Adjust the margins from 0.0–2.0 in. using the arrow buttons. Press OK. Repeat the steps for other margins, then press the Return button. -
Page 122: Changing The Default Scan Settings
Scanning Changing the Default Scan Settings This section includes: Setting the Scan to Network Option ........................122 Setting the File Format ..............................123 Changing the Color Mode ............................123 Setting the Scan Resolution ............................123 Setting the Color Button Sets ............................ -
Page 123: Setting The File Format
Scanning Setting the File Format To select File Format, press the arrow buttons, then press OK. Select a setting. Press OK. Changing the Color Mode To select Color, press the arrow buttons, then press OK. Select a color setting: Black &... -
Page 124: Making The Image Lighter Or Darker
Scanning Making the Image Lighter or Darker To select Lighten/Darken, press the arrow buttons, then press OK. To lighten or darken the image, press the arrow buttons to move the slider. Press OK. Adjusting the Sharpness To select Sharpness, press the arrow buttons, then press OK. Select a sharpness setting: ... -
Page 125: Setting The Tiff File Format
Scanning Setting the TIFF File Format Note: TIFF files created by this printer can fail to open properly in some computer applications. To select TIFF File Format, press the arrow buttons, then press OK. Select a setting: TIFF V6 ... -
Page 126: Limiting Access To Scanning
Scanning Limiting Access to Scanning The Scan Lock options limit access to scanning by requiring a password to use the Scan function. You can also turn off scanning. To set the Scan Lock: On the printer control panel, press the System button. To select Admin Menu, press the arrow buttons, then press OK. -
Page 127: Faxing
Faxing This chapter includes: Loading Documents for Faxing ..........................128 Basic Faxing ..................................129 Using the Fax Book................................ 131 Selecting Fax Options for Single Jobs ........................137 Configuring the Printer for Faxing ........................... 139 Managing Fax Functions ............................. -
Page 128: Loading Documents For Faxing
Faxing Loading Documents for Faxing Position the original document as shown. Document Glass Automatic Document Feeder Lift the automatic document feeder or Insert originals face up with the top of the page the document glass cover, then place the entering the feeder first. Adjust the paper guides so original face down in the upper left corner they fit against the originals. -
Page 129: Basic Faxing
Faxing Basic Faxing This section includes: Sending a Fax From the Printer ..........................129 Sending a Fax From Your Computer ........................130 Note: Before faxing, you must set the country code and fax number for the printer. For details, see Setting Up the Fax Header on page 56. -
Page 130: Sending A Fax From Your Computer
To stop a fax from sending, click the Stop Sending button. Sending a Fax Using Macintosh Applications To send a fax from a Macintosh OS X version 10.5 and later computer, download the latest driver from www.xerox.com/office/WC6015drivers. WorkCentre 6015 Color Multifunction Printer User Guide... -
Page 131: Using The Fax Book
Faxing Using the Fax Book This section includes: Faxing to an Individual ..............................132 Faxing to a Group ................................134 You can create and save fax information for individuals or groups. You can select saved names and numbers without re-entering them each time you want to send a fax. WorkCentre 6015 Color Multifunction Printer User Guide... -
Page 132: Faxing To An Individual
To add an individual entry using the Address Book Editor: To access the Address Book Editor, do one of the following: For Windows computers, select Start > Programs > Xerox > WorkCentre 6015 > Address Book Editor. For Macintosh computers, open the Applications folder, select Xerox > WorkCentre 6015 >... - Page 133 Faxing To assign the speed dial number manually, select the Specify an Address Number check box, then enter a value from 1–200. Note: The first eight entries in the Address Book correspond to the eight one-touch buttons on the left side of the printer control panel. Type the name, phone number, and email address for the individual.
-
Page 134: Faxing To A Group
Faxing Faxing to a Group This section includes: Creating a Fax Group ..............................134 Editing Address Book Fax Groups ..........................135 Faxing to an Address Book Group ........................... 136 Searching the Local Phone Book ..........................136 To send a fax to multiple individuals, create a group speed dial entry. - Page 135 To create a fax group using the Address Book Editor: To access the Address Book Editor, do one of the following: For Windows computers, select Start > Programs > Xerox > WorkCentre 6015 > Address Book Editor. For Macintosh computers, open the Applications folder, select Xerox > WorkCentre 6015 >...
- Page 136 To edit an existing fax group using the Address Book Editor: To access the Address Book Editor, do one of the following: For Windows computers, select Start > Programs > Xerox > WorkCentre 6015 > Address Book Editor. ...
-
Page 137: Selecting Fax Options For Single Jobs
Faxing Selecting Fax Options for Single Jobs This section includes: Setting the Fax Resolution ............................137 Making the Image Lighter or Darker ........................137 Turning OnHook On or Off ............................137 Sending a Delayed Fax ..............................137 ... -
Page 138: Sending A Delayed Fax
Faxing Sending a Delayed Fax You can set a time in the future for the printer to send your fax job. The time delay can be from 15 minutes to 24 hours from the current time. Note: The printer must be set to the current time before you can use this feature. To send a fax at a specified time: On the printer control panel, press the Fax button. -
Page 139: Configuring The Printer For Faxing
Faxing Configuring the Printer for Faxing Before you use the fax, you must configure the Fax Settings to make it compatible with your local connection and regulations. The Fax Settings include optional features you can use to configure the printer for faxing. To configure the printer for faxing: On the printer control panel, press the System button. -
Page 140: Managing Fax Functions
Faxing Managing Fax Functions This section includes: Printing Monitor Reports ............................. 140 Printing a Monitor Report for a Group Fax ......................140 Turning Secure Fax Receive On or Off ........................141 Limiting Access to Faxing ............................141 ... -
Page 141: Turning Secure Fax Receive On Or Off
Faxing Turning Secure Fax Receive On or Off When the Secure Receive setting is enabled, you must enter a password before faxes can be printed. To turn Secure Receive Lock on or off: On the printer control panel, press the System button. To select Admin Menu, press the arrow buttons, then press OK. - Page 142 Faxing Select an option: Unlocked turns off the service lock. Locked turns on the service lock, and turns off the fax function. Password Locked requires a password to use the fax function. Enter a new password, then press Press OK.
-
Page 143: Printing Fax Reports
Faxing Printing Fax Reports Fax reports provide information about faxing activities, directories, and pending jobs. To print a fax report: On the printer control panel, press the System button. At Information Pages, press OK. If prompted, enter the password, then press OK. To select Fax Activity, press the arrow buttons, then press OK. -
Page 145: Maintenance
Maintenance This chapter includes: Cleaning the Printer ..............................146 Adjustments and Maintenance Procedures ......................157 Ordering Supplies ................................160 Managing the Printer ..............................163 Moving the Printer ................................. 164 WorkCentre 6015 Color Multifunction Printer User Guide... -
Page 146: Cleaning The Printer
Maintenance Cleaning the Printer This section includes: General Precautions ..............................146 Cleaning the Scanner ..............................147 Cleaning the Exterior ..............................149 Cleaning the Interior ..............................149 General Precautions CAUTION: When cleaning your printer do not use organic or strong chemical solvents or aerosol cleaners. -
Page 147: Cleaning The Scanner
Maintenance Cleaning the Scanner Slightly dampen a soft, lint-free cloth with water. Lift and open the scanner. Remove any paper or other media from the output tray. Wipe the area under the scanner until it is clean. Lower the scanner and close it. WorkCentre 6015 Color Multifunction Printer User Guide... - Page 148 Wipe the surface of the document glass until it is clean and dry. ® Note: For best results, use Xerox Glass Cleaner to remove marks and streaks. Wipe the white underside of the document cover until it is clean and dry.
-
Page 149: Cleaning The Exterior
Maintenance Close the document cover. Cleaning the Exterior Clean the exterior of the printer once a month. Wipe the paper tray, output tray, control panel, and other parts with a damp, soft cloth. After cleaning, wipe with a dry, soft cloth. ... -
Page 150: Cleaning Inside The Printer
Maintenance Cleaning Inside the Printer Turn off the printer. Open the side door. Pinch the release tab on the toner cartridge as shown. Pull out the toner cartridge. Note: To avoid spilling toner, pull out the toner cartridge slowly. WorkCentre 6015 Color Multifunction Printer User Guide... - Page 151 Maintenance Remove the remaining toner cartridges in the same manner. Pull out the cleaning rod. Note: To remove toner and debris from the top of the cleaning rod, wipe it with a clean lint-free cloth. Insert the cleaning rod into the hole indicated by the arrow in the middle of the toner cartridge slot. Push in the cleaning rod until it stops, then pull it out.
- Page 152 Maintenance 10. Align the black toner cartridge with the rear toner slot. Press firmly near the center of the cartridge until it clicks into place. 11. Replace the remaining three toner cartridges in the same manner. 12. Close the side door. WorkCentre 6015 Color Multifunction Printer User Guide...
- Page 153 Maintenance Cleaning the LED Lenses If prints have voids or light streaks through one or more color, use the following instructions to clean the Light Emitting Diode (LED) lenses. WARNING: If you accidentally get toner on your clothes, lightly dust them off as best as you can. If some toner remains on your clothes, use cool water, not hot, to rinse off the toner.
- Page 154 Maintenance Remove the remaining toner cartridges in the same manner. Pull out the cleaning rod. Note: To remove toner and debris from the top of the cleaning rod, wipe it with a clean lint-free cloth. Insert the cleaning rod into the hole indicated by the arrow in the middle of the toner cartridge slot. Push in the cleaning rod until it stops, then pull it out.
-
Page 155: Cleaning The Color Toner Density Sensors
Maintenance 10. Align the black toner cartridge with the rear toner slot. Press firmly near the center of the cartridge until it clicks into place. 11. Replace the remaining three toner cartridges in the same manner. 12. Close the side door. Cleaning the Color Toner Density Sensors Note: Clean the color toner density (CTD) sensors when an alert for the CTD sensors appears on the... - Page 156 Maintenance Use a dry cotton swab to clean the color toner density sensors. Close the rear cover. WorkCentre 6015 Color Multifunction Printer User Guide...
-
Page 157: Adjustments And Maintenance Procedures
Maintenance Adjustments and Maintenance Procedures This section includes: Color Registration ................................157 Adjusting Paper Type ..............................158 Adjusting the Bias Transfer Roller ........................... 158 Adjusting the Fuser ............................... 158 Refreshing the Bias Transfer Roller ......................... 159 ... -
Page 158: Adjusting Paper Type
Maintenance Adjusting Paper Type Use Adjust Paper Type to compensate for paper thickness within a paper type. If the printed image is too light, use a heavier setting for the paper you are using. If the printed image is mottled or blotchy-looking, decrease the setting for the paper you are using. -
Page 159: Adjusting The Fuser
Maintenance Adjusting the Fuser Use Adjust Fuser for optimum print quality across a wide range of paper types. If the toner on a print is smearing or can be rubbed off the paper, increase the offset for the paper you are using. If the toner is blistered or mottled, decrease the offset for the paper you are using. -
Page 160: Ordering Supplies
Xerox supplies not specified for this printer. The Total Satisfaction Guarantee is available in the United States and Canada. Coverage could vary outside these areas. Please contact your Xerox representative for details. WorkCentre 6015 Color Multifunction Printer User Guide... -
Page 161: Toner Cartridges
Use a damp cloth to wipe off spilled toner. Never use a vacuum cleaner to remove spills. Electric sparks inside the vacuum cleaner can cause a fire or explosion. If you spill a large volume of toner, contact your local Xerox representative. WARNING: Never throw a toner cartridge into an open flame. -
Page 162: Recycling Supplies
The process runs automatically. Wait three minutes for the process to complete and the printer to return to Ready. Recycling Supplies ® For more information on the Xerox supplies recycling program, go to: www.xerox.com/gwa. WorkCentre 6015 Color Multifunction Printer User Guide... -
Page 163: Managing The Printer
Maintenance Managing the Printer This section includes: Checking Page Counts ..............................163 Changing the Panel Lock Password ......................... 163 Checking Page Counts You can check the total number of printed pages on the System Settings page. It lists the print volume by the total number of pages printed on each paper size. -
Page 164: Moving The Printer
Maintenance Moving the Printer Follow these instructions when moving the printer: Turn off the printer and disconnect the power cord and other cables from the back of the printer. WARNING: To prevent electric shock, never touch the power plug with wet hands. When removing the power cord, ensure that you pull the plug and not the cord. - Page 165 Maintenance Lift the bypass tray and push it into the printer. Push in the length guides and slide bar until they stop. Fold up the main tray to cover the paper feed. Lift and carry the printer as shown in the illustration. Note: To find the weight for your printer configuration, see Physical Specifications...
- Page 166 Failure to repackage the printer properly for shipment can result in damage not covered by ® ® the Xerox Warranty, Service Agreement, or Total Satisfaction Guarantee. The Xerox Warranty, Service Agreement, or Total Satisfaction Guarantee do not cover damage to the printer caused by improper moving.
-
Page 167: Troubleshooting
Troubleshooting This chapter includes: General Troubleshooting............................. 168 Paper Jams ..................................171 Getting Help ..................................187 WorkCentre 6015 Color Multifunction Printer User Guide... -
Page 168: General Troubleshooting
Turn off the printer, then turn it on again. Print the Error History from the Information Pages of the Printer Setting Utility. If the error persists, contact your Xerox representative. The printer is connected to an uninterruptible Turn off the printer, then connect the power cord to a suitable outlet. -
Page 169: The Printer Does Not Print
Push the control panel button. PrintingScout displays an error message. Follow the instructions in the PrintingScout message to correct the problem. If the error persists, contact your Xerox representative. The printer is out of paper. Load paper into the tray. -
Page 170: Condensation Has Formed Inside The Printer
Troubleshooting Condensation has Formed Inside the Printer Moisture can condense inside a printer where the humidity is above 85% or when a cold printer is located in a warm room. Condensation can form in a printer after it has been sitting in a cold room that is heated quickly. -
Page 171: Paper Jams
Print-Quality Problems ..............................181 Minimizing Paper Jams ® The printer is designed to function with minimal paper jams using Xerox supported paper. Other paper types can cause jams. If supported paper is jamming frequently in one area, clean that area of the paper path. -
Page 172: Locating Paper Jams
Overfilling the trays. Allowing the output tray to overfill. For a detailed list of supported paper, go to www.xerox.com/paper. Locating Paper Jams WARNING: Never touch a labeled area on or near the heat roller in the fuser. You can get burned. If a sheet of paper is wrapped around the heat roller, do not try to remove it immediately. -
Page 173: Clearing Paper Jams
Troubleshooting Clearing Paper Jams This section includes: Clearing Paper Jams From the Front of the Printer ..................173 Clearing Paper Jams From the Back of the Printer .................... 174 Clearing Paper Jams From the Output Tray ......................176 Clearing Paper Jams From the Front of the Printer Note: To resolve the error displayed on the control panel you must clear all paper from the paper... - Page 174 Troubleshooting Place the bypass tray on the main tray, then align the tabs with the marks. Follow the instructions on the control panel display and in the Printer Status window of PrintingScout. Press OK. Clearing Paper Jams From the Back of the Printer Note: To resolve the error displayed on the control panel you must clear all paper from the paper path.
- Page 175 Troubleshooting Remove any jammed paper from the back of the printer. Lower the levers to their original position. Close the rear cover. Follow the instructions on the control panel display and in the Printer Status window of PrintingScout. Press OK. WorkCentre 6015 Color Multifunction Printer User Guide...
-
Page 176: Clearing Paper Jams From The Output Tray
Troubleshooting Clearing Paper Jams From the Output Tray Note: To resolve the error displayed on the control panel you must clear all paper from the paper path. Push down on the rear cover release and pull the cover open. Lift the levers as shown. Remove any jammed paper from the back of the printer. - Page 177 Troubleshooting Lift and open the scanner. Remove any paper or other media from the output tray. Lower the scanner and close it. Lower the levers to their original position. WorkCentre 6015 Color Multifunction Printer User Guide...
- Page 178 Troubleshooting Close the rear cover. Follow the instructions on the control panel display and in the Printer Status window of PrintingScout. Press OK. WorkCentre 6015 Color Multifunction Printer User Guide...
-
Page 179: Troubleshooting Paper Jams
Try a new ream of paper. Too much static electricity is present. Do not fan transparencies before loading in tray. ® Using unsupported paper. Use only Xerox -approved paper. For details, see Supported Paper on page 72. Humidity is too high for coated paper. -
Page 180: Label And Envelope Misfeeds
Troubleshooting Label and Envelope Misfeeds Probable Causes Solutions Load label sheets according to the instructions from the The label sheet is facing the wrong way in the tray. manufacturer. Load labels face up in either tray. Load No. 10, DL, and Monarch envelopes in the trays with the Envelopes are loaded incorrectly. -
Page 181: Print-Quality Problems
Warranty, Service Agreement, or Xerox Total Satisfaction Guarantee does ® not cover damage caused by using unsupported paper or specialty media. The Xerox Total Satisfaction Guarantee is available in the United States and Canada. Coverage could vary outside these areas. Please contact your local representative for details. - Page 182 Your printer is designed to use various paper and other media types. Follow the guidelines in this section for the best print quality and to avoid jams: ® Use only Xerox approved paper. For details, see Supported Paper on page 72.
- Page 183 You can also print a Demo Page to more precisely determine the print-quality problem. For details, see Information Pages on page 26. If the print quality does not improve after carrying out the appropriate action, contact your Xerox representative. Notes: ...
- Page 184 For details, see Supported Paper on page 72. ® The toner cartridges are not Xerox Verify that the toner cartridges meet toner cartridges. specifications and replace them if necessary. For details, see Consumables on page 160.
- Page 185 Troubleshooting Symptom Cause Solution ® The printer is worn or damaged. For assistance, go to the Xerox Support website at www.xerox.com/office/WC6015support. ® The toner cartridges are not Xerox Verify that the toner cartridges meet toner cartridges. specifications and replace if necessary.
- Page 186 Troubleshooting Symptom Cause Solution Colors are blurry or there is Color-to-color alignment is not Perform an automatic color registration white area around objects. correct. adjustment. For details, see Color Registration on page 157. Blotchy or mottled images. The paper is too light or too thin. Compensate for the paper thickness.
-
Page 187: Getting Help
You can find solutions for print-quality problems, paper jams, software installation issues, and more. To access the Online Support Assistant, go to www.xerox.com/office/WC6015support. Information Pages Your printer has a printable set of information pages. These include configuration and font information, demonstration pages, and more. -
Page 188: More Information
You can obtain more information about your printer from these sources: Resource Location Installation Guide Packaged with the printer. Quick Use Guide Packaged with the printer. Video Tutorials www.xerox.com/office/WC6015docs Recommended Media List United States: www.xerox.com/paper Europe: www.xerox.com/europaper Technical support information for your printer; includes www.xerox.com/office/WC6015support online Technical Support, Online Support Assistant, and driver downloads. -
Page 189: Specifications
Specifications This appendix includes: Printer Configurations and Options ........................190 Physical Specifications ..............................191 Environmental Specifications ............................ 193 Electrical Specifications ............................... 194 Performance Specifications ............................195 Controller Specifications ............................. 196 WorkCentre 6015 Color Multifunction Printer User Guide... -
Page 190: Printer Configurations And Options
Specifications Printer Configurations and Options Available Configurations The WorkCentre 6015 Color Multifunction Printer is available in three configurations: WorkCentre 6015B Color Multifunction Printer: Printer with copy, print, and scan functions, and USB connectivity. WorkCentre 6015N Color Multifunction Printer: Network printer with copy, print, scan, and fax functions and USB or network connectivity. -
Page 191: Physical Specifications
Specifications Physical Specifications Weights and Dimensions WorkCentre 6015B Color WorkCentre 6015N/NI Color Multifunction Printer Multifunction Printer Width 410 mm (16.1 in.) 410 mm (16.1 in.) Depth 389 mm (15.3 in.) 389 mm (15.3 in.) Height 318 mm (12.5 in.) 337.5 mm (13.3 in.) Weight 14.3 kg (31.5 lb.) 15.2 kg (33.4 lb.) - Page 192 Specifications WorkCentre 6015N/NI Color Multifunction Printer WARNING: The WorkCentre 6015NI Color Multifunction Printer requires 20 cm (7.9 in.) separation from the left side of the printer to any people. WorkCentre 6015 Color Multifunction Printer User Guide...
-
Page 193: Environmental Specifications
Specifications Environmental Specifications Temperature Operating temperature: 10–32°C (50–90°F) Optimum temperature: 15–28°C (59–82°F) Relative Humidity Minimum–Maximum Humidity Range: 15–85% relative humidity at 28°C (82°F) Optimal Humidity Range: 20–70% relative humidity at 28°C (82°F) Note: Under extreme environmental conditions, such as 10°C and 85% relative humidity, defects can occur due to condensation. -
Page 194: Electrical Specifications
® Xerox ENERGY STAR equipment is preset at the factory to switch to Energy Saver Modes after 60 minutes and 1 minute from the last copy or print. -
Page 195: Performance Specifications
Specifications Performance Specifications Item Specifications Printer warm up time Power on: 25 seconds or less. Recovery from sleep mode: 25 seconds or less. Note: Warm up time assumes an ambient temperature of 22ºC (71.6°F). WorkCentre 6015 Color Multifunction Printer User Guide... -
Page 196: Controller Specifications
Specifications Controller Specifications Processor 295 MHz ARM9 processor Memory Memory WorkCentre 6015B Color Multifunction WorkCentre 6015N/NI Color Printer Multifunction Printer Standard memory 128 MB RAM 128 MB RAM Flash memory 16 MB NVRAM 16 MB NVRAM Fax memory None 2 MB RAM Interfaces WorkCentre 6015B Color Multifunction Printer WorkCentre 6015N/NI Color Multifunction... -
Page 197: Regulatory Information
Regulatory Information This appendix includes: Basic Regulations ................................198 Copy Regulations ................................200 Fax Regulations ................................203 Material Safety Data Sheets ............................. 207 WorkCentre 6015 Color Multifunction Printer User Guide... -
Page 198: Basic Regulations
Consult the dealer or an experienced radio/TV technician for help. Changes or modifications to this equipment not approved by Xerox can void the authority of the user to operate this equipment. Note: To ensure compliance with Part 15 of the FCC rules, use shielded interface cables. -
Page 199: European Union
To ensure compliance with European Union regulations, use shielded interface cables. A signed copy of the Declaration of Conformity for this printer can be obtained from Xerox. Turkey RoHS Regulation In compliance with Article 7 (d), we hereby certify “it is in compliance with the EEE regulation.”... -
Page 200: Copy Regulations
Regulatory Information Copy Regulations United States Congress, by statute, has forbidden the reproduction of the following subjects under certain circumstances. Penalties of fine or imprisonment may be imposed on those guilty of making such reproductions. Obligations or Securities of the United States Government, such as: ... - Page 201 Regulatory Information Copyrighted materials, unless permission of the copyright owner has been obtained or the reproduction falls within the “fair use” or library reproduction rights provisions of the copyright law. Further information of these provisions may be obtained from the Copyright Office, Library of Congress, Washington, D.C.
-
Page 202: Canada
Regulatory Information Canada Parliament, by stature, has forbidden the reproduction of the following subjects under certain circumstances. Penalties of fine or imprisonment may be imposed on those guilty of making such reproductions. Current bank notes or current paper money ... -
Page 203: Fax Regulations
Regulatory Information Fax Regulations United States Fax Send Header Requirements The Telephone Consumer Protection Act of 1991 makes it unlawful for any person to use a computer or other electronic device, including a fax machine, to send any message unless such message clearly contains in a margin at the top or bottom of each transmitted page or on the first page of the transmission, the date and time it is sent and an identification of the business or other entity, or other individual sending the message and the telephone number of the sending machine or such business,... - Page 204 Ask your local Telephone Company for the modular jack type installed on your line. Connecting this machine to an unauthorized jack can damage telephone company equipment. You, not Xerox, assume all responsibility and/or liability for any damage caused by the connection of this machine to an unauthorized jack.
-
Page 205: Canada
DTMF signaling for more reliable and faster call setup. Modification of this product, connection to external control software, or connection to an external control ® apparatus not authorized by Xerox will invalidate its certification. South Africa This modem must be used in conjunction with an approved surge protection device. -
Page 206: New Zealand
Regulatory Information New Zealand The grant of a Telepermit for any item of terminal equipment indicates only that Telecom has accepted that the item complies with minimum conditions for connection to its network. It indicates no endorsement of the product by Telecom, it does not provide any sort of warranty, and it does not imply that any Telepermitted product is compatible with all Telecom network services. -
Page 207: Material Safety Data Sheets
Regulatory Information Material Safety Data Sheets For Material Safety Data information regarding your printer, go to: North America: www.xerox.com/msds European Union: www.xerox.com/environment_europe For the Customer Support Center phone numbers, go to www.xerox.com/office/worldcontacts. WorkCentre 6015 Color Multifunction Printer User Guide... -
Page 209: Recycling And Disposal
Recycling and Disposal This appendix includes: All Countries ..................................210 North America ................................. 211 European Union ................................212 Other Countries ................................214 WorkCentre 6015 Color Multifunction Printer User Guide... -
Page 210: All Countries
Recycling and Disposal All Countries ® If you are managing the disposal of your Xerox product, please note that the printer may contain lead, mercury, perchlorate, and other materials whose disposal may be regulated due to environmental considerations. The presence of these materials is fully consistent with global regulations applicable at the time that the product was placed on the market. -
Page 211: North America
Recycling and Disposal North America Xerox operates an equipment take-back and reuse/recycle program. Contact your Xerox representative ® (1-800-ASK-XEROX) to determine if this Xerox product is part of the program. For more information ® about Xerox environmental programs, visit www.xerox.com/environment, or for recycling and disposal information, contact your local authorities. -
Page 212: European Union
In accordance with European legislation, end of life electrical and electronic equipment subject to disposal must be managed within agreed procedures. Prior to disposal, please contact your local reseller or Xerox representative for end of life take-back information. WorkCentre 6015 Color Multifunction Printer... -
Page 213: Collection And Disposal Of Equipment And Batteries
Recycling and Disposal Collection and Disposal of Equipment and Batteries These symbols on the products and/or accompanying documents mean that used electrical and electronic products and batteries should not be mixed with general household waste. For proper treatment, recovery, and recycling of old products and used batteries, please take them to applicable collection points, in accordance with your national legislation and the Directive 2002/96/EC and 2006/66/EC. -
Page 214: Other Countries
Recycling and Disposal Other Countries Please contact your local waste management authority to request disposal guidance. WorkCentre 6015 Color Multifunction Printer User Guide...