RocketFish RF-MRBTAD User Manual
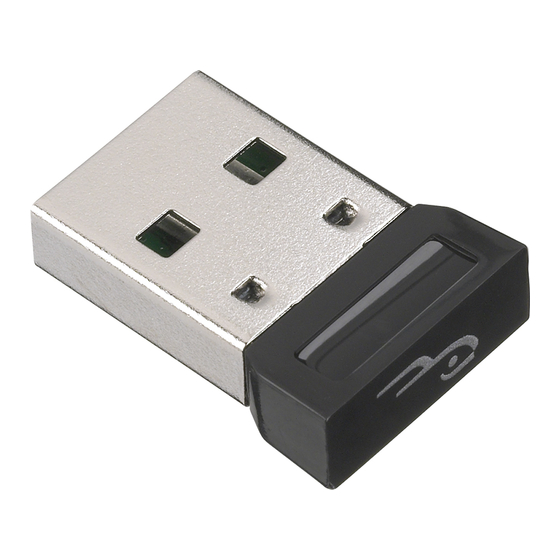
Micro bluetooth 2.1 edr adapter
Hide thumbs
Also See for RF-MRBTAD:
- User manual (84 pages) ,
- Manual del usuario (42 pages) ,
- Manual de l'utilisateur (40 pages)
Table of Contents
Advertisement
Quick Links
Advertisement
Table of Contents

Related Manuals for RocketFish RF-MRBTAD


Summary of Contents for RocketFish RF-MRBTAD
- Page 1 Micro Bluetooth 2.1 EDR Adapter User Guide RF-MRBTAD...
-
Page 2: Table Of Contents
Uninstalling the software ...........32 Troubleshooting ............33 Legal notices ..............33 One-Year Limited Warranty........35 Introduction Congratulations on your purchase of a high-quality Rocketfish product. Your RF-MRBTAD represents the state of the art in Bluetooth adapter design and is designed for reliable and trouble-free performance. -
Page 3: Features
• Installation CD • Quick Setup Guide System requirements • Pentium processor or equivalent • One available USB port (USB 2.0 or 1.1) • CD drive • Operating system: Microsoft® Windows 2000, Microsoft Windows XP, Microsoft Windows Vista®, or Windows 7 RF-MRBTAD... -
Page 4: Windows Vista® Or Windows® 7
Windows Vista® or Windows® 7 Installing the Bluetooth software in Windows Vista or Windows 7 To install the Bluetooth software in Windows Vista or Windows 7: Insert the provided installation CD into the computer’s CD drive. The introductory screen appears automatically. If the screen does not appear, open the Autorun.exe file on the CD. - Page 5 Click Install Bluetooth Micro Adapter Driver. The Welcome screen opens. Click Next to begin the installation. The License Agreement screen opens. RF-MRBTAD...
- Page 6 Read the agreement, click I accept the terms in the license agreement, then click Next. The Destination Folder screen opens. To install the driver in the default location, click Next. The Ready to Install the Program screen opens. Or, to change the location, click Change, type the location, then click Next. The Ready to Install the Program screen opens.
- Page 7 Bluetooth device not Found message opens. Plug the Bluetooth adapter into a USB port on the computer, then click OK. Click Install. The Found New Hardware Wizard starts installing the Bluetooth software. When the installation is complete, the InstallShield Wizard Completed screen opens. RF-MRBTAD...
- Page 8 Click Finish. A message tells you that you need to restart the computer. Click Yes.
- Page 9 • Receive a File—Click to receive a file using Bluetooth File Sharing. • Join a Personal Area Network—Click to join a private Bluetooth network. • Open Bluetooth Settings—Click to open the Bluetooth Devices screen. • Remove Bluetooth Icon—Click to remove the Bluetooth icon from the task bar. RF-MRBTAD...
-
Page 10: Windows Vista Or Windows 7
Managing Bluetooth connections and settings in Windows Vista or Windows 7 To manage Bluetooth connections and settings in Windows Vista or Windows 7: Double-click the Bluetooth icon in the task bar. The Bluetooth Devices window opens. Click a tab at the top of the window to navigate through the options. Make changes, as needed, then click: •... - Page 11 Use this tab to add, view properties for, or remove a device. • Click Add to configure a new device. • Click a device, then click Properties to view the properties for a selected device. • Click a device, then click Remove to remove a device from the list. RF-MRBTAD...
- Page 12 Options tab Use this tab to set discovery and connection permissions, show or hide the task bar Bluetooth icon, or restore default settings.
- Page 13 Use this tab to configure the COM (serial) port settings for Bluetooth devices. • Click a device, then click Add to assign a COM port to a Bluetooth device. • Click a device, then click Remove to remove a Bluetooth device from the list. RF-MRBTAD...
- Page 14 Hardware tab Use this tab to view hardware information on all connected devices. To see detailed information about a device, click the device, then click Properties.
- Page 15 Use this tab to configure sharing permissions and settings for sending and receiving files. You can specify what type of file can be accessed by remote devices, where shared files are stored, and whether devices can access the Internet through the computer. RF-MRBTAD...
- Page 16 PIM Interface tab Use this tab to configure settings for received PIM items, such as business cards, calendar items, e-mails, and notes. Click an arrow to open a drop-down list, then click the item you want to receive. To block a PIM type, click Do Not Accept.
- Page 17 Audio tab Use this tab to configure settings for devices used for audio playback, audio recording, or telephony. Click a device, then click Connect or Remove. RF-MRBTAD...
- Page 18 Dial-up tab Use this tab to select or remove a device that uses Bluetooth Dial-up Networking to connect to the Internet.
-
Page 19: Windows® 2000 Or Windows® Xp
Plug the Bluetooth adapter into a USB port on the computer. Insert the included installation CD into the CD drive on the computer. The introductory screen appears automatically. If the screen does not appear, open the Autorun.exe file on the CD. RF-MRBTAD... - Page 20 Click Install Bluetooth Micro Adapter Driver. The Welcome screen opens. Click Next to begin the installation. The License Agreement screen opens.
- Page 21 To install the driver in the default location, click Next. The Ready to Install the Program screen opens. Or, to change the location, click Change, type the location, then click Next. The Ready to Install the Program screen opens. RF-MRBTAD...
- Page 22 Note: If you have not plugged the Bluetooth adapter into a USB port on the computer, the Bluetooth device not Found message opens. Plug the Bluetooth adapter into a USB port on the computer, then click OK. Click Install. The Found New Hardware Wizard starts installing the software.
- Page 23 To set up the Bluetooth software in Windows 2000 or Windows XP: If the Initial Bluetooth Configuration Wizard screen is not open, double-click My Bluetooth Places on the Windows desktop or double-click the Bluetooth icon on the task bar. RF-MRBTAD...
- Page 24 Click to uncheck the options you do not need, then click Next. The Device Name and Type screen opens. Type a name for the computer in the Computer name box, then open the Computer type list and click Laptop or Desktop. Click Next.
- Page 25 Click Next. The Bluetooth Service Selection screen opens. Click the services that you want the computer to provide to other Bluetooth devices, then click Next. Another Initial Bluetooth Configuration Wizard screen opens. RF-MRBTAD...
- Page 26 If you want to configure another Bluetooth device, click Next and follow the on-screen instructions. Otherwise, click Skip. After you configure all devices, the Initial Bluetooth Configuration Wizard-Congratulations screen opens. Click Finish.
- Page 27 To connect to a Bluetooth device in Windows 2000 or Windows XP: Follow the instructions in the Bluetooth device’s documentation to wirelessly connect the device to the Bluetooth adapter. Double-click My Bluetooth Places on the Windows desktop. The My Bluetooth Places window opens. RF-MRBTAD...
- Page 28 Click Add a Bluetooth Device. The Initial Bluetooth Configuration Wizard screen opens. Click Next. The Blue Device Selection screen opens. The connected Bluetooth devices are listed.
- Page 29 Click a device, then click Next. The Bluetooth Security Setup screen opens. Type the numbers shown on the screen to connect to the device. The Bluetooth Service Selection screen opens. RF-MRBTAD...
- Page 30 Click the services you want to enable, then click Next. The Completing Bluetooth Setup Wizard screen opens. Type the name for the Bluetooth device. If you want to connect another Bluetooth device, click the Create a shortcut and restart this wizard checkbox.
- Page 31 Click Finish. The My Bluetooth Places window opens and a shortcut for the device you connected appears. Click the shortcut to connect to the device. RF-MRBTAD...
-
Page 32: Uninstalling The Software
Getting help in Windows 2000 or Windows XP To get help in Windows 2000 or Windows XP: Open the My Bluetooth Places window. Click Help, then click Bluetooth Help Topics. The help file opens. Uninstalling the software Windows Vista or Windows 7 To uninstall the Bluetooth software: Unplug the Bluetooth adapter. -
Page 33: Troubleshooting
The user’s manual or instruction manual for an intentional or unintentional radiator shall caution the user that changes or modifications not expressly approved by the party responsible for compliance could void the user’s authority to operate the equipment RF-MRBTAD... - Page 34 Note: This equipment has been tested and found to comply with the limits for a Class B digital device, pursuant to part 15 of the FCC Rules. These limits are designed to provide reasonable protection against harmful interference in a residential installation. This equipment generates, uses and can radiate radio frequency energy and, if not installed and used in accordance with the instructions, may cause harmful interference to radio communications.
-
Page 35: One-Year Limited Warranty
Product is determined to be defective by an authorized Rocketfish repair center or store personnel, Rocketfish will (at its sole option): (1) repair the Product with new or rebuilt parts; or (2) replace the Product at no charge with new or rebuilt comparable products or parts. Products and parts replaced under this warranty become the property of Rocketfish and are not returned to you. - Page 36 7601 Penn Avenue South, Richfield, Minnesota, U.S.A. 55423-3645 © 2009 Best Buy Enterprise Services, Inc. All rights reserved. ROCKETFISH is a trademark of Best Buy Enterprise Services, Inc. Registered in some countries. All other products and brand names are trademarks of their respective owners.
- Page 37 RF-MRBTAD...
- Page 40 7601 Penn Avenue South, Richfield, MN 55423-3645 USA © 2009 Best Buy Enterprise Services, Inc. All rights reserved. ROCKETFISH is a trademark of Best Buy Enterprise Services, Inc. All other products and brand names are trademarks of their respective owners.