Advertisement
Quick Links
Please read these instructions carefully before attempting to rebuild your carburetor.
Instructions for further information if need be. If you have any questions or problems, do not hesitate to contact our Technical Hotline at: (800) 416-
8628 from 7:00 am to 5:00 pm, Monday through Friday, Pacific Standard Time or e-mail us at: edelbrock@edelbrock.com.
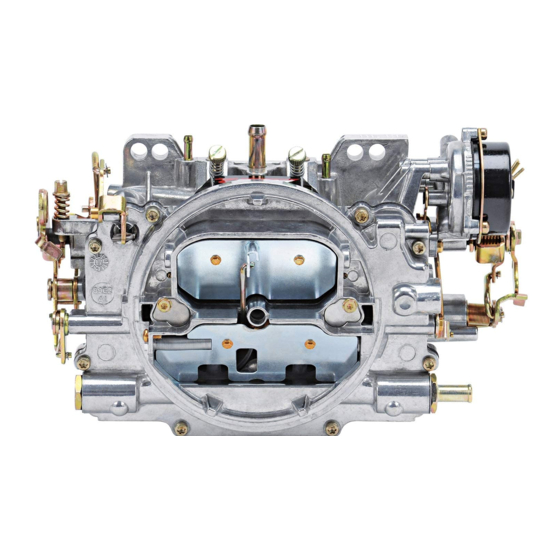
To check kit contents see exploded view of carburetor and parts description on last page. Verify that all parts underlined on
list are in your kit.
Carb Kit contains all necessary parts and instructions to rebuild your Edelbrock Carburetor properly. When similar parts are contained in the Carb Kit,
choose the ones that most closely match the existing parts. Some parts in the kit may not be needed.
1. DISASSEMBLE carburetor use accompanying exploded view as a
guide..
Remove pump lever by driving roll pin through far enough to permit
release of lever.
Remove air horn screws.
Remove power piston by pressing down and releasing with a snap.
Remove power piston spring(s).
Do Not turn nor remove factory-adjusted stop screw next to power
piston. (APT) Adjustable part throttle.
Do Not turn nor remove factory-adjusted screw in aneroid cover.
Turn idle mixture needles clockwise and record number of turns
needed to lightly bottom them, for use during reassembly. Remove
needles.
Disassemble choke cap from housing per Figure 13 (not applicable
to remote choke models).
2. CLEAN carburetor.
Soak the carb parts (except as noted below) in a cold immersion
type carb cleaner.
Use mineral spirits or kerosene to clean solenoids, choke cover,
aneroid, float, float bowl inserts, vacuum breaks, seals or other
parts containing rubber. Do not immerse these parts in carb
cleaner.
Blowout all passages with compressed air .
After a thorough cleaning of all castings and parts, pay particular
attention to the cleanliness of the power piston and the body
casting bore where it is housed. Any sticking of the power valve
will prevent proper fuel control and affect driveability.
3. REASSEMBLE carburetor and ADJUST following sequence illustrated.
Refer to model number for specifications. Use figure 1 to find
position of model number
Install new intermediate choke shaft seal in float bowl. Lip faces
outward. On Hot Air Choke models, install additional shaft seal in
©2002 Edelbrock Corporation
Brochure No. 63-0149
®
FIG. 2
FIG. 1
PUMP SETTINGS
LEVER
DIM.
FLOAT
HOLE
CARB #
SETTINGS
1901
INNER
15/32"
13/32"
(8904S)
1902
15/32"
13/32"
INNER
(8905S)
1903
25/64"
INNER
13/32"
(8906S)
1904
25/64"
INNER
13/32"
1905
1906
(8907S)
1910
19/64"
INNER
5/8"
(8908S)
choke housing. Lip faces float bowl. Disregard for remote choke
models.
Do not install float needle pull clip into holes in float arm.
Install power piston. Press plastic retainer into bore until flush with
top of float bowl casting.
Carefully remove pump cup (with garter spring, if used) from pump
head. Install new cup (with new garter spring, if used) on pump
head.
If used, install new pump stem seal and retainer in air horn. Lip
faces toward outside of carburetor. Lightly stake casting around
retainer.
Select correct air horn gasket by matching replacement to old
gasket.
Tighten air horn screws in numerical sequence per illustration.
Torque screws 32-60 in-lbs.
Install the choke cover and
coil assembly per Figure15.
Use the cover gasket on hot
air model only (1903). Do
not use the cover gasket on
electric choke model
1904,05,06,10.
4. REINSTALL carburetor to intake
manifold, torque mounting bolts
to 110 in-Ibs.
5. ADJUST idle mixture and speed
according to vehicle manufacturer's specifications.
ADJUSTMENT SPECIFICATIONS
FIG. 4
FIG. 5
FIG. 6
AIR
CHOKE
VALVE
COIL
FAST
SPRING
LEVER
IDLER
7/8 TURN
1/8"
48°
48°
7/8 TURN
1/8"
48°
7/8 TURN
1/8"
48°
7/8 TURN
1/8"
48°
1 TURN
1/8"
Page 1 of 4
REPLACEMENT Q-JET CARBURETOR
KIT INSTRUCTIONS
KITS #1920, 1921 & 1990
Performer Models 1901, 1902, 1903,
1904,1905,1906,1910
Make sure to refer to your carburetor Installation
FIG. 7
FIG. 9
FIG. 13
VACUUM
UN-
CHOKE
BREAK
LOADER
SETTINGS
PER
22°
40°
NOTCH
PER
22°
40°
NOTCH
PER
27°
40°
NOTCH
PER
27°
40°
NOTCH
PER
27°
40°
NOTCH
Rev. 10/02
Advertisement

Related Manuals for Edelbrock 1901


Summary of Contents for Edelbrock 1901
- Page 1 Carb Kit contains all necessary parts and instructions to rebuild your Edelbrock Carburetor properly. When similar parts are contained in the Carb Kit, choose the ones that most closely match the existing parts. Some parts in the kit may not be needed.
- Page 2 MEASURING GAP AT EDGE OF CHOKE VALVE. MAKE ADJUSTMENT TO BRING BUBBLE BACK TO CENTER POSITION. GAUGE: J-26701 KENT MOORE TOOL ANGLE GAUGE METHOD ©2002 Edelbrock Corporation Brochure No. 63-0149 PRESS DOWN GENTLY ON FLOAT TANG UNTIL ALUMINUM TAG SEATED ON NEEDLE.
- Page 3 SECONDARY OPENING ADJUSTMENT 1/8” TURN CLOCKWISE FOR RICHER SETTING 2 0’CLOCK POSITION ©2002 Edelbrock Corporation Brochure No. 63-0149 TAPE PURGE BLEED HOLE IN COVER. (WHEN USED). APPLY OUTSIDE VACUUM SOURCE TO FULLY SEAT DIAPHRAGM. PUSH UP ON INSIDE CHOKE COIL...
- Page 4 EXPLODED VIEW OF TYPICAL EDELBROCK CARBURETOR ©2002 Edelbrock Corporation Brochure No. 63-0149 PA RT D E S C R I P T I O N 1. SCREW (2) - THROTTLE LEVER ACTUATOR 2. THROTTLE LEVER ACTUATOR ASSY. 3. SCREW (2) REAR VAC. BREAK 4.