
Related Manuals for Coby TFDVD7091


Summary of Contents for Coby TFDVD7091
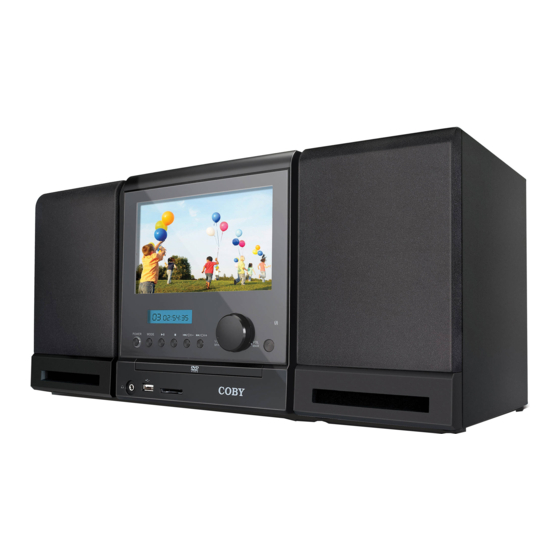
- Page 1 TFDVD7091 7” DTV/DVD/Radio Player with USB Port and Card Slot Instruction Manual Please read this manual carefully before operation.
- Page 2 Retain this information for future DO NOT OPEN reference. CAUTION: TO REDUCE THE RISK OF FIRE AND ELEC- Model No. TFDVD7091 TRIC SHOCK, DO NOT REMOVE THE COVER (OR BACK) Serial No. OF THE UNIT. REFER SERVICING ONLY TO QUALIFIED SERVICE PERSONNEL.
- Page 3 PRECAUTIONS Do not make any changes or modifications to the equipment unless otherwise specified in the manual. If such changes or modifications should be made, you could be required to stop operation of the equipment. For recycling or disposal information about this product, please contact your local authorities or the Electronics Industries Alliance: www.eiae.org.
-
Page 4: Important Safety Instructions
IMPORTANT SAFETY INSTRUCTIONS Read Instructions: All the safety and operating instructions should be read before the product is operated. Retain Instructions: The safety and operating instructions should be retained for future refer- ence. Heed Warnings: All warnings on the product and in the operating instructions should be adhered to. - Page 5 IMPORTANT SAFETY INSTRUCTIONS motor vehicle, or left unsecured in the vehicle whilst driving. If this unit is being used by a passenger in your vehicle, be sure that it is secured or held safely, and does not obstruct any safety device (i.e. airbag, seat belt etc.) that is fitted. All passengers should wear seat belts when using this unit in a moving vehicle.
- Page 6 IMPORTANT SAFETY INSTRUCTIONS for long periods of time. This will prevent damage to the product due to lightning or power-line surges. If at any time in the future you should need to dispose of this product please note that Waste electrical products should not be disposed of with household waste. Please recycle where facilities exist.
-
Page 7: Table Of Contents
TABLE OF CONTENTS PRECAUTIONS IMPORTANT SAFETY INSTRUCTIONS PACKAGE CONTENTS ........................2 ABOUT OPTICAL DISCS ........................3 LOCATION OF CONTROLS ......................4 REMOTE CONTROL ........................6 CONNECTIONS ..........................8 General Connection .........................8 AV Connection .........................9 Coaxial Connection .......................10 AUX IN Connection ........................10 USB/SD Card Connection ..................... 11 Headphones/Earphones Connection ..................12 BASIC OPERATIONS ........................13 Set Clock ..........................13... -
Page 8: Package Contents
PACKAGE CONTENTS Please make sure the following items are included in the package. If any item is missing, please contact your dealer. Remote... -
Page 9: About Optical Discs
ABOUT OPTICAL DISCS Disc Requirements This player supports the following discs. Type Disc Mark Content Type Disc Size Max. Playback Time 133 min (SS-SL) 242 min (SS-DL) Audio + Video DVD-Video Discs 12 cm (moving picture) 266 min (DS-SL) 484 min (DS-DL) Audio Compact Discs (CDs) Audio 12 cm... -
Page 10: Location Of Controls
LOCATION OF CONTROLS TFT Screen Remote Sensor VFD Display Sense remote signals. STOP Open/Close Stop disc playback. Open/close the disc room in a DVD mode. MODE CH+/- Repeatedly press the button to shift Skip DTV channels or radio stations, In the modes. - Page 11 LOCATION OF CONTROLS Speaker Connectors RCA Input Input external AV signals. TV Antenna Connects with TV RF source. RCA Output Output AV signals to an external monitor. Power Switch Switch on/off the unit. Power Cord Connects with an AC100V-240V,50Hz/60Hz power supply. Coaxial Output Output audio signals by a coaxial cable.
-
Page 12: Remote Control
REMOTE CONTROL Remote Control MODE DVD/SD/USB STANDBY OPEN/CLOSE TITLE KEY PAD GOTO AUDIO SUBTITLE SETUP ANGLE TV SETUP EXIT DIRECTION REPEAT /OK/TUN/CH MENU MUTE F.FWD NEXT F.BWD PREV PLAY/PAUSE STEP STOP SLOW CLEAR PROGRAM MEMORY/ZOOM DISPLAY FM/AM/EPG CH-List ST/MONO AUTO/FAV Using The Coin Lithium Battery 1. - Page 13 REMOTE CONTROL • Mode Press to search stations automatically in Press to shift modes. the radio mode. Press to display favorite • Standby channels in the DTV mode. Access/exit the standby mode. • Open/Close • Title Open/close the DVD room. Display the DVD title menu.
-
Page 14: Connections
CONNECTIONS General Connection RIGHT SPEAKER LEFT SPEAKER Wall Outlet 100-240V~50/60Hz TV ANTENNA FM ANTENNA AM LOOP ANTENNA Power Connection Insert the power plug into a standard AC outlet with 100-240V, 50Hz/60Hz. If you have diffi culty inserting the plug, turn it over and re-insert it. •... -
Page 15: Av Connection
CONNECTIONS Audio and Video Signal Input/Output Through the player’s AV function, you can view programs from an external signal device as well as transmit the player’s AV signal to an outer receiver. Fig1 - AV signal input AV Signal Device Fig2 - AV signal output External Receiver •... -
Page 16: Coaxial Connection
CONNECTIONS Connecting to an amplifi er equipped with a Dolby Pro Logic Surround Ampli er equipped with a DolbyPro Logic Surround Coaxial cable (not supplied) • Refer to the user’s manual of external devices as well. AUX Audio Signal Input - Input external audio signals to the player’s speaker system. RIGHT SPEAKER •... -
Page 17: Usb/Sd Card Connection
CONNECTIONS USB/SD Card Connection Insert a USB/card into the corresponding slot. In the DVD mode, press the DVD /SD/USB button on the remote to display the source option menu, use the up/down direction button to select USB/Card, press OK to access. DISC CARD It takes a short while for the systems’s reading data,... -
Page 18: Headphones/Earphones Connection
CONNECTIONS Using Headphones / Earphones Maximum output voltage ≤ 900mV Be sure that your unit is set at a low volume level before connecting the headphone. Increase the volume gradually for your comfortable listening. To Headphone jack CAUTION: Hearing experts advise against the constant use of personal stereos played at high volume. Constant high volume use can lead to hearing loss. -
Page 19: Basic Operations
BASIC OPERATIONS Set Clock In the standby mode, press the OPEN/CLOSE button on the main unit to display the active setting interface, press the STOP/PLAY/PAUSE button on the unit to move the cursor left/right, press CH+/- to change character, press MODE to confi rm new time settings. Press OPEN/CLOSE to display clock under any living mode. -
Page 20: Dtv
BASIC OPERATIONS NOTE: • The player supports discs as follow: DVD, CDR, MP3, JPEG. • More DVD functions are listed clearly under the “DVD Function” section and the “DVD Setup” section, please read carefully. TV Operation • Connect the cables. Press POWER to turn on the player. Refer to the “Cable Connections” section for details. -
Page 21: Dvd Function
DVD FUNCTIONS Start Playing After correctly loaded a disc, press PLAY/PAUSE to start playback Pause Playing During playback, press PLAY/PAUSE once to pause playing, press it again to resume. Stop Playing Press STOP once to stop playback at a time point. (Pre-stop mode) It will resume from where it was stopped. Press it twice to stop playback completely. - Page 22 DVD FUNCTIONS Slow Motion Playback Press the SLOW button to have playback advanced in a slow motion. Repeatedly press the button to change the slow speed as below. Step-by-Step Playback During playback, repeatedly press the STEP button to go forward step by step. Zoom Function Repeatedly press the ZOOM button to achieve the following zoom effect.
-
Page 23: Dvd Setup
DVD SETUP Various features can be preset through the DVD setup menu. Press the Setup button to show the DVD menu. While working with the setup menu: • Press the direction buttons to select the desired item. • Press the right direction button or the OK button to confi rm. •... - Page 24 DVD SETUP Language Setup Item Instruction Default OSD Language Setup the OSD language. English Audio Language Setup the audio language. English Subtitle Language Setup the subtitle language. When OFF is English selected, the subtitle will not be displayed. Menu Language Setup the menu language.
- Page 25 DVD SETUP Speaker Setup Item Instruction Default Downmix Set the audio downmix mode. STEREO (LT/RT, STEREO,VSS) Digital Setup Item Instruction Default Dynamic Range Adjust the dynamic range. Dual Mono Select the sound output mode. (STEREO, MONO L/R, MIX MONO) STEREO...
-
Page 26: Dtv Function
DTV FUNCTION SETUP DTV Function Preparations • Connect the antenna and the power supply. Press POWER to turn on the player. See “ Cable Connections” section. • Press MODE to select DTV. • Press the CH+/- button to skip channels, or use numeric buttons to input the channel directly. •... - Page 27 SPECIFICATIONS DTV FUNCITON Time Setup Item Instruction Time Zone Select the time zone. (Central, Mountain, Pacifi c, Alaska, Hawaii, Atlantic, Eastern). Daylight Saving Set the time saving function on/off. Time Option Setup Item Instruction Menu Language Setup the menu language. Color Mode Setup the color mode.
-
Page 28: Specifications
SPECIFICATION AC100-240V,50Hz/60Hz ATSC/NTSC Specifi cations and manual are subject to change without prior notice. -
Page 29: Troubleshooting
If you have a problem with this unit, please read the troubleshooting guide below and check our website at www. cobyusa.com for Frequently Asked Questions (FAQs) and firmware updates. If these resources do not resolve the problem, please contact Technical Support. COBY Electronics Technical Support 150 Knowlton Way Savannh, GA 31407 Email: techsupport@cobyusa.com... - Page 30 TROUBLESHOOTING • Try a different Audio track of the DVD by pressing AUDIO. • Ensure that the MUTE function of the TV, Amplifier, or Player is not engaged. The remote control doesn’t work. • Ensure that there are no obstacles between the remote and the player. •...
- Page 31 COBY Electronics Corp. 56-65 Rust Street 1991 Marcus Avenue,Suite 301 Maspeth, NY 11378 Lake Success, NY 11042 www.cobyusa.com www.ecoby.com...