LG LWD3081ST - Double Electric Oven User's Manual And Cooking Manual
Electric convection built-in oven
Hide thumbs
Also See for LWD3081ST - Double Electric Oven:
- User manual (80 pages) ,
- Training manual (78 pages) ,
- User's manual and cooking manual (42 pages)
Table of Contents
Advertisement
Please read this guide thoroughly before operating
and keep it handy for reference at all times.
Lea esta guía con detenimiento antes de utilizar el
aparato y manténgala a mano para referencia en
Veuillez lire ce manuel avec attention avant
d'utiliser cet appareil et gardez-le à portée de main
pour toute référence en cas de besoin.
Model/Modelo/Modèle
P/No. MFL51224501
Printed In Korea
Impreso en Korea
Imprimé en Corée
todo momento.
LWD3081ST
LSWD305ST
To contact LG Electronics
24 hours a day, 7 days a week:
1-800-243-0000 (U.S.A.)
1-888-542-2623 (Canada)
Or visit us on the Web at:
us.lge.com (U.S.A) or ca.lge.com (Canada)
Para comunicarse con LG Electronics
24 horas al día, 7 días a la semana:
1-800-243-0000 (EE.UU.)
1-888-542-2623 (Canadá)
O visítenos en la Web en:
us.lge.com (EE.UU.) o ca.lge.com (Canadá)
Pour contacter LG Electronics
24h/24 et 7jours/7 :
1-800-243-0000 (U.S.A.)
1-888-542-2623 (Canada)
Ou consultez notre site Internet au :
us.lge.com (U.S.A) ou ca.lge.com (Canada)
Advertisement
Table of Contents

Related Manuals for LG LWD3081ST - Double Electric Oven


Summary of Contents for LG LWD3081ST - Double Electric Oven
- Page 1 1-800-243-0000 (U.S.A.) 1-888-542-2623 (Canada) Or visit us on the Web at: us.lge.com (U.S.A) or ca.lge.com (Canada) Para comunicarse con LG Electronics 24 horas al día, 7 días a la semana: 1-800-243-0000 (EE.UU.) 1-888-542-2623 (Canadá) O visítenos en la Web en: us.lge.com (EE.UU.) o ca.lge.com (Canadá)
-
Page 2: Table Of Contents
Congratulations on your Sound Volume...............11 Convection Auto Conversion.........11 Temperature Adjustment..........12 purchase and welcome to the Clock Time ..............12 Reset................12 LG family. Your new LG Built-In Timer On/Off ..............13 Telescopic Rack............14 Oven combines precision Bake ................15 Baking Layer Cakes ............15 Timed Bake ..............16 cooking features with simple Delayed Timed Bake.............17... -
Page 3: Safety Precautions
READ ALL INSTRUCTIONS BEFORE USE This is the safety alert symbol. This symbol alerts you to potential hazards that can kill or hurt you and others. All safety messages will follow the safety alert symbol and either the word WARNING or CAUTION. These words mean: WARNING This symbol will alert you to hazards or unsafe practices which could cause serious bodily harm or death. -
Page 4: Electrical Safety
READ ALL INSTRUCTIONS BEFORE USE SAFETY PRECAUTIONS (cont.) • Be certain all packing materials are removed • DO NOT use a steel-wool pad. from the appliance before operating. It will SCRATCH the surface. Keep plastics, clothes, and paper away from parts •... -
Page 5: Safety During Use
READ ALL INSTRUCTIONS BEFORE USE SAFETY DURING USE • Oven Racks. Always place oven racks in • Should an oven fire occur, leave the oven door desired position while oven is cool. closed and turn the oven off. If the fire continues, throw baking soda on the fire or •... -
Page 6: Safety When Cleaning
READ ALL INSTRUCTIONS BEFORE USE SAFETY WHEN CLEANING • Do Not Clean Door Gasket. The door gasket is • Important Instruction. In the event the self clean essential for a good seal. Care should be taken error code F is displayed, and error melody not to rub, damage, or move the gasket. -
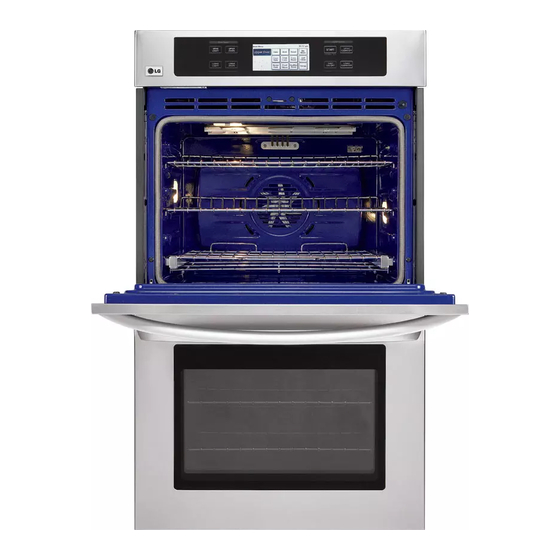
Page 7: Parts And Features
PARTS AND FEATURES Door switch (2 ea) - One on upper oven and one on lower oven. Door latch (2 ea) - One on upper oven and Control panel one on lower oven. Model & serial Meat probe number plate Broiler pan &... -
Page 8: Control Panel Features
CONTROL PANEL FEATURES READ THE INSTRUCTIONS CAREFULLY BEFORE USING THE OVEN. For satisfactory use of your oven, become familiar with the various features and functions of the oven as described below. UPPER LIGHT: Use to turn the upper oven lights on and off. Bake: Use to select the normal bake mode. -
Page 9: Initial Set Up
INITIAL SET UP When the oven is first powered ON, the oven needs to To set the clock (example below for be programmed for the language and time of day. for 3:30 pm): Set up 11:35 am Touch 12HR to use a To set the language (example below for Back Clock Time... -
Page 10: Language Selection
The following options can be found by touching SET UP on the main menu. LANGUAGE SELECTION (ENGLISH, ESPAÑOL OR FRANÇAIS) English, French or Spanish can be set as the display language. To set language selection Touch Set Up. Touch English, Español English Español Français... -
Page 11: Sound Volume
SOUND VOLUME (MUTE, NORMAL OR LOUD) The sound volume feature allows you to adjust the volumes to a more acceptable volume. There are three possible volume levels. To set sound volume Touch Set Up. Touch Mute or Normal or Mute Normal Loud Set up... -
Page 12: Temperature Adjustment
TEMPERATURE ADJUSTMENT The oven cavity temperature can be adjusted if it is Touch Set Up. Set up running too hot or too cool. If needed, the temperature can be adjusted +/- 35 Touch 6 for temperature degrees. adjustment. The Upper and Lower oven temperature can be To increase the temperature, independently adjusted. -
Page 13: Timer On/Off
TIMER ON/OFF The TIMER ON/OFF serves as an extra timer in the kitchen that will beep when the set time has run out. It does not start or stop cooking. The TIMER ON/OFF feature can be used during any of the other oven control functions. -
Page 14: Telescopic Rack
TELESCOPIC RACK The sliding shelf telescopic rack can be used in the Installing the Telescoping Rack UPPER or LOWER oven in any rack position. Step. 1 Start with the rack in the "Closed" position. Place one hand in the front near the center, and place your other Open Position hand near the right rear corner. -
Page 15: Bake
BAKE The oven can be programmed to bake at any To change the Bake Temperature while cooking temperature from 170˚F (77˚C) to 550˚F (288˚C). (example changing from 375˚F to 425˚F): Default temperature is 350˚F (177˚C). Touch Options. Options To set the Bake Temperature to 375˚F Touch Temp. -
Page 16: Timed Bake
TIMED BAKE The oven will turn on immediately and bake for a IMPORTANT NOTE: selected length of time. At the end of the cooking Preheating is necessary for good results when baking time, the oven will turn off automatically. cakes, cookies, pastries and breads. After the oven has reached the desired temperature, the preheat To set the oven to begin cooking alarm melody will sound once. -
Page 17: Delayed Timed Bake
DELAYED TIMED BAKE The automatic timer of the Delayed Timed Bake will IMPORTANT NOTE: turn the oven ON and OFF at the time you select in The heating elements turn off immediately when the advance. door is opened. They will turn on again in approximately 5 seconds after the door is closed. -
Page 18: Broil
BROIL Broiling uses an intense, radiant heat to cook food. IMPORTANT NOTE: Both the inner and outer broil elements heat during The heating element(s) turn off immediately when the full broiling. Only the inner broil element heats during door is opened. They will turn on again in center broiling. -
Page 19: Recommended Broiling Guide
RECOMMENDED BROILING GUIDE (cont.) Quantity and/ or Shelf First Side Second Side Food Comments Position Time (min.) Thickness Time (min.) Ground Beef 1 lb. (4 patties) D or E 5–7 4–5 Space evenly. Up to 8 patties may be Well Done 1/2 to 3/4”... -
Page 20: Roast
ROAST The oven can be programmed to roast. To change the Temperature while cooking The meat probe may be used in this feature. (example changing from 375˚F to 425˚F): To set the Roast feature (example for Meats Touch Options. Options to cook at 375˚F): Touch Temp. -
Page 21: Convection Bake
CONVECTION BAKE To set the oven for Convection Bake 375˚F: Benefits of Convection Bake: Touch UPPER OVEN or Some foods cook up to 25 to 30% faster, saving LOWER OVEN. time and energy. Multiple rack baking. Conv. Touch Conv. Bake. No special pans or bakeware needed. -
Page 22: Crisp Convection
CRISP CONVECTION To set the oven for Crisp Convection 375˚F: Benefits of Crisp Convection: This crisp convection feature is best for light colored Touch UPPER OVEN or and delicate baked goods like cakes, tarts, cookies, LOWER OVEN. puff pastries, scones, muffins, biscuits, free from yeast breads etc. -
Page 23: Convection Roast
CONVECTION ROAST This Convection Roast feature is designed to give IMPORTANT NOTE: optimum cooking performance for roasting meats and The heating elements and a fan turn off immediately poultry. Preheating is not necessary for meats and when the door is opened. They will turn on again in poultry. -
Page 24: Recipe Bank
RECIPE BANK The Recipe bank features 100 recipes, with 10 To set the Recipe Bank feature only categories, for the at home chef. Preset cooking (example Guacamole): cycles are available on many of these recipes. Touch Recipe Bank. Main Menu 11:35 am Upper Oven Bake... -
Page 25: Proof
PROOF The proof feature maintains a warm environment IMPORTANT NOTE: useful for rising yeast-leavened products. The heating elements and a fan turn off immediately The proof feature automatically provides the optimum when the door is opened. They will turn on again in temperature for the proof process, and therefore does not approximately 5 seconds after the door is closed. -
Page 26: Healthier Roast
HEALTHIER ROAST This Healthier Roast feature is designed to give Touch START to run this cooking results of low fat, low calorie for roasting feature. The display will show meats and poultry. Healthier Roasting can reduce the the current probe temperature Upper Oven 11:35 am fat up to 20% compared to regular roasting. -
Page 27: My Menu
MY MENU My Menu feature is used to record and recall your To set the My Menu feature during setting: favorite recipe settings. This feature may store and recall up to 10 different settings. The My Menu setting Touch Bake. Bake may be used with Timed Bake feature. -
Page 28: Cook & Warm
COOK & WARM The Cook & Warm feature can only be used with Touch START to hold foods Timed Cook or Delayed Timed Cook feature. This warm after the cooking is feature is not designed to reheat cold foods. This finished. -
Page 29: Control Lock Feature
MEAT PROBE (cont.) To change the Meat Probe temperature RECOMMENDATION CHART FOR PROBE during cooking: TEMPERATURE Doneness Probe Temp. Touch Options. Options Beef, Lamb and Veal Probe Touch Probe Temp. Rare 140˚F (60˚C) Temp. Medium Rare 145˚F (63˚C) Medium 160˚F (71˚C) Clear Set the probe temperature Well Done... -
Page 30: Self-Clean
SELF-CLEAN The self-clean cycle uses above normal cooking Before a self-clean Cycle temperatures to clean the oven’s interior We recommend venting automatically. your kitchen with an open It is normal for smoking to occur during cleaning if the window or using a oven is heavily soiled. - Page 31 SELF-CLEAN (cont.) This SELF-CLEAN key is used to start a self-clean To set a delay start time of 12:00 am cycle. When used with Start Time key, a delayed self- Be sure the clock is set with clean cycle may also be programmed. The self-clean the correct time of day, the function has cycle times of 2 (Light), 3 (Normal) or 4 oven is empty and the oven...
-
Page 32: Self-Clean
SELF-CLEAN (cont.) To change the setting during the operation When the self-clean cycle is done of this self-clean feature: • It will not be possible to open the oven door until oven temperature has cooled. Upper Oven 11:35 am Touch Options. Self Clean After the self-clean cycle Clean Level... -
Page 33: Care & Cleaning
CARE & CLEANING Changing the Oven Light Glass Light Cover Clip Housing The oven light is a standard 10-watt halogen bulb for ovens. To replace lamps located on the side wall: • Make sure oven and bulb are cool. 1. Unplug oven or disconnect power. 2. - Page 34 CARE & CLEANING (cont.) Broiler Pan and Grid Oven Cavity Do not clean the broiler DO NOT use oven cleaners. pan or grid in a self- NEVER wipe a warm or hot porcelain surface with a cleaning mode. damp sponge; it may cause chipping or crazing (tiny hairlike cracks.) Food spills should be cleaned when Do not store a soiled After broiling, remove the...
-
Page 35: Removing & Replacing The Lift-Off Oven Door
REMOVING & REPLACING THE LIFT-OFF OVEN DOOR To replace the door: CAUTION Step. 1 • Be careful when removing and lifting the door. Firmly grasp both sides of the door at the top. • DO NOT lift the door by the handle. - The door is very heavy. -
Page 36: Troubleshooting
BEFORE CALLING FOR SERVICE Before you call for service, review this list. It may save you time and expense. The list includes common occurrences that are not the result of defective workmanship or materials in this appliance. Problem Possible Causes / Solutions Oven control beeps •... - Page 37 BEFORE CALLING FOR SERVICE (cont.) Problem Possible Causes / Solutions Food does not • Oven controls improperly set. bake or roast - See the using the oven section. properly • Rack position is incorrect or the rack is not level. - See the using the oven section.
- Page 38 BEFORE CALLING FOR SERVICE (cont.) Problem Possible Causes / Solutions Oven not clean • Oven controls not properly set. after a self clean - See the self-clean section, page 30~32. cycle • Oven was heavily soiled. - Clean up heavy spillovers before starting the clean cycle. Heavily soiled ovens may need to self-clean again or for a longer period of time.
-
Page 39: Warranty For Customers In The U.s.a
LG ELECTRIC OVEN LIMITED WARRANTY – USA LG Electronics Inc. will repair or replace your product, at LG’s option, if it proves to be defective in material or workmanship under normal use, during the warranty period set forth below, effective from the date of original consumer purchase of the product. -
Page 40: Warranty
Radiant Surface units LG CANADA’S SOLE LIABILITY IS LIMITED TO THE WARRANTY SET OUT ABOVE. EXCEPT AS EXPRESSLY PROVIDED ABOVE, LG CANADA MAKES NO AND HEREBY DISCLAIMS ALL OTHER WARRANTIES AND CONDITIONS RESPECTING THE PRODUCT, WHETHER EXPRESS OR IMPLIED, INCLUDING, BUT NOT LIMITED TO, ANY IMPLIED WARRANTY OR CONDITION OF MERCHANTABILITY OR FITNESS FOR A PARTICULAR PURPOSE, AND NO REPRESENTATIONS SHALL BE BINDING ON LG CANADA. - Page 41 MEMO...