Table of Contents
Advertisement
Available languages
Available languages
Advertisement
Chapters
Table of Contents

Related Manuals for Samsung SMH2117S/XAC


Summary of Contents for Samsung SMH2117S/XAC
-
Page 1: Microwave Oven
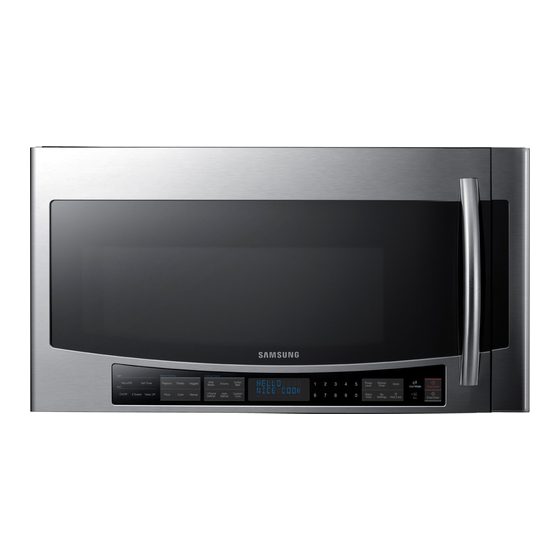
SMH2117S Microwave Oven user manual This manual is made with 100% recycled paper. imagine the possibilities ENGLISH Thank you for purchasing this Samsung product. Please register your product at www.samsung.com/register 1-800-SAMSUNG (726-7864) SMH2117S_XAC_EN.indd 1 2011-08-08 9:28:00... -
Page 2: Safety Information
ANd PRecAuTIONs information What the icons and signs in this user manual mean: Congratulations on your new Samsung Hazards or unsafe practices that microwave oven. This manual contains important information on the installation, use and care of may result in severe personal WARNING your appliance. -
Page 3: Important Safety
IMPORTANT sAfeTy 17. To reduce the risk of fire in the oven cavity. a. Do not overcook food. Carefully attend appliance INsTRucTIONs when paper, plastic, or other combustible materials are placed inside the oven to facilitate cooking. When using any electrical appliance, basic safety b. -
Page 4: Grounding Instructions
GROuNdING INsTRucTIONs Make sure to install your oven in a location with adequate space. his appliance must be grounded. In the event of an Remove all foreign substances such as dust or water electrical short circuit, grounding reduces the risk of from the power plug terminals and contact points electric shock by providing an escape wire for the using a dry cloth on a regular basis. - Page 5 When the power plug or power cord is damaged, Do not attempt to repair, disassemble, or modify the contact your nearest service center for a appliance yourself. replacement or repair. • Because a high voltage current enters the product chassis during operation, opening the chassis can result in electric shock or fire.
- Page 6 USAGE CAUTIONS Do not defrost frozen beverages in narrow-necked bottles. The containers can break. CAUTION Do not scratch the glass of the oven door with a If the surface of the microwave is cracked, turn it off. sharp object. • Failing to do so may result in electric shock. •...
-
Page 7: Table Of Contents
contents seTTING Up yOUR mICROWAve OveN COOkING GUIDe Checking the parts General microwave tips Warranty and service information Cooking meat Setting up your microwave oven Cooking poultry Checking the control panel Cooking seafood Turning on the power for the first Cooking eggs time Cooking vegetables... -
Page 8: Warranty And Service
To help us to serve you better, please complete the enclosed registration card and promptly return it by mail. If the registration card is missing, you can call Samsung Electronics, Inc., at Be sure to follow these instructions closely so 1-800-sAmsUNG (726-7864) or register online at that your new microwave oven works properly. -
Page 9: Checking The Control Panel
ChECkING ThE CONTROL PANEL See page 15 See page 14 See page 14 See page 10-11 See page 12 See page 13 See page 16 Display See page 10-11 See page 15 See page 10 See page 16 See page 10 See page 10 See page 10-11 setting up your new microwave oven _9... -
Page 10: Setting The Time
This will also occur after a power interruption Cooking has never been easier than with your SETTING ThE TImE new Samsung microwave oven. The following section describes everything you Your microwave oven is equipped with a built-in clock. need to know about using your microwave oven. -
Page 11: Set Timer Button
SET TImER bUTTON You can set the microwave so the light turns on and off automatically at a preset time. The light comes on at the same time every day until reset. 1. Press the set Timer button. 2. Use the Number button to set the light on time. 3. -
Page 12: Sensor Cooking Buttons
SENSOR COOkING bUTTONS The sensor Cooking buttons let you cook favorite foods using preset power levels and times at the touch of a button. If the food is not thoroughly cooked or reheated when you use the auto cook feature, complete the cooking process by selecting a power level and cooking the food for an additional amount of time. -
Page 13: Auto Defrost Button
Sensor reheating table Follow the instructions below when reheating different types of food. Food Amount Procedure Use only precooked, refrigerated foods. Cover the plate with vented plastic wrap or waxed paper tucked under the plate. If the food is not as hot as you would like after using the Sensor Reheat function, continue 1 serving heating using additional time and power. -
Page 14: Kids Meals Button
SOfTEN/mELT bUTTON 1. Press the soften/melt button. The display will show: SELECT MENU 1 TO 3. (Refer to the Soften/Melt table below.) Press the button repeatedly to cycle through the available options. 2. Press the number 1 or 2 buttons to select the amount. Only number 1 (serving) is available for the Melt Chocolate and Soften Cream Cheese options. -
Page 15: Snacks Button
SNACkS bUTTON 1. Press the snacks button. The display will show SELECT MENU 1 TO 4. (Refer to the snack bar table below.) Press the button repeatedly to cycle through the available options. 2. Press the number 1 or 2 buttons to select the serving size. Only number 1 (serving) is available for Nachos. (Refer to the snack bar table for the serving size). -
Page 16: Cookware Guide
cookware guide Power Levels The 10 power levels allow you to choose the optimal power level for your cooking needs. For food to cook in the microwave oven, the microwaves must be able to penetrate the food Warm Simmer without being reflected or absorbed by the dish. Medium high It is important to choose the correct cookware, Defrost... -
Page 17: Cooking Guide
cooking guide Cookware Comments Glassware Microwave energy actually penetrates food, Oven-to-table Can be used, unless decorated attracted and absorbed by the water, fat and ware with a metal trim. sugar in the food. The microwaves cause the Fine Can be used to warm foods or molecules in the food to move rapidly. -
Page 18: Cooking Poultry
Turning Remove After standing Food Turn foods over midway through the cooking cycle from oven (10 MIN.) to expose all parts to the microwave energy. This is Beef Rare 135 °F 145 °F especially important with large items such as roasts. Medium 150 °F 160 °F... -
Page 19: Cooking Seafood
COOkING SEAfOOd the tips toward the center. When cooking cut vegetables, always cover the dish with Place the fish on a microwave-safe roasting rack in a a lid or vented microwavable plastic wrap. microwave-safe dish. Use a tight cover to steam the fish. Whole, unpeeled vegetables such as potatoes, squash, A lighter cover of wax paper or paper towel will decrease eggplant, etc., should have their skins pierced in several... -
Page 20: Warm Potato Salad
cleaning and Warm potato salad 2 lbs. small red potatoes, cut into ½-inch pieces maintaining your 4 slices bacon (uncooked), cut into ½-inch pieces ¼ cup chopped onion 2 tsp. sugar microwave oven 1 tsp. salt 1 tsp. flour ½ tsp. celery seed 1/8 tsp. -
Page 21: Cleaning The Turntable And Roller Rings
To purchase a new LED lamp board, visit an and a solution of warm water and detergent. Be careful not to bend the stirrer fan. Dry both parts authorized service center or call 1-800-SAMSUNG (726-7864). thoroughly. 7. Place the fan on the pin and confi rm that it moves freely. -
Page 22: Replacing The Oven Light
11. Turn the power back on. order a new charcoal fi lter, contact the Parts Department at 1-800-627-4368 or your Samsung dealer. You can also order online at www.samsungparts.com 1. Unplug the oven or turn off the power at the main power supply. -
Page 23: Troubleshooting
SAMSUNG’s authorized service center. Causes TV This is similar to interference caused SAMSUNG will repair or replace this product, at our option and or radio by other small appliances, such as at no charge as stipulated herein, with new or reconditioned interference. - Page 24 SAMSUNG which damage this product or result in service problems; incorrect electrical line voltage, fluctuations and surges; customer adjustments and failure to follow...
- Page 25 notes SMH2117S_XAC_EN.indd 25 2011-08-08 9:29:16...
- Page 26 notes SMH2117S_XAC_EN.indd 26 2011-08-08 9:29:16...
- Page 27 notes SMH2117S_XAC_EN.indd 27 2011-08-08 9:29:16...
- Page 28 SMH2117S_XAC_EN.indd 28 2011-08-08 9:29:17...
-
Page 29: Guide De Cuisson
électrique Ce manuel est en papier recyclé à 100%. monde de possibilités FRANÇAIS CANADIEN Nous vous remercions d'avoir choisi ce produit Samsung. Veuillez enregistrer votre appareil sur www.samsung.com/register 1-800-SAMSUNG (726-7864) SMH2117S_XAC_CFR.indd 1 2011-08-08 9:42:13... - Page 30 Signification des icônes et des symboles utilisés dans ce manuel : Félicitations pour l'acquisition de votre Risques ou manipulations nouveau four à micro-ondes Samsung. Ce dangereuses susceptibles d'entraîner manuel contient des informations importantes des blessures graves, voire AVERTISSEMENT concernant l'installation, l'utilisation et l'entretien mortelles.
- Page 31 coNSigNeS de Sécurité 17. Pour réduire le risque d'incendie à l’intérieur du four : a. Évitez de surcuire vos aliments. Surveillez imPortANteS attentivement la cuisson lorsque vous placez du papier, du plastique ou d'autres matériaux Lorsque vous utilisez des appareils électriques, respectez combustibles à...
- Page 32 AVERTISSEMENT Retirez régulièrement toute substance étrangère (poussière ou eau) présente sur les bornes et les points de contact de AVERTISSEMENT la prise d'alimentation à l'aide d'un chiffon sec. Toute utilisation non conforme de la prise de mise à la • Débranchez la prise et nettoyez-la à l'aide d'un chiffon terre peut entraîner un risque d'électrocution.
- Page 33 Lors d'une utilisation à puissance élevée, ne laissez jamais les Pour débrancher la fiche, ne tirez pas sur le cordon. éléments situés sous l'appareil sans surveillance. En cas de • Débranchez le four en tirant sur la fiche uniquement. débordement, les particules grasses provenant des aliments •...
- Page 34 N'utilisez et n'entreposez pas d'aérosols ou d'objets N'approchez pas votre visage ou votre corps de l'appareil inflammables à proximité du four. pendant la cuisson ou lors de l'ouverture de la porte juste après la cuisson. • La chaleur dégagée par le four micro-ondes risque de faire exploser ou s'enflamme les gaz.
- Page 35 sommaire RéglAgE DE VOTRE fOuR MICRO-ONDES guIDE DE CuISSON Contrôle du contenu Conseils généraux d’utilisation du Informations concernant la micro-ondes garantie et l'assistance Cuisson de la viande Préparation de votre four micro- Cuisson de la volaille ondes Cuisson des fruits de mer Boutons du tableau de Cuisson des œufs commande...
-
Page 36: Contrôle Du Contenu
D'ACHAT Les services de garantie ne peuvent être assurés que par un centre de service Samsung agréé. Si vous souhaitez en bénéficier, fournissez à votre centre de service Samsung agréé les informations ci-dessus ainsi que la copie de votre facture. - Page 37 BOUTONS DU TABLEAU DE COMMANDE Reportez-vous à la page 15 Reportez-vous à Reportez-vous à Reportez-vous à Reportez-vous à la page 12 la page 10-11 la page 14 la page 14 Reportez-vous à la page 13 Reportez-vous à la page 16 Écran Reportez-vous à...
-
Page 38: Première Mise Sous Tension
(HORLOGE) POUR RÉGLER L'HEURE). Ce message apparaît également après une coupure de courant. Avec votre nouveau four micro-ondes Samsung, la cuisine n'aura jamais été aussi facile. La section suivante décrit tout ce que RéGLAGE DE L'hORLOGE vous devez savoir sur l'utilisation de cet appareil. -
Page 39: Bouton Réglage De La Minuterie
BOUTON RéGLAGE DE LA MINUTERIE Le four micro-ondes peut être réglé pour que l'éclairage s'allume et s'éteigne automatiquement à une heure prédéfinie. L'éclairage s'allume à la même heure tous les jours jusqu'à réinitialisation. 1. Appuyez sur le bouton Set Timer (Réglage de la minuterie). -
Page 40: Boutons Cuisson Par Capteur
BOUTONS CUISSON PAR CAPTEUR Les boutons Sensor cooking (Cuisson par capteur) vous permettent de faire cuire vos plats préférés à l'aide d'une seule pression. Si les aliments ne sont pas assez cuits ou pas assez chauds après un programme de cuisson automatique, terminez la cuisson en sélectionnant manuellement une puissance et un temps de cuisson. -
Page 41: Bouton Décongélation 1 Livre
Tableau de chauffe par capteur Respectez les instructions suivantes lorsque vous faites réchauffer différentes catégories d'aliments. Type d'aliment Standard Instructions Utilisez uniquement des aliments précuits et conservés au frais. Couvrez le plat avec un film plastique perforé ou du papier sulfurisé que vous prendrez soin de replier sous le plat. Si les aliments ne sont pas suffisamment chauds après l'utilisation de la fonction Sensor Reheat (Réchauffage par capteur), 1 portion ajoutez du temps et augmentez la puissance. -
Page 42: Bouton Ramollir/Faire Fondre
BOUTON RAMOLLIR/FAIRE FONDRE 1. Appuyez sur le bouton Soften/Melt (faire ramollir/fondre). Les informations suivantes s’affichent : SELECT (SÉLECTIONNER MENU 1 À 4) (Reportez-vous au tableau Faire ramollir/fondre ci-dessous). MENU 1 TO 3 Appuyez sur le bouton plusieurs fois pour faire défiler les options disponibles. 2. -
Page 43: Bouton En-Cas
BOUTON EN-CAS 1. Appuyez sur le bouton Snacks (En-cas). L'écran affiche SELECT MENU 1 TO 4 (SÉLECTIONNER MENU 1 À 4) (Reportez-vous au tableau des en-cas ci-dessous). Appuyez sur le bouton plusieurs fois pour faire défiler les options disponibles. 2. Appuyez sur le bouton 1 ou 2 pour sélectionner le nombre de portions. Seul le nombre 1 (portion) est disponible pour les nachos. -
Page 44: Maintien Au Chaud
guide des récipients Puissances Les 10 niveaux de puissance vous permettent de choisir le niveau le plus adapté aux aliments que vous cuisinez. Pour faire cuire des aliments dans le four micro- Chaud Mijotage ondes, il est nécessaire que les micro-ondes Faible Moyennement élevé... -
Page 45: Techniques De Cuisson
guide de cuisson Récipient Remarques Plats en verre Plats de service Peuvent être utilisés sauf s'ils sont ornés de Les micro-ondes sont d'abord attirées puis absorbées adaptés à la décorations métalliques. par l'eau, la graisse et le sucre contenus dans les cuisson au four Plats en cristal Peuvent être utilisés pour faire réchauffer... -
Page 46: Cuisson De La Volaille
Rotation Retrait du Après repos Type d'aliment Retournez les aliments à mi-cuisson afin d’en exposer four (10 MIN) toutes les parties aux micro-ondes. Cette méthode se révèle Bœuf particulièrement efficace pour la cuisson de grandes pièces de Saignant 135 °F 145 °F viande comme les rôtis. -
Page 47: Cuisson Des Fruits De Mer
CUISSON DES FRUITS DE MER Avant la cuisson, percez la peau des légumes entiers non pelés (ex : pommes de terre, courges, aubergines, etc.) afin d’éviter qu’ils Placez le poisson sur une grille à rôtir adaptée à la cuisson aux micro- n’éclatent. -
Page 48: Nettoyage De La Partie Extérieure
nettoyage et Salade de pommes de terre chaude 2 lb de petites pommes de terre à peau rouge (Roseval), entretien de votre coupées en morceaux de 0.5 pouce 4 tranches de lard (cru) coupées en morceaux de ½ pouce four micro-ondes ¼... -
Page 49: Nettoyage Du Plateau Tournant Et
5. Vérifi ez que le ventilateur et le cache ne sont pas vous dans un centre technique agréé ou appelez le endommagés. 1-800-SAMSUNG (726-7864). 6. Nettoyez le ventilateur et le cache à l’aide d’une brosse pour la vaisselle et d’eau chaude additionnée de détergent. - Page 50 9. Remontez le support de l’ampoule. le Service des pièces détachées au 1-800-627-4368 10. Replacez la grille du ventilateur et les 2 vis. ou le revendeur Samsung le plus proche de chez vous. 11. Remettez sous tension. Vous pouvez également commander en ligne sur www.
- Page 51 Pour être couverte par la garantie, la maintenance ne peut être effectuée que rebranchez le four sur son propre par un service technique agréé SAMSUNG. Lors de la remise d'un produit circuit. défectueux à SAMSUNG ou à un centre de service SAMSUNG agréé, Formation Retirez du four les éventuels...
- Page 52 SAMSUNG. Dans le cas contraire, la responsabilité du transport vers et depuis le centre de service agréé de SAMSUNG incombera à l’acquéreur.
- Page 53 notes garantie _25 SMH2117S_XAC_CFR.indd 25 2011-08-08 9:43:39...
- Page 54 notes 26_ garantie SMH2117S_XAC_CFR.indd 26 2011-08-08 9:43:39...
- Page 55 notes garantie _27 SMH2117S_XAC_CFR.indd 27 2011-08-08 9:43:39...
- Page 56 SMH2117S_XAC_CFR.indd 28 2011-08-08 9:43:40...