Table of Contents
Advertisement
Quick Links
Advertisement
Table of Contents

Related Manuals for ACR Electronics GLOBALWATCH UAIS - QUICK


Summary of Contents for ACR Electronics GLOBALWATCH UAIS - QUICK
- Page 2 Please read this first! Warning: Although ACR strives for accuracy in all its publications; this material may contain errors or omissions, and is subject to change without prior notice. ACR shall not be made liable for any specific, indirect, incidental or consequential damages as a result of its use. ACR components may only be used in safety of life devices or systems, with the express written approval of ACR, as the failure of such components could cause the failure of the ACR device or system.
-
Page 3: Table Of Contents
GlobalWatch UAIS Short Operation Manual Index Page Number GLOBALWATCH UAIS Components and Interfaces................ 1 GLOBALWATCH UAIS User Interface ....................2 Navigation Screen........................... 3 Inputing Voyage Related Data – (User Password Protected)............. 4 Setting Ship Related Data – (User Password Protected)..............6 Configuring the GlobalWatch UAIS –... - Page 4 History of Changes Date Version Status Comments Responsible 2002-12-04 Released Latest release amendments A. Lesch 2003-06-30 1.0.1 Released Corrections B. Werner 2004-04-14 1.0.1 Changes upon Customer Requests S. Reinisch GlobalWatch UAIS Quick User Manual Y1-03-0176A Version 1.0...
-
Page 5: Globalwatch Tm Uais Components And Interfaces
1 GLOBALWATCH UAIS Components and Interfaces GlobalWatch Quick User Manual Y1-03-0176A Version 1.0... -
Page 6: Globalwatch Tm Uais User Interface
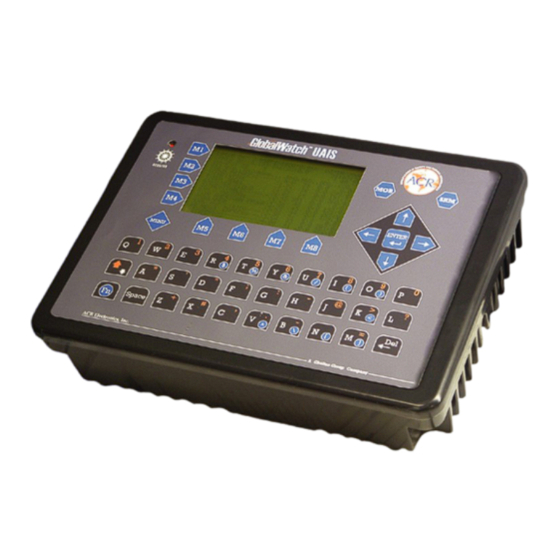
2 GLOBALWATCH UAIS User Interface Soft Keys [M1] – [M8] Display Safety Keys Navigation Screen Header (max. 3 lines) ______________________________ Navigation Screen or MENU Structure (Content 13 lines) Keyboard Cursor Cross Enter Key GlobalWatch Quick User Manual Y1-03-0176A Version 1.0... -
Page 7: Navigation Screen
3 Navigation Screen UTC Time Latitude & Own speed over Ground GPS Solution Own course over Ground Longitude LAT:N 1^27.845'ExtSOG:34.6kn 11/26/2002 LON:E 0^21.289'IntCOG:173.0^ 10:52:26 IntGPS: 3D ExtHDT:222^ Reg6 001/021..ShipName..RNG.BRG..SOG..COG.. 1>DOREEN-----------> N/A 120 22.2 301.5 2>FINE EAGLE------->0.00 N/A 13.1 359.9 3>SYLVAEPSILON----->0.10 23 32.1 203.2 4>ESSOTOKYO-------->0.43 99 10.0 120.3... -
Page 8: Inputing Voyage Related Data - (User Password Protected)
4 Inputing Voyage Related Data – (User Password Protected) Note: The User Password is set to “NAUT” – please reconfigure it immediately after Transponder initial operation [Up] [Down] Select “Voyage Settings” from the Main Menu with the cursor button & or press Nr. - Page 9 [Enter] Scroll the Voyage Data Fields with and input own vessel data. Select a default Cargo Type and [Left] [Right]. NavStat Setting with the cursor buttons & [Save], [Exit]. Save the new settings by pressing and return to the Main Menu Screen by pressing Press [Back] to return to the Main Menu without saving any changes.
-
Page 10: Setting Ship Related Data - (User Password Protected)
5 Setting Ship Related Data – (User Password Protected) [Up] [Down] Select “Ship Settings” with cursor button & or press Nr. 4 on the keyboard. Note: The User Password is set to “NAUT” – please reconfigure it immediately after Transponder initial operation N 1^23' E 0^16' |1>0.01|2>1.30|3>1.80nm... - Page 11 [Enter] Scroll the Ship Settings Fields with and input own vessel data. Select a default Ship Type with the [Left] [Right]. cursor button & [Save]. [Back] Save the new settings by pressing By pressing you return to the Main Menu Screen without saving any changes.
-
Page 12: Configuring The Globalwatch Tm Uais - (User Password Protected)
6 Configuring the GlobalWatch UAIS – (User Password Protected) [Up] [Down] Select “Transponder Configuration” with the cursor button & or press Nr. 5 on the keyboard. Note: The User Password is set to “NAUT” – please reconfigure it immediately after Transponder initial operation N 1^19' E 0^13' |1>0.01|2>1.30|3>1.80nm |----------------------------------... - Page 13 [Up] [Down] Select desired Submenu with the cursor buttons & or by pressing the appropriate number on the keyboard. N 1^20' E 0^13' |1>0.01|2>1.30|3>1.80nm |---------------------------------- | 5. Transponder Configuration -----| | | +- 1. Change User Password View | +- 2. Region Settings | +- 3.
- Page 14 Alarm Settings: Select Submenu 3 [Change] [Back] Press to enable or disable the Alarms Function. takes you to the Submenu without saving, [Save] [Exit] by pressing the changes are stored and by pressing you return to the Submenu. Note: It is highly recommended to enable the Alarm Function. N 1^21' E 0^15' |1>0.01|2>1.30|3>1.80nm ************ Alarm Settings ************...
-
Page 15: Changing The Service Password - (Service Password Protected)
7 Changing the Service Password – (Service Password Protected) Note: The User Password is set to “NAUT” – please reconfigure it immediately after Transponder initial operation [Up] [Down] Select “Service Configuration” from the Main Menu with the cursor button & or press Nr. - Page 16 Select Submenu 1: Change Service Password. N 1^23' E 0^17' |1>0.01|2>1.30|3>1.80nm |---------------------------------- | 6. Service Configuration -----| | | +- 1. Change Service Password View | +- 2. User Password Settings | +- 3. Change MMSI / IMO -----| +- 4. Restore Factory Settings Msg.
-
Page 17: Changing The Mmsi / Imo Numbers
8 Changing the MMSI / IMO Numbers Select “Service Configuration” from the Main Menu with the [Up] & [Down] cursor button or press Nr. 6 on the keyboard. N 1^19' E 0^13' |1>0.01|2>1.30|3>1.80nm |---------------------------------- | Menu -----| | | +- 1. Messages View | +- 2. - Page 18 [Save] Input new MMSI / IMO Numbers and press to store input data. [Back] Press to return to the Submenu without saving. Note: Data input is limited to 9 characters. N 1^21' E 0^14' |1> N/A|2>0.00|3>0.10nm ********** Change MMSI / IMO *********** MMSI :1193046 IMO No.:303174162...
-
Page 19: Writing An Addressed Safety Related Message To An Individual Vessel
Writing an Addressed Safety Related Message to an individual Vessel [Menu] Select the Main Menu Screen with the Button. N 1^46' E 0^39' |1>0.10|2>1.30|3>1.80nm |---------------------------------- | Menu -----| | | +- 1. Messages View | +- 2. AIS Status | +- 3. Voyage Settings -----| +- 4. - Page 20 N 1^26' E 0^20' |1>0.10|2>1.30|3>1.80nm ************ Write Message ************* ..ShipName..Dist..SOG..COG..CallSign 1>DOREEN-------> N/A 22.2 301.5 DORET6W 2>FINE EAGLE--->0.00 13.1 359.9 OEX1538 3>SYLVAEPSILON->0.10 32.1 203.2 ND4RX 4>ESSOTOKYO---->0.43 10.0 120.3 ZA9A 5>OLYMPIAHIGHWA>0.59 21.2 50.0 3FSH4 6>SANEI-------->0.80 32.1 270.1 YJQX9 7>KATOO-------->1.00 21.2 200.8 A4F317 8>OLYMPIA PALAC>1.34 [BASESTAT] 4DSW 9>MINILOG------>1.96 21.7 102.2 FOR6 10>ALIBRAHIMYA->2.66 22.1...
-
Page 21: Writing A Broadcast Safety Related Message To All Vessels
10 Writing a Broadcast Safety Related Message to all Vessels [Up] [Down] Select Messages with the cursor button & or press Nr. 2 on the keyboard. Select “Write Broadcast SRM”. N 1^19' E 0^12' |1>0.10|2>1.30|3>1.80nm |---------------------------------- | 1. Messages -----| | | +- 1. - Page 22 After message transmission, the Transmission Status Screen is displayed. N 1^19' E 0^13' |1>0.10|2>1.30|3>1.80nm ---------------------------------------- ++++++++++++++++++++++++++++++++++++++++ Broadcast Transmission Status [+] OK, broadcast successful ++++++++++++++++++++++++++++++++++++++++ ---------------------------------------- | Send To | | <-Back After Messaging is completed, the GlobalWatch UAIS automatically returns to the Navigation Screen. Y1-03-0176A GlobalWatch Quick User Manual...
-
Page 23: Safety Functions - Mob And Srm Buttons
11 Safety Functions – MOB and SRM Buttons The GlobalWatch UAIS Transponder is fitted with Safety Keys, which allows automatic transmission of urgent messages. The SRM Button sends out Broadcast Safety Related Messages to all ships in the Vessel Listing. The MOB Button sends out precise position of incident to Addressed Vessels. - Page 24 SRM - Safety Related Message The desired Distress Message Text can be selected by pressing the appropriate number on the keyboard. [Exit] By pressing the button it is possible to escape from this screen, without sending the SRM Message. Note: If no Message Subject is selected, the message is automatically sent as an undesignated distress call.
- Page 25 Note: [Stop] The SRM message transmission is automatically repeated every 180 seconds until the button has been pressed. LAT:N 1^19.008'ExtSOG:34.6kn 11/28/2002 LON:E 0^12.452'IntCOG:173.0^ 07:31:52 IntGPS: 3D ExtHDT:222^ Reg6 SRM -SRM----SRM----SRM----SRM----SRM----SRM- MAYDAY,DE,ANDREA DORIA,D11233,1193046,PO 1^19.006'_E 0^12.451'_UTC07:31 - F IRE, EXPLOSION Repeating SRM in 180 sec... ************** Stop SRM? *************** ---------------------------------------- Stop...
-
Page 26: Display Settings
12 Display Settings Select “Display Settings” from the Main Menu with the cursor button [Up] & [Down] or press Nr. 7 on the keyboard. N 1^19' E 0^13' |1>0.01|2>1.30|3>1.80nm |---------------------------------- | Menu -----| | | +- 1. Messages View | +- 2. AIS Status | +- 3. -
Page 27: Contact And Support Information
13 Contact and Support Information ACR Electronics Customer Service 5757 Ravenswood Road Fort Lauderdale, FL 33312 U.S.A. Tel.: +1 (954) 981-3333 Fax: +1 (954) 983-5087 info@acrelectronics.com www.acrelectronics.com Y1-03-0176A GlobalWatch Quick User Manual Version 1.0...