Advertisement
Table of Contents
- 1 Important Safety Information
- 2 Components View
- 3 Package Contents
- 4 Controls and Connections
- 5 First Time Setup
- 6 Using the Remote
- 7 Changing the Battery
- 8 Connecting a Subwoofer
- 9 Wall Mounting the Sound Bar
- 10 Help & Troubleshooting
- 11 One-Year Limited Warranty
- 12 Specifications
- 13 Legal & Compliance
- Download this manual
Advertisement
Table of Contents

Related Manuals for Vizio VSB207


Summary of Contents for Vizio VSB207
- Page 1 MODEL VIZIO VSB207 QUICK START GUIDE...
-
Page 2: Important Safety Information
IMPORTANT SAFETY INFORMATION Your Sound Bar is designed and manufactured to operate within defined design limits, and of electric shock to persons. misuse may result in electric shock or fire. To prevent your Sound Bar from being damaged, • The exclamation point within an equilateral triangle is intended to alert the the following rules should be observed for its installation, use, and maintenance. -
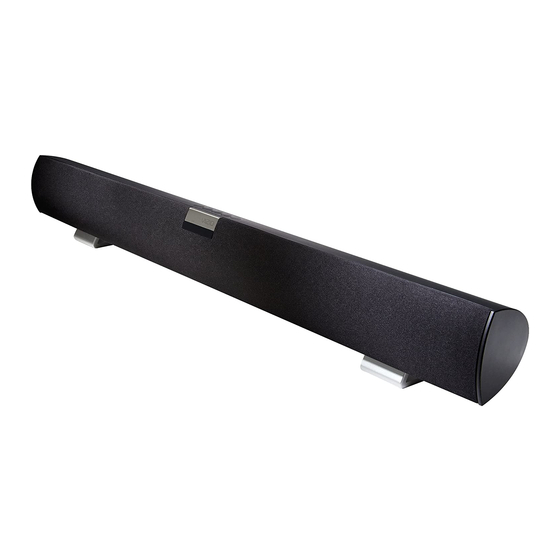
Page 3: Components View
PACKAGE CONTENTS Sub - Sub + Input High Definition Sound Bar Remote Control with Battery Power Adapter w/Cable This Quick Start Guide Stereo RCA to 3.5mm Audio Cable... -
Page 4: Controls And Connections
CONTROLS & CONNECTIONS Power Input Volume + / - Press to turn Press to change Press to increase/ Sound Bar input source decrease system on or off. (Input 1, Input 2). volume. Input Vol - Vol + 24V DC SUB OUT INPUT 1 SERVICE INPUT 2... -
Page 5: First Time Setup
FIRST-TIME SETUP SUB OUT INPUT 1 24V DC SERVICE INPUT 2 BACK OF SOUND BAR CHOOSE ONE Connect the included Stereo RCA to 3.5mm Cable to ONE TV audio output as shown. AUDIO OUT AUDIO OUT BACK OF YOUR TV* *Not all TVs have the audio outputs shown above. - Page 6 SUB OUT INPUT 1 24V DC SERVICE INPUT 2 SUB OUT INPUT 1 24V DC SERVICE INPUT 2...
- Page 7 Sound Bar is centered below the For the best surround sound experience, position the Sound Bar as shown.* The Sound Bar should be close to ear level.
- Page 8 Power Turn your TV on, then press the Power button on the remote to turn the Sound Bar on. Sub - Sub + Press the Input button to switch between audio sources. For example, if you connected your TV to Input 1, set the Sound Bar to Input 1.
-
Page 9: Using The Remote
USING THE REMOTE Power Press to turn on or off. Volume Up Press to increase volume. Mute Press to mute/unmute. Sub + Press to increase Sub - Sub + subwoofer volume. Sub - Press to decrease Volume Down subwoofer volume. Press to decrease volume. -
Page 10: Changing The Battery
CHANGING THE BATTERY Insert a flat-head screwdriver into the slot as shown. Replace the old battery with a new CR2032. Be Gently push down on the tab, then press and pull sure that the + sign on the battery is facing up. downward on the battery cover to open. -
Page 11: Connecting A Subwoofer
CONNECTING A SUBWOOFER SUB OUT INPUT 1 24V DC SERVICE INPUT 2 BACK OF SOUND BAR TURN BOTH SOUND BAR AND SUBWOOFER OFF. CONNCECT AN RCA CABLE* TO YOUR SUBWOOFER*. The volume on your Subwoofer must be manually adjusted. See your Subwoofer’s user manual for details on proper operation. -
Page 12: Wall Mounting The Sound Bar
WALL MOUNTING THE SOUND BAR Remove the screw from the Sound Bar stands and rotate as shown. 26 3/4” (67.95 cm) Be sure your screws are attached to wood studs or drywall anchors (for drywall) or concrete anchors (for brick/concrete walls). Wall mounting hardware is not included. -
Page 13: Help & Troubleshooting
HELP & TROUBLESHOOTING All VIZIO products include FREE lifetime technical support. The VIZIO support team is highly trained and is based in the United States. We can help with: • Product Setup • Technical Problems • Warranty Questions • And More... -
Page 14: One-Year Limited Warranty
Type of Service Defective Products must be sent to a VIZIO service center to obtain warranty service. VIZIO is not responsible for transportation costs to the service center, but VIZIO will cover return shipping to the customer. PRE-AUTHORIZATION IS REQUIRED BEFORE SENDING ANY PRODUCT TO A VIZIO SERVICE CENTER FOR WARRANTY SERVICE. -
Page 15: Legal & Compliance
LEGAL & COMPLIANCE FCC Class B Radio Interference Statement NOTE: This equipment has been tested and found to comply with the limits for a Class B digital device, pursuant to Part 15 of the FCC Rules. These limits are designed to provide reasonable protection against harmful interference in a residential installation. - Page 16 © 2012 VIZIO INC. ALL RIGHTS RESERVED. 120110ST-A...