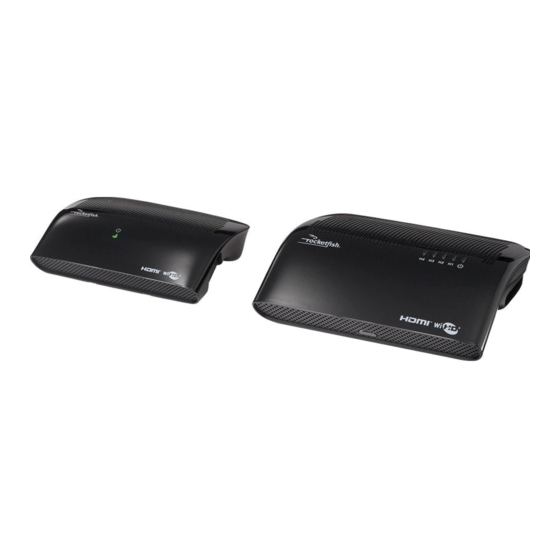
RocketFish RF-WHD200 Quick Setup Manual
4-port wireless hd kit
Hide thumbs
Also See for RF-WHD200:
- User manual (25 pages) ,
- Quick setup manual (2 pages) ,
- Guía de configuración rápida (2 pages)
Advertisement
Quick Links
Download this manual
See also:
User Manual
RF-WHD200
I
4-port Wireless HD Kit
Quick Setup Guide
Package contents
• 60 GHz WirelessHD transmitter (1)
• Remote control (1)
• 60 GHz WirelessHD receiver (1)
• Wall mounting bracket (1) (for use with the receiver)
• HDMI cables (2)
• Quick Setup Guide
• AC power adapters (2)
• For more detailed instructions, see your online User
Guide at www.rocketfishproducts.com
Features
Transmitter front/top panel
Receiver front/top panel
#
Component
Description
1
HDMI 4
Lights to indicate that this HDMI input is selected.
2
HDMI 3
Lights to indicate that this HDMI input is selected.
3
HDMI 2
Lights to indicate that this HDMI input is selected.
4
HDMI 1
Lights to indicate that this HDMI input is selected.
5
Power and link status indicator
Blinking—The power is connected and the transmitter is on.
(transmitter)
On—The transmitter and receiver are linked.
Off—The power is off.
6
Power and link status indicator
Blinking—The power is connected and the receiver is on.
(receiver)
On—The transmitter and receiver are linked.
Off—The power is off.
Transmitter back panel
#
Component
Description
1
DC IN jack
Connect the power adapter to this jack.
2
Power switch
Turns the unit on or off.
3
HDMI select switch
Slide to select the HDMI port.
4
HDMI 1 jack
Connect an HDMI cable to this jack and to an HDMI signal source.
5
HDMI 2 jack
Connect an HDMI cable to this jack and to an HDMI signal source.
6
HDMI 3 jack
Connect an HDMI cable to this jack and to an HDMI signal source.
7
HDMI 4 jack
Connect an HDMI cable to this jack and to an HDMI signal source.
Receiver back and side panels
Right side
Back panel
Left side
#
Component
Description
1
HDMI jack
Connect one end of an HDMI cable to this jack and the other end to your
TV or computer.
2
DC IN jack
Connect the power adapter to this jack.
3
Power switch
Turns the receiver on or off.
4
Cable routing clips
Insert HDMI cable into these clips for receiver placement stability.
Remote control
Note: Remove the plastic film from the remote control before to using it for the first time.
Connecting the transmitter and receiver
1 Connect up to 4 HDMI enabled source components, such as a Blu-ray/DVD player, cable/satellite
box, gaming system, laptop, etc., to the HDMI input jacks on the transmitter. We recommend using
TM
high-quality Rocketfish
HDMI cables in the necessary length for your configuration (4 ft.
RF-G1160a, 8 ft. RF-G1161a, 12 ft. RF-G1162a). Two 4 ft. Rocketfish HDMI cables have been
included for your convenience. Additional Rocketfish HDMI cables can be found at your local Best
Buy or Future Shop store.
Blu-ray/DVD
2 Connect the transmitter to an available HDMI input on the display component, such as an HDTV or
HD projector. If desired, a wall mounting bracket is included to mount the receiver module on the
wall or ceiling near the display component. If the included 4 ft. Rocketfish HDMI cable is not long
enough to accommodate your desired mounting location, longer Rocketfish HDMI cables (up to
24 ft.) can be found at your local Best Buy or Future Shop store.
OR
3 Connect the AC power adapters to the transmitter and receiver.
4 Turn on your TV or projector and switch the input to the HDMI input that the receiver module was
connected to.
5 Turn on the source component(s) you wish to view (be sure to switch to the HDMI output if
necessary, consult documentation provided from the component manufacturer to accomplish this).
(Steps continued on the back)
Advertisement

Summary of Contents for RocketFish RF-WHD200
- Page 1 Note: Remove the plastic film from the remote control before to using it for the first time. HD projector. If desired, a wall mounting bracket is included to mount the receiver module on the wall or ceiling near the display component. If the included 4 ft. Rocketfish HDMI cable is not long Package contents enough to accommodate your desired mounting location, longer Rocketfish HDMI cables (up to •...
- Page 2 6 Turn on the RF-WHD200 transmitter and receiver modules. During the initial setup, it may take a few Important safety instructions FCC Part 15 Class B Statement Distributed by Best Buy Purchasing, LLC minutes for the transmitter and receiver modules to establish a link with each other, this is normal 7601 Penn Avenue South, Richfield, MN 55423-3645 USA •...


