
Related Manuals for Coby DVD-937


Summary of Contents for Coby DVD-937
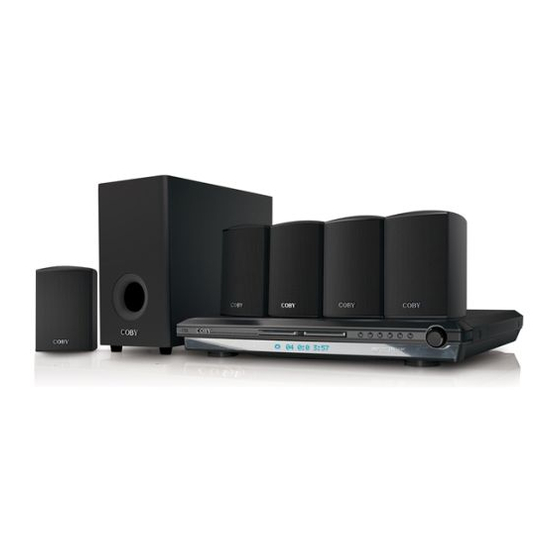
- Page 1 DVD-937 5.1-Channel Home Theater System Progressive Scan DVD Player with Digital AM/FM Tuner Instruction Manual Please read this manual carefully before operation.
-
Page 2: Precautions
PRECAUTIONS CAUTION For Customer Use: Enter below the serial number that is located on the RISK OF ELECTRIC SHOCK bottom of the unit. Retain this information for future DO NOT OPEN reference. CAUTION: TO REDUCE THE RISK OF FIRE AND ELEC- Model No. -
Page 3: Important.safety.instructions
IMPORTANT SAFETY INSTRUCTIONS In addition to the careful attention devoted to quality standards in the manufacture of your video product, safety is a major factor in the design of every instrument. However, safety is your re- sponsibility, too. This sheet lists important information that will help to assure your enjoyment and proper use of the video product and accessory equipment. - Page 4 IMPORTANT SAFETY INSTRUCTIONS If an outside antenna or cable system is connected to the device, be sure the antenna or cable system is grounded so as to provide some protection against voltage surges and built-up static charges. Section 810 of the National Electrical Code, ANSI/NFPA No. 70-1984 (Section 54 of Canadian Electrical Code, Part 1) provides information with respect to proper grounding of the mast and supporting structure, grounding of the lead-in wire to antenna-discharge unit, connection to grounding electrodes, and requirements for the...
-
Page 5: Package.contents
PACKAGE CONTENTS • DVD-937 Progressive Scan DVD Player (Main Unit) • Satellite Speakers (5) • Subwoofer (1) • Full Function Remote Control • AV Cable • FM Antenna • AM Antenna... -
Page 6: Table Of Contents
TABLE OF CONTENTS PRECAUTIONS..........................2 IMPORTANT.SAFETY.INSTRUCTIONS....................3 PACKAGE.CONTENTS........................5 TABLE.OF.CONTENTS........................6 ABOUT.DVD.DISCS.......................... 8 Disc Requirements ........................8 DVD Feature Symbols ......................8 DVD Region Codes ........................8 Disc Care and Maintenance ....................9 Handling a Disc ........................9 Cleaning a Disc ........................9 FEATURES. - Page 7 TABLE OF CONTENTS DVD.FUNCTIONS........................... 17 Display ...........................17 Menu / Title / Return ......................17 Setup ............................17 Go To ............................17 DVD Chapter/Title Search: ....................17 DVD Time Search (within a specified title): ..............17 CD Time Search: ......................17 Repeat Mode..........................18 Repeat A-B Mode ........................18 Multi-Angle/Subtitle/Audio .....................18 Zoom ............................18 Program ..........................19...
-
Page 8: About.dvd.discs
ABOUT DVD DISCS Disc Requirements This DVD player supports playback of the following discs. Type Disc Mark Content Type Disc Size Capacity 4.7GB / 2 hr (SS-SL) 8.5GB / 4hr (SS-DL) Audio + Video DVD-Video Discs 12 cm (moving picture) 9.4GB / 4.5hr (DS-SL) 17GB / 8hr (DS-DL) Audio Compact Discs (CDs) -
Page 9: Disc Care And Maintenance
ABOUT DVD DISCS Disc Care and Maintenance Optical discs (DVDs, CDs) contain high-density compressed data and need proper handling. Handling a Disc • Hold a DVD/CD by its edges. Avoid touching the recorded side of the disc. To remove a DVD/CD from its storage case, press down on the center retention mechanism of the case and lift the disc out. -
Page 10: Features
FEATURES • DVD, DVD±R/RW, CD, CD-R/RW, and JPEG compatible • TV Format • NTSC/PAL color system • 4:3 or 16:9 screen size support • Video Output • Component Video (Progressive Scan) • S-Video • Composite Video • Audio Output • Dolby Digital Decoding •... -
Page 11: Location.of.controls
LOCATION OF CONTROLS Main Unit Open/Close Button Mode Button AM/FM Band Display Screen Play / Pause Button Remote Control Auto Search Power Button Previous / Next Button Tuner Up / Tuner Down Stop Button CH / TUN Button Disc Tray Volume Dial Remote Control Open/Close... -
Page 12: Connections
CONNECTIONS... -
Page 13: Progressive Scan Connection
CONNECTIONS Progressive Scan Connection Use the component video connection for progressive scan DVD video. Please refer to the Screen/ Setup section for more information on progressive scan mode. Green Blue Blue Green Notes: The player is equipped with RCA composite AV outputs located on the rear panel. Your TV must have at least one set of AV input jacks. -
Page 14: Getting.started
GETTING STARTED Remote Control • Refer to the diagram. Remove the bat- tery compartment cover located on the rear of the remote control. Insert batter- ies, making sure to match their polari- ties (+/-) to the markings on the inside of the compartment. -
Page 15: Basic.operations
BASIC OPERATIONS Basic Playback Prepare the power supply. Press the Power button on the player to turn the player on. Load a disc. Press the Open/Close button to open the disc tray. Insert a disc with the label-side up. Press the Open/Close button again to close the disc tray. •... -
Page 16: Menu Navigation
BASIC OPERATIONS Menu Navigation To navigate DVD disc menus or the player’s setup menus (press TITLE or MENU to access DVD disc menus): • Press the NAVIGATION buttons to select a desired feature or option in the menu. • Press ENTER to confirm a selection in the menu. •... -
Page 17: Dvd.functions
DVD FUNCTIONS Display • Press the DISPLAY button once to show time information on-screen; press it twice to show status information on-screen; press it a third time to exit the on-screen display mode. • When the player is in AV IN mode, press the DISPLAY button to toggle between TV System modes (NTSC or PAL). -
Page 18: Repeat Mode
DVD FUNCTIONS Repeat Mode Press REPEAT to change the repeat mode of the player. Each successive press of REPEAT will change the mode as follows: Note: Some DVD discs do not allow Repeat mode. Repeat A-B Mode To repeat playback of a specific section of a disc (loop): Press A-B to set the desired start point (“A”) of the section to be repeated. -
Page 19: Program
DVD FUNCTIONS Program Enter Program mode to create a custom sequence of tracks to be played. Note: You can also use the numeric keypad to enter numbers directly in the fields. Use the Navi- gation buttons to move between entry fields. DVD Program Mode Load a DVD and press PROGRAM. -
Page 20: Setup
SETUP Enter Setup mode to adjust the various internal settings of the player. Make sure the player has been completely stopped before entering Setup mode. Press SETUP to enter Setup mode. Use the NAVIGATION buttons to select a desired item. Press ENTER to confirm a selection. -
Page 21: Audio Setup
SETUP Audio Setup Use the NAVIGATION buttons to highlight the desired audio selection and press ENTER to confirm. Item Description Options (Default is in Bold) Sets the player’s digital output signal (Optical and Coaxial). For use with SPDIF/PCM, SPDIF/RAW, Off Digital Out 5.1-channel receivers (see your receiver’s manual for more details). -
Page 22: Am/Fm.tuner
AM/FM TUNER Your player comes with a built-in AM/FM tuner. To use the AM/FM tuner: Make sure that the AM loop antenna and the FM antenna have been connected properly on the rear panel of the player. Press MODE to enter AM/FM mode. Press the AM or FM button to listen to the AM of FM band, respectively. -
Page 23: Troubleshooting
If you have a problem with this player, please read the troubleshooting guide below and check our website at www.cobyusa.com for Frequently Asked Questions (FAQs) and firmware updates. If these resources do not resolve the problem, please contact Technical Support. COBY Electronics Technical Support Hours: Monday to Friday, 8:30 AM–11:00 PM EST Saturday to Sunday, 9:00 AM–11:00 PM EST... - Page 24 TROUBLESHOOTING There is no sound or distorted sound. • Ensure that the TV and amplifier have been turned on and properly set up. • Ensure that the TV and amplifier connections are secure and correct. • Try a different Audio track of the DVD by pressing AUDIO. •...
-
Page 25: Specifications
SPECIFICATIONS Power Supply AC: 100-240V 50/60Hz 100W (max) Disc Media Support DVD, DVD±R/RW, CD, CD-R/RW, JPEG Video Signal System NTSC / PAL Video Output Component Video (Progressive Scan) S-Video RCA Composite Video Audio Output Optical Digital Audio Coaxial Digital Audio RCA Stereo Audio Speaker Output Surround Right... - Page 26 COBY Electronics Corp. 56-65.Rust.Street. Maspeth,.NY.11378 www.cobyusa.com. www.ecoby.com...