Table of Contents
Advertisement
Quick Links
UNVENTED (VENT-FREE) PROPANE/LP GAS HEATERS
SAFETY INFORMATION AND INSTALLATION MANUAL
INFRARED: GMP16, GMP16T, GMP26, GMP26T
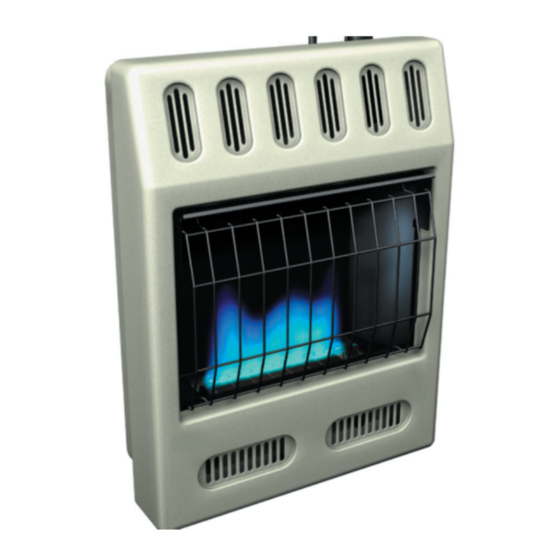
BLUE FLAME: GMP20BT, GMP30BT
WARNING: If the information in this manual is not
followed exactly, a fire or explosion may result causing
property damage, personal injury, or loss of life.
— Do not store or use gasoline or other flammable
vapors and liquids in the vicinity of this or any other
appliance.
— WHAT TO DO IF YOU SMELL GAS
• Do not try to light any appliance.
• Do not touch any electrical switch; do not use any
phone in your building.
• Immediately call your gas supplier from a
neighbor's phone. Follow the gas supplier's in-
structions.
• If you cannot reach your gas supplier, call the fire
department.
— Installation and service must be performed by a quali-
fied installer, service agency, or the gas supplier.
For more information, visit www.desatech.com
Save this manual for future reference.
Advertisement
Table of Contents

Related Manuals for Desa GMP16


Summary of Contents for Desa GMP16
- Page 1 UNVENTED (VENT-FREE) PROPANE/LP GAS HEATERS SAFETY INFORMATION AND INSTALLATION MANUAL INFRARED: GMP16, GMP16T, GMP26, GMP26T BLUE FLAME: GMP20BT, GMP30BT WARNING: If the information in this manual is not followed exactly, a fire or explosion may result causing property damage, personal injury, or loss of life.
-
Page 2: Table Of Contents
WARNING: Improper installation, adjustment, altera- tion, service, or maintenance can cause injury or prop- erty damage. Refer to this manual for correct installation and operational procedures. For assistance or addi- tional information consult a qualified installer, service agency, or the gas supplier. WARNING: This is an unvented gas-fired heater. -
Page 3: Safety Information
SAFETY INFORMATION WARNING: This product con- tains and/or generates chemicals known to the State of California to cause cancer or birth defects, or other reproductive harm. IMPORTANT: Read this owner’s manual carefully and completely before trying to assemble, oper- ate, or service this heater. Im- proper use of this heater can cause serious injury or death from burns, fire, explosion, elec-... -
Page 4: Local Codes
SAFETY INFORMATION Continued 5. This heater needs fresh, outside air ventila- tion to run properly. This heater has an Oxy- gen Depletion Sensing (ODS) safety shutoff system. The ODS shuts down the heater if not enough fresh air is available. See Air for Com- bustion and Ventilation, page 5. -
Page 5: Air For Combustion And Ventilation
AIR FOR COMBUSTION AND VENTILATION WARNING: This heater shall not be installed in a confined space or unusually tight con- struction unless provisions are provided for adequate combus- tion and ventilation air. Read the following instructions to in- sure proper fresh air for this and other fuel-burning appli- ances in your home. - Page 6 51,200 (maximum Btu/Hr the space can support) Add the Btu/Hr of all fuel burning appliances in the space. Vent-free heater ______________ Btu/Hr Gas water heater* ______________ Btu/Hr Gas furnace ______________ Btu/Hr Vented gas heater ______________ Btu/Hr Gas fireplace logs ______________ Btu/Hr...
-
Page 7: Installation
AIR FOR COMBUSTION AND VENTILATION Continued VENTILATION AIR Ventilation Air From Inside Building This fresh air would come from an adjoining un- confined space. When ventilating to an adjoining unconfined space, you must provide two perma- nent openings: one within 12" of the ceiling and one within 12"... - Page 8 INSTALLATION Continued INSTALLATION ITEMS Before installing heater, make sure you have the items listed below. • external regulator (supplied by installer) • piping (check local codes) • sealant (resistant to propane/LP gas) • equipment shutoff valve * • ground joint union •...
- Page 9 INSTALLATION Continued THERMOSTAT SENSING BULB (Thermostat Models Only) The thermostat sensing bulb has been placed be- low the heater. 1. Place clamp on thermostat sensing bulb as shown in Figure 5. Clamp is provided in hard- ware package. 2. Snap clamp into upper mounting hole as shown in Figure 5.
- Page 10 INSTALLATION Continued 2. Mark screw locations on wall (see Figure 8). Note: Only mark last hole on each end of mounting bracket. Insert mounting screws through these holes only. 3. Remove tape and mounting bracket from wall. 12" 14" Min. Only Insert Mounting Screws Through Last Hole On Each End...
- Page 11 INSTALLATION Continued Installing Bottom Mounting Screws 1. Locate two bottom mounting holes. These holes are near bottom on back panel of heater (see Figure 12). 2. Mark screw locations on wall. 3. Remove heater from mounting bracket. 4. If installing bottom mounting screws into hol- low or solid wall, install wall anchors.
- Page 12 Typical Inlet Pipe Diameters GMP20PT, GMP16(T) - 3/8" or greater GMP30BT, GMP26(T) - 1/2" or greater Installation must include equipment shutoff valve, union, and plugged 1/8" NPT tap. Locate NPT tap within reach for test gauge hook up.
-
Page 13: Checking Gas Connections
INSTALLATION Continued Apply pipe joint sealant lightly to male NPT threads. This will prevent excess sealant from go- ing into pipe. Excess sealant in pipe could result in clogged heater valves. WARNING: Use pipe joint sealant that is resistant to liquid petroleum (LP) gas. -
Page 14: Operating Heater
INSTALLATION Continued PRESSURE TESTING HEATER GAS CONNECTIONS 1. Open equipment shutoff valve (see Figure 16, page 13). 2. Open propane/LP supply tank valve. 3. Make sure control knob of heater is in the OFF position. 4. Check all joints from equipment shutoff valve to thermostat gas valve (see Figure 17, page 13). -
Page 15: Operating Heater
After 30 seconds, release control knob. Now follow step 8, under Lighting Instructions. 5. Replace front panel. www.desatech.com to the LOW, MED, or HI GMP16 GMP26 HIGH Thermostat Models TO TURN OFF GAS TO APPLIANCE to the PI-... - Page 16 OPERATING HEATER Continued THERMOSTAT CONTROLLED MODELS LIGHTING INSTRUCTIONS 1. STOP! Read the safety information. 2. Make sure equipment shutoff valve is fully open. 3. Turn control knob clockwise OFF position. 4. Wait five (5) minutes to clear out any gas. Then smell for gas, including near the floor.
-
Page 17: Inspecting Heater
OPERATING HEATER Continued THERMOSTAT CONTROL OPERATION The thermostatic control used on these models differs from standard thermostats. Standard thermostats simply turn on and off the burner. The thermostat used on this heater senses the room temperature. The thermostat adjusts the amount of gas flow to the burner. -
Page 18: Inpecting Heater
INPECTING HEATER Continued BURNER FLAME PATTERN FOR BLUE FLAME HEATERS WARNING: If yellow tipping occurs, your heater could pro- duce increased levels of carbon monoxide. NOTICE: Do not mistake orange flames with yellow tipping. Dirt or other fine particles enter the heater and burn causing brief patches of orange flame. -
Page 19: Cleaning And Maintenance
CLEANING AND MAINTENANCE WARNING: Turn off heater and let cool before cleaning. CAUTION: You must keep control areas, burner, and cir- culating air passageways of heater clean. Inspect these ar- eas of heater before each use. Have heater inspected yearly by a qualified service person. -
Page 20: Troubleshooting
WARNING: Turn off and unplug heater and let cool before servic- ing. Only a qualified service person should service and repair heater. CAUTION: Never use a wire, needle, or similar object to clean ODS/pilot. This can damage ODS/pilot unit. Note: All troubleshooting items are listed in order of operation. OBSERVED PROBLEM When ignitor button is pressed, there is no spark at ODS/pilot... - Page 21 OBSERVED PROBLEM ODS/pilot lights but flame goes out when control knob is released Burner does not light after ODS/ pilot is lit Delayed ignition of burner Burner backfiring during com- bustion 113048-01C TROUBLESHOOTING Continued POSSIBLE CAUSE 1. Control knob not fully pressed in 2.
- Page 22 OBSERVED PROBLEM Yellow flame during burner com- bustion Slight smoke or odor during ini- tial operation Heater produces a whistling noise when burner is lit White powder residue forming within burner box or on adjacent walls or furniture TROUBLESHOOTING Continued POSSIBLE CAUSE 1.
- Page 23 WARNING: If you smell gas • Shut off gas supply. • Do not try to light any appliance. • Do not touch any electrical switch; do not use any phone in your building. • Immediately call your gas supplier from a neighbor’s phone. Follow the gas supplier’s instructions.
-
Page 24: Specifications
* For purposes of input adjustment. SPECIFICATIONS GMP30BT 15,000/30,000 Propane/LP Only Piezo 8" W.C. 14" 11" x 25 x 28 x 10 GMP16 GMP16T 6,000/11,000/16,000 Propane/LP Only Piezo 8" W.C. 14" 11" x 18 x 20 x 10 www.desatech.com GMP20BT... -
Page 25: Service Hints
If so, contact DESA Heating Products’ Technical Service Department at 1-866-672-6040. When calling please have your model and serial numbers of your heater ready. You can also visit DESA Heating Products’ tech- nical service web site at www.desatech.com. SERVICE PUBLICATIONS You can purchase a service manual from the address listed on the back page of this manual. -
Page 26: Illustrated Parts Breakdown And Parts List
ILLUSTRATED PARTS BREAKDOWN MODELS GMP16, GMP26, GMP16T, AND GMP26T See Pages 28 & 29 www.desatech.com 113048-01C... -
Page 27: Parts List
This list contains replaceable parts used in your heater. When ordering parts, follow the instructions listed under Replacement Parts on page 25 of this manual. PART NUMBER GMP16 GMP26 107673-01 107676-01 107673-01 103476-01 103476-02 103476-01 107894-01 107894-02 107894-01 097159-04 097159-04 097159-04... -
Page 28: Illustrated Parts Breakdown And Parts List
ILLUSTRATED PARTS BREAKDOWN AND PARTS LIST MODELS GMP16 AND GMP26 This list contains replaceable parts used in your heater. When ordering parts, follow the instructions listed under Replacement Parts on page 25 of this manual. Burner Assembly GMP16 PART NUMBER... - Page 29 ILLUSTRATED PARTS BREAKDOWN AND PARTS LIST MODELS GMP16T AND GMP26T This list contains replaceable parts used in your heater. When ordering parts, follow the instructions listed under Replacement Parts on page 25 of this manual. Burner Assembly GMP16T GMP16T 110803-02* 110803-02* ODS/Pilot 110186-01 099387-11 104818-03...
- Page 30 ILLUSTRATED PARTS BREAKDOWN MODELS GMP20BT AND GMP30BT www.desatech.com 113048-01C...
- Page 31 This list contains replaceable parts used in your heater. When ordering parts, follow the instructions listed under Replacement Parts on page 25 of this manual. PART NUMBER GMP20BT 097159-04 107673-01 103476-01 098522-11 104189-01 098260-09 107894-10 098271-09 098249-01 110803-02 110186-01 103446-01 099387-03 103845-05 099066-02...
-
Page 32: Warranty Information
We make no other warranty, expressed or implied. VENT-FREE RESIDENTIAL GAS HEATERS DESA Heating Products warrants this product to be free from defects in materials and components for two (2) years from the date of first purchase, provided that the product has been properly installed, operated and maintained in accordance with all applicable instructions.