Bernina Aurora 440QE User Manual
User guide
Hide thumbs
Also See for Aurora 440QE:
- Brochure & specs (6 pages) ,
- Owner's manual (198 pages) ,
- Service manual (86 pages)
Table of Contents
Advertisement
Quick Links
Download this manual
See also:
Owner's Manual
Advertisement
Table of Contents

Related Manuals for Bernina Aurora 440QE


Summary of Contents for Bernina Aurora 440QE
- Page 1 032907.52.04_1103_a430_a440_a450_EN...
- Page 2 032907.52.04_1103_a430_a440_a450_EN...
- Page 3 All about embroidery 59 - 80 Details Accessories 60-62 Setting up the embroidery computer 63-67 Important embroidery information 67-69 Embroidery operating requirements Bernina embroidery software 70-71 Software - EC on PC 72-77 Starting to embroider Mega-Hoop 79-80 Stitch summary 81-83 Index 84 - 85 032907.52.04_1103_a430_a440_a450_EN...
-
Page 4: Key To Signs
In order to improve the product, and for our customers' benefit, all of the sewing and embroidery computer's features, parts, and accessories are subject to unannounced changes and alterations at any time. Text Herbert Stolz Drawings Müller-Melzer ID, Kreuzlingen Design concept Susanne Ribi Copyright 2008 BERNINA International AG, Steckborn 032907.52.04_1103_a430_a440_a450_EN... -
Page 5: Presser Feet
Accessories Accessories Standard accessories: Accessories 1 5 bobbins (one in bobbin case) • foot control 2 Needle selection 130/705H • instruction manual 3 Seam ripper • power cable 4 Brush • warranty card 5 Seam guide • Free Hand System presser foot lifter 6 Height compensating tool •... - Page 6 032907.52.04_1103_a430_a440_a450_EN...
- Page 7 032907.52.04_1103_a430_a440_a450_EN...
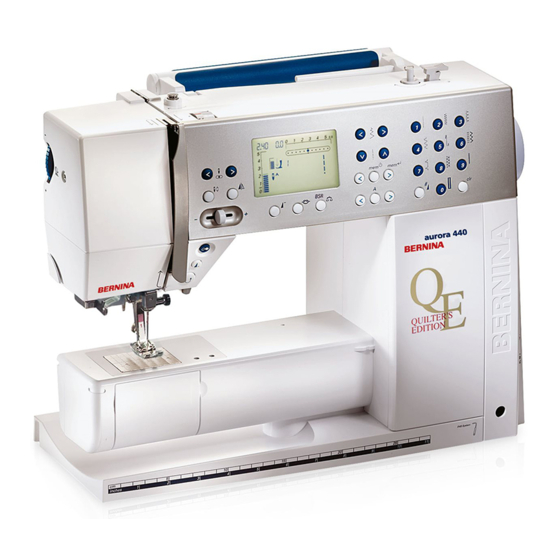
- Page 8 8 Details Details Front view Back view 032907.52.04_1103_a430_a440_a450_EN...
- Page 9 Details Front view 1 Bobbin cover 2 Stitch plate 3 Attachment base for special accessories 4 Darning hoop connection 5 Presser foot 6 Needle clamp 7 Thread guide 8 Needle threader 9 Thread take-up cover 10 Thread path 11 Thread take-up 12 Holder for stitch card 13 Bobbin winder with on/off switch and thread cutter...
- Page 10 032907.52.04_1103_a430_a440_a450_EN...
-
Page 11: Cfl Sewing Light
• the feed dog is raised as soon as the be replaced by an authorized first stitch is sewn technician. The sewing computer must be brought to an authorized BERNINA dealer! Slide-on table Always raise needle and presser foot when attaching... - Page 12 032907.52.04_1103_a430_a440_a450_EN...
-
Page 13: Threading The Double Needle
Setting up the sewing computer Threading the Double Needle Threading the First Thread Threading the Second Thread • place thread spool on horizontal spool • when using the supplementary spool pin pin and thread (vertical) always attach the foam pad •... - Page 14 032907.52.04_1103_a430_a440_a450_EN...
- Page 15 032907.52.04_1103_a430_a440_a450_EN...
-
Page 16: Bobbin Case
16 Setting up the sewing computer Bobbin case* To remove the bobbin case To insert the bobbin case Bobbin thread cutter • raise the needle • hold the bobbin case latch • take the thread over cutter A and cut it •... - Page 17 032907.52.04_1103_a430_a440_a450_EN...
- Page 18 Needle summary • cotton threads are particularly suitable for cotton fabrics BERNINA requires needle system 130/705 H. This system • mercerized cotton threads have a slight sheen number refers to shank shape as well as to length and form of the needle point.
- Page 19 032907.52.04_1103_a430_a440_a450_EN...
- Page 20 032907.52.04_1103_a430_a440_a450_EN...
- Page 21 032907.52.04_1103_a430_a440_a450_EN...
- Page 22 032907.52.04_1103_a430_a440_a450_EN...
- Page 23 032907.52.04_1103_a430_a440_a450_EN...
- Page 24 032907.52.04_1103_a430_a440_a450_EN...
- Page 25 032907.52.04_1103_a430_a440_a450_EN...
- Page 26 032907.52.04_1103_a430_a440_a450_EN...
- Page 27 Functions - Memory aurora 430 / 440 QE aurora 450 Example A: Example A: Sewing a stitch combination conti- Sewing a stitch combination conti- nuously nuously • press the -button • press the -button • select stitch, e.g. No. 155 (440) or 126 •...
- Page 28 28 Functions - Memory Programming alphabets and numbers Open Memory Select alphabet Programming letters/numbers • press the -button • press the Alphabet button once or more • select letter/number • the cursor on the left and the available to select the desired Alphabet style •...
- Page 29 032907.52.04_1103_a430_a440_a450_EN...
- Page 30 032907.52.04_1103_a430_a440_a450_EN...
- Page 31 032907.52.04_1103_a430_a440_a450_EN...
- Page 32 032907.52.04_1103_a430_a440_a450_EN...
- Page 33 032907.52.04_1103_a430_a440_a450_EN...
- Page 34 032907.52.04_1103_a430_a440_a450_EN...
- Page 35 032907.52.04_1103_a430_a440_a450_EN...
-
Page 36: Darning Program
36 Practical stitches - Application Securing stitch (straight stitch) Stitch: Securing stitch No. 5 Needle: size and type suitable for the fabric selected Thread: cotton or polyester Feed dog: Presser foot: 430 / 440 QE: Reverse pattern foot No. 1 450: Reverse pattern foot No. - Page 37 032907.52.04_1103_a430_a440_a450_EN...
- Page 38 032907.52.04_1103_a430_a440_a450_EN...
- Page 39 032907.52.04_1103_a430_a440_a450_EN...
- Page 40 032907.52.04_1103_a430_a440_a450_EN...
- Page 41 032907.52.04_1103_a430_a440_a450_EN...
- Page 42 032907.52.04_1103_a430_a440_a450_EN...
- Page 43 032907.52.04_1103_a430_a440_a450_EN...
- Page 44 032907.52.04_1103_a430_a440_a450_EN...
- Page 45 032907.52.04_1103_a430_a440_a450_EN...
- Page 46 46 BSR foot - Application Preparation • it is not possible to switch to BSR mode, once a buttonhole is selected • select straight stitch first • lower the feed dog • attach the desired presser foot sole • attach the BSR presser foot to the •...
- Page 47 032907.52.04_1103_a430_a440_a450_EN...
- Page 48 032907.52.04_1103_a430_a440_a450_EN...
- Page 49 032907.52.04_1103_a430_a440_a450_EN...
- Page 50 032907.52.04_1103_a430_a440_a450_EN...
- Page 51 032907.52.04_1103_a430_a440_a450_EN...
- Page 52 No. 10 Standard buttonhole No. 11 Narrow buttonhole No. 12 Stretch buttonhole No. 13 Round buttonhole No. 14 Round buttonhole with square end No. 15 Keyhole buttonhole No. 16 Keyhole buttonhole with tapered No. 17 Heirloom buttonhole No. 18 Straight stitch buttonhole 032907.52.04_1103_a430_a440_a450_EN...
- Page 53 Buttonholes 4-step standard buttonhole 1. sew the first bead forward up to the length mark, stop the sewing computer • press the Quick reverse button 2. sew reverse straight stitch, stop the sewing computer at the first stitch (buttonhole begin) •...
- Page 54 032907.52.04_1103_a430_a440_a450_EN...
- Page 55 Buttonholes Programming the standard and stretch buttonhole 1. sew the first bead forwards, stop the sewing computer • press the Quick reverse button • «auto» is indicated on the display = the buttonhole length is programmed 2. the sewing computer sews reverse straight stitch automatically 3.
- Page 56 56 Eyelet / Button sew-on program Eyelet s Stitch: 430: Straight stitch eyelet No. 17 440 QE: Straight stitch eyelet No. 19 450: Straight stitch eyelet No. 21 440 QE: Narrow zig-zag eyelet No. 18 450: Narrow zig-zag eyelet No. 20 Needle: size and type suitable for the fabric selected Thread:...
- Page 57 032907.52.04_1103_a430_a440_a450_EN...
- Page 58 032907.52.04_1103_a430_a440_a450_EN...
- Page 59 032907.52.04_1103_a430_a440_a450_EN...
-
Page 60: Standard Accessories
Embroidery needle range (145x255mm) Template for embroidery hoop Art Design V1 Embroidery Software Net for upper thread spools – pull over Embroidery software BERNINA / USB connecting cable for PC upper thread spool for even spooling mouse pad embroidery software Carrying bag... - Page 61 032907.52.04_1103_a430_a440_a450_EN...
- Page 62 032907.52.04_1103_a430_a440_a450_EN...
-
Page 63: Attaching The Module
Attaching the module Attaching the module Attaching the module Releasing the cable When connecting the em- • place the module on the sewing compu- • the cable connects the module to the broidery module, attention ter behind the free arm sewing computer must be paid that all items •... - Page 64 032907.52.04_1103_a430_a440_a450_EN...
- Page 65 032907.52.04_1103_a430_a440_a450_EN...
- Page 66 032907.52.04_1103_a430_a440_a450_EN...
- Page 67 032907.52.04_1103_a430_a440_a450_EN...
- Page 68 032907.52.04_1103_a430_a440_a450_EN...
- Page 69 032907.52.04_1103_a430_a440_a450_EN...
- Page 70 032907.52.04_1103_a430_a440_a450_EN...
- Page 71 032907.52.04_1103_a430_a440_a450_EN...
- Page 72 032907.52.04_1103_a430_a440_a450_EN...
- Page 73 Software EC on PC Motif size Embroidery time and stitch count Color summary • display of the motif name, width and • display in minutes of the total embroide- • each color of the motif is represented as height in mm ry time of the motif selected a spool in the original color •...
- Page 74 032907.52.04_1103_a430_a440_a450_EN...
- Page 75 EC on PC - Functions Functions on the display Show grid Zoom (4 levels) Position hoop 1. a large cursor - a blue cross - indicates • display of the motif will be enlarged by 1. the hoop will be moved until the needle the hoop center.
- Page 76 032907.52.04_1103_a430_a440_a450_EN...
- Page 77 032907.52.04_1103_a430_a440_a450_EN...
- Page 78 032907.52.04_1103_a430_a440_a450_EN...
- Page 79 032907.52.04_1103_a430_a440_a450_EN...
- Page 80 032907.52.04_1103_a430_a440_a450_EN...
- Page 81 032907.52.04_1103_a430_a440_a450_EN...
- Page 82 032907.52.04_1103_a430_a440_a450_EN...
- Page 83 032907.52.04_1103_a430_a440_a450_EN...
- Page 84 032907.52.04_1103_a430_a440_a450_EN...
- Page 85 Index Leaving Memory 5, 45 Stabilizer Programming alphabets Changing the presser foot Stitch patterns Programming practical and Presser foot pressure Display decorative stitches Standard accessories Overview 81-83 Samples Selecting Mirror image Stitch plate Display Quilting Attaching/removing Mirror image (left/right) Free-motion quilting Cleaning function button Quilting stitches...
- Page 86 032907.52.04_1103_a430_a440_a450_EN...