Denon AVR-688 Owner's Manual
Hide thumbs
Also See for AVR-688:
- Specifications (2 pages) ,
- Service manual (368 pages) ,
- Manual (12 pages)
Table of Contents
Advertisement
Available languages
Available languages
Quick Links
Advertisement
Chapters
Table of Contents

Related Manuals for Denon AVR-688


Summary of Contents for Denon AVR-688
- Page 1 AV SURROUND RECEIVER AVR-688 Owner’s Manual Manuel de l’Utilisateur...
-
Page 2: Safety Instructions
ENGLISH FRANCAIS SAFETY INSTRUCTIONS SAFETY PRECAUTIONS Read Instructions – All the safety and operating instructions should be read 13. Power-Cord Protection – Power-supply cords should be routed so that they before the product is operated. are not likely to be walked on or pinched by items placed upon or against CAUTION Retain Instructions –... - Page 3 2. IMPORTANT NOTICE: DO NOT MODIFY THIS PRODUCT This product, when installed as indicated in the instructions contained in this manual, meets FCC requirements. Modification not expressly approved by DENON may void your authority, granted by the FCC, to use the product. 3. NOTE This product has been tested and found to comply with the limits for a Class B digital device, pursuant to Part 15 •...
-
Page 4: Table Of Contents
ENGLISH Contents Operations Surround Modes Menu Map ····················································································· 18 Standard Playback ········································································29 Examples of Front Display ··························································· 18 Surround Playback of 2-channel Sources ·······························29, 30 Getting Started Playing Multi-channel Sources (Dolby Digital, DTS, etc.) ·············30 Accessories ······················································································2 DSP Simulation Playback·····························································30 Auto Setup Cautions on Handling ·····································································3 Stereo Playback ············································································30... -
Page 5: Getting Started
Turning the Power On and Off······················································49 Operations During Playback ·························································35 Selecting the Input Source ···························································49 Thank you for purchasing this DENON product. To ensure proper Playing Video and Audio Equipment ···········································36 Adjusting the Volume ···································································49 operation, please read this owner’s manual carefully before using the Basic Operation ············································································36... -
Page 6: Cautions On Handling
Unit • Before turning the power switch on In addition to the AVR-688, the included remote control unit (RC-1075) Check once again that all connections are correct and that there are can also be used to operate the equipment listed below. -
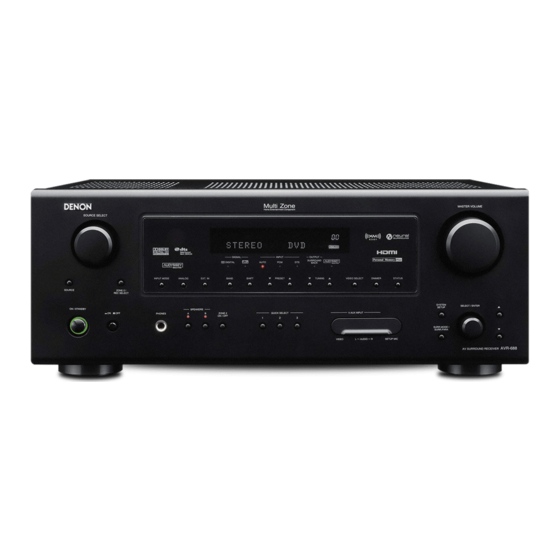
Page 7: Part Names And Functions
ENGLISH EXT. IN button ············································· (35) SIGNAL indicators Part Names and Functions Display BAND button ··············································· (36) For buttons not explained here, see the page indicated in parentheses ( ). Remote control sensor ································· (3) SHIFT button ··············································· (37) ZONE2 / REC SELECT button ·············· (41, 49) PRESET CHANNEL buttons ·······················... -
Page 8: Rear Panel
ENGLISH Rear Panel Digital audio connectors AC OUTLETS ··············································· (17) VIDEO / S-VIDEO connectors ·····················(11) (OPTICAL / COAXIAL) ························ (11 ~ 13) Power cord ·················································· (17) XM connector (SAT TU) ······························ (15) Analog audio connectors (AUDIO) ·············(11) Speaker terminals (SPEAKERS) ············ (9, 47) DOCK CONTROL jack ·································... -
Page 9: Remote Control Unit
ENGLISH Remote Control Unit [ Front ] [ Rear ] Indicator ······················································ (43) ZONE2 power buttons ······························· (49) Power buttons············································· (35) Source select buttons ·························· (35, 49) Tuner system buttons ···························(37 , 40) Tuner system buttons ································ (36) Source select buttons ·························· (35, 49) Test tone button (TEST) ·······················... -
Page 10: Connections
With some types of connections, certain settings must be made Coaxial digital connections Component video connections on the AVR-688. For details, refer to the instructions for the (Green) (Orange) respective connection items below. -
Page 11: Video Conversion Function
ENGLISH Speaker Connections Video Conversion Function • This function automatically converts various formats of video signals input to the AVR-688 into the format Speaker Installation used to output the video signals from the AVR-688 to a monitor. • The AVR-688’s video input/output circuitry is compatible with the following four types of video signals:... -
Page 12: Speaker Connections
NOTE • Never touch the speaker terminals while the By default, the AVR-688’s “Amp Assign” setting is set to “ZONE2” . To use as the surround back speaker for power supply is connected. Doing so could result the main zone, change the “Amp Assign” setting (vpage 27). -
Page 13: Connecting Equipment With Hdmi Connectors
Connecting Equipment with HDMI connectors NOTE • The audio signal input to the HDMI input connector cannot be played on the AVR-688. Input the audio With HDMI connections, the video and audio signals can be transferred with a single cable. -
Page 14: Connecting The Monitor
• The component video connectors may be indicated differently on your monitor. For details, see the monitor’s operating instructions. • To play the sound by AVR-688, make analog or digital audio output connections to AVR-688’s audio input connectors. • The signals output from the HDMI connectors are only the HDMI input signals. -
Page 15: Cd Player
Connect the cables to be used. Use a DENON Control Dock for iPod (ASD-1R, sold separately) to connect the iPod to the AVR-688. For instructions on the Control Dock for iPod settings, refer to the Control Dock for iPod’s operating CD player instructions. -
Page 16: Tv/Cable Tuner
When using a optical cable for the digital audio connection, make the settings at “System Setup” – “Input Setup” – “Digital In Assign” (vpage 25). • When recording via the AVR-688, the playback device’s cable must be of the same type as the cable used to connect the AVR-688’s VCR OUT connector. -
Page 17: Cd Recorder / Md Recorder / Tape Deck
ENGLISH Connections to Other Devices CD Recorder / MD Recorder / Tape Deck Carefully check the left (L) and right (R) channels and the inputs and outputs, and be sure to interconnect Connect the cables to be used. correctly. CD recorder / MD recorder / Video Camera / Game Console Tape deck... -
Page 18: Component With Multi-Channel Output Connectors
“EXT. IN” (vpage 35). • The video signal can be connected in the same way as a DVD player (vpage 11). • To play copyright-protected discs, connect the AVR-688’s EXT. IN connector with the DVD player’s analog NOTE multi-channel output connector. -
Page 19: Antenna Terminals
ENGLISH Antenna terminals An F-type FM antenna cable plug can be connected directly. Direction of broadcasting station FM antenna AM loop antenna (supplied) 75 Ω/ohms Coaxial cable FM indoor antenna (supplied) Connection of AM antennas 1. Push the 2. Insert the 3. -
Page 20: Multi-Zone
ENGLISH Connecting the Power Cord Multi-zone Wait until all connections have been completed before connecting the power cord. ZONE2 Out Connections If another pre-main (integrated) amplifier or power amplifier is connected, the ZONE2 out connectors can be used to play a different program source in ZONE2 the same time (vpage 47 ~ 49). To household Power cord power outlet... -
Page 21: Operations
ENGLISH ENGLISH Examples of Front Display Some typical examples are described below. Operations Item number Currently selected line Menu Map Menu number 1 H D M I 1 D V D Auto Setup (vpage 19 ~ 21) Current setting b When the setup microphone is connected. n Start Menu •... -
Page 22: Preparations
ENGLISH • Audyssey MultEQ ® automatically measures the acoustical problems Preparations in the listening environment to create the best audio experience for your home theater. SPEAKER> Press < to select the front speakers Front • Audyssey MultEQ ® optimizes a large listening area where one or A, Front B or Front A+B Auto Setup more listeners are seated. -
Page 23: A Auto Setup
ENGLISH Start NOTE • Loud test sounds may be played during Audyssey MultEQ Automatic Press to start the MultEQ Auto Setup. When using a subwoofer, make the following settings before starting Speaker Setup. This is part of normal operation. If there is background The Audyssey MultEQ Auto Setup process automatically calculates the auto setup procedure: noise in room, these test signals will increase in volume. -
Page 24: Error Messages
· The surround back speaker was Step 5 : Store detected, but the surrounds were The auto setup measurement results are stored in the AVR-688 or cancelled. not detected. After checking, press ENTER to select “Store” , then press to select “Store” or “Cancel” . -
Page 25: System Setup
ENGLISH System Setup • Make detail settings for various parameters. • With the AVR-688, settings and operations for most functions can be performed by operating while looking at the items displayed on the main unit. Operations SYSTEM SETUP The same operation is possible on the main unit or remote control unit. -
Page 26: Example Of Display Of Default Values
Select low range signal to be reproduced by subwoofer. NOTE Subwoofer Mode Setup [Display] By default, the AVR-688’s “Amp Assign” setting is set to “ZONE2” . To k ~ A5 Distance use as the surround back speaker for the main zone, change the “Amp Crossover Frequency Assign”... -
Page 27: K ~ A5 Distance
ENGLISH k ~ A5 Distance A6 Crossover Frequency A7 Test Tone Set distance from listening position to speakers. Select crossover frequency from which subwoofer handles low Adjust channel levels to obtain equal volume from all speakers. Before making the settings, measure the distance from the range signal. -
Page 28: Input Setup
ENGLISH Operating from the remote control unit d ~ h Digital In Assign a, s HDMI In Assign Adjusting with the remote control unit using the test tones is only Select HDMI connector to assign to this source. Select digital input connector to assign to this source. possible in the “Auto”... -
Page 29: J Ipod Assign
ENGLISH k ~ A0 Component In Assign j iPod Assign A5 Audio Delay Assign Control Dock for iPod to this source. Select component video input to assign to this source. Compensate for mismatched timing between video and audio. [Display] [Display] [Display]... -
Page 30: A7 Auto Preset Memory
ENGLISH Terrestrial A7 Auto Preset Memory Indicate terrestrial signal strength. For details, see “Amp Assign / Multi-zone Connections and Operations” Use the auto preset function to program radio stations. (vpage 47 , 48). Display Condition [Display] Signal strength is strong Signal strength is good 1 . -
Page 31: G ~ A1 2Ch Direct/Stereo Custom
ENGLISH Power On Level Front g ~ A1 2ch Direct/Stereo Custom This sets the volume set when the main zone’s power is turned on. Select front speaker size. Make speaker settings for 2-channel mode playback. [Selectable items] [Selectable items] [Display] Last Large... -
Page 32: A2 Auto Surround Mode
: This is the Pro Logic playback mode. This can A3 Room EQ Setup be selected when playing with a DOLBY PLg When using the AVR-688 with only the included remote control unit Select room EQ setting method. decoder. When this mode is selected, “DOLBY (RC-1075), there is no need to make settings. -
Page 33: Playing Multi-Channel Sources (Dolby Digital, Dts, Etc.)
The desired mode according to the program source and viewing [Selectable items] “Surround Parameter” – “MODE” (vpage 31). situation can be selected from among 7 DENON original surround STEREO modes. This is the mode for playing in stereo. The tone can be adjusted. -
Page 34: Parameter
ENGLISH D.COMP CENTER WIDTH Compress dynamic range (difference between loud and soft sounds). Assign center channel signal to front left and right channels for wider sound. [Selectable items] Parameter [Variable range] 0 ~ 3 ~ 7 : Turn dynamic range compression off. : Low setting. -
Page 35: Tone Control
ENGLISH SB CH OUT SB CH OUT (for Multi-channel sources (for 2-channel sources) Tone Control Select playback mode for surround back channels. Determine whether to use surround back speakers. Adjust the tonal quality of the sound. [Selectable items] [Selectable items] Tone Defeat No signal is played from the surround back : The surround back channel signal is played. -
Page 36: Room Eq
ENGLISH Room EQ RESTORER Night Mode Select the desired room equalization target. This function restores compressed audio signals to how they Optimized setting for late-night listening. were before compression and corrects the sense of volume of [Selectable items] the bass and treble to obtain richer playback sound. [Selectable items] Audyssey : Turn night mode off. -
Page 37: Information
ENGLISH s Audio Input Signal Shows information about audio input signals. Information [Items to be checked] Surround Mode : The currently set surround mode is displayed. Information can be called out directly by pressing the STATUS button. SIGNAL : The input signal type is displayed. a Status s Audio Input Signal : The... -
Page 38: Playback
ENGLISH SOURCE SELECT INPUT MODE MASTER VOLUME Setting the Input Mode VIDEO SELECT <SOURCE> <PHONES> Set the input mode for this source. Playback INPUT MODE Press The INPUT mode indicator lights (AUTO, PCM, DTS mode). Preparations AUTO ※ ※ EXT. IN ANALOG Turning the Power On Press <ANALOG>... -
Page 39: Playing Video And Audio Equipment
ENGLISH Turning Off the Sound Temporarily (Muting) Checking the currently playing program source, etc. Listening to FM/AM Broadcasts [MUTING] STATUS Press Press The current program source and various settings are indicated on Basic Operation the display. For details, refer to “Information” (vpage 34). <SOURCE SELECT>... -
Page 40: Presetting Radio Stations (Preset Memory)
ENGLISH Presetting Radio Stations Listening to Preset Stations <SOURCE SELECT> SHIFT STATUS (Preset Memory) SHIFT Press to select the memory block (A to G). Your favorite broadcast stations can be preset so that you can tune them in easily. Up to 56 stations can be preset. <PRESET CHANNEL>... -
Page 41: Listening To Xm Satellite Radio Programs
ENGLISH Note: The XM Radio ID does not use the letters “I” , “O” , “S” or Listening to XM Satellite Radio Checking the XM Signal Strength and “F” . Activate your XM Satellite Radio service in the U.S. online at Programs Radio ID http://activate.xmradio.com or call 1-800-XM-RADIO (1-800-967-... -
Page 42: Searching Categories
Basic Operation <SOURCE SELECT> STATUS Press Make the necessary preparations. q S et the iPod in the DENON Control Dock for iPod. (vSee the Control Dock for iPod’s operating instructions.) Channel category C A T : R o c k w Assign the Control Dock for iPod’s input. -
Page 43: Listening To Music In The Browse Mode
• The title name, artist name and album name can be checked by pressing STATUS during playback. • On the AVR-688, folder and file names can be displayed as titles. Any characters that cannot be displayed are replaced with “ . (period)” . -
Page 44: Other Operations And Functions
ENGLISH <SOURCE SELECT> <SPEAKER B> <SPEAKER A> • To cancel, press <ZONE2 / REC SELECT>, then turn <SOURCE SELECT> Other Operations and until “ZONE2 SOURCE” is displayed. • Make a test recording before starting the actual recording. Functions • Sources selected with the REC OUT mode are output from ZONE2 as well. -
Page 45: Quick Select Function
ENGLISH Quick Select Function Last Function Memory With this function, the currently playing input source, input mode, This stores the settings as they were directly before the standby surround mode, room EQ settings and volume can be stored in mode was set. the memory. -
Page 46: Remote Control Unit Operations
CABLE or TV position. [Rear] Presetting [MODE SELECTOR 2] to the component you want • DENON and other makes of components can be operated by to operate. [ZONE2 OFF] [MAIN ON] setting the preset memory. • Operation is not possible for some models. - Page 47 ENGLISH Functions of Buttons by Component n Front Video disc Satellite Device CD Player iPod Tape Deck DVD Player Video Deck Cable TV operated Recorder Recorder player Receiver (Monitor) MODE AUDIO VIDEO SELECTOR 1 [OFF] [ON/SOURCE] iPod/ MODE TAPE / CD-R / MD DVD / VDP SAT / CABLE [SHIFT]...
- Page 48 RETURN – – – – – Return – – Return Return Return Default DENON DENON DENON HITACHI HITACHI setting – – – – – (111) (151) (111) (108) (007) (134) (Preset code) Special –...
-
Page 49: Punch Through Function
ENGLISH Punch Through Function [Front] “Punch Through” is a function allowing you to operate 1, 2, 3, 0, 6, 7, 8 and 9 on CD, iPod/NETWORK, TAPE/CD-R/ MD, DVD/VDP or VCR components when in the SAT/CABLE or TV mode. By default, nothing is set. [MODE SELECTOR 1] to “VIDEO”. -
Page 50: Amp Assign / Multi-Zone Connections And Operations
Amp Assign mode setting and speakers connected to the various speaker Multi-zone Settings with the Amp Assign Function terminals The amp assign function lets you assign the amplifiers for the different channels built into the AVR-688 to Speaker terminal SURROUND BACK /... -
Page 51: Multi-Zone Settings And Operations With Zone Output
Amp Assign mode: Monitor Pre-main amplifier 5.1ch Front A Bi-Amp FL/FR Front B Bi-Amp Bi-Amp AVR-688 DVD player ZONE2 Input audio output n Amp Assign mode setting and speakers connected to the various speaker terminals Speaker terminal SURROUND BACK /... -
Page 52: Multi-Zone Operations
ENGLISH Multi-zone Operations SOURCE SELECT VOLUME Turning off the Sound Temporarily [MODE SELECTOR 1] [MODE SELECTOR 2] to “AUDIO” and Turning the Power On and Off “ZONE2” . [MUTING] Press GOperation on the main unitH [MUTING] b To cancel, either adjust the volume or press again. -
Page 53: Other Information
ENGLISH Number of surround back speakers w Setting for primarily watching movies using diffusion type speakers for the surround speakers We recommend using 2 speakers. For the greatest sense of surround sound envelopment, diffuse Other Information When using dipolar speakers in particular, be sure to use 2 speakers. radiation speakers such as bipolar types, or dipolar types, provide a wider dispersion than is possible to obtain from a direct radiating Placement of the surround left and right channels... - Page 54 Sources recorded in Dolby Surround are indicated with the following DTS NEO:6™ Surround logo marks. The AVR-688 is equipped with a digital signal processing circuit that Dolby Surround support mark : lets you play program sources in the surround mode to achieve the DTS NEO:6™...
- Page 55 ENGLISH Audyssey MultEQ ® Neural Surround HDMI (High-Definition Multimedia Interface) Audyssey MultEQ ® is the first technology to properly measure sound Neural Surround™, a breakthrough in audio technology, will bring the excitement of surround music to more of America’s listening audience. information throughout a listening area, then combine this information HDMI is a digital interface standard for next generation TVs based It provides the rich envelopment and discrete image detail of surround...
-
Page 56: Surround Modes And Parameters
ENGLISH Surround Modes and Parameters Signals and adjustability in the different modes Channel output Parameter (default values are shown in parentheses) Surround mode Surround Back D. COMP EFFECT Front L/R Center Surround L/R Subwoofer SB CH OUT CINEMA EQ. MODE ROOM SIZE DELAY TIME Subwoofer... - Page 57 ENGLISH Signals and adjustability in the different modes Parameter (default values are shown in parentheses) NEO:6 MUSIC Surround mode PRO LOGIC g/gx MUSIC mode only EXT. IN only mode only Tone Control Night Mode Room EQ RESTORER CENTER CENTER SUBWOOFER PANORAMA DIMENSION WIDTH...
- Page 58 ENGLISH Differences in Surround Mode Names Depending on the Input Signals Input signals Button DOLBY DIGITAL DVD-AUDIO DOLBY Note LINEAR DTS ES DTS ES DOLBY DOLBY DOLBY DOLBY Surround mode ANALOG DIGITAL EX DVD-Audio DVD-Audio DSCRT MTRX DTS (5.1ch) DTS 96/24 DIGITAL EX DIGITAL DIGITAL...
- Page 59 ENGLISH Button Input signals DOLBY DIGITAL DVD-AUDIO DOLBY Note LINEAR DTS ES DTS ES DOLBY DOLBY DOLBY DOLBY Surround mode ANALOG DIGITAL EX DVD-Audio DVD-Audio DSCRT MTRX DTS (5.1ch) DTS 96/24 DIGITAL EX DIGITAL DIGITAL DIGITAL (With no (multi ch) (2ch) (With Flag) (With Flag)
-
Page 60: Troubleshooting
• Turn off the power and contact a – Symptom Cause Countermeasure Page DENON service center. Power does not • Connection of the power cord is • Check the insertion of the power turn on, or turns faulty. cord plug. - Page 61 HDMI audio • The audio signal input to the signals are not HDMI input connector cannot be output from played on the AVR-688. Input the – speakers. audio signal to the digital audio input connector or analog audio input connector.
- Page 62 AC adapter into a power outlet. power outlet. GXM Satellite RadioH Symptom Cause Countermeasure Page ”CHECK • AVR-688’s XM connector and the • Check that the connections are ANTENNA” is XM Mini-Tuner and Home Dock correct. displayed in the is not properly connected. XM mode.
-
Page 63: Specifications
ENGLISH Specifications Audio section Tuner section [FM] [AM] • Power amplifier (note: µV at 75 Ω/ohms, 0 dBf = 1 x 10 Rated output: Front (A, B): Receiving Range: 87 .5 MHz ~ 107 .9 MHz 520 kHz ~ 1710 kHz 75 W + 75 W (8 Ω/ohms, 20 Hz ~ 20 kHz with 0.08 % T.H.D.) Usable Sensitivity:... - Page 64 FRANCAIS Contenu Fonctionnement Surround Modes (Modes surround) Plan du menu················································································· 18 Lecture standard· · ··········································································29 Reproduction·surround·des·sources·2·canaux························29,·30 Exemples d’affichage avant·························································· 18 Introduction Lecture·de·sources·multi-canaux·(Dolby·Digital,·DTS,·etc.)··········30 Accessoires······················································································2 Reproduction avec simulation DSP·············································30 Auto Setup (Réglage auto) Précautions de manipulation·························································3 Lecture stéréo················································································30 Préparatifs················································································ 19,·20 Précautions d’installation·······························································3 Lecture directe···············································································30 Auto Setup (Réglage auto)···························································20 A propos de la télécommande·······················································3...
-
Page 65: Introduction
Sélection·de·la·source·d’entrée····················································35 Réglages multi-zone et fonctionnement avec la Réglage·du·mode·d’entrée···························································35 sortie de zone················································································48 Opérations·pendant·la·lecture·······················································35 Nous· vous· remercions· d’avoir· acquis· cet· appareil· DENON.· Afin· Fonctionnement multi-zone·························································49 Lecture des équipements audio et vidéo····································36 d’assurer· son· bon· fonctionnement,· veuillez· lire· attentivement· ce· Mise·en·marche·et·extinction·······················································49 Fonctionnement·élémentaire· · ······················································36 manuel·de·l’utilisateur·avant·d’utiliser·l’appareil. -
Page 66: Précautions De Manipulation
Outre·l’ A VR-688,·la·télécommande·fournie·(RC-1075)·peut·également· Pointez· la· télécommande· vers· le· capteur· de· télécommande· de· · Vérifiez·que·toutes·les·connexions·ont·été·correctement·effectuées· faire·fonctionner·les·équipements·ci-après. l’unité. et·que·les·câbles·sont·fonctionnels. q Composants·de·système·DENON w Composants·de·système·autres·que·DENON • Certains· circuits· restent· sous· tension· même· lorsque· l’appareil· est· • En·activant·la·mémoire·préréglée·(vpage·43·~·45) mis· en· mode· veille.· En· cas· d’absence· prolongée,· débranchez· le· cordon·d’alimentation·de·la·prise·murale. -
Page 67: Nomenclature Et Fonctions
FRANCAIS Touche EXT. IN ············································ (35) Témoin SIGNAL Nomenclature et fonctions Affichage Touche BAND ·············································· (36) Pour les touches qui ne sont pas décrites ici, lire la page indiquée entre parenthèses ( ). Capteur de télécommande ·························· (3) Touche SHIFT ·············································· (37) Touche ZONE2 / REC SELECT ·············... -
Page 68: Panneau Arrière
FRANCAIS Panneau arrière ·Bornes audio numériques ·Sorties CA (AC OUTLETS)·························· (17) · Bornes VIDEO / S-VIDEO·····························(11) (OPTICAL / COAXIAL)························· (11·~·13) ·Cordon d’alimentation································ (17) · Borne XM (SAT TU)· · ···································· (15) ·Bornes audio analogiques (AUDIO)············(11) ·Bornes d’enceintes (SPEAKERS)············ (9,·47) · Prise DOCK CONTROL· · ······························· (12) ·Bornes EXT. -
Page 69: Télécommande
FRANCAIS Télécommande [ Avant ] [ Arrière ] Témoin·························································· (43) ·Touches d’alimentation ZONE2 · · ··············· (49) Touches d’alimentation· · ····························· (35) ·Touches sélection de source· · ··············· (35,·49) Touches système tuner··························(37 ,·40) ·Touches système tuner······························· (36) · T ouches sélection de source· · ··············· (35,·49) ·Touche de tonalité... -
Page 70: Connexions
à l’équipement que vous connectez. Connexions numériques coaxiales Connexions vidéo composante Des réglages doivent être effectués sur l’AVR-688 pour certains types (Vert) (Orange) · de connexion. Pour plus de détails, se reporter aux instructions des (Bleu) Câble·numérique·coaxial·(RCA·75·Ω/ohms) -
Page 71: Fonction De Conversion Vidéo
FRANCAIS Connexion des enceintes Fonction de conversion vidéo •·Cette·fonction·convertit·automatiquement·différents·formats·de·signaux·vidéo·reçus·par·l’ A VR-688·dans· Installation des enceintes le·format·utilisé·pour·reproduire·les·signaux·vidéo·de·l’ A VR-688·vers·un·moniteur. •·Le· circuit· d’entrée/sortie· vidéo· de· l’ A VR-688· est· compatible· avec· les· quatre· types· de· signaux· vidéo· L ’illustration·ci-dessous·montre·un·exemple·de·disposition·basique·de·l’amplificateur·associé·à·8·enceintes· suivants: et·à·un·moniteur. Signaux·vidéo·numériques:·HDMI Subwoofer Enceinte centrale Signaux·vidéo·analogiques:·Vidéo·composante,·S-Vidéo·et·vidéo GParcours des signaux vidéo à... -
Page 72: Connexion Des Enceintes
Si·le·circuit·de·protection·est·à·nouveau·activé·bien· pour la desserrer. que·la·ventilation·autour·de·l’appareil·soit·suffisante· et·que·les·connexions·soient·correctes,·il·se·peut· Insérez câble que·l’appareil·soit·endommagé.·Eteignez·l’appareil· et·contactez·un·centre·technique·DENON. d’enceinte dans la garde de la borne d’enceinte. Tournez la borne d’enceinte dans le sens horaire pour la serrer. Utilisation de prises bananes Bien·serrer·la·borne·d’enceinte·avant·d’insérer·la· prise·banane. -
Page 73: Connexion D'équipements Dotés De Bornes Hdmi
FRANCAIS Connexion d’équipements dotés de bornes HDMI REMARQUE •·Le·signal·audio·arrivant·sur·l’entrée·HDMI·ne·peut·pas·être·reproduit·par·l’ A VR-688.·Le·signal·audio·doit· Les·connexions·HDMI·permettent·le·transfert·des·signaux·vidéo·et·audio·à·l’aide·d’un·seul·câble. arriver·sur·l’entrée·audio·numérique·ou·analogique. •·L’AVR-688·ne·peut·pas·être·contrôlé·par·un·autre·appareil·via·le·câble·HDMI. Lecteur DVD Moniteur •·Les·signaux·vidéo·ne·sont·pas·émis·si·les·signaux·vidéo·d’entrée·ne·correspondent·pas·à·la·résolution· du· moniteur.· Dans· ce· cas,· changez· la· résolution· du· lecteur· DVD· afin· qu’elle· soit· compatible· avec· le· moniteur. •·Utilisez·un·câble·sur·lequel·figure·le·logo·HDMI·(produit·certifié·HDMI)·pour·effectuer·la·connexion·à·la· borne·HDMI.·La·lecture·normale·risque·d’être·impossible·si·vous·utilisez·un·câble·sur·lequel·ne·figure·pas· le·logo·HDMI·(produit·non·certifié·HDMI). •·Si· le· moniteur· ou· le· lecteur· DVD· ne· supporte· pas· Deep· Color,· le· transfert· du· signal· Deep· Color· est·... -
Page 74: Connexion Du Moniteur
Connexion du moniteur Connexion des composants de lecture Connectez·les·câbles·(vpage·8·“Fonction·de·conversion·vidéo”). Contrôlez·attentivement·les·canaux·gauche·(L)·et·droit·(R)·ainsi·que·les·entrées·et·sorties,·puis·veillez·à· effectuer·correctement·les·connexions. Moniteur Lecteur DVD •·Connectez·les·câbles. •·Les·connexions·HDMI·permettent·le·transfert·des·signaux·vidéo·et·audio·à·l’aide·d’un·seul·câble. Lecteur DVD REMARQUE •·Les· bornes· vidéo· composante· peuvent· être· indiquées· différemment· sur· votre· moniteur.· Pour· plus· de· détails,·voir·le·mode·d’emploi·du·moniteur. •·Pour·lire·le·son·à·partir·du·AVR-688,·effectuez·les·connexions·de·sortie·audio·numérique·ou·analogique· aux·bornes·d’entrée·audio·du·AVR-688. •·Les·seuls·signaux·émis·par·les·bornes·HDMI·sont·les·signaux·d’entrée·HDMI. •·Connectez·un·lecteur·haute·définition·(HDP)·de·la·même·façon. •·Avec·un·câble·optique·pour·la·connexion·audio·numérique,·effectuez·les·réglages·sur·“System·Setup”·–· · “Input·Setup”·–·“Digital·In·Assign”·(vpage·25). -
Page 75: Lecteur Cd
FRANCAIS Lecteur CD iPod ® Connectez·les·câbles. Utilisez·un·dock·de·contrôle·pour·iPod·DENON·(ASD-1R,·vendue·séparément)·pour·connecter·l’iPod·à·l’ A VR- 688.·Reportez-vous·au·mode·d’emploi·du·dock·de·contrôle·pour·iPod·pour·les·instructions·de·réglage·du· Lecteur CD dock·de·contrôle·pour·iPod. iPod Avec·un·câble·coaxial·pour·la·connexion·audio·numérique,·effectuez·les·réglages·sur·“System·Setup”·–· · “Input·Setup”·–·“Digital·In·Assign”·(vpage·25). •·Avec·les·réglages·par·défaut,·l’iPod·peut·être·connecté·à·la·borne·VCR·(iPod). •·Pour·attribuer·le·iPod·à·un·connecteur·autre·que·le·VCR·(iPod),·effectuez·les·réglages·sur·“System·Setup”·–· · “Input·Setup”·–·“iPod·Assign”(vpage·26). -
Page 76: Tuner Tv/Cable
FRANCAIS Connexion des composants d’enregistrement Tuner TV/CABLE Contrôlez·attentivement·les·canaux·gauche·(L)·et·droit·(R)·ainsi·que·les·entrées·et·sorties,·puis·veillez·à· Connectez·les·câbles. effectuer·correctement·les·connexions. Tuner TV Magnétoscope Connectez·les·câbles. Magnétoscope Avec·un·câble·optique·pour·la·connexion·audio·numérique,·effectuez·les·réglages·sur·“System·Setup”·–·“Input· Setup”·–·“Digital·In·Assign”·(vpage·25). •·Lors·d’un·enregistrement·via·l’ A VR-688,·le·câble·du·dispositif·de·lecture·doit·être·du·même·type·que·le· câble·utilisé·pour·connecter·la·borne·VCR·OUT·de·l’ A VR-688. Exemple:· TV·IN·→·Câble·S-Vidéo·:·VCR·OUT·→·Câble·S-Vidéo · TV·IN·→·Câble·vidéo·:·VCR·OUT·→·Câble·vidéo •·Lorsque· vous· utilisez· un· câble· vidéo· composante· pour· la· connexion· vidéo,· effectuez· les· réglages· sur· “System·Setup”·–·“Input·Setup”·–·“Component·In·Assign”·(vpage·26). -
Page 77: Enregistreur Cd / Enregistreur Md / Platine Cassette
FRANCAIS FRANCAIS Connexions d’autres appareils Enregistreur CD / Enregistreur MD / Platine cassette Contrôlez·attentivement·les·canaux·gauche·(L)·et·droit·(R)·ainsi·que·les·entrées·et·sorties,·puis·veillez·à· Connectez·les·câbles. effectuer·correctement·les·connexions. Enregistreur CD / Enregistreur MD / Caméra vidéo / Console de jeux Platine cassette Connectez·les·câbles. Caméra vidéo / Console de jeux... -
Page 78: Composant Doté De Bornes De Sortie Multi-Canaux
FRANCAIS FRANCAIS Composant doté de bornes de sortie multi-canaux Borne XM ® ®· Connectez·les·câbles. •·L’AVR-688·est·XM·Ready .·Vous·pouvez·capter·la·XM Satellite·Radio·en·vous·connectant·au·XM·Mini- Tuner·et·Home·Dock·(comprend·l’antenne·intérieure,·vendue·séparément)·et·en·souscrivant·au·service· Lecteur DVD /Décodeur externe •·Branchez·le·XM·Mini-Tuner·et·Home·Dock·dans·la·borne·XM·située·sur·le·panneau·arrière. •·Placez·le·antenne·Home·Dock·à·proximité·d’une·fenêtre·orientée·au·sud·afin·de·mieux·capter·le·signal. · Pour·plus·de·détails,·lire·“Ecoute·des·programmes·XM·Satellite·Radio”·(vpage·38,·39). · Lorsque·vous·effectuez·les·connexions,·reportez-vous·également·au·mode·d’emploi·du·XM·Mini-Tuner·et· Home·Dock. XM Mini-Tuner et Home Dock EXT. IN •·Pour·reproduire·les·signaux·d’entrée·analogiques·aux·bornes·EXT.·IN,·appuyez·sur·la·touche· ·de· INPUT l’unité·principale·ou·sur·la·touche·... -
Page 79: Bornes D'antennes
FRANCAIS FRANCAIS Bornes d’antennes Une·prise·de·câble·d’antenne·FM·type·F·peut·être·connectée·directement. Direction·de·la·station·émettrice Antenne·FM Antenne·à·boucle·AM·· (fournie) Câble·coaxial·· 75·Ω/ohms Antenne·intérieure·FM·· (fournie) Connexion des antennes AM 1.·Enfoncez· 2.·Insérez·le· 3.·Ramenez· le·levier. conducteur. le·levier. Antenne·AM·extérieure Terre Antenne à boucle AM Connexion·aux·bornes· d’antenne·AM. REMARQUE •·Ne·pas·connecter·simultanément·deux·antennes·FM. •·Ne· pas· débrancher· l’antenne· à· boucle· AM,· même· si· vous·utilisez·une·antenne·AM·externe. -
Page 80: Multi-Zone
FRANCAIS FRANCAIS Connexion du cordon d’alimentation Multi-zone Ne·pas·brancher·le·cordon·d’alimentation·avant·d’avoir·terminé·toutes·les·connexions. Connexions hors ZONE2 Lorsqu’un·autre·amplificateur·de·pré-main·(intégré)·est·connecté,·les·connecteurs·de·sortie·ZONE2·peuvent· Cordon· servir·à·reproduire·simultanément·une·source·différente·dans·la·ZONE2·(vpage·47·~·49). d’alimentation· Vers·la·prise·murale (CA·120·V,·60·Hz) Amplificateur de pré-main (ZONE2) Connexion aux prises CA •·Ces·prises·alimentent·les·dispositifs·audio·externes. •·L ’alimentation·fournie·par·ces·prises·est·activée·et· désactivée·par·l’interrupteur·principal·de·l’appareil. •·Vous·pouvez·connecter·un·équipement·audio·dont·la· consommation·totale·est·de·120·W·(1·A). REMARQUE •·Bien·insérer·les·prises·CA.·Des·connexions·incomplètes·risquent·de·générer·du·bruit. •·N’utilisez·les·prises·CA·que·pour·brancher·les·dispositifs·audio.·Ne·les·utilisez·pas·comme·alimentation· pour·des·sèche-cheveux·ou·des·équipement·non·audio. Une fois les connexions terminées Mise en marche ·(vpage·35) Entrée... -
Page 81: Fonctionnement
FRANCAIS Exemples d’affi chage avant Quelques·exemples·représentatifs·sont·décrits·ci-dessous. Fonctionnement Numéro·de·l’élément Ligne·sélectionnée Plan du menu Numéro·de·menu 1 H D M I 1 D V D Auto Setup (vpage·19·~·21) Réglage·actuel b·Lorsque·le·microphone·de·réglage·est·connecté. n Start Menu • Step 1: Speaker Detection • Step 2: Measurement • Step 3: Calculation Appuyez·sur·la·touche·o·pour·sélectionner. -
Page 82: Auto Setup (Réglage Auto)
FRANCAIS FRANCAIS •·Audyssey· MultEQ ® · mesure· automatiquement· les· problèmes· Préparatifs acoustiques·dans·la·zone·d’écoute·pour·créer·la·meilleure·expérience· possible·avec·votre·home·cinéma. <SPEAKER> Appuyez sur pour sélectionner les •·Audyssey· MultEQ ® ,· offre· une· qualité· de· son· maximale· dans· les· enceintes avant Front A, Front B ou Front A+B. Auto Setup (Réglage·auto grandes·zones·d’écoute·où·un·ou·plusieurs·auditeurs·sont·assis. -
Page 83: A· Auto·setup·(Réglage·auto)
FRANCAIS FRANCAIS Start· (Démarrer) REMARQUE •·Un· fort· signal· d’essai· peut· être· émis· pendant· la· confi · guration· Appuyez·sur· ·pour·démarrer·la·confi · guration·automatique·MultEQ. Pour· utiliser· un· subwoofer,· effectuez· les· réglages· suivants· avant· de· automatique·du·enceinte·Audyssey·MultEQ.·Ceci·est·normal.·S’il·y· Le· processus· de· confi · guration· automatique· du· Audyssey· MultEQ· · commencer·le·processus·de·confi ·... -
Page 84: S· Message·d'erreur
Step 5 : Store (Etape·5·:·Mémoriser) détecté,· mais· les· autres· ne· le· sont· pas. Les· résultats· de· mesure· de· confi · guration· automatique· sont· enregistrés· dans· le·AVR-688· ou· •·Enceintes·affi · chées·connectées·avec· •·Vérifi · ez· les· polarités· des· enceintes· annulés. Après· vérifi · cation,· appuyez· sur· ENTER· pour· sélectionner·“Store” ,· puis· appuyez· sur·... -
Page 85: System Setup (Configuration Système)
FRANCAIS System Setup (Configuration·système) •· Effectuez·les·réglages·détaillés·des·différents·paramètres. •· ·Avec·le·AVR-688,· le· fonctionnement· et· les· réglages· de· plupart· des· options· peuvent· être· exécutés· en· utilisant· les· éléments· affichés· sur· · l’appareil·en·fonction. Fonctionnement SYSTEM SETUP La·même·opération·peut·se·faire·à·partir·de·l’unité·principale·ou·de· la·télécommande. SYSTEM SETUP Appuyez sur puis appuyez sur ENTER. -
Page 86: Exemple D'affichage Des Valeurs Par Défaut
FRANCAIS Center Speaker (Enseinte·centrale) Exemple d’affi chage des valeurs Sélection·de·la·taille·et·de·l’utilisation·de·l’enceinte·centrale. •·Sélectionnez·“Large”·ou·“Small” ,·non·en·fonction·de·la·taille·physique· par défaut de· l’enceinte,· mais· en· fonction· de· la· capacité· de· reproduction· [Eléments sélectionnables] Large · Small · None des· basses· fréquences· défi · nie· par· le· réglage· de· la· fréquence· de· Dans·... -
Page 87: K·~·A5 Distance
FRANCAIS A6 Crossover Frequency (Tonalité·test) k·~·A5 Distance A7 Test Tone (Fréquence·de·crossover) Réglez·la·distance·entre·la·position·d’écoute·et·les·enceintes. Ajuster·niveaux·d’écoute·pour·obtenir·le·même·volume·de·toutes· Avant· d’effectuer· les· réglages,· mesurez· la· distance· entre· la· les·enceintes. Sélectionner·la·fréquence·de·croisement·pour·laquelle·le·subwoofer· position·d’écoute·et·les·différentes·enceintes. [Affichage] reproduit·les·signaux·de·basse. [Affichage] [Affichage] . S p 2 . I n 3 . O p . -
Page 88: Input Setup (Configuration De L'entrée)
FRANCAIS Fonctionnement à partir de la télécommande (Attribution·HDMI) a,·s HDMI In Assign d·~·h Digital In Assign Le·réglage·à·l’aide·des·tonalités·test·de·la·télécommande·n’est·possible· (Attribution·numérique) Sélectionner·le·borne·HDMI·à·affecter·à·cette·source. qu’en· mode·“Auto”· et· effectif· qu’en· mode· STANDARD.· Les· niveaux· Sélectionner· le· borne· d’entrée· numérique· à· attribuer· à· cette· [Affichage] réglés· pour· les· différents· modes· sont· automatiquement· enregistrés· source. -
Page 89: A1 ~ A4 Video·convert·(Conversion·vidéo)
FRANCAIS A5 Audio Delay (Délai·audio) j iPod Assign k·~·A0 Component In Assign (Attribution·iPod) (Attribution·de·composant) Compensation·du·délai·entre·la·prise·sonore·et·l’image. Sélectionner·l’entrée·vidéo·composante·à·affecter·à·cette·source. Attribuez·le·dock·de·contrôle·pour·iPod·à·cette·source. [Affichage] [Affichage] [Affichage] 1 . S p . I n 3 . O p 1 . S p . I n 3 . O p 1 . -
Page 90: A7 Auto Preset Memory (Préréglage·automatique·de·mémoire)
FRANCAIS Terrestrial (Terrestre) A7 Auto Preset Memory Indique·la·force·du·signal·de·diffusion·terrestre. (Préréglage·automatique·de·mémoire) Pour·plus·détails,·voir·“Affectation·de·l’amplificateur·/·Connexions·et· fonctionnement·multi-zone”·(vpage·47 ,·48). Utiliser· la· fonction· de· préconfiguration· auto· de· programmation· Affichage Etat des·chaînes·radio. La·puissance·du·signal·est·forte La·puissance·du·signal·est·bonne [Affichage] s·~·f Volume Control La·puissance·du·signal·est·moyenne La·puissance·du·signal·est·faible (Commande·du·volume) 1 . S p . I n 3 . O p Aucun·signal Réglez·le·volume·de·la·zone·principale. -
Page 91: G ~ A1 2Ch·direct/Stereo·custom
FRANCAIS Power On Level Front (Niveau·démarrage) (Avant) g·~·A1 2ch Direct/Stereo Custom Définit·le·volume·activé·à·la·mise·en·marche·de·la·zone·principale. Sélection·de·la·taille·de·l’enceinte·avant. (Direct/Stéréo·2·canaux) [Eléments sélectionnables] [Eléments sélectionnables] Effectuer·les·réglages·du·mode·de·reproduction·à·2-ch. Last :· · U tiliser· la· valeur· mémorisée· depuis· la· dernière· Large Small · :··Sélection·de·la·taille·de·l’enceinte·avant. [Affichage] · · session. Subwoofer –... -
Page 92: A2 Auto Surround Mode (Mode·surround·automatique)
FRANCAIS A2 Auto Surround Mode A4 Direct Mode Setup (Mode·surround·automatique) (Configuration·du·mode·direct) · Sélectionnez·EQ·de·la·pièce·pour·le·mode·DIRECT. Réglage·de·la·mémorisation·des·réglages·de·mode·surround·pour· Surround Modes chaque·type·de·signal. [Affichage] (Modes·surround) [Affichage] 1 . S p 2 . I n . O p 1 . S p 2 . I n . -
Page 93: Lecture De Sources Multi-Canaux (Dolby Digital, Dts, Etc.)
Sélectionnez· les· modes·“Cinema” ,·“Music” ,·“Game”· et·“Pro· Logic”· Le·mode·souhaité·en·fonction·de·la·source·de·programme·et·des· [Eléments sélectionnables] dans·“Surround·Parameter”·–·“MODE”·(vpage·31). conditions· de· visionnement· peut· être· sélectionné· parmi· les· 7· STEREO modes·surround·originaux·de·DENON. · Lecture de sources multi-canaux Les·paramètres·surround·peuvent·être·réglés·(vpage·53,·54)·afin· Il·s’agit·du·mode·de·lecture·en·stéréo.·La·tonalité·peut·être·réglée. d’obtenir·un·champ·sonore·encore·plus·puissant·et·réaliste. Le· son· est· émis· par· les· enceintes· avant· gauche· et· droite· et· par· le·... -
Page 94: Parameter (Paramètre)
FRANCAIS D.COMP CENTER WIDTH (Compression·de·gamme·dynamique) (CENTRER·LARGEUR) Compressez· la· gamme· dynamique· (écart· entre· les· sons· denses· et· Affecter· le· signal· aux· voies· avant· gauche· et· droite· pour· un· son· plus· doux). riche. Parameter (Paramètre) [Plage de réglage] [Eléments sélectionnables] :· · D ésactiver·la·compression·de·la·gamme·dynamique. ·... -
Page 95: Tone Control (Tonalité)
FRANCAIS SB CH OUT SB CH OUT (SORTIE·CANAL·SURROUND·ARRIÈRE,·pour· (SORTIE·CANAL·SURROUND·ARRIÈRE,·pour· Tone Control (Tonalité) les·sources·multi-canaux) les·sources·à·2·canaux) Réglage·de·la·qualité·tonale·du·son. Sélection·du·mode·de·lecture·pour·les·voies·surround·arrière. Décider·de·l’utilisation·des·enceintes·surround·arrière. [Eléments sélectionnables] [Eléments sélectionnables] Tone Defeat (Exclusion·du·réglage·de·la·tonalité) : · · A ucun· signal· n’est· reproduit· par· les· canaux· :· · L e·signal·des·canaux·surround·arrière·est·reproduit. Désactiver·les·réglages·de·la·tonalité. ·... -
Page 96: Room Eq (Egalisateur·de·la·pièce)
FRANCAIS Room EQ RESTORER Night Mode (Egalisateur·de·la·pièce) (Mode·de·nuit) Sélectionnez·le·point·d’égalisation·de·la·pièce. Cette·fonction·restaure·les·signaux·audio·compressés·à·l’identique· Réglage·optimisé·pour·une·écoute·nocturne·tardive. et·corrige·l’impression·de·volume·des·graves·et·aigüs·afin·d’obtenir· [Eléments sélectionnables] un·son·plus·riche. [Eléments sélectionnables] Audyssey ·:· · O ptimisez· la· réponse· de· fréquence· de· tous· · :· · D ésactivation·du·mode·nocturne. [Eléments sélectionnables] les·enceintes. :· · R églage·bas. ·... -
Page 97: Information
FRANCAIS s Audio Input Signal (Signal·audio·d’entrée) Information Affichage·des·infos·sur·les·signaux·audio·en·entrée. [Eléments à vérifier] L ’information·peut·être·directement·affichée·en·appuyant·sur·la·touche· Surround Mode :· Le·mode·surround·actif·s’affiche. · STATUS. SIGNAL :· Le·type·de·signal·d’entrée·s’affiche. · a Status s Audio Input Signal :· La·fréquence·d’échantillonnage·du·signal·d’entrée· · s’affiche. Format · :· Le· nombre· de· canaux· du· signal· d’entrée· (avant,· a Status (Etat) surround,·LFE)·s’affiche. -
Page 98: Lecture
FRANCAIS SOURCE SELECT INPUT MODE MASTER VOLUME Réglage du mode d’entrée VIDEO SELECT <SOURCE> <PHONES> Configurer le mode d’entrée pour cette source. Lecture INPUT MODE Appuyez sur L ’indicateur de mode INPUT s’allume (mode AUTO, PCM, DTS). Préparatifs AUTO ※ ※ EXT. IN ANALOG Mise en marche Appuyer sur <ANALOG> pour sélectionner “ANALOG” , appuyer sur <POWER> Appuyez sur <EXT. IN> pour sélectionner “EXT. IN” . Le témoin principal s’allume et l’appareil est mis en mode veille. -
Page 99: Lecture Des Équipements Audio Et Vidéo
FRANCAIS Coupure temporaire du son (sourdine) Vérification de la source programme actuellement Ecoute d’émissions FM/AM en cours de reproduction, etc. [MUTING] Appuyez sur STATUS Appuyez sur Fonctionnement élémentaire La source de programme actuel et les divers réglages sont affichés. Pour plus détails, voir “Information” (vpage 34). <SOURCE SELECT> [TUNER] Tournez ou appuyez sur Pour annuler, appuyez à nouveau sur [MUTING]. La sourdine peut pour sélectionner “TUNER”. -
Page 100: Préréglage Des Stations Radio (Mémoire Préréglée)
FRANCAIS Préréglage des stations radio Ecoute des stations préréglées <SOURCE SELECT> SHIFT STATUS (Mémoire préréglée) SHIFT Appuyez sur pour sélectionner le bloc mémoire Vous pouvez prérégler vos stations radio préférées afin de les (A à G). retrouver plus facilement. Vous pouvez prérégler jusqu’à 56 stations. <PRESET CHANNEL> [CHANNEL] Appuyez sur Accordez la station émettrice que vous souhaitez pour sélectionner le numéro du canal préréglé... -
Page 101: Ecoute Des Programmes Xm Satellite Radio
FRANCAIS Remarque: XM Radio ID ne peut avoir les lettres“I” , “O” , “S” ou“F” . Ecoute des programmes XM Vérification de la puissance du signal et Activez votre service XM Satellite Radio en ligne (États-Unis) au Satellite Radio de l’ID radio XM http://activate.xmradio.com ou appelez le 1-800-XM-RADIO (1-800- 967-2346). Activez votre service XM Satellite Radio en ligne (Canada) <SOURCE SELECT>... -
Page 102: Catégories De Recherche
<SOURCE SELECT> STATUS Appuyez sur Effectuez les préparatifs nécessaires. Catégorie du canal C A T : R o c k q P lacez l’iPod dans le dock de contrôle pour iPod DENON. (vVoir le mode d’emploi du dock de contrôle pour iPod.) w A ttribuez du dock de contrôle pour iPod comme entrée iPod. Utilisez pour sélectionner la catégorie, puis “System Setup” – ”Input Setup” – ”iPod Assign” utilisez pour sélectionner la station souhaitée. -
Page 103: Ecoute De Musique En "Browse Mode
FRANCAIS Répétition de la lecture Ecoute de musique en “Browse Mode” Appuyez sur [CHANNEL –]. [MODE] Appuyez sur pendant 2 secondes ou plus pour All One OFF [Eléments sélectionnables] passer de “Remote Mode” à “Browse Mode”. Lecture aléatoire Appuyez sur [CHANNEL +]. [Eléments sélectionnables] Albums Songs OFF Pour passer du mode navigation au mode télécommande Maintenez [MODE] enfoncé. -
Page 104: Autres Opérations Et Fonctions
FRANCAIS <SOURCE SELECT> <SPEAKER B> <SPEAKER A> • Pour annuler, appuyez sur <ZONE2 / REC SELECT>, puis tournez Autres opérations et <SOURCE SELECT> jusqu’à ce que “ZONE2 SOURCE” s’affiche. • Effectuez un test d’enregistrement avant de commencer. fonctions • Les sources sélectionnées avec le mode REC OUT mode sont émises à partir de la ZONE2 également. • En mode REC OUT, les touches du mode ZONE2 de la télécommande ne fonctionnent pas. Autres opérations REMARQUE • L es enregistrements que vous réalisez sont pour votre usage Enregistrement sur un dispositif externe personnel et ne doivent pas être utilisés à d’autres fins sans l’accord... -
Page 105: Fonction De Sélection Rapide
FRANCAIS Fonction dernière mémoire Fonction de sélection rapide Mémorise les réglages tels qu’ils étaient juste avant la mise en Cette fonction vous permet de conserver dans la mémoire les réglages d’égaliseur de pièce, le mode surround et la source mode veille. Lorsque l’appareil est remis en marche, les réglages sont restaurés d’entrée en cours. tels qu’ils étaient juste avant la mise en mode veille. Réglez la source d’entrée, le mode surround et EQ de la pièce tels que vous voulez les enregistrer. -
Page 106: Fonctionnement De La Télécommande
Fonctionnement des composants modèles de composants peuvent ne pas être actionnés avec cette préréglés télécommande. [MODE SELECTOR 1] Réglez sur “AUDIO” ou Préréglage “VIDEO”. • DENON et des composants d’autres marques peuvent être b Régler sur AUDIO pour la position CD, iPod/NETWORK ou TAPE/ actionnés en réglant la mémoire préréglée. CD-R/MD, régler sur VIDEO pour la position DVD/VDP , VCR, SAT/ [Arrière] • L ’opération n’est pas possible pour certains modèles. CABLE ou TV position. [MODE SELECTOR 1] Réglez sur “AUDIO” ou... - Page 107 FRANCAIS Fonctions des touches par composant Lecteur n Avant Appareil Enregistreur Enregistreur Platine Lecteur CD iPod Lecteur DVD de vidéo Magnétoscope Tuner satellite TV câblée actionné cassette (Moniteur) disque MODE AUDIO VIDEO [OFF] [ON/SOURCE] SELECTOR 1 iPod MODE [SHIFT] [CHANNEL +/–] TAPE / CD-R / MD DVD / VDP SAT / CABLE...
- Page 108 – – l’affichage l’affichage l’affichage l’affichage RETURN – – – – – Retour – – Retour Retour Retour Réglage original DENON DENON DENON HITACHI HITACHI – – – – – (code (111) (151) (111) (108) (007) (134) préréglé) Remarques –...
-
Page 109: Fonction De Transfert D'informations
FRANCAIS Fonction de transfert [Avant] d’informations “Punch Through” est une fonction permettant d’utiliser 1, 2, 3, 0, 6, 7, 8 et 9 des composants CD, iPod/NETWORK, TAPE/CD-R/MD, DVD/VDP ou VCR en mode SAT/CABLE ou TV. Le réglage par défaut est sur aucun composant. [MODE SELECTOR 1] Réglez sur “VIDEO”. [1], [2], [3], [0], [6], [7], [8], [9] [MODE SELECTOR 2] Réglez sur le composant à enregistrer (SAT/CABLE ou TV). [MEMORY] [RETURN] Appuyez sur en même temps. -
Page 110: Réglages Multi-Zone Avec La Fonction D'affectation
Réglage 1 : Reproduction multi-zone Affectation l’amplificateur • Reproduction 5.1 canaux + Reproduction stéréo ZONE2 • Reproduction 5.1 canaux + Reproduction monoaurale ZONE2 Connexions et fonctionnement multi-zone Zone principale ZONE2 FL SW L’AVR-688 est compatible avec les types de reproduction suivants: • Reproduction multi-zone (ZONE2) Mode affectation de l’amplificateur: • Reproduction bi-amp (enceintes avant) ZONE2 (Défaut) 5.1canaux REMARQUE Stéréo • En cas de reproduction bi-amp, utilisez des enceintes compatibles avec ce type de connexion. • Lorsque vous réalisez une reproduction bi-amp, ôtez les tableaux (ou fils) de court-circuit des bornes d’enceintes. -
Page 111: Réglages Multi-Zone Et Fonctionnement Avec La
Bi-amp Zone principale (Système 7.1 canaux) ZONE2 Mode affectation de l’amplificateur: 5.1 Moniteur Amplificateur de canaux Front A Bi-Amp pré-main FL/FR Front B Bi-Amp AVR-688 Lecteur DVD n Réglage du mode affectation de l’amplificateur et enceintes connectées aux Sortie audio Entrée différentes bornes d’enceintes ZONE2 Borne d’enceinte SURROUND BACK / FRONT-A FRONT-B SURROUND... -
Page 112: Fonctionnement Multi-Zone
FRANCAIS Fonctionnement multi-zone SOURCE SELECT VOLUME Coupure temporaire du son Mettez [MODE SELECTOR 1] sur “AUDIO” et [MODE SELECTOR 2] sur Mise en marche et extinction “ZONE2” . Appuyez sur [MUTING]. GFonctionnement à partir de l’appareilH Pour annuler, réglez le volume ou appuyez à nouveau sur [MUTING]. Appuyez sur <ZONE2 ON/OFF> pour sélectionner la zone. Le réglage est annulé lorsque la zone est éteinte. GFonctionnement à partir de la télécommandeH Mettez [MODE SELECTOR 1] sur “AUDIO” et [MODE SELECTOR 2] sur La source sélectionnée pour la ZONE2 est également émise à partir “ZONE2”... -
Page 113: Autres Informations
FRANCAIS Nombre d’enceintes surround arrière w Réglage pour regarder essentiellement des films en utilisant des enceintes de diffusion pour les enceintes surround Nous vous recommandons d’utiliser 2 enceintes. Pour une impression d’enveloppement plus importante du son Autres informations Lorsque vous utilisez des enceintes dipolaires, veillez à utiliser 2 surround, des enceintes à radiation diffuse, par exemple de type enceintes. - Page 114 Surround b Sources enregistrées en Dolby Surround Les sources enregistrées en Dolby Surround sont signalées par les DTS NEO:6™ Surround L’AVR-688 est équipé d’un circuit de traitement des signaux logos suivants. numériques qui vous permet de lire des sources de programme en DTS-NEO:6™ est une technologie de décodage de matrice permettant Logo de support Dolby Surround: mode surround pour obtenir la même impression de présence que d’obtenir une reproduction surround 6.1 canaux avec les sources 2...
- Page 115 FRANCAIS ® Neural Surround Audyssey MultEQ HDMI (High-Definition Multimedia Interface) Audyssey MultEQ ® est la première technologie permettant de Neural Surround™, une révolution dans la technologie audio, offre l’accès au plaisir de la musique surround à une plus grande partie mesurer correctement les données de son dans une zone d’écoute.
- Page 116 FRANCAIS Modes surround et paramètres Signaux et réglages dans les différents modes Sortie de canaux Paramètre (valeurs par défaut indiquées entre parenthèses) Mode surround Surround D. COMP EFFECT Avant G/D Centrale Surround G/D Subwoofer SB CH OUT CINEMA EQ. MODE ROOM SIZE DELAY TIME Subwoofer arrière G/D LEVEL DIRECT S (OFF) S (0 dB) STEREO S (OFF) S (0 dB) EXT. IN DOLBY PRO LOGIC gx S (OFF) S (REMARQUE1) S (CINEMA) DOLBY PRO LOGIC g S (OFF) S (REMARQUE2) S (CINEMA) DTS NEO:6 S (OFF) S (REMARQUE1) S (CINEMA) DOLBY DIGITAL...
- Page 117 FRANCAIS Signaux et réglages dans les différents modes Paramètre (valeurs par défaut indiquées entre parenthèses) Mode NEO:6 EXT. IN Mode surround MUSIC Mode PRO LOGIC g/gx MUSIC uniquement uniquement uniquement Tone Control Night Mode Room EQ RESTORER CENTER CENTER SUBWOOFER PANORAMA DIMENSION WIDTH IMAGE ATT. DIRECT S (OFF) S (REMARQUE4) STEREO S (0 dB) S (OFF) S (OFF) EXT. IN DOLBY PRO LOGIC gx S (OFF) S (3) S (3) S (0 dB) S (OFF) S (OFF) DOLBY PRO LOGIC g S (OFF) S (3) S (3) S (0 dB) S (OFF)
- Page 118 FRANCAIS Différences dans les noms de mode surround en fonction des signaux d’entrée Signal d’entrée Touche DOLBY DIGITAL DVD-AUDIO Remarque LINEAR DTS ES DTS ES DOLBY DOLBY DOLBY DOLBY DOLBY Mode surround ANALOG DTS DVD-Audio DVD-Audio DSCRT MTRX DTS 96/24 DIGITAL EX DIGITAL EX DIGITAL DIGITAL DIGITAL (5.1canaux) (multicanal) (2canaux) (avec drapeau)
- Page 119 FRANCAIS Touche Signal d’entrée DOLBY DIGITAL DVD-AUDIO Remarque LINEAR DTS ES DTS ES DOLBY DOLBY DOLBY DOLBY DOLBY Mode surround ANALOG DTS DVD-Audio DVD-Audio DSCRT MTRX DTS 96/24 DIGITAL EX DIGITAL EX DIGITAL DIGITAL DIGITAL (5.1canaux) (multicanal) (2canaux) (avec drapeau) (avec drapeau) (avec drapeau) (sans drapeau) (5.1/5/4canaux) (4/3canaux) (2canaux) DIRECT DIRECT DSP SIMULATION 5CH / 7CH STEREO ROCK ARENA JAZZ CLUB...
-
Page 120: Dépistage Des Pannes
Dans ce cas, débranchez immédiatement le cordon d’alimentation et contactez votre revendeur. utilisées. • L ’appareil est endommagé. • Eteignez l’appareil et contactez – GGénéralH un centre technique DENON. Symptôme Cause Mesure Page L ’appareil • Défaut de connexion du cordon • Vérifier que la fiche du cordon se met pas en d’alimentation. - Page 121 • Le lecteur DVD n’est pas • Utilisez un lecteur compatible – compatible avec la reproduction DTS. du son DTS. • Le paramètre AVR-688’s “Input • Activez le mode “Auto” ou Mode” est réglé sur des options “DTS” . différentes de “DTS” . Les signaux audio • Le signal audio arrivant sur HDMI ne sont l’entrée HDMI ne peut pas être pas émis par les...
- Page 122 FRANCAIS GiPodH Symptôme Cause Mesure Page Impossible de lire • La source d’entrée attribuée à • Sélectionnez la source d’entrée l’iPod. dock de contrôle pour iPod n’a attribuée à dock de contrôle pour pas été sélectionnée. iPod. • Le câble n’est pas correctement • Reconnectez. connecté. • Le dock de contrôle pour iPod • Branchez le dock de contrôle –...
-
Page 123: Spécifications
FRANCAIS Spécifications Section audio Section tuner [FM] [AM] (remarque: µV à 75 Ω/ohms, 0 dBf = 1 x 10 • Amplificateur de puissance Puissance nominale: Avant (A, B) Plage de réception: 87 ,5 MHz ~ 107 ,9 MHz 520 kHz ~ 1710 kHz 75 W + 75 W (8 Ω/ohms, 20 Hz ~ 20 kHz avec 0,08 % T.H.D.) Sensibilité utile: 1,0 µV (11,2 dBf) 18 µV 110 W + 110 W (6 Ω/ohms, 1 kHz avec 0,7 % T.H.D.) Sensibilité seuil 50 dB: MONO 1,6 µV (15,3 dBf) Centrale: STEREO 23 µV (38,5 dBf) ... - Page 124 024, 049 Cybernex Daytron 003, 049 Aiwa 004, 005, 006, 018, 026, 029, 087, 092 025, 055, 059, 074, 089, 093, Denon 014, [111] Dimensia 045, 061, 062, 085 Daewoo 013, 017, 020, 041, 059, 089, 095, 096 Toshiba Nikko...
- Page 125 Viking 032, 122 factory. 002, 009, 017, 036, 037, 071, Panasonic General Instruments 039, 040, 041 Denon [151]*, 112 *[ ] : Les codes préréglés diffèrent en fonctiom 141, 143, 147 005, 045, 066, 078, 085, 088, des livraison de l’usine.
- Page 128 Denon Brand Company, D&M Holdings Inc. Printed in China 00D 511 4637 102...