Lenovo 43R2019 - ThinkPad 320 GB External Hard Drive User Manual
Usb portable secure hard drive
Hide thumbs
Also See for 43R2019 - ThinkPad 320 GB External Hard Drive:
- Features and benefits (1 page) ,
- Information manual (6 pages)
Table of Contents
Advertisement
Available languages
Available languages
Advertisement
Table of Contents

Related Manuals for Lenovo 43R2019 - ThinkPad 320 GB External Hard Drive


Summary of Contents for Lenovo 43R2019 - ThinkPad 320 GB External Hard Drive
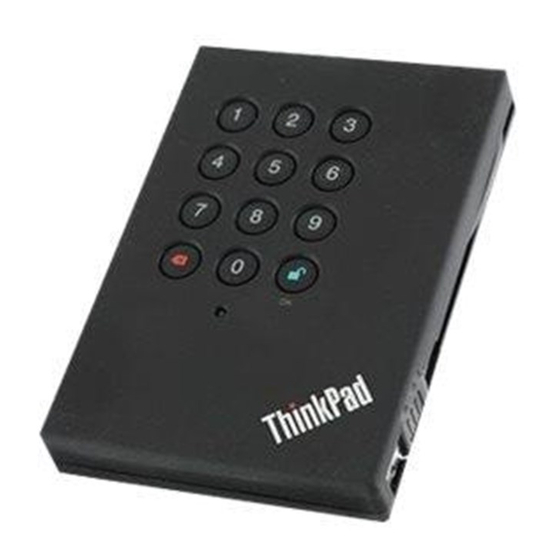
- Page 1 ThinkPad USB Portable Secure Hard Drive User Guide...
- Page 2 Note Before installing the product, be sure to read the information in Lenovo Limited Warranty on page B-1 and Before you begin the installation on page 3. First Edition (November 2008) © Copyright Lenovo 2008. All rights reserved. LENOVO products, data, computer software, and services have been developed exclusively at private expense and are sold to governmental entities as commercial items as defined by 48 C.F.R.
-
Page 3: Table Of Contents
Registering your option . . A-1 Online technical support . A-1 Telephone technical support . . A-1 Appendix B. Lenovo Limited Warranty . . B-1 Warranty Information . B-5 Suplemento de Garantía para México . . B-7 Appendix C. Notices . - Page 4 Federal Communications Commission (FCC) Declaration of Conformity Appendix E. Important information for the European Directive 2002/96/EC . . E-1 Appendix F. China RoHS . . F-1 ThinkPad USB Portable Secure Hard Drive User Guide...
-
Page 5: About The Thinkpad Usb Portable Secure Hard Drive
User Mode (In this mode, the Secure Hard Drive is unlocked.) v Admin Mode (In this mode, the Secure Hard Drive is locked.) Note: Passwords are required for the Admin Mode and User Mode. Accordingly, they are called Admin Password and User Password. © Copyright Lenovo 2008... -
Page 6: Secure Hard Drive Button Panel
Secure Hard Drive button panel The Secure Hard Drive button panel is shown as follows: button button 3 Indicator light button can be used to: v Cancel current operation v Return to the previous step when you knowingly entered a wrong password v Exit the Admin Mode button can be used to access the Secure Hard Drive and it can also be used as an OK acknowledgement in the following operations:... -
Page 7: Installing The Secure Hard Drive
Installing the Secure Hard Drive This chapter provides information about installing the Secure Hard Drive. Before you begin the installation Be sure to review the following information before you begin to install and use the Secure Hard Drive. Attention: Use only the cables that come with this option. You might damage the drive if you use a cable not included with the option package. - Page 8 2. Depending on the distance between the Secure Hard Drive and your computer, attach either the primary USB data cable or the USB data extension cable to an available USB port. The indicator light turns red, as shown: ThinkPad USB Portable Secure Hard Drive User Guide...
-
Page 9: Using The Secure Hard Drive
Using the Secure Hard Drive This chapter provides information about using the Secure Hard Drive. Entering and exiting the Standby Mode, Admin Mode, and User Mode This section provides information about how to enter and exit the Standby Mode, Admin Mode, and User Mode of your Secure Hard Drive. Entering the Standby Mode The Standby Mode is the default working mode of the Secure Hard Drive and is the gateway to other working modes. -
Page 10: Exiting The Admin Mode
Note: If the indicator light flashes red for a few seconds, indicating the Secure Hard Drive has returned to the Standby Mode, go back to Step 2. This is due to one of the following conditions: v You entered an incorrect Admin Password in Step 3. v No activity was detected within two minutes in the Admin Mode. -
Page 11: Adding A New User Password
4. Re-enter the new Admin Password and press . The indicator light stays solid green for three seconds and the Admin Password is changed successfully. Notes: a. If the indicator light flashes red intermittently and then blue intermittently, go back to step 3. This is due to one of the following conditions: v You waited longer than 10 seconds before entering a password. -
Page 12: Deleting The User Passwords
Deleting the User Passwords You can delete all User Passwords by doing the following: 1. Enter the Admin Mode. 2. Press and hold 7 + 8 + for five seconds until the indicator light flashes blue intermittently. After the indicator light flashes green three times and then blue intermittently. -
Page 13: Completely Resetting The Secure Hard Drive
Completely resetting the Secure Hard Drive If you forget all the User Passwords or Admin Passwords, you can perform a complete reset to remove all the User Passwords, and restore the Admin Password to the default 123456. Attention: Completely resetting the Secure Hard Drive will erase all the data on the drive. -
Page 14: Using The Thinkvantage Rescue And Recovery Program With The Secure Hard Drive
7. Right-click in the blank area under the Unallocated section, and then select New Partition. The Welcome to the New Partition Wizard window opens. 8. Click Next. 9. Select Primary partition and click Next. 10. If you need only one partition, accept the default partition size and click Next. -
Page 15: Hibernating, Suspending, Or Logging Off From The Operating System
Note: For more information about the Rescue and Recovery program, go to http://www.lenovo.com Hibernating, Suspending, or Logging off from the operating system Be sure to save and close all the files on your Secure Hard Drive before hibernating, suspending, or logging off from the Windows operating system. It is recommended that you log off the Secure Hard Drive manually before hibernating, suspending, or logging off from your system. -
Page 16: Troubleshooting
Troubleshooting This section contains troubleshooting information for the Secure Hard Drive. If you encounter any of the following problems when using the Secure Hard Drive, refer to the corresponding answers. Q: How do I use the Secure Hard Drive the first time? A: You can use it in one of the following ways: v Enter the Admin Mode with 123456 (default administrator password), and then you are able to change the Admin Password or create a User Password... - Page 17 Q: What encryption algorithm is used in this product? A: AES 128 bits algorithm. Q: Why could I not change my User Password which has the same digits as the Admin password? A: You can change it only in the Admin Mode. In the User Mode, the User Password which has the same digits is created in the Admin Mode cannot be changed or deleted Q: Why could I not create recovery media using the ThinkVantage Rescue and...
-
Page 18: Description Du Produit
ThinkPad USB Portable Secure Hard Drive - Présentation Le présent document fournit des informations sur l’unité de disque dur ThinkPad USB Portable Secure Hard Drive. Les annexes contiennent les informations relatives à la garantie ainsi que des mentions légales. Remarque : Avant d’installer et d’utiliser l’option, veuillez prendre connaissance des informations figurant à... - Page 19 Boutons et voyant de l’unité de disque dur sécurisée L’unité comporte les boutons et voyant suivants : 1 Bouton 2 Bouton 3 Voyant Le bouton peut être utilisé pour : v Annuler l’opération en cours v Revenir à l’étape précédente lorsque vous avez entré un mot de passe erroné v Quitter le mode Administrateur Le bouton peut être utilisé...
- Page 20 Installation de l’unité de disque dur sécurisée Le présent chapitre fournit des informations sur l’installation de l’unité de disque dur sécurisée. Avant de démarrer l’installation Veuillez lire attentivement les informations suivantes avant d’installer et d’utiliser l’unité de disque dur sécurisée. Avertissement : Utilisez uniquement les câbles fournis avec cette option.
- Page 21 2. En fonction de la distance séparant l’unité de disque dur sécurisée de l’ordinateur, branchez le câble de transmission de données USB principal ou la rallonge à un port USB disponible. Le voyant de l’unité devient rouge, comme illustré ci-dessous. Installation de l’unité...
- Page 22 Utilisation de l’unité de disque dur sécurisée Le présent chapitre fournit des informations sur l’utilisation de l’unité de disque dur sécurisée. Utilisation des modes Veille, Administrateur et Utilisateur La présente section fournit des informations sur le passage en mode Veille, Administrateur et Utilisateur et sur la façon de quitter ces modes.
- Page 23 Remarque : Si le voyant clignote en rouge pendant quelques secondes, cela signifie que l’unité est repassée en mode Veille. Reprenez la procédure à l’étape 2. Cela signifie que l’une des situations suivantes s’est produite : v Vous avez saisi un mot de passe administrateur incorrect à l’étape 3.
- Page 24 Remarque : Si le voyant clignote trois fois en rouge, cela signifie que le mot de passe comporte moins de 6 caractères ou plus de 16 caractères. Entrez un mot de passe comprenant entre 6 et 16 caractères lorsque le voyant clignote par intermittence en bleu. 4.
- Page 25 2. En fonction de la distance séparant l’unité de disque dur sécurisée de l’ordinateur, branchez le câble de transmission de données USB principal ou la rallonge à un port USB disponible. Le voyant de l’unité devient rouge, comme illustré ci-dessous. Utilisation de l’unité...
- Page 26 Remarque : Si le voyant clignote par intermittence trois fois en rouge puis en bleu, reprenez la procédure à l’étape 4. Cela signifie que l’une des situations suivantes s’est produite : v Vous avez attendu plus de 10 secondes avant d’entrer un mot de passe.
- Page 27 5. Dans la fenêtre Gestion de l’ordinateur, cliquez sur Gestion des disques. Dans la fenêtre qui s’affiche, l’unité de disque dur sécurisée est reconnue en tant que périphérique inconnu non initialisé et non alloué. 6. Procédez de l’une des manières suivantes pour que l’unité soit reconnue en tant qu’unité...
- Page 28 L’ordinateur redémarrera à partir de l’espace de travail Rescue and Recovery et à partir de l’unité de disque dur sécurisée. Remarque : Pour plus d’informations sur le programme Rescue and Recovery, accédez au site suivant : http://www.lenovo.com Mise en hibernation, en suspens ou arrêt du système d’exploitation Sauvegardez et fermez tous les fichiers sur l’unité...
- Page 29 Identification et résolution des incidents Le présent chapitre contient des informations relatives à l’identification et à la résolution des incidents liés à l’unité de disque dur sécurisée. Si l’un des incidents ci-après se produit lorsque vous utilisez l’unité, reportez-vous à la solution préconisée.
- Page 30 Question : Comment utiliser l’unité sans mot de passe ? Réponse : L’unité étant un produit de chiffrement complet du disque, elle ne peut pas être utilisée sans mot de passe. Question : Quel est l’algorithme de chiffrement utilisé pour ce produit ? Réponse : L’algorithme AES 128 bits.
- Page 31 Question : Pourquoi le système ne peut-il pas être initialisé à partir de l’unité lorsqu’il est connecté à une station d’accueil ? Réponse : La station d’accueil met hors tension le port USB au cours d’un démarrage à chaud ; l’unité ne peut pas se déverrouiller dans le délai imparti. Vous pouvez facilement contourner ce problème en connectant l’unité...
- Page 32 Informazioni sull’unità disco fisso sicura USB ThinkPad Questo manuale fornisce informazioni sull’unità disco fisso sicura portatile ® USB ThinkPad Le appendici di questo manuale contengono informazioni sulla garanzia e sui marchi. Nota: prima di installare e utilizzare l’opzione, leggere attentamente Informazioni preliminari all’installazione a pag.
- Page 33 Pannello di pulsanti dell’unità disco fisso sicura Il pannello di pulsanti dell’unità disco fisso sicura è il seguente: Pulsante Pulsante 3 Indicatore luminoso Il pulsante può essere utilizzato per: v Annullare l’operazione corrente v Tornare alla fase precedente nel caso in cui sia stata immessa una password errata v Uscire dalla modalità...
- Page 34 Installazione dell’unità disco fisso sicura Questo capitolo fornisce informazioni sull’installazione dell’unità disco fisso sicura. Prima di iniziare l’installazione Accertarsi di consultare le seguenti informazioni prima di installare e utilizzare l’unità disco fisso sicura. Attenzione: utilizzare solo i cavi forniti con questa opzione. L’utilizzo di cavi diversi da quelli forniti in questo pacchetto di opzioni, potrebbe danneggiare l’unità.
- Page 35 2. In base alla distanza tra l’unità disco fisso sicura e il computer, collegare il cavo dei dati USB primario o il cavo di estensione dei dati USB ad una porta USB disponibile. L’indicatore luminoso si accende di colore rosso, come mostrato: Installazione dell’unità...
- Page 36 Utilizzo dell’unità disco fisso sicura Questo capitolo fornisce informazioni sull’utilizzo dell’unità disco fisso sicura. Attivazione e disattivazione della modalità Standby, Amministratore e Utente Questa sezione fornisce informazioni sulla procedura di attivazione e disattivazione delle modalità Standby, Amministratore e Utente della propria unità...
- Page 37 Nota: se l’indicatore luminoso lampeggia di colore rosso per alcuni secondi, ad indicare che l’unità disco fisso sicura è tornata alla modalità Standby, tornare al passo 2. Ciò è causato da una delle seguenti condizioni: v È stata immessa una password amministratore non corretta nel passo v Non è...
- Page 38 Remarque : Si le voyant clignote trois fois en rouge, cela signifie que le mot de passe comporte moins de 6 caractères ou plus de 16 caractères. Entrez un mot de passe comprenant entre 6 et 16 caractères lorsque le voyant clignote par intermittence en bleu. 4.
- Page 39 Note: 1. L’unità disco fisso sicura consente di impostare fino a 10 password utente nella modalità Amministratore. Quando l’indicatore luminoso lampeggia per tre volte di colore rosso e ritorna poi ad un blu fisso, ciò indica che è stato raggiunto il limite e che non è possibile aggiungere ulteriori password utente.
- Page 40 5. Immettere ancora una volta la nuova password e premere . Quando l’indicatore luminoso rimane fisso di color verde, la password utente è stata modificata correttamente. Nota: se l’indicatore luminoso lampeggia per tre volte di color rosso e poi a intermittenza di color blu, tornare al passo 4. Ciò è dovuto ad una delle seguenti condizioni: v Sono passati più...
- Page 41 3. Attendere finché il sistema operativo non avrà installato tutti i driver di periferica USB per l’unità disco fisso sicura. 4. Fare clic con il tasto destro del mouse su Risorse del computer e quindi su Gestione dal desktop Windows. 5.
- Page 42 Rescue and Recovery sull’unità disco fisso sicura. Nota: per ulteriori informazioni sul programma Rescue and Recovery, accedere all’indirizzo http://www.lenovo.com Sospensione o scollegamento dal sistema operativo Accertarsi di avere salvato e chiuso tutti i file sulla propria unità disco fisso sicura prima di eseguire una sospensione o uno scollegamento dal sistema operativo Windows.
-
Page 43: Risoluzione Dei Problemi
Risoluzione dei problemi Questa sezione fornisce informazioni sulla risoluzione dei problemi relativi all’unità disco fisso sicura. Se si incontrano uno o più dei seguenti problemi durante l’utilizzo dell’unità disco fisso sicura, fare riferimento alle risposte corrispondenti. D: come utilizzare l’unità disco fisso sicura per la prima volta? R: è... - Page 44 R: No, questa è una limitazione di Windows. Per inizializzare e formattare l’unità disco fisso sicura, è necessario utilizzare l’account di amministratore. D: come utilizzare l’unità disco fisso sicura senza una password? R: in qualità di prodotto di codifica disco completo, l’unità disco fisso sicura non può...
- Page 45 3. Premere Ctrl + Alt + Canc per consentire all’unità disco fisso sicura di rimanere nella modalità Utente durante il processo di reimpostazione ed eseguire un avvio dall’unità. D: perché non è stato possibile avviare il sistema dall’unità disco fisso sicura quando è...
- Page 46 Informationen zum ThinkPad USB Portable Secure Hard Drive ® Dieses Handbuch enthält Informationen zum ThinkPad USB Portable Secure Hard Drive. Die Anhänge dieses Handbuchs enthalten Garantieinformationen und rechtli- che Hinweise. Anmerkung: Bevor Sie die Zusatzeinrichtung installieren und verwenden, soll- ten Sie den Abschnitt ″Vorbereitung der Installation″ auf Seite 44 lesen. Im Lieferumfang dieser Zusatzeinrichtung sind folgende Komponenten enthal- ten: v ThinkPad USB Portable Secure Hard Drive mit einem primären USB-Daten-...
- Page 47 Tastenfeld des Sicherheitsfestplattenlaufwerks In der folgenden Abbilddung ist das Tastenfeld des Sicherheitsfestplatten- laufwerks dargestellt: 1 Taste 2 Taste 3 Leuchtanzeige Die Taste kann für folgende Aufgaben verwendet werden: v Laufenden Prozess abbrechen v Zum vorherigen Schritt zurückkehren, wenn ein falsches Kennwort eingege- ben (und vom Benutzer bemerkt wurde) v Administratormodus verlassen Die Taste...
- Page 48 Sicherheitsfestplattenlaufwerk installieren Dieses Kapitel enthält Informationen zur Installation des Sicherheitsfestplatten- laufwerks. Vorbereitung der Installation Lesen Sie die folgenden Informationen, bevor Sie das Sicherheits- festplattenlaufwerk installieren und verwenden. Achtung: Verwenden Sie nur die im Lieferumfang der Zusatzeinrichtung ent- haltenen Kabel. Wenn Sie ein Kabel verwenden, das nicht im Lieferumfang der Zusatzeinrichtung enthalten war, könnte das Laufwerk beschädigt werden.
- Page 49 Sicherheitsfestplattenlaufwerk installieren Gehen Sie wie folgt vor, um das Sicherheitsfestplattenlaufwerk zu installieren: 1. Schließen Sie das eine Ende des Zusatznetzkabels an das Sicherheits- festplattenlaufwerk und das andere Ende des Kabels an einen verfügbaren USB-Anschluss an Ihrem Computer an, wie in der folgenden Abbildung dargestellt: 2.
- Page 50 Sicherheitsfestplattenlaufwerk verwenden Dieses Kapitel enthält Informationen zur Verwendung des Sicherheits- festplattenlaufwerks. Bereitschaftsmodus, Administratormodus und Benutzer- modus aktivieren und verlassen Dieser Abschnitt enthält Informationen dazu, wie Sie den Bereitschafts-, den Administrator- und den Benutzermodus des Sicherheitsfestplattenlaufwerks aktivieren und wieder verlassen können. Bereitschaftsmodus aktivieren Der Bereitschaftsmodus ist der Standardbetriebsmodus des Sicherheitsfest- plattenlaufwerks;...
- Page 51 3. Geben Sie das Administratorkennwort ein, und drücken Sie die Taste Das Standardadministratorkennwort lautet ″123456″. Wenn die Leuchtan- zeige blau leuchtet, befindet sich das Sicherheitsfestplattenlaufwerk im Administratormodus. Anmerkung: Wenn die Leuchtanzeige einige Sekunden lang rot blinkt, ist das Sicherheitsfestplattenlaufwerk zurück in den Bereitschaftsmodus gewechselt.
- Page 52 2. Drücken Sie die Tastenkombination ″ + 9″, und halten Sie sie gedrückt, bis die Leuchtanzeige blau blinkt. 3. Geben Sie das neue Kennwort ein (Minimum: 6 Ziffern; Maximum: 16 Zif- fern), und drücken Sie die Taste . Die Leuchtanzeige blinkt drei Mal grün.
- Page 53 Anmerkung: Wenn die Leuchtanzeige zuerst rot und dann blau blinkt, kehren Sie zu Schritt 3 zurück. Diese Situation kann unter fol- genden Bedingungen eintreten: v Sie haben länger als 10 Sekunden mit der Eingabe des Kennworts gewartet. v Das neue Kennwort wurde falsch eingegeben. Anmerkungen: 1.
- Page 54 4. Geben Sie das neue Kennwort ein (Minimum: 6 Ziffern; Maximum: 16 Zif- fern), und drücken Sie die Taste . Die Leuchtanzeige blinkt drei Mal grün und danach blau. Anmerkung: Wenn die Leuchtanzeige drei Mal rot blinkt, besteht das Kennwort aus weniger als 6 Ziffern oder mehr als 16 Ziffern. Geben Sie unmittelbar nachdem die Leuchtanzeige blau zu blinken begonnen hat, ein Kennwort ein, dass aus 6 –...
- Page 55 Sicherheitsfestplattenlaufwerk nach dem vollständigen Zurücksetzen initialisieren und formatieren Durch das vollständige Zurücksetzen des Sicherheitsfestplattenlaufwerks wer- den alle Daten und alle Partitionseinstellungen auf dem Laufwerk gelöscht. Sie müssen das Sicherheitsfestplattenlaufwerk initialisieren und formatieren, bevor Sie es verwenden können. Gehen Sie wie folgt vor, um das Sicherheits- festplattenlaufwerk zu initialisieren: 1.
- Page 56 Bootliste aus. Ihr Computer wird vom Arbeitsbereich von Rescue and Recovery aus gestartet, der sich auf dem Sicherheits- festplattenlaufwerk befindet. Anmerkung: Weitere Informationen zum Programm ″Rescue and Recovery″ finden Sie unter der Adresse http://www.lenovo.com. ThinkPad USB Portable Secure Hard Drive User Guide...
- Page 57 Computer in den Hibernationsmodus oder den Modus ″Betrieb aussetzen″ versetzen oder vom Betriebssystem abmelden Stellen Sie sicher, dass alle Dateien auf dem Sicherheitsfestplattenlaufwerk gespeichert und geschlossen wurden, bevor Sie in den Hibernationsmodus oder in den Modus ″Betrieb ausssetzen″ wechseln oder sich vom Windows- Betriebssystem abmelden.
- Page 58 Fehlerbehebung Dieser Abschnitt enthält Fehlerbehebungsinformationen für das Sicherheits- festplattenlaufwerk. Wenn einer der im Folgenden beschriebenen Fehler bei der Verwendung des Sicherheitsfestplattenlaufwerks auftritt, führen Sie die in der jeweiligen Antwort vorgeschlagenen Fehlerbehebungsmaßnahmen durch. Frage: Wie soll ich vorgehen, wenn ich das Sicherheitsfestplattenlaufwerk zum ersten Mal verwende? Antwort: Sie können das Laufwerk wie folgt verwenden: v Aktivieren Sie den Administratormodus durch Eingabe von ″123456″...
- Page 59 Frage: Kann ich das Sicherheitsfestplattenlaufwerk mit einem Windows- Benutzerkonto initialisieren und formatieren? Antwort: Nein, das ist nicht möglich. Dabei handelt es sich um eine Einschrän- kung unter Windows. Sie können das Sicherheitsfestplattenlaufwerk nur mit einem Windows-Administratorkonto initialisieren und formatieren. Frage: Wie kann ich das Sicherheitsfestplattenlaufwerk ohne Kennwort verwen- den? Antwort: Da es sich bei dem Sicherheitsfestplattenlaufwerk um ein Produkt mit vollständiger Festplattenverschlüsselung handelt, kann es nur mit einem...
- Page 60 Antwort: Das Sicherheitsfestplattenlaufwerk ist eine Einheit mit einer vollstän- digen Festplattenverschlüsselung, die erst einige Sekunden nach der Eingabe des richtigen Benutzerkennworts entsperrt wird. 1. Drücken Sie die Taste F1 oder die Taste F12, um den Bootprozess anzuhal- ten, da das Sicherheitsfestplattenlaufwerk erst nach einigen Sekunden ent- sperrt wird.
- Page 61 Acerca de ThinkPad USB Portable Secure Hard Drive ® Este manual proporciona información acerca de ThinkPad USB Portable Secure Hard Drive. Los apéndices de esta publicación contienen información sobre garantías y avisos legales. Nota: Antes de instalar y utilizar esta opción, asegúrese de leer Antes de empezar la instalación en la página 59.
- Page 62 Panel del botón de la unidad de disco duro segura El panel del botón de la unidad de disco duro segura se muestra de la manera siguiente: botón botón 3 luz del indicador botón se puede utilizar para: v Cancelar la operación actual v Volver al paso anterior cuando especifique una contraseña incorrecta deliberadamente v Salir de la modalidad de administrador...
- Page 63 Instalación de la unidad de disco duro segura En este capítulo se proporciona información acerca de la instalación de la unidad de disco duro segura. Antes de empezar la instalación No olvide revisar la información siguiente antes de empezar a instalar y a utilizar la unidad de disco duro segura.
- Page 64 2. En función de la distancia entre la unidad de disco duro segura y el sistema, conecte el cable de datos USB principal o el cable de extensión de datos USB a un puerto USB disponible. La luz del indicador se vuelve roja, como se muestra: ThinkPad USB Portable Secure Hard Drive User Guide...
- Page 65 Utilización de la unidad de disco duro segura En este capítulo se proporciona información acerca de la utilización de la unidad de disco duro segura. Cómo entrar y salir de las modalidades en espera, administrador y usuario Esta sección proporciona información acerca de cómo entrar y salir de las modalidades de espera, administrador y usuario de la unidad de disco duro segura.
- Page 66 3. Entre a la modalidad de administrador y pulse . El código de administrador predeterminado es 123456. La unidad de disco duro segura está en modalidad de administrador cuando la luz del indicador cambie a azul. Nota: Si la luz del indicador parpadea en rojo durante unos segundos, que indica que la unidad de disco duro segura ha vuelto a la modalidad de espera, retroceda al paso 2.
- Page 67 2. Puse y mantenga pulsado + 9 hasta que la luz del indicador parpadee en azul. 3. Introduzca la nueva contraseña (debe contener un mínimo de 6 dígitos y un máximo de 16) y pulse . La luz del indicador parpadea en verde tres veces.
- Page 68 v Esperó más de 10 segundos antes de introducir una contraseña. v La contraseña nueva no se introdujo correctamente. Notas: 1. La unidad de disco duro segura le permite disponer de hasta 10 contraseñas de usuario en modalidad de administrador. Cuando la luz del indicador parpadea en rojo tres veces y después vuelve a azul permanente, esto indica que se ha llegado al límite y que no se pueden añadir más contraseñas de usuario.
- Page 69 Nota: Si la luz del indicador parpadea en verde tres veces, indica que la contraseña contiene menos de 6 dígitos o más de 16. Introduzca una contraseña que contenga de 6 a 16 dígitos después de que la luz del indicador parpadee en azul de manera intermitente.
- Page 70 1. Después de un restablecimiento completo, conecte la unidad de disco duro segura al sistema. 2. Introduzca la contraseña predeterminada 123456 y pulse para acceder a la modalidad usuario. 3. Espere hasta que el sistema operativo instale todos los controladores de los dispositivos USB para la unidad de disco duro segura.
- Page 71 El sistema se iniciará desde el espacio de trabajo Rescue and Recovery en la unidad de disco duro segura. Nota: Para obtener más información acerca del programa Rescue and Recovery, vaya a http://www.lenovo.com Cómo Hibernar, Suspender o Cerrar sesión en el sistema operativo Asegúrese de guardar y cerrar todos los archivos de la unidad de disco duro...
- Page 72 Resolución de problemas Esta sección contiene información para la resolución de problemas de la unidad de disco duro segura. Si experimenta cualquier de los problemas siguientes al utilizar la unidad de disco duro segura, consulte las respuestas correspondientes. P: ¿Cómo puedo utilizar la unidad de disco duro segura? R: Puede utilizar la unidad de disco duro segura de una de estas maneras: v Acceda a la modalidad de administrador con el número 123456 (contraseña de administrador predeterminada) y a continuación cambie la contraseña de...
- Page 73 R: No, esta es una limitación de Windows. Debe utilizar la cuenta de administrador para inicializar y formatear la unidad de disco duro segura. P: ¿Cómo utilizo la unidad de disco duro segura sin contraseña? R: Como producto de cifrado de disco completo, la unidad de disco duro segura no se podrá...
- Page 74 3. Pulse Ctrl + Alt + Supr y la unidad de disco duro segura permanecerá en modalidad de usuario durante el proceso de restablecimiento y a continuación podrá arrancar desde el dispositivo. P: ¿Por qué el sistema no puede arrancar desde la unidad de disco duro segura cuando se conecta a un dock? R: Puesto que el dock apagará...
- Page 75 Sobre o ThinkPad USB Portable Secure Hard Drive ® Este manual fornece informações sobre o ThinkPad USB Portable Secure Hard Drive. Os apêndices deste guia contêm informações de garantia e avisos legais. Nota: Antes de instalar e utilizar a opção, certifique-se de ler Antes de iniciar a instalação na página 73.
- Page 76 Painel de Botões da Unidade de Disco Rígido Segura O painel de botões da Unidade de Disco Rígido Segura é mostrado a seguir: Botão 1 Botão 2 Indicador luminoso 3 O botão pode ser utilizado para: v Cancelar a operação atual v Retornar à...
- Page 77 Instalando a Unidade de Disco Rígido Segura Este capítulo fornece informações sobre a instalação da Unidade de Disco Rígido Segura. Antes de Iniciar a Instalação Certifique-se de rever as informações a seguir antes de iniciar a instalação e o uso da Unidade de Disco Rígido Segura. Atenção: Utilize somente os cabos que acompanham esta opção.
- Page 78 2. Dependendo da distância entre a Unidade de Disco Rígido Segura e seu computador, conecte o cabo de dados USB primário ou o cabo de extensão de dados USB a uma porta USB disponível. Os indicadores luminosos acendem na cor vermelha, como mostrado: ThinkPad USB Portable Secure Hard Drive User Guide...
- Page 79 Utilizando a Unidade de Disco Rígido Segura Este capítulo fornece informações sobre a utilização da Unidade de Disco Rígido Segura. Entrando e Saindo dos Modos de Espera, Administração e Usuário Esta seção fornece informações sobre como entrar e sair dos Modos de Espera, Administração e Usuário de sua Unidade de Disco Rígido Segura.
- Page 80 Nota: Se o indicador luminoso piscar na cor vermelha por alguns segundos, indicando que a Unidade de Disco Rígido Segura retornou ao Modo de Espera, vá para a Etapa 2. Isto é devido a uma das seguintes condições: v Você digitou uma Senha de Administração incorreta na Etapa 3. v Nenhuma atividade foi detectada dentro do intervalo de dois minutos no Modo de Administração.
- Page 81 Digite uma senha que contenha de 6 a 16 dígitos após o indicador luminoso piscar intermitentemente na cor azul. 4. Redigite a nova Senha de Administração e pressione . O indicador luminoso fica aceso na cor verde por três segundos e a Senha de Administração é...
- Page 82 piscar três vezes na cor vermelha e, em seguida, voltar a ficar aceso na cor azul, isto indica que o limite foi atingido, e nenhuma Senha de Usuário adicional pode ser incluída. 2. Se nenhuma atividade for detectada dentro do período de dois minutos no Modo de Administração, ela retorna ao Modo de Espera.
- Page 83 Nota: Se o indicador luminoso piscar em vermelho três vezes e, em seguida, em azul intermitentemente, volte para a Etapa 4. Isto é devido a uma das seguintes condições: v Você esperou mais do que 10 segundos antes de digitar uma senha.
- Page 84 4. Clique com o botão direito em Meu Computador e, em seguida, clique em Gerenciar no desktop do Windows. 5. Na janela Gerenciar Computador, clique em Gerenciamento de Disco. Na janela Gerenciamento de Disco, a Unidade de Disco Rígido Segura é reconhecida como um dispositivo desconhecido que não está...
- Page 85 Seu computador inicializará a partir do espaço de trabalho de Rescue and Recovery na Unidade de Disco Rígido Segura. Nota: Para obter informações adicionais sobre o programa Rescue and Recovery, vá para http://www.lenovo.com Hibernando, Suspendendo ou Cancelando Login do Sistema Operacional Certifique-se de salvar e fechar todos os arquivos em sua Unidade de Disco Rígido Segura antes de hibernar, suspender ou efetuar logoff do sistema...
- Page 86 Resolução de Problemas Esta seção contém informações para a Unidade de Disco Rígido Segura. Se você encontrar qualquer um dos seguintes problemas ao utilizar a Unidade de Disco Rígido Segura, consulte as respostas correspondentes. P: Como eu utilizo a Unidade de Disco Rígido Segura pela primeira vez? R: Você...
- Page 87 P: Como utilizo a Unidade de Disco Rígido Segura sem uma senha? R: Como um produto de criptografia completa de disco, a Unidade de Disco Rígido Segura nunca pode ser utilizada sem uma senha. P: Que algoritmo de criptografia é utilizado neste produto? R: Algoritmo AES de 128 bits.
- Page 88 P: Por que o sistema pode não inicializar a partir da Unidade de Disco Rígido Segura quando ela estiver conectada em uma base de acoplamento? R: Como a base de acoplamento interromperá a alimentação da porta USB durante o warm boot, a Unidade de Disco Rígido Segura pode não se desbloquear em um tempo limitado.
- Page 89 Bezpečná přenosná jednotka ThinkPad USB Portable Secure Hard Drive ® Tento příručka obsahuje informace o bezpečné přenosné jednotce ThinkPad Portable Secure Hard Drive. Přílohy této příručky obsahuji informace o záruce a právní informace. Poznámka: Před instalací a použitím jednotky si přečtěte část Než začnete s instalací na stránce 2-1.
- Page 90 Panel tlačítek bezpečného pevného disku Panel tlačítek bezpečného pevného disku vypadá takto: 1 tlačítko 2 tlačítko 3 kontrolka Tlačítko slouží pro: v zrušení aktuální operace v návrat na předchozí krok po zadání nesprávného hesla v ukončení administrátorského režimu Tlačítko slouží pro přístup k bezpečnému pevnému disku a pro potvrzení těchto operací: v zadání...
- Page 91 Instalace bezpečného pevného disku Tato část obsahuje informace o instalaci bezpečného pevného disku. Než začnete s instalací Než začnete s instalací a používáním bezpečného pevného disku přečtěte si tyto pokyny. Upozornění: Používejte pouze kabely dodané s tímto produktem. Použitím jiných kabelů...
- Page 92 2. Podle vzdálenosti mezi bezpečným pevným diskem a počítačem připojte buď primární datový kabel USB nebo prodlužovací datový kabel USB k dostupnému portu USB. Kontrolka se rozsvítí červeně, jak ukazuje obrázek: Uživatelská příručka jednotky ThinkPad USB Portable Secure Hard Drive...
- Page 93 Používání bezpečného pevného disku Tato část obsahuje informace o používání bezpečného pevného disku. Přepnutí do pohotovostního, administrátorského nebo uživatelského režimu a jeho ukončení Tato část obsahuje informace o přepnutí do pohotovostního, administrátorského nebo uživatelského režimu bezpečného pevného disku a ukončení daného režimu. Přepnutí...
- Page 94 v V administrátorském režimu nedošlo po dvě minuty k žádné činnosti. Ukončení administrátorského režimu Administrátorský režim ukončíte stisknutím tlačítka , dokud nezačne kontrolka svítit červeně. To znamená, že došlo k přepnutí do pohotovostního režimu. Přepnutí do uživatelského režimu Do uživatelského režimu přepnete takto: 1.
- Page 95 b. Pokud v administrátorském režimu nedojde po dvě minuty k žádné činnosti, bezpečný pevný disk přejde do pohotovostního režimu. Přidání hesla uživatele Nové heslo uživatele přidáte takto: 1. Přepněte do administrátorského režimu. 2. Podržte tlačítka + 1 stisknutá, dokud kontrolka nezačne modře blikat. 3.
- Page 96 3. Zadejte aktuální heslo uživatele a stiskněte tlačítko . Kontrolka se na tři sekundy rozsvítí zeleně a dále bude blikat modře. Poznámka: Pokud kontrolka bliká červeně, vraťte se na krok 2. Tento stav nastane, pokud došlo k jednomu z těchto případů: v Uběhlo 10 sekund před zadáním hesla.
- Page 97 Inicializace a formátování bezpečného pevného disku po obnově původního stavu Obnova původního stavu odstraní všechna data a rozdělení na diskové oblasti. Bude nutné bezpečný pevný disk inicializovat a formátovat. Bezpečný pevný disk inicializujte takto: 1. Po obnově původního stavu připojte bezpečný pevný disk k počítači. 2.
- Page 98 Počítač se spustí z pracovní plochy Rescue and Recovery na bezpečném pevném disku. Poznámka: Další informace o programu Rescue and Recovery naleznete na webové stránce http://www.lenovo.com Hibernace, pozastavení a odhlášení z operačního systému Předtím než převedete operační systém Windows do režimu hibernace, pozastavíte ho nebo se z něj odhlásíte, uložte a uzavřete všechny soubory na bezpečném pevném disku.
- Page 99 Odstraňování problémů Tato část obsahuje informace o odstraňování problémů s bezpečným pevným diskem. Pokud narazíte na některý z následujících problémů při používání bezpečného pevného disku, postupujte podle příslušných odpovědí. Otázka: Jak poprvé použít bezpečný pevný disk? Odpověď: Lze ho použít jedním z těchto způsobů: v Přepnout do administrátorského režimu pomocí...
- Page 100 Otázka: Jaký šifrovací algoritmus tento produkt využívá? Odpověď: 128bitový algoritmus AES. Otázka: Proč nemohu změnit heslo uživatele, které má stejné číslice jako heslo administrátora? Odpověď: Lze ho změnit pouze v administrátorském režimu. V uživatelském režimu nelze změnit nebo odstranit heslo uživatele, které je stejné jako heslo administrátora. Otázka: Proč...
- Page 101 Informácie o jednotke ThinkPad USB Portable Secure Hard Drive ® Táto príručka poskytuje informácie o jednotke ThinkPad USB Portable Secure Hard Drive. Prílohy tohto sprievodcu obsahujú informácie o zárukách a právne vyhlásenia. Poznámka: Pred inštaláciou a používaním tohto produktu si prečítajte časť Skôr ako začnete s inštaláciou na strane 2-1.
- Page 102 Panel s tlačidlami jednotky Secure Hard Drive Panel s tlačidlami jednotky Secure Hard Drive vyzerá takto: 1 Tlačidlo 2 Tlačidlo 3 Svetelný indikátor Tlačidlo môžete použiť na: v Zrušenie aktuálnej operácie v Návrat na predchádzajúci krok, keď zadáte zlé heslo v Ukončenie režimu administrátora Tlačidlo môžete použiť...
- Page 103 Inštalácia jednotky Secure Hard Drive Táto kapitola poskytuje informácie o inštalácii jednotky Secure Hard Drive. Pred inštaláciou jednotky Pred inštaláciou a používaním jednotky Secure Hard Drive si prečítajte nasledujúce informácie. Upozornenie: Používajte iba káble, ktoré sa dodávajú spolu s produktom. Ak použijete kábel, ktorý...
- Page 104 2. V závislosti od vzdialenosti medzi jednotkou Secure Hard Drive a počítačom pripojte buď primárny dátový USB kábel alebo predlžovací dátový kábel USB k dostupnému portu USB. Svetelný indikátor sa rozsvieti načerveno, ako je zobrazené na tomto obrázku: ThinkPad USB Portable Secure Hard Drive User Guide...
- Page 105 Používanie jednotky Secure Hard Drive Táto kapitola poskytuje informácie o používaní jednotky Secure Hard Drive. Použitie a ukončenie pohotovostného režimu, režimu administrátora a režimu užívateľa Táto časť poskytuje informácie o používaní a ukončení pohotovostného režimu, režimu administrátora a režimu užívateľa vašej jednotky Secure Hard Drive. Použitie pohotovostného režimu Pohotovostný...
- Page 106 Používanie jednotky Secure Hard Drive Táto kapitola poskytuje informácie o používaní jednotky Secure Hard Drive. Použitie a ukončenie pohotovostného režimu, režimu administrátora a režimu užívateľa Táto časť poskytuje informácie o používaní a ukončení pohotovostného režimu, režimu administrátora a režimu užívateľa vašej jednotky Secure Hard Drive. Použitie pohotovostného režimu Pohotovostný...
- Page 107 Poznámky: a. Ak svetelný indikátor bliká prerušovane na červeno a potom prerušovane na modro, vráťte sa ku kroku 3. Táto situácia môže nastať z nasledujúcich príčin: v Čakali ste dlhšie než 10 sekúnd pred zadaním hesla. v Nové heslo bolo zadané nesprávne. b.
- Page 108 3. Stlačte a držte stlačené tlačidlá 7 + 8 + aspoň 5 sekúnd ešte raz, kým sa svetelný indikátor nerozsvieti na zeleno na tri sekundy a potom zas na modro, čo značí, že heslá užívateľov boli úspešne vymazané. Zmena hesla užívateľa Heslo užívateľa môžete zmeniť...
- Page 109 1. Stlačte a držte stlačené tlačidlo , kým pripojíte jednotku Secure Hard Drive k dostupnému portu USB k vášmu počítaču. Svetelný indikátor bude blikať striedavo na modro a červeno. Poznámka: Keď v tomto kroku nebude v priebehu 30 sekúnd zaznamenaná žiadna aktivita, jednotka Secure Hard Drive prejde do pohotovostného režimu.
- Page 110 Váš počítač sa zavedie z pracovného priestoru Rescue and Recovery na jednotke Secure Hard Drive. Poznámka: Viac informácií o programe Rescue and Recovery nájdete na adrese http://www.lenovo.com Hibernácia, pozastavenie alebo odhlásenie z operačného systému Pred hibernáciou, pozastavením alebo odhlásením z operačného systému Windows uložte a zatvorte všetky súbory na jednotke Secure Hard Drive.
- Page 111 Upozornenie: Aby ste zaistili integritu údajov na jednotke Secure Hard Drive, vždy uzamknite alebo sa odhláste z jednotky Secure Hard Drive, keď: v ste preč od vášho počítača v používate funkciu na prepínanie užívateľov pri zdieľaní počítača s inými užívateľmi Používanie jednotky Secure Hard Drive...
- Page 112 Odstraňovanie problémov Táto kapitola poskytuje informácie o odstraňovaní problémov jednotky Secure Hard Drive. Ak zaznamenáte ktorýkoľvek z nasledujúcich problémov počas používania jednotky Secure Hard Drive, prečítajte si príslušné odpovede. Otázka: Ako môžem použiť jednotku Secure Hard Drive pri prvom pripojení? Odpoveď...
- Page 113 Otázka: Aký šifrovací algoritmus používa táto jednotka? Odpoveď: 128-bitový algoritmus AES. Otázka: Prečo nemôžem zmeniť moje heslo užívateľa, ktoré pozostáva z tých istých číslic ako administračné heslo? Odpoveď: Toto heslo môžete zmeniť len v režime administrátora. V režime užívateľa nie je možné...
- Page 114 Bölüm 1. ThinkPad USB Portable Secure Hard Drive ürünü hakkında ® Bu elkitabında, ThinkPad USB Portable Secure Hard Drive ürününe ilişkin bilgiler sağlanır. Bu elkitabının ekleri garanti bilgilerini ve yasal notları içermektedir. Not: Aksamı takıp kullanmadan önce, sayfa 2-1’deki Takma işlemine başlamadan önce başlıklı...
- Page 115 Odstraňovanie problémov Táto kapitola poskytuje informácie o odstraňovaní problémov jednotky Secure Hard Drive. Ak zaznamenáte ktorýkoľvek z nasledujúcich problémov počas používania jednotky Secure Hard Drive, prečítajte si príslušné odpovede. Otázka: Ako môžem použiť jednotku Secure Hard Drive pri prvom pripojení? Odpoveď...
- Page 116 Bölüm 2. Güvenli Sabit Sürücü’nün takılması Bu bölümde, Güvenli Sabit Sürücü’nün takılmasına ilişkin bilgiler sağlanır. Takma işlemine başlamadan önce Güvenli Sabit Sürücü’yü takmaya ve kullanmaya başlamadan önce aşağıdaki bilgileri gözden geçirdiğinizden emin olun. Uyarı: Yalnızca bu aksamla birlikte gönderilen kabloları kullanın. Aksam paketindekiler dışında bir kablo kullanırsanız sürücü...
- Page 117 2. Güvenli Sabit Sürücü ve bilgisayarınız arasındaki uzaklığa bağlı olarak, birincil USB veri kablosunu ya da USB veri uzatma kablosunu, kullanılabilir bir USB kapısına bağlayın. Gösterge ışığı gösterildiği biçimde kırmızıya döner: ThinkPad USB Portable Secure Hard Drive User Guide challengechallenge...
- Page 118 Bölüm 3. Güvenli Sabit Sürücü’nün kullanılması Bu bölümde, Güvenli Sabit Sürücü’nün kullanılmasına ilişkin bilgiler sağlanır. Bekleme Kipi’ne, Yönetici Kipi’ne ve Kullanıcı Kipi’ne girilmesi ve bu kiplerden çıkılması Bu bölümde Güvenli Sabit Sürücü’nüzün Bekleme Kipi’ne, Yönetici Kipi’ne ve Kullanıcı Kipi’ne nasıl girileceğine ve bu kiplerden nasıl çıkılacağına ilişkin bilgiler sağlanmaktadır.
- Page 119 Yönetici Kipi’nden çıkılması Yönetici Kipi’nden çıkmak için, gösterge ışığı kırmızıya dönünceye kadar Yönetici Kipi’nde düğmesine basın. Bu, Bekleme Kipi’nde olduğunuzu gösterir. Kullanıcı Kipi’ne girilmesi Kullanıcı Kipi’ne girmek için aşağıdaki işlemleri gerçekleştirin: 1. Güvenli Sabit Sürücü’yü bilgisayarınıza bağlayın. Güvenli Sabit Sürücü Bekleme Kipi’ne girer.
- Page 120 Yeni bir Kullanıcı Parolası eklenmesi Aşağıdakileri gerçekleştirerek yeni bir Kullanıcı Parolası ekleyebilirsiniz: 1. Yönetici Kipi’ne girin. 2. Gösterge ışığı aralıksız mavi yanıp sönünceye kadar + 1 tuşlarını basılı tutun. 3. Kullanıcı Parolası (en az 6 haneli ve en çok 16 haneli) girin ve tuşuna basın.
- Page 121 Not: Gösterge ışığı, aralıksız kırmızı yanıp sönerse, 2. adıma geri dönün. Bu durum, aşağıdaki koşullardan kaynaklanır: v Parola girmeden önce 10 saniyeden fazla beklediniz. v Yeni parola, yanlış girildi. 4. Yeni parolayı (en az 6 haneli ve en çok 16 haneli) girin ve tuşuna basın.
- Page 122 Tam sıfırlama işleminden sonra Güvenli Sabit Sürücü’nün başlatılması ve biçimlendirilmesi Güvenli Sabit Sürücü’nün tamamen sıfırlanması, tüm bilgileri ve bölümleme ayarlarını siler. Güvenli Sabit Sürücü’yü başlatmanız ve biçimlendirmeniz gerekir. Güvenli Sabit Sürücü’yü başlatmak için aşağıdaki işlemleri gerçekleştirin: 1. Tam sıfırlama işleminden sonra, Güvenli Sabit Sürücü’yü bilgisayara takın. 2.
- Page 123 Bilgisayarınız, Güvenli Sabit Sürücü üzerindeki Rescue and Recovery çalışma alanından başlatılır. Not: Rescue and Recovery programına ilişkin daha fazla bilgi için http://www.lenovo.com adresine gidin İşletim sisteminin Uyku kipine girmesi, Askıya alınması ya da Oturumun kapatılması Windows işletim sistemi uyku kipine girmeden, askıya alınmadan ya da oturum kapatılmadan önce Güvenli Sabit Sürücü’deki tüm dosyaları...
- Page 124 Uyarı: Güvenli Sabit Sürücü’nün veri bütünlüğünü sağlamak için, aşağıdaki durumlarda, Güvenli Sabit Sürücü’yü kilitlediğinizden ve oturumunu kapattığınızdan emin olun: v Bilgisayarınızdan uzaktaysanız v Bilgisayarı başkalarıyla paylaşırken kullanıcılar arası geçiş işlevini kullanıyorsanız ThinkPad USB Portable Secure Hard Drive User Guide...
- Page 125 Bölüm 4. Sorun Giderme Bu bölümde, Güvenli Sabit Sürücü’ye ilişkin sorun giderme bilgileri yer alır. Güvenli Sabit Sürücü’yü kullanırken aşağıdaki sorunlardan biriyle karşılaşırsanız, karşılık gelen yanıtlara bakın. S: Güvenli Sabit Sürücü’yü ilk defa nasıl kullanırım? Y: Aşağıdaki yollardan biriyle kullanabilirsiniz: v 123456 (varsayılan yönetici parolası) ile Yönetici Kipi’ne girin, sonra Yönetici Parolası’nı...
- Page 126 S: Bu üründe hangi şifreleme algoritması kullanılır? Y: AES 128 bit algoritması. S: Yönetici parolası ile aynı haneye sahip Kullanıcı Parolamı neden değiştiremiyorum? Y: Yalnızca Yönetici Kipi’nde değiştirebilirsiniz. Kullanıcı Kipi’nde, Yönetici Kipi’nde oluşturulanlarla aynı hanelere sahip Kullanıcı Parolası değiştirilemez ya da silinemez S: ThinkVantage Rescue and Recovery yazılımını...
- Page 127 ThinkPad USB Portable Secure Hard Drive B ThinkPad ® USB Portable Secure Hard Drive ThinkPad USB Portable Secure Hard Drive v USB v ThinkPad USB Portable Secure Hard Drive & )B t ThinkPad USB Portable Secure Hard Drive( Q USB 2.0 @OY.
- Page 128 e es j v @OY. @OY. @OY. C OY. v ! v: kb v lv: g C OY. s ThinkPad USB Portable Secure Hard Drive User Guide...
- Page 129 e es j 3! 3!& C JC . JC . @OY. @OY. W JC . Y JC . JC . USB I ?X * AC JC . USB I JC . e es j 3! JC . 1. Y JC . ThinkPad USB Portable Secure Hard Drive User Guide...
- Page 130 GB USB JC . rOY. ThinkPad USB Portable Secure Hard Drive User Guide...
- Page 131 e es j gk kb pe, pe W gk pe C W > kb pe C JC . rOY. @OY. < B bI GB @OY. @OY. pe C < B JC . 1. USB I JC . B kb rOY. ) JC .
- Page 132 pe C JC . JC . kb 2. g ) JC . rOY. pe > Oe~n H|O & ® ® Microsoft Windows JC . rOY. @OY. O# /f @OY. JC . ) JC . 3. u Vk 16 ) JC . * 16 6 –...
- Page 133 3. g Vk 16 ) JC . * 16 6 – 16 JC . 4. u g ) JC . JC . Vk 10 @OY. ^ YB @OY. , kb O# h& @OY. JC . ) JC . 7+8+ u 7+8+ ) JC .
- Page 134 * 16 6 – 16 JC . 5. u ) JC . JC . e es j O w @OY. 123456 OY. G JC . JC . , Secure Hard DriveB ) JC . @OY. D 8H e es j Jb- W OY.
- Page 135 5. D tJC . 6. D YC C JC . 7. g < JC . rOY. g JC . $ Ctrl+Alt+Del YC C JC . JC . D 10. F12 Rescue and Recovery V: Rescue and Recovery B http://www.lenovo.com JC .
- Page 136 n5 <& , kb pe x < , kb Windows OY. C: , kb @OY. Oe~n H|O & Windows JC . JC . ThinkPad USB Portable Secure Hard Drive User Guide...
- Page 137 .& JC . A: Y @OY. v 123456(b JC . v 123456(b JC . Q: g @OY. JC . @OY. @OY. Jb , OY. W YC g @OY. 123456 Q: g YC R < Jb , JC . Q: Windows g B Windows @On? @OY.
- Page 138 A: AES 128 OY. g @OY. Q: ThinkVantage Rescue and Recovery @OY. JC . W NTFS YC C JC . Jb , W GB @OY. JC . Jb , W GB Q: g @OY. < F1 GB F12 JC . rOY.
- Page 139 XZ ThinkPad USB Portable Secure Hard Drive ® USB Portable Secure Hard Drive DE"# >Vaa)XZ ThinkPad >8OD=<?V|,#^E"M(Iyw# ":Z20M9CC!~.0,kqXDAZ 137 3 OD*<20.0# C!~|P|(: v xP USB w}]gBD ThinkPad USB Portable Secure Hard Drive v (zg4_ v USB }])9gB v c/| v ThinkPad USB Portable Secure Hard Drive 205w z7hv ThinkPad USB Portable Secure Hard Drive(KsF*02+2L1)G;naI"...
- Page 140 2+2L4|fe 2+2L4|fegBy>: 3 8>F 4|ICZ: v !{10Yw v Zz*@dkKms\kDivB5XAO;= v Kv0\m==1 4|ICZCJ2+2L,"R9ICwTBYwD7O4|: v dk\k v 7OB\k 8>F(}T>TBU+48>wV;,DYw==: v l+:8C== v 6+:\m== v L+:C'== 8>F99Cd{T>=(48>2+2LDd{4,#>BTsaa)`XDj 8E"# 13 6 ThinkPad USB Portable Secure Hard Drive C'8O...
- Page 141 202+2L >Ba)XZ202+2LDE"# *<20.0 Z*<20M9C2+2L.0,k7#DAKTBE"# /f: ;\9C>!~f=DgB#g{9CG>!~|P|,DgB,G4I \ap5C}/w#>!~IZ^;wg4JdwDivB/x9C#kp+;w g4Jdw,S=C}/w# v *\bp52+2L,k!DYw#ZKd}/wr;9C|1,k+dCZ >!~f=Dc/|Z# v *92+2LT\H(,k7#yPD USB gB1SS}/w,S=FczD USB SZr9C;wg4D USB /_w#kp+ USB gB,S=;(gD USB /_wO# 202+2L *202+2L,kjITB=h: 1. +(zg4_D;K,S=2+2L,;s+m;K,S=FczOD3vI C USB KZ,gBy>: ThinkPad USB Portable Secure Hard Drive...
- Page 142 2. y]2+2LMFcz.dD`k,+ USB w}]_r USB )9}]_,S =ICD USB KZ#8>Fdl,gBy>: 13 8 ThinkPad USB Portable Secure Hard Drive C'8O...
- Page 143 9C2+2L >Ba)XZ9C2+2LDE"# xkMKv08C==1"0\m==1M0C'==1 >?Va)XZgNxkMKv2+2LD08C==1"0\m==1M0C' ==1DE"# xk08C==1 08C==1G2+2LD1!$w==,b2Gd{$w==DkZ# *xk08C==1,k+2+2L,S=Fcz#}/wT/xk08C==1 "R8>Fdl#ZC==B,2+2L;x(#K1,2+2L;\;Yw53 6p,xR;aa);c&\rS\&\#;x,|Jmzxk0\m==1M 0C'==1,"Z|G.dP;# ":*Z0\m==1M0C'==1.dxPP;,zh*WHP;A08C= =1,;sxkz!qD==# xk0\m==1 ":Z0\m==1B,Yw53^(6p2+2L# *xk0\m==1,k4PTB=h: 1. + USB gB,S=FczDIC USB KZ#2+2Lxk08C==1," R8>Fdl# 2. 4B + 0 #V 5 kS,1A8>FA8l+#b8>zITdk0\m\ k1 # 3. dk0\m\k1,;s4 #1!0\m\k1G 123456#18>Fd6 1,2+2Lxk0\m==1 # ":g{8>FZ8kSZA8l+,G48>2+2L5XA08C==1,k *XAZ 2 =#bGITB3Viv}p: v ZZ 3 =PdkKmsD0\m\k1 # v Z0\m==1B,=VSZ4lb=NNn/# Kv0\m==1...
- Page 144 xk0C'==1 *xk0C'==1,k4PTB=h: 1. +2+2L,S=Fcz#b+xk08C==1 # 2. dk0C'\k1r0\m\k1,;s4 #8>F+dLT8>}/wx k0C'==1 #g{8>FA8l+,G4zh*XBdk}7D\k# Kv0C'==1 ® ® *Kv0C'==1,k+w Microsoft @fOD2+>}2~<j, Windows ;sSFczP>}2+2L#+2+2LXB,S=Fcz,"R8>FdIl +#b8>zxk08C==1 # \k\m >?Va)XZZ0\m==1M0C'==1B\m\kDE"# |D0\m\k1 zIT4PTB=h4|D0\m\k1: 1. xk0\m==1 # 2. 4B + 9 1A8>FA86+# 3. dkB\k(nY 6 ;}V,n` 16 ;}V),"4 #8>FA8L+ 3 ":g{8>FA8l+ 3 N,G48>\kYZ 6 ;r_`Z 16 ;}V# Z8>Fd*TA86+s,dk|, 6-16 ;}VD\k# #8>F#VL+ 3 kS,0\m\k1|D...
- Page 145 ":g{8>FA8l+ 3 N,G48>\kYZ 6 ;r_`Z 16 ;}V# Z8>Fd*TA86+s,dk|, 6-16 ;}VD\k# 4. XBdkBD0C'\k1,;s4 #g{8>F#VL+ 3 kS,G4 0C'\k1|DI&# ":g{8>Fd*TA8l+,;sd*TA86+,G45XAZ 3 =# bGITB3Viv}p: v Zdk\k0QH},} 10 kS# v dkK;}7DB\k# ": 1. 2+2L'VzZ0\m==1Bn`hC 10 v0C'\k1 #18>FA8 l+ 3 N,;s5X#V*6+1,b8>=o^F5,;CYmSNN0C '\k1 # 2. g{Z0\m==1B,=VSZ4lb=NNn/,G4+5XA08C= =1 # >}0C'\k1 zIT4PTB=h4>}yP0C'\k1: 1.
- Page 146 5. XBdkB\k,;s4 #18>F#VL+1,b8>0C'\k1|D I&# ":g{8>FA8l+ 3 N,;sd*TA86+,G45XA=h 4#b GITB3Viv}p: v Zdk\k0QH},} 10 kS# v dkK;}7DB\k# j+XC2+2L g{|GyP0C'\k1r0\m\k1,G44Pj+XC4}%yP0C' \k1,"+0\m\k1V4*1!5 123456# /f: j+XC2+2L+A}}/wODyP}]#z+h*{CEL\m& CLr4VxMq=/2+2L# *4P}/wDj+XC,k4PTB=h: 1. Z+2+2L,S=FczDIC USB KZs,4B 4%#8>F+; fA86+Ml+# ":g{ZC=hP 30 kZ4lb=NNn/,G42+2L+5XA08C ==1 # 2. 4B + 2 "#V 10 kS,1A8>Fd*L+ 3 kS#zQI &XC2+2L# Zj+XCs,u</Mq=/2+2L j+XC2+2L+A}yPE"MVxhC#z+h*u</Mq=/2+2...
- Page 147 " : * K b X Z R e s c u e a n d R e c o v e r y L r D | ` E " , k * A h t t p : / / www.lenovo.com...
- Page 148 ]_"}zr"zYw53 Z]_"}zr"z Windows Yw53.0,kqX#f"XU2+2LODyP D~#Z]_"}zr"z530,FvzV$"z2+2L#*"z2+2L, k+w Windows @fOD2+>}2~,SFczP}%2+2L# /f: *7#2+2LPD}]j{T,kZTBivBx(r"z2+2L: v 6kFcz1 v Zkd{K2mFczDivB9CP;C'&\1 14 4 ThinkPad USB Portable Secure Hard Drive C'8O...
- Page 149 JOoO >?V|,XZ2+2LDJOoOE"#g{Z9C2+2L1v=BPNNJ b,kND`&Dbp# Jb:Z;N&gN9C2+2L? bp:zIT(}TB3V==9C: v 9C 123456(1!\m1\k)xk0\m==1,;sIT|D0\m\k1 r4(0C'\k1 v 1S9C 123456(1!0\m\k1)xk02+C'==149C2+2L Jb:|GK0C'\k11&CgNv? bp:9CzD0\m\k1Txk0\m==1,;sZ0\m==1B4(m ;v0C'\k1 # Jb:|G0\m\k11&CgNv? bp:}j+XC2+2Lb,^d{=(Ilw0\m\k1 #Zj+XCs, yP}]+*',"Rz+h*V$u</"VdMq=/2+2L#;s,IT 9C1!0\m\k1123456# Jb:ZRxk0C'==1"j+XCFczs,*NYw53^(6p2+2 bp:zh*V$u</"VdMq=/2+2L#*Kb|`E",kNDZj +XCsu</Mq=/2L# Jb:GqIT9C Windows C'J'4u</Mq=/2+2L? bp:;IT,bG Windows D;VV^,zXk9C\m1J'4u</Mq= /2+2L# Jb:gNZ^\kDivB9C2+2L? bp:w*;n+ELS\z7,2+2L;\Z^\kDivB9C# Jb:Cz79C24S\c(? bp:AES 128 ;c( Jb:*N^(|D_Pk0\m\k1`,D}VD0C'\k1? ThinkPad USB Portable Secure Hard Drive...
- Page 150 bp:z;\Z0\m==1BxP|D#Z0C'==1B,^(|Dr>}Z 0\m==1P4("_Pk0\m\k1`,D}VD0C'\k1 # Jb:*N9C ThinkVantage Rescue and Recovery m~;\4(V4iJ? bp:k7#IT}7CJzD2+2L#g{zT^(4(V4iJ,G4{C FczD NTFS D~53q=/2+2L,;sXT# Jb:*N^(u</"Vxrq=/2+2L? bp:k7#z_8\m1X(#z;\9C\m1J'Z0\m==1Bu< /"Vxrq=/2+2L# Jb:*NZdk0C'\k1s,53^(S2+2L}<# bp:2+2LG;V+ELS\h8,Zdk}7D0C'\k1sh*8kS 1dxPbx# 1. k4 F1 r F12 T]#}<}L,TJm2+2LP8kS1dxPbx# 2. kdk}7D0C'\k1,"R8>FdL# 3. k4B Ctrl + Alt + Del,ZXC}LP2+2LT&Z0C'==1,;sz ITS}/wxP}<# Jb:12+2L,S=)9k1,*N53^(S2+2LxP}<? bp:ZHt/Zd,)9k+XU USB KZDg4,rK2+2L^(ZP^ D1dZbx#;vr%Dbvl(G+2+2L1S,S=Fcz(xG)9 k),b+9Fcz\;ZV4}LPS2+2L}<# 14 6 ThinkPad USB Portable Secure Hard Drive C'8O...
- Page 151 ÷≤ ThinkPad USB Portable Secure Hard Drive ® ΓUú ÷ΩTC ThinkPad USB Portable Secure Hard Drive ΓU ²]tOTΩT k : bw ∩ t ºeA ²\¬ ∩ t M≤]AG v ThinkPad USB Portable Secure Hard Drive] W@°Dn USB Ω Uq u v USB Ω...
- Page 152 uw w v÷se uw w v÷se pU ÷s ÷s 3 ⁿ O ÷si ≤G °{μ@ v GNΘJ KX i ⌠u z ív ÷si ≤s uw w vAbUC@ ñ]i ϕ uTwvG v ΘJKX v T{sKX ⁿ O π UCCΓ ϕ U @ íG v ⌡ΓG R í...
- Page 153 w uw w v ú w uw w v ÷ΩTC ²\¬UCΩTAA}lw uw w vC ∩ t H uCpG ∩ t M≤H uAiα law C ∩ t OM ΦKΓaAú AC q πy pC úns AC q πy ≈C @A Klauw w vChB ≈...
- Page 154 uw w vPzqúºí Z≈ANDn USB Ω USB Ω USB s ≡Cⁿ O ¿⌡ΓAp °us 15 0 ThinkPad USB Portable Secure Hard Drive User Guide...
- Page 155 3 ΘJú T u zKXvC v u z ívbΓ ⌠≤í C ≈} z í Yn≈}u z ívA bu z ívñ÷ϕ ÷sA ⁿ O ¿⌡ Γ εCoϕ wiJu R ívC ThinkPad USB Portable Secure Hard Drive User Guide © Copyright Lenovo 2008 challengechallenge...
- Page 156 í YniJu ívA ⌡μUC @G 1. Nuw w vs qúCo iJu R ívC KXv u zKXv ÷U 2. ΘJu Cⁿ O ¿±ΓAϕ ≈B≤u ívCpGⁿ OH⌡Γ{{Ahz n½sΘJ T K ≈} í ® ® Yn≈}u ívA b Microsoft α W ½kΣ÷ΓUw Windows AMßqqú...
- Page 157 : pGⁿ OH⌡Γ{{T Aoϕ KX ≤ 6 WL 16 Cϕ ⁿ O}lí aH Γ{{ºßA ΘJ]t 6 4. ½sΘJs u KXvA ÷@U CpGⁿ O ≥G ±ΓTϕ A ϕ w QsWu KXvC : pGⁿ Oí aH⌡Γ{{AMßSí aH Γ{{A BJ 3C UCΣñ@ ¼pG v zÑ...
- Page 158 : Yⁿ OH⌡Γ{{T AMßSí aH Γ{{A BJ 4CoO ] o FUCΣñ@ ¼pG v zÑ WL 10 ϕ ΘJKXC v ΘJ sKXú TC ² ½]uw w v pG O KXv u zKXvAziH² ½] ú KXvA Nu zKXv 123456C ² ½]uw w v Mú ≈W Ω...
- Page 159 ß÷@U Ctrl + Alt + Del ½s qúC 10. ÷@U F12Aq}≈Mμñ∩ uw w vCz qú quw w vW Rescue and Recovery u@ ñ Rescue and Recovery {í ÷ΩTA yX http://www.lenovo.com ≡vB bq Windows @ t ñ≡vB nXºeA Oo²xs ÷¼uw w bqt ñ≡vB nXºeA ²Γ nXuw w vCYnnXuw w vA b Windows α...
- Page 160 ° ]tuw w v ° ΩTCb uw w v ApGJ UC⌠ ≤ \ ∩ ¬ C DG @ uw w vnτ≥ H ¬G UCX ΦíG v ΘJ 123456]w] z KX iJu z ívA NiH ≤u zK v ΘJ 123456]w] iJuw ív uw w DG Ou...
- Page 161 D: ≤Lk ≤Pu zKXv KXvH ¬Gu bu z ívU iH ≤Cbu ívñALk ≤ Rú bu z ívU Bπ DG ≤Lk ThinkVantage Rescue and Recovery nΘ CΘH ¬G TwiH Tas z uw w vCpG MLk CΘA Hzqú μí uw w vAMßA @ C NTFS DG ≤Lk l]wB μí...
- Page 162 ThinkPad USB Portable Secure Hard Drive ® ThinkPad USB Portable Secure Hard Drive ThinkPad USB Portable Secure Hard Drive v USB v ThinkPad USB Portable Secure Hard Drive ThinkPad USB Portable Secure Hard Drive ( USB 2.0 ThinkPad USB Portable Secure Hard Drive User Guide...
- Page 163 ThinkPad USB Portable Secure Hard Drive User Guide ThinkPad USB Portable Secure Hard Drive User Guide...
- Page 164 ThinkPad USB Portable Secure Hard Drive User Guide...
- Page 165 ThinkPad USB Portable Secure Hard Drive User Guide...
- Page 166 1. USB ThinkPad USB Portable Secure Hard Drive User Guide...
- Page 167 ® ® Microsoft Windows ThinkPad USB Portable Secure Hard Drive User Guide ThinkPad USB Portable Secure Hard Drive User Guide...
- Page 168 ThinkPad USB Portable Secure Hard Drive User Guide...
- Page 169 7 + 8 + + 8 + ThinkPad USB Portable Secure Hard Drive User Guide ThinkPad USB Portable Secure Hard Drive User Guide...
- Page 170 123456 123456 Windows → → ThinkPad USB Portable Secure Hard Drive User Guide...
- Page 171 10. 1 ThinkVantage Rescue and Recovery ® ® ThinkVantage Rescue and Recovery ThinkVantage Rescue and Recovery 4. Rescue and Recovery ThinkPad USB Portable Secure Hard Drive User Guide ThinkPad USB Portable Secure Hard Drive User Guide...
- Page 172 Ctrl + Alt + Del 10. F12 Rescue and Recovery : Rescue and Recovery http://www.lenovo.com Windows Windows ThinkPad USB Portable Secure Hard Drive User Guide...
- Page 173 123456 ( v 123456 ( 123456 : Windows ThinkPad USB Portable Secure Hard Drive User Guide © Copyright Lenovo 2008...
- Page 174 Windows : AES 128 ThinkVantage Rescue and Recovery NTFS ThinkPad USB Portable Secure Hard Drive User Guide...
- Page 175 3. Ctrl + Alt + Del...
-
Page 176: Appendix A. Service And Support
Product replacement assistance or exchange of defective components also is available during the warranty period. In addition, if your option is installed in a Lenovo computer, you might be entitled to service at your location. A Lenovo technical support representative can help you determine the best alternative. - Page 177 ThinkPad USB Portable Secure Hard Drive User Guide...
-
Page 178: Appendix B. Lenovo Limited Warranty
Appendix B. Lenovo Limited Warranty L505-0010-01 04/2008 This Lenovo Limited Warranty applies only to Lenovo branded hardware products you purchased for your own use and not for resale. This Lenovo Limited Warranty is available in other languages at www.lenovo.com/ warranty. - Page 179 Only unaltered Lenovo products and parts are eligible for replacement. The replacement product or part provided by Lenovo may not be new, but it will be in good working order and at least functionally equivalent to the original product or part. The replacement product or part shall be warranted for the balance of the period remaining on the original product.
- Page 180 Personal Data that you did not delete, you are in compliance with all applicable laws. Use of Personal Information If you obtain service under this warranty, Lenovo will store, use, and process information about your warranty service and your contact information, including name, phone numbers, address, and e-mail address. Lenovo will use this information to perform service under this warranty and to improve our business relationship with you.
- Page 181 Lenovo is responsible for loss or damage to your product only while it is: 1) in your Service Provider’s possession; or 2) in transit in those cases where the Service Provider is responsible for the transportation. Neither Lenovo nor your Service Provider is responsible for any of your data including confidential, proprietary, or personal data contained in a product.
-
Page 182: Warranty Information
CANNOT BE WAIVED OR LIMITED BY CONTRACT. European Economic Area (EEA) Customers in the EEA may contact Lenovo at the following address: EMEA Service Organisation, Lenovo (International) B.V., Floor 2, Einsteinova 21, 851 01, Bratislava, Slovakia. Service under this warranty for Lenovo hardware products purchased in EEA countries may be obtained in any EEA country in which the product has been announced and made available by Lenovo. - Page 183 Under CRU Service, your Service Provider will ship CRUs to you for installation by you. CRU information and replacement instructions are shipped with your product and are available from Lenovo at any time upon request. CRUs that are easily installed by you are called Self-service CRUs, while Optional-service CRUs may require some technical skill and tools.
-
Page 184: Suplemento De Garantía Para México
Failure to collect the product may result in your Service Provider disposing of the product as it sees fit. For Mail-in Service, the product will be returned to you at Lenovo’s expense, unless your Service Provider specifies otherwise. - Page 185 Para obtener una lista de los Centros de servicio autorizados, por favor, visite: http://www.lenovo.com/mx/es/servicios Manufactured by: Lenovo Centro Tecnológico S. de R.L. de C.V. Boulevar Escobedo #320 Apodaca Technology Park Apodaca, Nuevo León México...
-
Page 186: Appendix C. Notices
Consult your local Lenovo representative for information on the products and services currently available in your area. Any reference to a Lenovo product, program, or service is not intended to state or imply that only that Lenovo product, program, or service may be used. Any functionally equivalent product, program, or service that does not infringe any Lenovo intellectual property right may be used instead. -
Page 187: Recycling Information
Lenovo may use or distribute any of the information you supply in any way it believes appropriate without incurring any obligation to you. Any references in this publication to non-Lenovo Web sites are provided for convenience only and do not in any manner serve as an endorsement of those Web sites. -
Page 188: Trademarks
Trademarks The following terms are trademarks of Lenovo in the United States, other countries, or both: Lenovo The Lenovo logo... - Page 189 ThinkPad USB Portable Secure Hard Drive User Guide...
-
Page 190: Appendix D. Electronic Emission Notices
Consult an authorized dealer or service representative for help. Lenovo is not responsible for any radio or television interference caused by using other than recommended cables and connectors or by unauthorized changes or modifications to this equipment. Unauthorized changes or modifications could void the user’s authority to operate the equipment. - Page 191 Estados Miembros sobre compatibilidad electromagnética se refiere. Lenovo no puede aceptar responsabilidad alguna si este producto deja de satisfacer dichos requisitos de protección como resultado de una modificación no recomendada del producto, incluyendo el ajuste de tarjetas de opción que no sean Lenovo.
- Page 192 2004/108/EC sull’armonizzazione legislativa degli stati membri in materia di compatibilità elettromagnetica. Lenovo non accetta responsabilità alcuna per la mancata conformità alle normative di protezione dovuta a modifiche non consigliate al prodotto, compresa l’installazione di schede e componenti di marca diversa da Lenovo.
- Page 193 ThinkPad USB Portable Secure Hard Drive User Guide...
-
Page 194: Copyright Lenovo 2008
à disposition des clients pour le retour, le recyclage et la récupération des déchets d’équipements électriques et électroniques, afin de réduire tout effet potentiel des équipements © Copyright Lenovo 2008... - Page 195 EEE en el medio ambiente y en la salud debidos a la presencia de substancias peligrosas. Para obtener información adicional acerca de WEEE consulte el sitio: http://www.lenovo.com/lenovo/ environment. Il marchio WEEE (Waste Electrical and Electronic Equipment) viene applicato soltanto ai paesi all’interno dell’unione europea (EU) e norvegia.
- Page 196 EEE sull’ambiente e sulla salute umana dovuto alla presenza di sostanze pericolose. Per ulteriori informazioni sulla WEEE visitare il sito: http://www.lenovo.com/lenovo/environment. A marca REEE (Resíduos de Equipamentos Eléctricos e Electrónicos) aplica-se apenas aos Estados Membros da União Europeia e à Noruega. Os aparelhos eléctricos deverão ser identificados em conformidade com a Directiva Europeia...
- Page 197 Sähkö- ja elektroniikkalaitteita ei saa hävittää sekajätteen mukana. Lisätietoja sähkö- ja elektroniikkalaiteromun uusiokäytöstä on WWW-sivustossa http://www.lenovo.com/lenovo/environment. WEEE-merket (Waste Electrical and Electronic Equipment) gjelder bare for land i Den europeiske union (EU) og Norge. Utstyr merkes i henhold til EU-direktiv 2002/96/EF om avfall fra elektrisk og elektronisk utstyr (WEEE).
- Page 198 Appendix E. Important information for the European Directive 2002/96/EC...
- Page 199 ThinkPad USB Portable Secure Hard Drive User Guide...
- Page 200 Appendix F. China RoHS The information in the following table is applicable for Products manufactured on or after March 1, 2007 for China. © Copyright Lenovo 2008...
- Page 201 ThinkPad USB Portable Secure Hard Drive User Guide...
- Page 203 Printed in China.