Advertisement
Quick Links
SERVICE
COLOR TELEVISION RECEIVER
COLOR TELEVISION RECEIVER
Chassis :
K15D(N)
Model
:
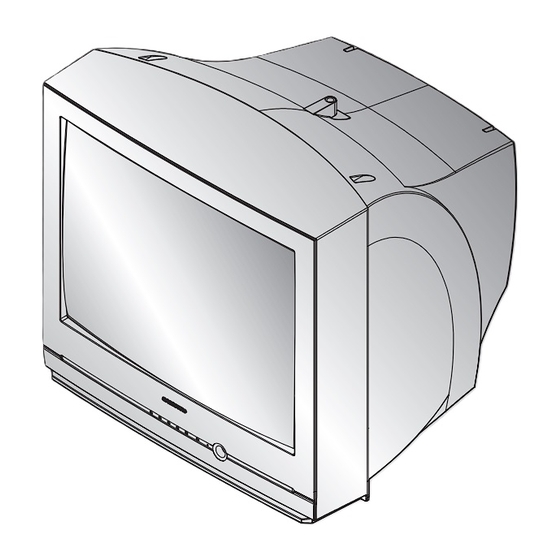
CT20F3FNT/XAP
Manual
1.
Precautions
2.
Specifications and IC Data
3.
Disassembly and Reassembly
4.
Alignment and Adjustments
5.
Troubleshooting
6.
Exploded View and Parts List
7.
Electrical Part List
8.
Block Diagram
9.
Wiring Diagram
10.
Schematic Diagrams
CONTENTS
Advertisement

Related Manuals for Samsung CXD1334


Summary of Contents for Samsung CXD1334
-
Page 1: Service Manual
COLOR TELEVISION RECEIVER Chassis : K15D(N) Model CT20F3FNT/XAP SERVICE Manual COLOR TELEVISION RECEIVER CONTENTS Precautions Specifications and IC Data Disassembly and Reassembly Alignment and Adjustments Troubleshooting Exploded View and Parts List Electrical Part List Block Diagram Wiring Diagram Schematic Diagrams... - Page 2 Follow these safety, servicing and ESD precautions to prevent damage and protect against potential hazards such as electrical shock and X-rays. 1. Be sure that all of the built-in protective devices are replaced. Restore any missing protective shields. 2. When reinstalling the chassis and its assemblies, be sure to restore all protective devices, including: nonmetallic control knobs and compartment covers.
- Page 3 9. High voltage is maintained within specified 15. Observe the original lead dress, especially limits by close-tolerance, safety-related near the following areas: Antenna wiring, components and adjustments. If the high sharp edges, and especially the AC and high voltage exceeds the specified limits, check voltage power supplies.
- Page 4 1. Servicing precautions are printed on the 5. Check the insulation between the blades of the cabinet. Follow them. AC plug and accessible conductive parts (examples: metal panels, input terminals and 2. Always unplug the unit’s AC power cord from earphone jacks).
- Page 5 1. Some semiconductor (“solid state”) devices 5. Use only a grounded-tip soldering iron when are easily damaged by static electricity. Such soldering or unsoldering ESDs. components are called Electrostatically Sensitive Devices (ESDs); examples include 6. Use only an anti-static solder removal device. integrated circuits and some field-effect Many solder removal devices are not rated as transistors.
- Page 9 S.N.A 1-12 6002-000512 SCREW-TAPPING;RH,+,2,M4,L12,ZPC(BLK),SWR T0081 S.N.A AA03-00246A CRT COLOR;A48KRD82X(H),380MG,2.20MH,30.0 T0063 AA61-00734A HOLDER;25POLYVINYL,DEGAUSSING,T0.5,CHLO CDCOIL S.N.A AA60-10050R SCREW-MACHINE;-,SWRCH18A,M5,L31.5,HH,+,W CCM1 S.N.A 3704-001105 SOCKET-CRT;11P,20PI,26.5PI,NI,- V999S AA64-03157A CABINET-BACK;20F3(SAMEX),HIPS HB T0015 6003-001026 SCREW-TAPTITE;RH,+,B,M4,L15,ZPC(BLK),SWR T0081 S.N.A AA96-20129C ASSY POWER CORD;-,EP2/YES,H/C200,ME301P, T0066 S.N.A AA59-00232A REMOCON;CT20R1,SAMSUNG,BLK,TM59,25,NTSC T0074 Samsung Electronics...
- Page 10 1. After removing the screws, press the tension rib and pull the cabinet backwards. 2. To reassemble, press the tension rib (see diagram).
- Page 11 1. Separate the socket board from the CRT neck. 2. Remove the Anode Cap from the CRT. 3. Remove the main board by pulling it with both hands. Warning: The FBT is charged with high voltage. Before removing the Anode Cap, discharge the voltage through one of the heat sinks on the main board.
- Page 12 1. Spread a soft mat on the floor. Place the TV set face down. 2. Remove the 4 nuts mounting the CRT to the front cabi- net. Lift the CRT. 3. Caution: Because of the high vacuum and large surface area of the picture tube, be careful while handling it: (1) Always lift the picture tube by grasping it firmly around the faceplate, (2) Never lift the tube by its neck.
- Page 13 1. Make the following adjustments AFTER set- 1. Do not attempt these adjustments in the Video ting up after setting up purity and conver- Mode. gence : 2. The Factory Mode adjustments are necessary White Balance when either the EEPROM (IC902) or the CRT Sub-Brightness is replaced.
- Page 15 In the Service Mode, various can be selected via the Option Table. Example:...
- Page 16 A degaussing coil is mounted around the pic- 1. Usually, a color TV needs only slight touch- ture tube, so that external degaussing after up adjustment upon installation. Check the moving the TV should be unnecessary. But basic characteristics such as height, horizontal the receiver must be properly degaussed upon and vertical sync and focus.
- Page 17 1. Warm up the receiver for at least 20 minutes. 2. Plug in the CRT deflection yoke and tighten the clamp screw. 1. Connect a digital voltmeter to the second anode of the picture tube. 3. Plug the convergence yoke into the CRT and set in as shown in Fig.
- Page 18 2 POLE PURITY ADJU (VERT YOKE CLAMP SCREW 6 POLE CONVERGENCE 4 POLE CONVERGENCE (a) Set up 1. Warm up the TV for at least 30 minutes in the Aging Mode (OSD White). This mode is dis- played by entering the following sequence: DISPLAY FACTORY FACTORY...
- Page 19 5. Turn the both tabs at the same time, keeping 1. Warm up the receiver for at least 20 minutes. the angle constant, and superimpose the red and blue horizontal line in the center of the 2. Adjust the two tabs of the 4 pole magnets to screen.
- Page 20 Set the AGC data to 33 (Factory Mode). Set NSR data to 3 (Factory Mode). VS VA VSL HS 6. Adjust HS (Horizontal Shift) so that the left 1. Input a lion head pattern. and right margins of the picture are 5. 2.
-
Page 21: Electrical Parts List
C-FILM,LEAD-PPF;5.5NF,5%,1.6KV,BK,29X9.5 ..4 DZ016 0403-000508 DIODE-ZENER;MTZJ5.6B,5.45-5.73V,500MW,DO ...3 SF101S 2904-001221 FILTER-SAW AV,45.75MHz,SIP5K,ST,14.2dB,M ..4 DZ016 0403-000508 DIODE-ZENER;MTZJ5.6B,5.45-5.73V,500MW,DO ...3 SWN01 3404-000295 SWITCH-TACT;12VDC,50mA,160gf,8.4X22.7,SP ..4 DZ016 0403-000508 DIODE-ZENER;MTZJ5.6B,5.45-5.73V,500MW,DO ...3 FP801S 3601-000281 FUSE-CARTRIDGE;250V,4A,TIME-LAG,GLASS,5..4 DZ016 0403-000508 DIODE-ZENER;MTZJ5.6B,5.45-5.73V,500MW,DO ...3 V999S 3704-001105 SOCKET-CRT;11P,20PI,26.5PI,NI,- ..4 DZ016 0403-000508 DIODE-ZENER;MTZJ5.6B,5.45-5.73V,500MW,DO Samsung Electronics... - Page 22 2001-000429 R-CARBON;1KOHM,5%,1/8W,AA,TP,1.8X3.2MM ..4 C689 2202-000127 C-CERAMIC,MLC-AXIAL;10nF,+80-20%,25V,Y5V ..4 R125 2001-000429 R-CARBON;1KOHM,5%,1/8W,AA,TP,1.8X3.2MM ..4 C689 2202-000796 C-CERAMIC,MLC-AXIAL;1NF,10%,50V,Y5P,TP,3 ..4 R125 2001-000449 R-CARBON;2.2KOHM,5%,1/8W,AA,TP,1.8X3.2MM ..4 C689 2202-000796 C-CERAMIC,MLC-AXIAL;1NF,10%,50V,Y5P,TP,3 ..4 R125 2001-000449 R-CARBON;2.2KOHM,5%,1/8W,AA,TP,1.8X3.2MM ..4 C689 2202-000796 C-CERAMIC,MLC-AXIAL;1NF,10%,50V,Y5P,TP,3 ..4 R125 2001-000449 R-CARBON;2.2KOHM,5%,1/8W,AA,TP,1.8X3.2MM ..4 C689 2202-000796 C-CERAMIC,MLC-AXIAL;1NF,10%,50V,Y5P,TP,3 Samsung Electronics...
- Page 23 ..4 R101 2701-000114 INDUCTOR-AXIAL;10UH,10%,2534 ..4 AA61-20284A HOLDER;P-CORD,PP,-,-,-,BLK,VO,KE-002 S.N.A ..4 R102 2701-000114 INDUCTOR-AXIAL;10UH,10%,2534 ..4 L203 2701-000127 INDUCTOR-AXIAL;15UH,10%,2534 ASSY ACCESSORY ..4 L301 2701-000142 INDUCTOR-AXIAL;1UH,10%,2534 ..4 L302 2701-000142 INDUCTOR-AXIAL;1UH,10%,2534 ..4 L404 2701-000142 INDUCTOR-AXIAL;1UH,10%,2534 M0045 AA92-08377A ASSY ACCESSORY;K15D,14/20,XAP S.N.A ..4 L102 2701-000159 INDUCTOR-AXIAL;22UH,10%,4298 Samsung Electronics...
- Page 24 Electrical Parts List Level Loc.No. Code No. Description;Specification Remark Level Loc.No. Code No. Description;Specification Remark T0080 AA26-90001F TRANS MATCHING;-,300ohm/75ohm,NTSC,40-89 T0075 AA42-00004A ANT ROD;CXD1334,VHF,4SDODIPOLE850MMBRN T0074 AA59-00232A REMOCON;CT20R1,SAMSUNG,BLK,TM59,25,NTSC T0152 AA68-00987A CARD WARRANTY;-,-,W/P100,-,-,-,-,-,A4,1P S.N.A T0511 AA68-02665A MANUAL USERS;ENG,W/P100(G),B5,K15D S.N.A T0511 AA68-02666A MANUAL USERS;SPA,W/P100(G),B5,K15D S.N.A BAG-PE AA69-01195A BAG PE;CL29A6W8X,HDPET0.012,93/4X151/2...
-
Page 25: Wiring Diagram
R- OUT VIDEO OUT SOUND L IN SOUND L OUT VIDEO IN SOUND R OUT SOUND R IN L - OUT R + OUT L - OUT L + OUT L - OUT L + OUT L + OUT Samsung Electronics... - Page 30 Block Diagram...
- Page 31 TP05 TP04 TP06 TP02 TP03 TP01...
- Page 32 TP11 TP10 TP08 TP09 TP07...
- Page 33 TP07 TP08...