Table of Contents
Advertisement
Advertisement
Table of Contents

Related Manuals for APRILIA RSV MILLE - PART 1 2000


Summary of Contents for APRILIA RSV MILLE - PART 1 2000
-
Page 2: Transport
© 2000 aprilia s.p.a. - Noale (VE) The terms “right” and “left” are referred to the rider seated on the vehicle in the nor- mal riding position. The following precautionary warnings are used throughout this manual in order to The vehicle... -
Page 3: Identification Data
In some countries the antipollu- Japan country (I, UK, A, ...). tion and noise regulations in force require and are to be supplied to the aprilia Offi- periodical inspections. cial Dealer as reference data for the pur- chase of spare parts or specific accesso- ries of the model you have acquired. -
Page 4: Table Of Contents
ADJUSTING REMOVING THE SIDE STAND ......80 THE REAR BRAKE CONTROL LEVER INSPECTING THE FRONT SAFE DRIVE ...............5 CLEARANCE ............. 44 AND REAR SUSPENSIONS......82 BASIC SAFETY RULES ........6 ADJUSTING FRONT SUSPENSION ........82 CLOTHING ............9 THE REAR BRAKE CONTROL LEVER STEERING DAMPER......... - Page 6 The use of medicins, alcohol and drugs or Most road accidents are caused by the psychotropic substances notably increases driver’s lack of experience. To drive the vehicle it is necessary to be in the risk of accidents. NEVER lend the vehicle to beginners and, possession of all the requirements pre- in any case, make sure that the driver has Be sure that you are in good psychophysi-...
- Page 7 Rigorously observe all road signs and na- Avoid obstacles that could damage the ve- Always drive with both hands on the han- tional and local road regulations. hicle or make you lose control. dlebars and both feet on the footrests (or on the rider’s footboards), in the correct Avoid abrupt movements that can be dan- Avoid riding in the slipstream created by...
- Page 8 If necessary, have the vehicle inspected by an aprilia Official Dealer who should care- fully check the frame, handlebars, suspen- sions, safety parts and all the devices that you cannot check by yourself.
-
Page 9: Clothing
ONLY ORIGINALS Never change the position, inclination or Any modification of the vehicle and/or the colour of: number plate, direction indica- removal of original components can com- Before starting, always wear a correctly tors, lights and horns. promise vehicle performance levels and fastened crash helmet. -
Page 10: Accessories
(aprilia genuine accessories). Avoid using accessories that hamper ac- cess to the controls, since this can prolong reaction times during an emergency. - Page 11 ous objects on the handlebars, mudguards Do not carry any bag if it is not tightly se- Do not exceed the maximum load allowed and forks, because the vehicle might re- cured to the vehicle. for each side-bag. spond more slowly in turns and its ma- Do not carry bags which protrude too much When the vehicle is overloaded, its stability noeuvrability could be unavoidably im-...
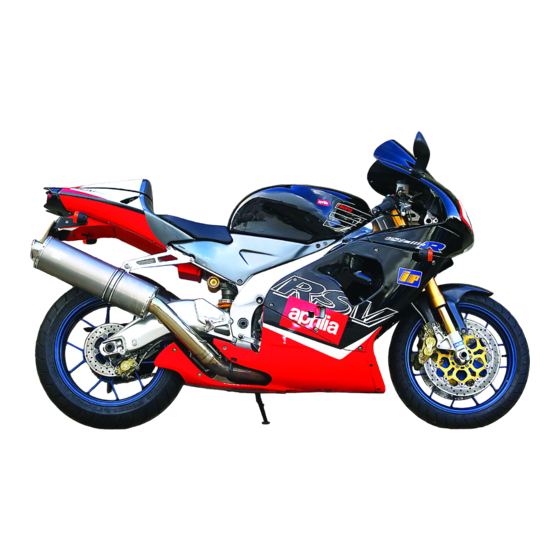
- Page 12 1) Left fairing 6) Left rear-view mirror 13) Passenger left footrest 19) Engine oil tank 2) Non-adjustable steering 7) Engine oil filter (snapping, closed/open) 20) Engine oil level damper (adjustable steering 8) Left side cover 14) Drive chain 21) Engine oil tank cap damper 9) Rider saddle 15) Rear fork...
- Page 13 1) Rear shock absorber 6) Passenger grab strap 13) Right rear-view mirror 19) Lower fairing 2) Passenger right footrest 7) Electronic unit 14) Front brake fluid tank 20) Rear brake pump (snapping, closed/open) 8) Right side cover 15) Secondary fuse carrier 21) Rear brake control lever 3) Rear light 9) Fuel tank...
- Page 14 1) Left fairing 8) Left side cover 13) Drive chain 18) Engine oil filter 2) Engine oil tank cap 9) Rider saddle 14) Rear fork 19) Engine oil tank 3) Adjustable steering damper 10) Battery 15) Rider left footrest 20) Engine oil level 4) Headlight 11) Main fuse carrier (30A) 16) Side stand...
- Page 15 1) Rear shock absorber 7) Fuel tank 13) Secondary fuse carrier 19) Rear brake control lever 2) Rear light (15A) 20) Rider right footrest 8) Coolant expansion tank 3) Glove/tool kit compartment 14) Horn 4) Glove/tool kit compartment 15) Expansion tank 9) Fuel tank filler cap cover 16) Rear brake fluid tank...
-
Page 16: Instruments And Indicators
1) Ignition switch/steering lock ( 8) Clutch lever 2) Cold start lever ( ) 9) Instruments and indicators 3) Dimmer switch ( 10) Front brake lever 4) Direction indicator switch ( 11) Throttle grip 5) Horn push button ( 12) Start push button ( ) •... - Page 17 1) Green direction indicator warning light ( 7) Right multifunction digital display (coolant temperature - clock 2) Blue high beam warning light ( - battery voltage - chronometer - diagnostic) 3) Revolution counter 8) Red engine oil pressure warning light LED ( 4) Programmable red line warning light LED (max) 9) Green neutral indicator warning light ( ) 5) Amber low fuel warning light ( )
- Page 18 Comes on whenever the ignition switch is in position “ ” and the engine is not running, thus checking the functionality of the LED. If the light LED does not come on in this phase, contact an aprilia Official Dealer. Engine oil pressure warning light If the engine oil pressure warning light LED “...
- Page 19 " see p. 20 (MUL- and check the coolant level, see p. 40 (COOLANT). If the writing “ ” is TIFUNCTION still displayed after the coolant level has been checked, contact an aprilia Of- COMPUTER). ficial Dealer. Multifunction digital display If the maximum allowed temperature (120°C -...
- Page 20 DIAG SERVICE V BATT V max km/h cessively every 7500 km (4687 mi), the – the revolution counter pointer (4) makes writing “SERVICE” (5a) appears on the twelve clockwise clicks, thus checking the When the ignition key (1) is rotated to posi- right display.
- Page 21 V max km/h V max km/h V max km/h Press the push button until, after the push button for about two seconds. The writing “AVS” (18), the average speed about five seconds, all the writings (12) (16) and the distance “trip 2” (17) are dis- To display the maximum speed (14) and on the left display start blinking.
- Page 22 NOTE SETTING THE RED LINE THRESHOLD For the adjustment, proceed as follows: It is not possible to set the red (WITH ENGINE OFF ONLY) line at values lower than 2000 rpm or high- Press the push button , release it and er than 12000 rpm.
- Page 23 MULTIFUNCTION (RIGHT DISPLAY) The right display (multifunction) includes the coolant temperature in °C (°F) (8) and the digital clock (7) as standard settings. NOTE DIAG SERVICE V BATT DIAG SERVICE V BATT When the engine is cold, the writ- ing " "...
- Page 24 DIAG SERVICE V BATT DIAG SERVICE V BATT 21 22 SETTING THE HOUR SETTING THE MINUTES SETTING °C OR °F When the push button is pressed for When the push button is pressed for When the push button is pressed for the second time, the hour segments (21) the third time, the minute segments (22) the fourth time, the segments of the cool-...
- Page 25 DIAG SERVICE V BATT DIAG SERVICE V BATT The “LAP” push button (6) is not enabled the “LAP” push button (6) and the push CHRONOMETER (RIGHT DISPLAY) for 10 seconds and the last time stored button The chronometer makes it possible to (23) is shown on the display.
- Page 26 3) DIMMER SWITCH ( When the light switch is in position " ": if the dimmer switch is in position " ", the high beam comes on; while if it is in position " ", the low beam comes on. 3) DIMMER SWITCH ( When it is in position “...
- Page 27 The high beam blinking is operated by pressing the push but- ton, independently of the position of the light switch ( • NOTE To disconnect the high beam blinking, release the push button. 6) COLD START LEVER ( ) The starter for the cold start of the engine is operated by ro- tating the lever “...
-
Page 28: Ignition Switch
Position Function Key removal The steer- It is possible ing is to remove the locked. It is key. neither pos- sible to start Steering the engine, lock nor to switch on the lights. Neither the It is possible engine, nor to remove the the lights key. -
Page 29: Unlocking/Locking The Passenger Seat
To lock the seat (2), proceed as follows: NOTE Upon request it is possible to supply the glove/tool kit compartment cov- Introduce its front part under the passen- Position the vehicle on the stand, see p. (4) to be used instead of the passen- ger grab strap (3). - Page 30 A useful compartment is available under To lock the glove/tool kit compartment the glove/tool kit compartment cover; to cover (2): reach it, it is sufficient to release and re- Introduce the lower front projections in move the flap (3). Position the vehicle on the stand, see p. the relevant recesses on the rear part of 58 (POSITIONING THE VEHICLE ON NOTE...
-
Page 31: Glove/Tool Kit Compartment
To reach the glove/tool kit compart- Small luggage can be anchored to the pas- ment, proceed as follows: senger seat, by means of elastic bands that must be fixed to the two fastenings Remove the passenger seat (or the (13). glove/tool kit compartment cover see p. -
Page 32: Special Tools
To perform some specific operations, it is advisable to use the following special tools (to be requested to an aprilia Official Deal- er): Tool Operations Page Pins (1) for To position the the rear vehicle on the rear support support stand. - Page 33 DO NOT DISPOSE OF FUEL IN THE EN- VIRONMENT. WARNING KEEP AWAY FROM CHILDREN. The fuel used for internal combustion Use only premium grade unleaded petrol, engines is extremely inflammable and m i n . O . N . 9 5 ( N . O . R . M . ) a n d 8 5 in particular conditions it can become (N.O.M.M.).
- Page 34 WARNING WARNING NOTE This vehicle is provided with front Carefully wash the parts of your body Make sure that the brake discs are nei- and rear disc brakes, with separate hy- ther oily nor greasy, especially after that get in contact with the liquid. Con- draulic circuits.
-
Page 35: Disc Brakes
Official Dealer. The rear brake reservoir is positioned un- years by an aprilia Official Dealer. Use brake fluid of the type specified in der the right fairing; to reach it, remove the the lubricant chart, see p. 113 (LUBRI- WARNING right fairing, see p. -
Page 36: Front Brake
Leave the brake fluid tank open ONLY for the time necessary for topping up. Raise and remove the cover (3) together with the screws (1) and the gasket (4). CAUTION In order not to spill the brake fluid while topping up, do not shake the vehicle. Do not put additives or other subtances into the fluid. - Page 37 Unscrew the screw (3) completely. Slightly move the whole reservoir (1) out- wards. Unscrew and remove the plug (2). CAUTION In order not to spill the brake fluid while topping up, keep the fluid in the tank parallel to the tank rim (in horizontal po- sition).
- Page 38 For any doubt regarding the perfect changed by an aprilia Official Dealer every functioning of the system and in case T h e c l u t c h co n t r o l f l u i d m u s t b e two years.
-
Page 39: Clutch
The fluid may flow out. Do not operate Top up the reservoir (1) by adding clutch the clutch control lever if the reservoir Have the clutch checked by an aprilia Offi- fluid, see p. 113 (LUBRICANT CHART), plug is loose or has been removed. -
Page 40: Coolant
UP); have the coolant changed every two Be careful not to spill the coolant on the The mineral salt deposits left in the radiator years: for this operation, contact an aprilia red-hot parts of the engine: it may catch by evaporated water are thus reduced and Official Dealer. - Page 41 CHECKING AND TOPPING UP If not, proceed as follows: Top up the expansion tank by adding coola nt, see p. 113 (LU BR ICA NT Unscrew and remove the filling cap (1). WARNING CHART), until this almost reaches the “FULL” level. Do not exceed this level, Check the coolant level and top up the WARNING otherwise the fluid will flow out while the...
-
Page 42: Tyres
WARNING This vehicle is provided with tubeless tyres. The tyres must be replaced with other tyres of the type and model recom- NOTE Perform the maintenance opera- mended by the manufacturer, see p. 109 tions with doubled frequency if the vehicle (TECHNICAL DATA);... -
Page 43: Checking The Engine Oil Level And Topping Up
WARNING Engine oil may cause serious damage to the skin if handled daily and for long periods. Wash your hands carefully after use. KEEP AWAY FROM CHILDREN. DO NOT DISPOSE OF THE OIL IN THE ENVIRONMENT. Put it in a sealed container and take it to the filling station where you usually buy case not less than prescribed by the regu- it or to an oil salvage center. - Page 44 CAUTION Make sure that there is a certain idle stroke in the movement of the lever (6), The brake control lever is positioned ergo- to prevent the brake from remaining ap- It is possible to adjust the distance be- nomically during the assembly of the vehi- plied and the consequent untimely wear tween the lever (1) end and the grip (2), by cle.
- Page 45 " " Rotate the eccentric (2) in order to find aprilia Official Dealer. (front low beam). the optimal position of the pedal (3). Tighten the screw (1) and make sure that the eccentric is stable in its position.
- Page 46 Ø side and always with extended side stand. CAUTION The instructions below must be followed Do not apply the load of your weight or with the maximum care in order to avoid of the passenger’s weight onto the side any injury to persons and damage to prop- stand.
- Page 47 striking and safely pass the rear part of the WARNING fairing or the luggage without creating un- Make sure that the parking surface is balance. free from obstacles, firm and flat. GETTING ON THE VEHICLE With the left shoe heel, extend the side stand completely by acting on the appro- Grasp the handlebar correctly and get on priate lever.
-
Page 48: Preliminary Checking Operations
(3) and then the push but- gine, this means that the electronic unit (4) and keep them pressed for Do not hesitate to consult your aprilia Offi- has detected an anomaly. about five seconds. cial Dealer in case there is something you... - Page 49 Component Check Page Check the functioning, the idle stroke of the control levers, the fluid level and make sure there are no leaks. 34, 35, 36, Front and rear disc brakes Check the wear of the pads. 37, 88 If necessary, top up the fluid tank. Make sure that it works smoothly and that it is possible to open and close it completely, in all Accelerator 89, 89...
-
Page 50: Starting
At this point: – The engine oil pressure LED warning light (red) " " (5) comes on on the dashboard and remains on until the engine has been started; – the red line warning light LED “max” (red) (6) comes on on the dashboard for approximately three seconds and the revolution counter pointer (7) shifts to the preset red line threshold;... - Page 51 NOTE It is possible to set the unit of rotate the cold start lever “ ” (17) down- during the normal operation of the en- measurement of the speedometer (km or wards. gine, this means that the oil pressure in mi) and of the coolant temperature (°C or the circuit is insufficient.
- Page 52 Rotate the cold start lever “ ” (17) up- STARTING WITH COLD ENGINE If the engine does not start: wards after the engine has warmed up. If the room temperature is low (near to or Wait a few seconds and repeat the cold lower than 0°C/32°F), it may be difficult to START PROCEDURE.
- Page 53 Provide for topping up as soon as pos- To leave: sible, see p. 33 (FUEL). Start the engine, see p. 50 (STARTING). WARNING Adjust the inclination of the rear-view WARNING This vehicle is considerably powerful mirrors correctly. and must be used gradually and with If you drive without passenger, make the greatest care.
- Page 54 CAUTION If the engine oil pressure warning light LED “ ” (5) comes on during the nor- mal operation of the engine, this means that the engine oil pressure in the cir- cuit is insufficient. In this case, stop the engine immediate- ly and contact an Official Dealer.
- Page 55 If the writing “ ” is still displayed risk of locking one wheel and conse- a f t e r t h e c o o l a n t l e v e l h a s b e e n quently losing grip.
-
Page 56: Running-In
WARNING WARNING The running-in of the engine is essential to Pay the utmost attention to any obsta- After the first 1000 km (625 mi), have an ensure its duration and correct functioning. cle or variation of the ground. Official Dealer carry out the If possible, drive on hilly roads and/or Uneven roads, rails, manhole covers, checks indicated in the column “After... -
Page 57: Stopping
WARNING The fall or excessive inclination of the vehicle may cause the fuel to flow out of the tank. The fuel used for internal combustion engines is extremely inflammable and in particular conditions it can become explosive. CAUTION Do not apply the load of your weight or of the passenger’s weight onto the side stand. - Page 58 NEVER leave the ignition key inserted and always use the steering lock. Park the vehicle in a safe place, possibly in a garage or a protected place. When possible, use an additional anti-theft device. Make sure that all documents are in order and the road tax has been paid.