
Related Manuals for Panasonic Lumix DMC-FZ15


Summary of Contents for Panasonic Lumix DMC-FZ15
-
Page 1: Operating Instructions
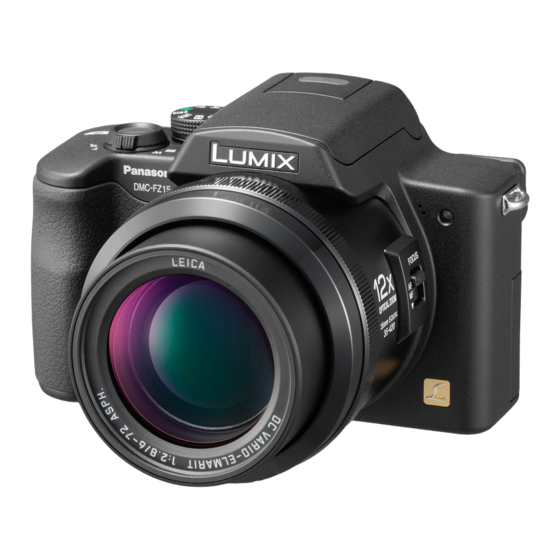
Operating Instructions Digital Camera DMC-FZ15P Model No. Before use, please read these instructions completely. For USA assistance, please call: 1-800-272-7033 or send e-mail to : digitalstillcam@panasonic.com VQT0N03... -
Page 2: Before Use
Recording of pre-recorded tapes or We would like to take this opportunity to disks or other published or broadcast thank you for purchasing this Panasonic material for purposes other than your Digital Camera. Please read these own private use may infringe copyright Operating Instructions carefully and keep laws. - Page 3 Class B digital device, pursuant to Part Corporation of 15 of the FCC Rules. These limits are America designed to provide reasonable One Panasonic protection against harmful interference Way, Secaucus, NJ in a residential installation. This 07094 equipment generates, uses, and can...
- Page 4 Before Use ∫ Care for the camera • Leaving the camera with the lens facing • Do not shake or cause impact to the the sun may cause a malfunction. Be camera. The camera may not be careful when you put the camera outside operated normally or recording of pictures or near a window.
-
Page 5: About These Operating Instructions
Before Use About These Operating Instructions Please note that the description on this page is a sample and all pages are not described in this manner. Modes indicated here allow you to use the functions or settings described on this page. Set the Mode dial to any of the modes to use the functions or settings. -
Page 6: Table Of Contents
Contents Before Use Recording pictures (advanced) Information for Your Safety....... 2 Using the Mode Dial ....... 51 About These Operating Instructions ..5 • Aperture-priority AE ......51 • Shutter-priority AE ......52 • Manual exposure ......53 Preparation • Macro mode........56 •... - Page 7 Playback (advanced) Others Playing Back Motion Images ....81 Using the MC Protector/ND Filter ..101 Using the [PLAY] mode menu ....82 Screen Display........102 • Rotating the Picture [ROTATE]..82 Cautions for Use ........104 • Setting the Picture to be Printed and Message Display ........107 the Number of Prints Troubleshooting ........108...
-
Page 8: Preparation
Preparation Preparation Standard Accessories Before using your camera, check the contents. ∫ SD Memory Card (8 MB) ∫ Video Cable RP-SD008B K1HA08CD0003 (In the text, it is indicated as “Card”) ∫ USB Connection Cable ∫ Battery Pack K1HA08CD0001 CGA-S002A (In the text, it is indicated as “Battery”) ∫... - Page 9 Preparation ∫ Lens Cap VYK0W96 ∫ Strap VFC4078 ∫ Lens Hood VYQ3234 ∫ Lens Hood Adaptor VYQ3213...
-
Page 10: Names Of The Components
Preparation Names of the Components 1 Lens 2 Flash (P39) 3 Self-timer Indicator (P42) AF Assist Lamp (P74) 4 Diopter Adjustment Dial (P29) 5 Viewfinder (P28, 102) 4 5 6 10 11 6 [EVF/LCD] Button (P28) 7 Flash Open Button (P39) 8 [DISPLAY] Button (P28) 9 [EXPOSURE] Button (P35, 51, 52, 53) - Page 11 23 Strap Eyelet (P19) 24 [V OUT / DIGITAL] Socket (P92, 95, 97) 25 [DC IN] Socket (P95, 97) • Please be sure to use genuine Panasonic AC adaptor (DMW-CAC1; optional). 26 Terminal Door 27 Card/Battery Door (P15, 16) 28 Tripod Receptacle...
-
Page 12: Quick Guide
Preparation Quick Guide This is the overview of the procedure to 3 Turn the camera on to take record pictures with this camera. For each pictures. operation, be sure to refer to the • Set the clock. (P22) corresponding pages. 1 Charge the battery. -
Page 13: Charging The Battery With The Charger
Preparation Charging the Battery with the Charger When the camera is shipped, the battery is not charged. Charge the battery before • After charging is completed, be sure to use. disconnect the charger from the electrical outlet. 1 Attach the battery to the charger. •... -
Page 14: About The Battery
Preparation About the Battery ∫ Battery indication Playback time when using the LCD monitor The remaining battery power appears on the screen. [It does not appear when you Playback time Approx. 240 min. use the camera along with the AC adaptor The number of recordable pictures and (DMW-CAC1;... -
Page 15: Inserting/Removing The Battery
1 Slide the card/battery door to open it. • Please be sure to use genuine Panasonic’s batteries (CGA-S002A). • If you will not be using the camera for a 2 Insert: long time, remove the battery. -
Page 16: Inserting/Removing The Card
• The card and the data may be damaged if it is inserted or removed while the camera is on. • We recommend using Panasonic’s SD Memory Card. (Use only the genuine SD card with SD Logo.) • If the card/battery door cannot be... -
Page 17: About The Card
Preparation About the Card ∫ Access to the card ∫ SD Memory Card (supplied) and While the card is being accessed MultiMediaCard (optional) (Recognizing/Recording/Reading/ The SD Memory Card and MultiMediaCard Deleting), the card access indication 1 are small, lightweight, removable external lights. -
Page 18: Approximate Number Of Recordable Pictures And The Size
Preparation Approximate number of recordable pictures and the size Picture size 2304k1728 1600k1200 1280k960 Quality 8 MB 16 MB 32 MB 64 MB 128 MB 256 MB 512 MB 1429 1 GB 1079 1889 1511 2748 Picture size 640k480 1920k1080 (HDTV) Quality 8 MB 16 MB... -
Page 19: Attaching The Lens Cap/Strap
Preparation Attaching the Lens Cap/Strap ∫ Lens Cap ∫ Strap 1 Attach the lens cap. 1 Pass the strap through the hole at the Strap Eyelet. 2 Pass the strap through the stopper and fasten the strap. A: Pull the strap 2 cm or more. •... -
Page 20: Attaching The Lens Hood
Preparation Attaching the Lens Hood In bright sunlight or backlight, the lens hood 2 Attach the lens hood. will minimize lens flare and ghosting. The 1 Place the camera upside down. lens hood cuts off excess lighting and 2 Catch the hook on the lens improves the picture quality. - Page 21 • For details on how to attach the MC protector and the ND filter, refer to P101. • If any of the accessories are lost, please contact Panasonic’s parts department at 1 800 833-9626 (For USA) for chargeable replacement. • Check if the screw is loose and then attach the lens hood.
-
Page 22: Setting Date/Time (Clock Set)
Preparation Setting Date/Time (Clock Set) ∫ Initial setting 2 Set date and time. The clock is not set when the camera is shipped. When you turn the camera on, the CLOCK SET following screen appears. 10 00 DEC 11 2004 M/D/Y PLEASE SET THE CLOCK CLOCK SET... - Page 23 Preparation • When a fully charged battery has been inserted for more than 24 hours, the clock setting is stored (in the camera) for at least 3 months even if the battery is removed. (The storing time may be shorter if the battery is not charged sufficiently.) If more than 3 months has passed, the clock setting will be lost.
-
Page 24: Setup Menu
Preparation Setup Menu 1 Turn the camera on. 4 Select the desired item. SETUP MONITOR AUTO REVIEW PLAY ON LCD 1 SEC. POWER SAVE 3 SEC. MF ASSIST ZOOM SELECT EXIT MENU 5 Set the desired value. SETUP MONITOR 2 Press the [MENU] button. AUTO REVIEW PLAY ON LCD 1SEC. - Page 25 Preparation You can control the following items on [SETUP] Menu. Menu Functions MONITOR/ Adjust the brightness of the LCD monitor (when pictures appear FINDER on the LCD monitor) or Viewfinder (when pictures appear on the Viewfinder) in 7 steps. AUTO REVIEW [OFF]: The recorded picture does not automatically appear.
- Page 26 Preparation Menu Functions MF ASSIST In manual focus, assistance screen appears on the center of the (Recording mode screen to facilitate focusing on the subject. (P65) only) BEEP Set to select the volume of operational sound. ]: No operational sound ]: Soft operational sound ]: Loud operational sound SHUTTER...
- Page 27 Preparation Menu Functions SCENE MENU [OFF]: Scene menu does not appear when setting the mode dial to [ ] or [ ] and the camera is operated in the scene mode currently selected. If you change the scene mode, Press the [MENU] button to display the scene menu and then select the desired scene mode.
-
Page 28: About The Lcd Monitor/Viewfinder
Preparation About the LCD Monitor/Viewfinder In recording mode (P32) EVF/LCD DISPLAY 2304 2304 1Switching the LCD monitor/Viewfinder Press the [EVF/LCD] button to switch to the screen you would like to turn on. A LCD monitor (LCD) B Viewfinder (EVF) • When the LCD monitor turns on, the Viewfinder turns off (and vice versa). - Page 29 Preparation ∫ Out-of-frame display ∫ Recording guide line The recording information is displayed out When you align the subject on the of the recording screen, therefore, you can horizontal and vertical guide lines or the take pictures without interruption by icons cross point of these lines, you can take or others on the recording screen.
- Page 30 Preparation ∫ Histogram • A histogram is a graph that displays • When the recorded picture and the brightness along the horizontal axis (black histogram do not match each other to white) and the number of pixels at each under the following conditions, the brightness level on the vertical axis.
-
Page 31: Recording Pictures (Basic)
Recording pictures (basic) Recording pictures (basic) Taking Pictures ∫ The Mode Dial This camera has a mode dial to suit for recording of many kinds of scenes. Select the desired mode and enjoy the variety of recording. Rotate the mode dial slowly and securely. : Program AE mode (P32) : Scene mode 1 The exposure is automatically adjusted by... - Page 32 Recording pictures (basic) ∫ Program AE 2 Aim the AF area 1 to the point you want to focus and then press the shutter button halfway. The camera automatically sets the shutter speed and the aperture value according to the brightness of the subject. •...
- Page 33 Recording pictures (basic) ∫ AF/AE Lock (AF: Auto focus/ ∫ Correct posture for taking good AE: Auto exposure) pictures To take pictures without blurring: 2304 • Hold the camera gently with both hands, keep arms stationary at your side and stand with your feet slightly apart.
- Page 34 Recording pictures (basic) ∫ Focusing ∫ Jitter (camera shake) • The focus range is 0.98 feet (30 cm) – ¶ • Be careful of jittering when pressing the (Wide), 6.56 feet (200 cm) – ¶ (Tele). shutter button. • When jitter could occur, the jitter alert 1 •...
- Page 35 Recording pictures (basic) ∫ Program shift • When you press the shutter button, the In Program AE mode, you can change the screen may become bright for a moment. preset aperture value and the shutter This function allows easy adjustment of speed under the same exposure.
- Page 36 Recording pictures (basic) ∫ Example of Program shift 1/ 2 1/ 4 1/ 8 1/ 15 1/ 30 1/ 60 1/ 125 1/ 250 1/ 500 1/ 1000 1/ 2000 (A): Aperture value (B): Shutter speed • Program shift can be set in Macro mode ] too.
-
Page 37: Checking The Recorded Picture (Review)
Recording pictures (basic) Checking the Recorded Picture (Review) • When you change the magnification or the position to be displayed, the zoom position indication A appears for about 1 Press 1 second to check where is enlarged. REVIEW1X ∫ Recorded pictures can be deleted during the review (Quick Deletion) DELETE SINGLE DELETE THIS PICTURE? -
Page 38: Using The Optical Zoom
Recording pictures (basic) Using the Optical Zoom ∫ To make subjects appear closer use (Tele) You can make people and subjects appear 2304 closer with the 12 times optical zoom, and landscapes can be recorded in wide angle. T 12X •... -
Page 39: Taking Pictures Using The Built-In Flash
Recording pictures (basic) Taking Pictures using the Built-in Flash : AUTO The flash is automatically activated according to the recording condition. When you set the flash, you can take pictures using the built-in flash according to : AUTO/Red-eye reduction the recording condition. The flash is automatically activated ∫... - Page 40 Recording pictures (basic) ∫ Available flash settings by recording mode The available flash settings depend on the recording mode. (±: Available, —: Not available) ∫ The available flash range to take pictures ISO sensitivity Available flash control range AUTO¢ 0.98 feet (30 cm) – 23.0 feet (7 m) (also applicable in Macro mode [ ISO64 0.98 feet (30 cm) –...
- Page 41 Recording pictures (basic) ∫ Adjusting flash output • If you bring the flash too close to the Adjust the flash output when the subject is subjects, they may appear distorted or small or reflection ratio is extremely high or discolored by its heat and lighting. low.
-
Page 42: Taking Pictures With The Self-Timer
Recording pictures (basic) Taking Pictures with the Self-timer • When using a tripod or in other cases, setting the self-timer to 2 seconds is a 1 Switch the self-timer setting. convenient way to stabilize the jitter caused by pressing the shutter button. 2304 •... -
Page 43: Compensating The Exposure
Recording pictures (basic) Compensating the Exposure 1 Press several times until EXPOSURE] appears and Use this function when you cannot achieve then compensate the exposure. appropriate exposure due to the difference of brightness between the subject and the EXPOSURE background. Under exposed Compensate the exposure toward positive. -
Page 44: Taking Pictures Using Auto Bracket
Recording pictures (basic) Taking Pictures using Auto Bracket • When setting the auto bracket, the auto In this mode, 3 pictures are automatically bracket icon appears on the lower left of recorded by each press of the shutter the screen. button according to the compensation •... -
Page 45: Taking Pictures Using Burst Mode
Recording pictures (basic) Taking Pictures using Burst Mode ∫ Number of pictures recorded in burst mode Burst speed Number of recordable 1 Switch the burst mode setting to (pictures/ pictures (pictures) record pictures. second)¢ max. 5 max. 10 2304 max. 5 max. -
Page 46: Playback (Basic)
Playback (basic) Playback (basic) Playing Back Pictures • When you forward or rewind a large number of pictures, release 2/1 once before reaching the picture to be played 1 Select the picture. back, then press 2/1 to forward/rewind pictures little by little. 2304 100 _ 0001 1/19... -
Page 47: Pictures Multi Playback
Playback (basic) 9 Pictures Multi Playback 1 Switch to multi screen. 2 Select the pictures. 2304 100 _ 0001 1/19 10:00 DEC. 1.2004 SELECT CANCEL SELECT CANCEL SELECT CANCEL ∫ To return to the normal playback Rotate the zoom lever towards [ ] or press the [MENU] button. -
Page 48: Using The Playback Zoom
Playback (basic) Using the Playback Zoom ∫ To delete a picture during the playback zoom Press the [ ] button. 1 Enlarge the picture. When the confirmation screen appears, press 4 to select [YES], and press 1. (P49) • The more the picture is enlarged, the more its quality deteriorates. -
Page 49: Deleting Pictures
Playback (basic) Deleting Pictures ∫ To delete multiple pictures 1 Select [MULTI DELETE]. ∫ To delete a single picture MULTI/ALL DELETE 1 Select the picture to be deleted. MULTI DELETE 2304 100 _ 0001 ALL DELETE 1/19 SELECT CANCEL 10:00 DEC. 1.2004 2 times 2 Select the pictures to be deleted. - Page 50 Playback (basic) 3 Delete the pictures. • Once deleted, pictures cannot be recovered. Please double-check before MULTI DELETE deleting pictures. • Do not turn off the camera while deleting. DELETE THE PICTURES • Pictures that are protected (P85) or that YOU MARKED? do not conform to DCF standards (P46) will not be deleted.
-
Page 51: Recording Pictures (Advanced)
Recording pictures (advanced) Recording pictures (advanced) Using the Mode Dial Aperture-priority AE • Refer to P55 for the available range of the aperture value and the shutter speed. • The focus range is 0.16 feet (5 cm) – ¶ When you want the background to be in (Wide), 6.56 feet (200 cm) –... -
Page 52: Shutter-Priority Ae
Recording pictures (advanced) Shutter-priority AE • Refer to P55 for the available range of the aperture value and the shutter speed. • The focus range is 0.16 feet (5 cm) – ¶ When you want to take a sharp picture of a (Wide), 6.56 feet (200 cm) –... -
Page 53: Manual Exposure
Recording pictures (advanced) Manual exposure 3 Take the picture. Decide the exposure by setting the aperture value and the shutter speed manually. 1 Set the aperture value and the shutter speed. F5.6 1/125 2304 ∫ Manual Exposure Assistance F2.8 1/30 The exposure is EXPOSURE adequate. - Page 54 Recording pictures (advanced) • Refer to P55 for the available range of the aperture value and the shutter speed. • The focus range is 0.16 feet (5 cm) – ¶ (Wide), 6.56 feet (200 cm) – ¶ (Tele). • If the exposure is not adequate, the aperture value and the shutter speed turn red when pressing the shutter button halfway.
- Page 55 Recording pictures (advanced) ∫ Aperture Value and Shutter Speed Aperture-priority AE Available Aperture Value Shutter Speed (Sec.) (Per 1/3 EV) F8.0 1 – 1/2000 F7.3 F6.5 F5.6 1 – 1/1600 F5.2 F4.6 F4.0 1 – 1/1300 F3.7 F3.3 F2.8 1 – 1/1000 Shutter-priority AE Available Shutter Speed (Sec.) Aperture Value...
-
Page 56: Macro Mode
Recording pictures (advanced) Macro mode Motion image mode This mode allows you to take pictures You can record motion images without closely focusing on the subject. (e.g. When audio. taking pictures of flowers.) 1 Select [MOTION RATE]. You can take pictures with the lens at a distance of up to 0.16 feet (5 cm) (Wide) from the subject. - Page 57 Recording pictures (advanced) ∫ Available recording time (seconds) 2 Press the shutter button halfway. Motion rate SD Memory Card Capacity 10fps 30fps 8 MB 16 MB 32 MB 64 MB 128 MB 256 MB 1482 512 MB 2989 1027 1 GB 5752 1978 •...
-
Page 58: Scene Mode
Recording pictures (advanced) Scene mode : [PORTRAIT] (P59) : [SPORTS] (P59) Press the [MENU] button to display the : [SCENERY] (P60) scene menu. When setting [AUTO] in the [SETUP] menu, set the mode dial to [ : [NIGHT SCENERY] (P60) or [ ] to display the scene menu automatically. -
Page 59: Portrait Mode
Recording pictures (advanced) Portrait mode Sports Mode This mode allows you to make the subject This mode allows you to take pictures of a stand out from an unfocused background fast moving subject. (e.g. When taking and adjust the exposure and the hue to pictures of outdoor sports.) achieve a healthy complexion on the subject. -
Page 60: Scenery Mode
Recording pictures (advanced) Scenery mode Night scenery mode This mode allows you to take a picture of a This mode allows you to take a picture of a wide landscape. The camera focuses on a nightscape. The landscape can be distant subject preferentially. -
Page 61: Night Portrait Mode
Recording pictures (advanced) Night portrait mode Panning mode This mode allows you to take pictures When you take a picture following the against a night landscape. The subject can motion of a subject which moves to a be recorded with brightness in real life by certain direction as a runner or a car, the using the flash and the slow shutter speed. -
Page 62: Fireworks Mode
Recording pictures (advanced) Fireworks mode • In panning mode, the shutter speed This mode allows you to take beautiful becomes slower than usual to achieve the pictures of fireworks exploding in the night panning effect. As a result, jitter can easily sky. -
Page 63: Party Mode
Recording pictures (advanced) Party mode • When the auto focus is activated, the This mode allows you to take a picture in a available recording range is 16.4 feet dim room (e.g. a wedding reception, a (5 m) – ¶. (We recommend following party, a banquet in a bar, etc.) clearly. -
Page 64: Snow Mode
Recording pictures (advanced) Snow mode This mode allows you to take a picture in locations such as skiing resorts and locations near snowy mountains. The exposure and the white balance are adjusted to make the white color of the snow stand out. 2304 •... -
Page 65: Taking Pictures With Manual Focus
Recording pictures (advanced) Taking Pictures with Manual Focus 2 Slide the focus switch to [MF] and rotate the MF ring 1 to focus on Use this function when you want to fix the the subject. focus or when the distance between the lens and the subject is determined and you do not want to activate the auto focus. - Page 66 Recording pictures (advanced) ∫ Technique for Manual focus ∫ Prefocus This is a technique to focus on the point to take pictures in advance when it is difficult to focus on the subject with auto focus due to its quick motion. [e.g. [PANNING] in scene mode (P61)] This function is suitable when the distance between the camera and the subject is...
-
Page 67: Using The [Rec] Mode Menu
Recording pictures (advanced) Using the [REC] mode menu : [W.BALANCE] (P68) Setting the hue, picture quality adjustment, : [SENSITIVITY] (P70) etc. allows you to create wide variations on taking pictures. : [PICT.SIZE] (P70) • Set the mode dial to the desired recording mode. -
Page 68: White Balance [W.balance]
Recording pictures (advanced) ∫ Auto White Balance White Balance [W.BALANCE] Use of auto white balance adjustment in inappropriate lighting conditions may result in reddish or bluish pictures. Where the subject is surrounded by many light This function allows you to reproduce a sources, auto white balance adjustment white color closer to the tone in real life on may not operate properly. - Page 69 Recording pictures (advanced) ∫ Setting the White Balance manually 3 Finely adjust the white balance. • 1 [BLUE]: Press when the hue is (White set Use this mode when you want to set the reddish. • 2 [RED]: Press when the hue is white balance manually.
-
Page 70: Iso Sensitivity [Sensitivity]
Recording pictures (advanced) ISO Sensitivity Picture Size [SENSITIVITY] [PICT.SIZE] When you select a smaller picture size ISO sensitivity represents the sensitivity to (640k480 pixels), you can store more light in values. If you set the ISO sensitivity pictures on a card. In addition, it is higher, the camera becomes more suitable convenient to attach the picture to an for recording in dark places. -
Page 71: Quality [Quality]
Recording pictures (advanced) Quality [QUALITY] You can select 3 types of quality (compression rate) according to the usage of the picture. TIFF (Uncompressed): This type is suitable when editing and processing pictures with retouch software. Fine (Low compression): This type gives priority to picture quality. -
Page 72: Metering Mode [Metering Mode]
Recording pictures (advanced) Metering Mode AF Mode [AF MODE] [METERING MODE] 9-area-focusing: You can switch to the following metering The camera focuses on any of modes. 9 focus areas. You can record a picture in free composition without Multiple: limiting the position of the subject. This is the method in which the camera measures the most suitable exposure by judging the allocation of... -
Page 73: Continuous Af [Cont.af]
Recording pictures (advanced) Continuous AF [CONT.AF] • When setting to 3-area-focusing, pictures may become still while being focused on, however, this is not a malfunction. This mode allows you to compose a picture • When using the digital zoom or when you more easily by always focusing on the take pictures in dark places, the AF area subject. -
Page 74: Af Assist Lamp [Af Assist Lamp]
Recording pictures (advanced) • The AF area is set only to a point on the AF Assist Lamp center of the screen when the AF assist [AF ASSIST LAMP] lamp is turned on. • A vignetting effect may appear on the circumference of the AF assist lamp because the AF assist lamp may be Illuminating the subject with the AF assist... -
Page 75: Color Effect [Col.effect]
Recording pictures (advanced) Picture Adjustment [PICT.ADJ.] Color Effect [COL.EFFECT] Use this function according to the recording You can use 4 types of color effects situation and the atmosphere of the picture. depending on the image of the picture. CONTRAST HIGH Increases the COOL The picture becomes bluish. -
Page 76: Optical Image Stabilizer [Stabilizer]
Recording pictures (advanced) Optical Image Stabilizer Flip Animation [FLIP ANIM.] [STABILIZER] This camera allows you to create motion picture files up to 20 seconds long by When image stabilization is not connecting images recorded in flip desired or when using the animation mode. - Page 77 Recording pictures (advanced) 1 Select [FLIP ANIM.]. 3 Capture images for flip animation. PICT.ADJ. REMAIN STABILIZER MODE1 FLIP ANIM. CONVERSION EXIT MENU SELECT EXIT MENU MENU • A motion image file is created by putting • You can check the recorded image with images recorded in [IMAGE CAPTURE] 4 and the previous or following image together by [CREATE MOTION...
- Page 78 Recording pictures (advanced) ∫ Deleting all still images used to create 5 Select [FRAME RATE] and set the flip animation number of frames. When selecting [DELETE STILL IMAGES] in [FLIP ANIM.] menu, a confirmation CREATE MOTION IMAGE screen appears. Select [YES] with 4 and then press 1.
-
Page 79: Conversion Lens [Conversion]
Recording pictures (advanced) Conversion Lens Turn the camera on and select [CONVERSION] [CONVERSION]. PICT.ADJ. The tele conversion lens (DMW-LTZ10; MODE1 STABILIZER optional) allows you to record pictures FLIP ANIM. zooming in much more (1.5 times). The CONVERSION wide conversion lens (DMW-LWZ10; optional) allows you to record pictures with wider range of focus than usual (0.8 times). - Page 80 Recording pictures (advanced) ∫ Recordable range when using the conversion lens • Check to make sure the lens cap is When using the tele conversion lens: removed before attaching the conversion • Normal: 15.1 feet (4.6 m) – ¶ lens. •...
-
Page 81: Playback (Advanced)
Playback (advanced) Playback (advanced) Playing Back Motion Images ∫ Fast forwarding/Fast rewinding During motion image playback, keep pressing 2/1. ∫ Motion images 1: Fast forward Select the picture with the motion image 2: Fast rewind icon [ ] and play back the motion •... -
Page 82: Using The [Play] Mode Menu
Playback (advanced) Using the [PLAY] mode menu Rotating the Picture [ROTATE] 2 Select the picture to be rotated and set it. ROTATE You can rotate the recorded pictures in 2304 100 _ 0001 increments of 90°. 1/19 This is a convenient function to play back pictures on TV. -
Page 83: Setting The Picture To Be Printed And The Number Of Prints [Dpof Print]
OS or software compatible with Exif. services now use DPOF. • Exif is the file format for still pictures, to For more information please visit: which recording information and other can http://panasonic.jp/dc/dpof_110/ be added, established by JEITA [Japan white_e.htm Electronics and Information Technology Industries Association]. - Page 84 Playback (advanced) ∫ Single setting ∫ To cancel all settings Select the picture and set the number of Select [YES] to cancel all settings. prints. CANCEL ALL DPOF DPOF SET THIS CANCEL ALL DPOF 100 _ 0001 PRINT SETTINGS? 1/19 COUNT DATE SELECT...
-
Page 85: Preventing Accidental Erasure Of The Picture [Protect]
Playback (advanced) Preventing Accidental Erasure • DPOF print setting is a convenient of the Picture [PROTECT] function when you print pictures with printers supporting DPOF printing. (P97) • DPOF is the abbreviation for Digital Print You can set the protection on the pictures Order Format. -
Page 86: Playing Back With Slide Show [Slide Show]
Playback (advanced) ∫ Multi setting/To cancel all settings Playing Back with Slide Show Perform the same operation as in [Setting [SLIDE SHOW] the Picture to be Printed and the Number of Prints [DPOF PRINT]]. (P83– 84) 1 Select [SLIDE SHOW], then select •... - Page 87 Playback (advanced) ∫ SD Slide Show DURATION It can be set among 1, If you insert a card including the SD 2, 3 and 5 seconds. Slide Show edited with the [SD Viewer for DPOF SET You can select the DSC] which is in the supplied CD-ROM, (Only when pictures you want to set...
-
Page 88: Resizing The Pictures [Resize]
Playback (advanced) –Pictures recorded after setting the Resizing the Pictures [RESIZE] quality to [TIFF] –Motion images –Flip animation –Rotated pictures (You can resize them This function is useful if you want to reduce if you rotate them back to their original the file size of the picture in cases when it position.) needs to be attached to an e-mail or... -
Page 89: Trimming The Pictures [Trimming]
Playback (advanced) 4 Select [YES] or [NO] and set it. Trimming the Pictures [TRIMMING] RESIZE DELETE ORIGINAL PICTURE? Use this function when you trim necessary parts of the recorded picture. SELECT CANCEL MENU MENU 2 times • When you select [YES], the picture is overwritten. - Page 90 Playback (advanced) 2 Select the picture to trim and set 4 Shift the picture and press the shutter button to set. TRIMMING 2304 TRIMMING 2304 100 _ 0001 100 _ 0001 1/19 1/19 ZOOM SELECT TRIM:SHUTTER EXIT MENU EXIT MENU •...
-
Page 91: Initializing The Card [Format]
[LOCK], you cannot format FORMAT the card. • If the card cannot be formatted, consult DELETE ALL DATA ON THE MEMORY CARD? your nearest servicenter. For USA assistance, please call: 1-800-272-7033 or send e-mail to : digitalstillcam@panasonic.com SELECT... -
Page 92: Playing Back Pictures With A Tv Screen
Playback (advanced) Playing Back Pictures with a TV Screen ∫ Playing back pictures with video 4 Turn the camera on and then set cable (supplied) the mode dial to playback mode • Turn the camera and the TV off. ∫ Viewing pictures in other countries When setting [VIDEO OUT] on the menu, you can view pictures on a TV in other countries (regions) which use the NTSC or... -
Page 93: Connecting To A Pc Or Printer
Connecting to a PC or Printer Connecting to a PC or Printer Before Connecting with USB Connection Cable : USB MODE] Select the USB communication system according to the OS of your PC or your printer before connecting them to the camera with the USB connection cable (supplied). Set the items on [USB MODE] in the [SETUP] menu. - Page 94 Connecting to a PC or Printer ∫ When using Windows 98/98 SE When using Windows 98/98 SE, install the USB driver before connecting. (When using Windows Me/2000/XP, Mac OS 9.x and Mac OS X, you do not have to install the USB driver.) ∫...
-
Page 95: Connecting To A Pc
Connecting to a PC or Printer Connecting to a PC • If you use Windows 98/98SE, install the 1 Turn the camera on and set the USB driver and then connect it to the [USB MODE] according to the OS computer. - Page 96 Connecting to a PC or Printer ∫ PC • While [ACCESS] is being displayed, do [Windows] not disconnect the USB connection cable. The drive appears on the [My Computer] • Do not use any other USB connection folder. cables except the supplied one. •...
-
Page 97: Connecting To A Pictbridge-Compliant Printer
Connecting to a PC or Printer Connecting to a PictBridge-compliant Printer By connecting the camera directly to a 3 Connect the camera to a printer printer supporting PictBridge via the USB via the USB connection cable A connection cable (supplied), you can select (supplied). - Page 98 Connecting to a PC or Printer ∫ [PRINT WITH DATE] • Set the print settings such as paper size or print quality on the printer beforehand. Settings on the printer are • Connect the camera to a printer. (P97) prioritized. ∫...
- Page 99 Connecting to a PC or Printer ∫ [PAGE LAYOUT] ∫ DPOF picture (Possible layouts on the camera) • Set the DPOF print with this camera in advance. (P83) Settings on the printer are 1 Select [DPOF PICTURE]. prioritized. 1 page with no frame print PictBridge 1 page with frame print 2 pages print...
- Page 100 Connecting to a PC or Printer ∫ Setting the date printing with the • In DPOF print, if the total number of prints DPOF print in advance or the number of printed pictures is high, When the printer supports the date printing pictures are printed several times.
-
Page 101: Using The Mc Protector/Nd Filter
Others Others Using the MC Protector/ND Filter The MC protector (DMW-LMC72; optional) 3 Attach the MC protector A or the is a transparent filter which affects neither ND filter B. the colors nor the amount of light, so it can always be used to protect the camera’s lens. -
Page 102: Screen Display
Others Screen Display 1 2 3 4 5 6 7 10 11 7 24 30 14 2304 PROGRAM SHIFT F2.8 1/25 17 4, 22 ∫ In recording 1 Recording mode 19 Program shift indication (P35) 2 Flash (P39) 20 Program shift setting indication (P35) 3 Conversion lens (P79) 21 Exposure compensation (P43) 4 Burst (P45) - Page 103 Others 2304 100 _ 0001 PLAY MOTION 1/19 IMAGE F2.8 1/25 AUTO 10:00 DEC. 1.2004 ∫ In playback 1 Playback mode 10 Recording information (Recording mode/Aperture value/ 2 DPOF (P83, 87) Shutter speed/ISO sensitivity/Flash/ (White): White balance) DPOF setting for printing •...
-
Page 104: Cautions For Use
Others Cautions for Use ∫ Optimal Use of the Camera Make sure to use the supplied cords and cables. If you use optional accessories, When carrying this camera, take care use the cords and the cables supplied not to drop or cause impact to it. with them. - Page 105 Others ∫ Battery Do not allow the battery terminals to The battery is a rechargeable lithium ion come in contact with metal objects battery. Its ability to generate power is (such as necklaces, hairpins, etc.). based upon the chemical reaction that •...
- Page 106 Others ∫ Card ∫ Printing pictures recorded with HDTV While the card access indication mode appears (the card is being accessed), do When you print pictures recorded after not open the Card/Battery Door to setting the picture size to [HDTV] remove the card, do not turn the camera (1920k1080 pixels), both ends of the off or do not shake or cause impact to...
-
Page 107: Message Display
Others Message Display [NO MEMORY CARD] [CAN’T BE SET ON THIS PICTURE / Insert the card. CAN’T BE SET ON SOME PICTURES] If the pictures are not based on the DCF [THIS MEMORY CARD IS PROTECTED] standard, the DPOF print cannot be set. Cancel the card lock. -
Page 108: Troubleshooting
Others Troubleshooting If you put the menu back to the settings at the time of purchase, the conditions may be improved. Carry out the [RESET] in the setup menu. (P24) Conditions Causes The camera will not turn Is the battery inserted correctly? Is the battery sufficiently charged? Use a battery that has been sufficiently charged. - Page 109 Others Conditions Causes When connecting to a Is the camera connected to the PC correctly? PC, pictures cannot be Check it. transferred. Is the camera recognized by the PC correctly? Is the USB mode set correctly? The clock setting is If you do not use the camera for a long time, the clock setting reset.
- Page 110 Others Conditions Causes Both ends of the picture When you order photo studios to print pictures, ask the photo recorded by setting the studio if the pictures can be printed with both ends. picture size to [HDTV] • When using the printer with a trimming feature or other (1920k1080 pixels) are feature which cuts out both edges of the pictures, cancel cut out.
-
Page 111: Specifications
Others Specifications Digital Camera: Information for your safety Power Source: DC 8.4 V Power Consumption: 2.4 W (When recording with LCD Monitor) 2.2 W (When recording with Viewfinder) 1.4 W (When playing back with LCD Monitor) 1.2 W (When playing back with Viewfinder) Camera Effective pixels: 4,000,000 pixels Image sensor: 1/2.5q CCD, total pixel number 4,230,000 pixels... - Page 112 Battery Charger (Panasonic DE-993B): Information for your safety Input: 110 – 240 V 50/60 Hz, 0.15 A Output: CHARGE 8.4 V 0.43 A Equipment mobility: Movable Battery Pack (lithium-ion) (Panasonic CGA-S002A): Information for your safety Voltage/capacity: 7.2 V, 680 mAh...
-
Page 113: Digital Camera Accessory System
Others Others Digital Camera Accessory System Accessory# Figure Description CGA-S002A Lithium Ion Battery DMW-CAC1 Battery Charger/AC Adaptor DMW-LTZ10 Tele Conversion Lens DMW-LWZ10 Wide Conversion Lens DMW-LND72 ND Filter DMW-LMC72 MC Protector RP-SDH01GU1A 1 GB SD Memory Card RP-SDH512U1A 512 MB SD Memory Card RP-SDH256U1A 256 MB SD Memory Card RP-SD128BU1A... -
Page 114: Digital Camera Accessory Order Form
THE FOLLOWING: VISIT YOUR LOCAL PANASONIC DEALER CALL PANASONIC’S ACCESSORY ORDER LINE AT 1-800-332-5368 [6 AM-5 PM M-F, 6 AM-10:30 AM SAT, PACIFIC TIME] MAIL THIS ORDER TO: PANASONIC SERVICES COMPANY ACCESSORY ORDER OFFICE 20421 84th Avenue South Kent, WA. 98032... -
Page 115: Request For Service Notice
Mail this completed form and your Proof of Purchase along with your unit to: Panasonic Services Company 1705 N. Randall Road Elgin, IL. 60123-7847 Attn: Digital Camera Repair... -
Page 116: Limited Warranty (For Usa Only)
Limited Warranty Coverage If your product does not work properly because of a defect in materials or workmanship, Panasonic Consumer Electronics Company or Panasonic Sales Company (collectively referred to as “the warrantor”) will, for the length of the period indicated on the chart below, which starts with the date of original purchase (“warranty period”), at its option either (a) repair your product with new... - Page 117 Carry-In or Mail-In Service For Carry-In or Mail-In Service in the United States call 1-800-272-7033. For assistance in Puerto Rico call Panasonic Sales Company (787)-750-4300 or fax (787)-768-2910. This warranty ONLY COVERS failures due to defects in materials or workmanship, and DOES NOT COVER normal wear and tear or cosmetic damage.
-
Page 118: (For Usa Only)
You can purchase parts, accessories or locate your nearest servicenter by visiting our Web Site. Accessory Purchases: Purchase Parts, Accessories and Instruction Books online for all Panasonic Products by visiting our Web Site at: http://www.pasc.panasonic.com or, send your request by E-mail to: npcparts@panasonic.com... -
Page 119: Index
Others Others Index Fireworks Mode ........62 Flip Animation ........76 Focus ............ 34 Adjusting Flash Output ...... 41 Formatting AF Assist Lamp ..........91 ........74 AF Mode ..........72 AF/AE Lock ......... 33 Aperture-priority AE HDTV ..... 51, 55 ..........70, 92 Auto Bracket Highlight Display ........ - Page 120 Others NTSC SD Slide Show ............ 26 ........87 Number of recordable pictures Setup Menu ..18 ......... 24 Shutter sound ........26 Shutter-priority AE ......52, 55 Slide Show One Shot AF ........... 86 ........66 Snow Mode Operational sound .........
-
Page 121: Spanish Quick Use Guide/Guía Rápida En Español
Others Others Spanish Quick Use Guide/Guía rápida en español Ésta es una visión de conjunto que trata Encienda la cámara para sacar del procedimiento para grabar las las imágenes. imágenes con esta cámara. Por lo que • Ajuste el reloj. respecta a cada única operación, haga referencia a las páginas correspondientes. - Page 122 MEMO...
- Page 123 MEMO...
- Page 124 Panasonic Consumer Electronics Company, Division of Matsushita Electric Corporation of America One Panasonic Way, Secaucus, NJ 07094 Panasonic Sales Company ("PSC") Division of Matsushita Electric of Puerto Rico, Inc. Ave. 65 de Infanteria, Km. 9.5, San Gabriel Industrial Park, Carolina, Puerto Rico 00985 2004 Matsushita Electric Industrial Co., Ltd.