Table of Contents
Advertisement
For USA assistance, please call: 1-800-211-PANA(7262) or send e-mail to:consumerproducts@panasonic.com
For Canadian assistance, please call: 1-800-561-5505 or visit us at www.panasonic.ca
PP
SD Multi Camera
Operating Instructions
Model No.
Before use, please read these instructions
completely.
SV-AS10
VQT0F01
Advertisement
Table of Contents

Related Manuals for Panasonic D-Snap SV-AS10


Summary of Contents for Panasonic D-Snap SV-AS10
-
Page 1: Operating Instructions
SD Multi Camera Operating Instructions SV-AS10 Model No. Before use, please read these instructions completely. For USA assistance, please call: 1-800-211-PANA(7262) or send e-mail to:consumerproducts@panasonic.com For Canadian assistance, please call: 1-800-561-5505 or visit us at www.panasonic.ca VQT0F01... -
Page 2: Table Of Contents
Contents Preparation Basic (Recording) Standard Accessories ....4 Taking a Picture (Still Picture) ... . . 20 Information for Your Safety . - Page 3 Advanced (Recording) Others Setting Flash ......37 LCD Monitor Display ....64 Changing the Quality and Size of Picture .
-
Page 4: Standard Accessories
Standard Accessories _ Remote Controller USB Cradle Before using your camera, check the contents. VSK0643 VYC0902 _ SD Memory Card (8MB) RP-SD008BVE0 _ AC Adaptor VSK0626 _ Stereo Earphones L0BAB0000173 _ Battery Pack CGA-S003 _ USB Cable K1HA09BD0001... - Page 5 _ CD-ROM _ Carrying Case VFF0206 VFC4013 _ Neck Lanyard VFC4028 _ Cleaning Cloth VFC1792...
-
Page 6: Information For Your Safety
Dear Customer, We would like to take this opportunity to Notice: A lithium ion/polymer thank you for purchasing this Panasonic This product has parts that contain a battery that is recyclable R B R C SD Multi Camera. Please read these small amount of mercury. - Page 7 Panasonic Model No.: SV-AS10 Responsible party: Matsushita Electric Corporation of America One Panasonic Way, Secaucus, NJ 07094 Support Contact: Panasonic Consumer Electronics Company 1-800-211-PANA(7262) This device complies with Part 15 of the FCC Rules. Operation is subject to the following two conditions: (1) This device may not cause harmful interference, and (2) this device must accept any interference received, including interference that may cause undesired operation.
-
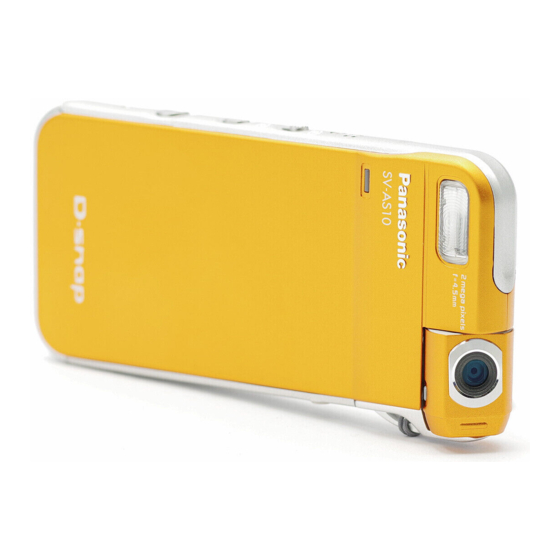
Page 8: Components
Components _ Body _ Operating Jog Ball Self timer Lamp Shutter Button [[] Flash Power Button [ Lens Record/Playback mode Switch Terminal (Headphone/Remote Controller) [ Microphone Strap Attachment Power/Card Access Lamp Shutter Button [[] Lock Release Lever Roll the ball to select items. 1 Jog Ball Battery Slot Press to select items. - Page 9 _ USB Cradle _ Remote Controller _ Stereo Earphones Insert SV-AS10 into cradle to charge the You can play back pictures, sounds and When using earphones, be sure to battery. When you connect the cradle to music, and control the volume of the connect to the supplied remote controller.
-
Page 10: Insert The Battery
Insert the Battery Slide the door while releasing the Insert the battery all the way. Close the door. 1 lock. 1 • Confirm the direction of the battery. Lock the door while sliding it. 2 Open the door. 2... -
Page 11: Remove The Battery
Remove the Battery Be sure to turn the power off when you remove the battery. Release the Battery lock A to Close the door. 1 Slide the door while releasing the lock. 1 remove the battery. Lock the door while sliding it. 2 Open the door. -
Page 12: Charging The Battery
Charging the Battery Connect the plug of AC adaptor to Charge the battery. When the charge lamp turns off, the the outlet and connect the DC plug battery is charged fully. • Align the connections. to the USB cradle. • Be sure to turn the power off when •... -
Page 13: Charging Information
If the charge Lamp turns off when The times shown above may vary • charging is not completed, the AC depending on the condition. Adaptor or the battery is probably defective. Contact your nearest Panasonic dealer. • For details, refer to P69. -
Page 14: Insert The Card
• We recommend using the cards made Open the door. 2 • Check the direction of the card. by Panasonic. (Use genuine card only) • Do not touch the connecting terminal on the rear of the card. • If you do not insert the card all the way,... -
Page 15: Remove The Card
Remove the Card Be sure to turn the power off when you remove the card. Slide the door while releasing the Press the card until it clicks to Close the door. 1 lock. 1 release and pull out the card. Lock the door while sliding it. -
Page 16: About Cards
About Cards _ Access to the card _ SD Memory Card (supplied) When you access the card, The SD Memory Card is a small, (recognition/recording/reading/deleting) lightweight, removable external card. The the Power/Card Access lamp blinks SD Memory Card is equipped with a quickly. -
Page 17: Basic Menu Operation
Basic Menu Operation Press the Power Button for 1 second to turn the power on. 1 Press the MENU button to access Select the recording mode [ ] or Select the menu item using the Jog the menu. Ball. playback mode [ ]. -
Page 18: About The Setup Menu
About the Setup Menu Items Details of the setting • Beep ON: The operational sound turns on. Volume [ • Beep OFF: The operational sound turns off. • Main volume: Adjust the volume of the speaker. • Warning: If the SD Memory Card is formatted, all data, including locked data, will be lost. Please Format card [ review the contents of the SD Memory Card before formatting. -
Page 19: Setting The Date/Time
Setting the Date/Time _ Initial Use The clock is not set when shipping. When you turn the power on, the clock setting screen appears. Adjust the time here. • If you do not set the clock here, the clock is automatically set to “January 1st, 2000 0:00”. -
Page 20: Taking A Picture (Still Picture)
Taking a Picture (Still Picture) Turn the power on. 1 Access the menu. (P17) Press the shutter button to take a picture. • The power/card access lamp is lit in Select Still picture from REC mode red. Switch to the recording mode [... - Page 21 _ Self-Recording _ Digital zoom You can play back the picture enlarging it up to 4 times. Turn the lens. • Do not touch the lens. Press the screen reversal button to reverse a picture. • If you take a picture without pressing the button, the picture is displayed upside down.
- Page 22 Taking a Picture (Still Picture) (Continued) _ Macro _ How to hold the camera • Distances for optimum focus Normal: About 1.65 feet (50 cm) - ¶ Slide the Macro switch to left side to take Macro: About 0.33 feet (10 cm) pictures of the subjects at a distance of •...
-
Page 23: Recording Still Picture With Audio
Recording Still Picture with Audio • You do not have to keep the shutter button pressed. • The audio is recorded with the microphone on this unit. Do not cover it with your finger. • Auto review (P44) does not work in this mode. -
Page 24: Taking Pictures In Burst Mode
Taking Pictures in Burst Mode Burst speed 3 frames/sec. Burst number Max. 3 frames • Flash setting is fixed to Flash off. • Self timer (P40) does not work in this mode. • Auto review does not work in this mode. -
Page 25: Recording Motion Images
Recording Motion Images • The remaining time displayed on the LCD monitor is an approximation. • When the motion image recorded with this unit is played back on other equipment, the quality of pictures and sounds may be deteriorated or pictures may not be able to be played back. -
Page 26: Recording Voice
Recording Voice • The remaining time displayed on the LCD monitor is an approximation. • Recording could suddenly stop when recording voice depending on the brand of card. • The audio recorded with this unit cannot be played back by other equipment. -
Page 27: Playing Back Still Pictures
Playing Back Still Pictures • This unit complies with DCF standards (Design rule for Camera File system) established by the Japan Electronics and Information Technology Industries Association (JEITA). • If you change the folder name or the file name of a picture on your PC, the picture may not be played back. -
Page 28: Playing Back Still Picture With Audio
Playing Back Still Picture with Audio • The still picture with audio recorded with other equipment cannot be played back by this unit. Select the picture with the audio icon Switch to the playback mode [ ] and press the jog ball to play •... -
Page 29: Playing Back Motion Images
Playing Back Motion Images • The file format which can be played back on this unit is QuickTime Motion JPEG. • The QuickTime Motion JPEG files recorded by PC or other equipment may not be played back. • When the motion image recorded with other equipment is played back on this unit, the quality of pictures may be deteriorated or pictures may not be... -
Page 30: Playing Back Voice
Playing Back Voice started. Roll the jog ball gently to turn it _ Adjusting the volume • You can adjust the volume on the Setup menu (P17, 18). Turn the jog ball right and left to adjust the volume. • The volume adjustment screen also appears when pressing the MENU button during play back. -
Page 31: Playing Back Music
Playing Back Music Insert the card which includes music Access the menu in the playback Select List from the menu. files. mode. (P17) • When you do not select the List, the music is played back from the track Connect the remote controller and the Select Audio player from Play displayed. - Page 32 Playing Back Music (Continued) _ With this unit _ Adjusting the volume using Roll the jog ball up and down to Remote Controller select the file and play it back. • Playback Press the jog ball. (Stop): • Index search: Roll the jog ball right and left.
- Page 33 _ Switching the sound quality (EQ) _ Controller _ Playing back repeatedly using Remote Controller (Repeat play) Select Controller [ ] from the menu when in Audio player mode and then roll Select Repeat play [ ] from the menu the jog ball to adjust the volume and in Audio player mode and then select switch the sound quality.
- Page 34 Playing Back Music (Continued) _ Selecting playlist • For details about recording of music • The remote controller can be file and playlist, refer to the operating connected even when using the You can select and play back the playlist instructions of SD-Jukebox Ver.4 carrying case (supplied).
-
Page 35: Multi File Playback (Thumbnail Display)
Multi File Playback (Thumbnail display) Item Details of Setting All files All kinds of files (except for music files) are displayed as thumbnails. Still picture Still picture files are displayed as thumbnails. Files with mark Mark (P46) are displayed as thumbnails. -
Page 36: Erasing Files
Erasing Files • You cannot delete protected files. Cancel the protection before deleting files. (P50) • Be sure to delete audio files with this unit only. • When you delete files on this unit, the DPOF information set on other equipment can be also deleted. -
Page 37: Setting Flash
Setting Flash Confirm that the lens is facing the front. Otherwise, the flash does not fire. Item Details of Setting Flash on The flash fires every The flash fires Auto [ time a picture is automatically according captured. to the lighting conditions. - Page 38 Setting Flash (Continued) • When setting REC mode to Video or • The available flash range is about 1.64 Burst, the flash setting is fixed to feet (50 cm) - 3.28 feet (1 m). If the Flash off. subject is too close to the camera •...
-
Page 39: Changing The Quality And Size Of Picture
Changing the Quality and Size of Picture You can change quality and size of a picture according to its use (e.g. printing, e-mail, etc.). • Fine gives priority to picture quality to record high quality pictures. • Normal gives priority to the number of recordable pictures and records standard quality pictures. -
Page 40: Taking Pictures With The Self Timer
Taking Pictures with the Self Timer • If you press the MENU button while the self timer is activated, the self timer is cancelled. • When setting REC mode to Video or Burst, you cannot set the self timer. • Use USB cradle when taking pictures with the self timer. -
Page 41: Setting The White Balance
Setting the White Balance Use this function to adjust the whiteness when a recorded scene looks bluish or reddish. • The setting of the white balance is Item Details of Setting reflected to other REC mode. And it is retained even if the power is It is designed to Auto [ turned off. -
Page 42: Setting The White Balance (Manual)
Setting the White Balance (Manual) • When taking a picture with the flash after setting the white balance manually, the white balance may not be properly adjusted. We recommend setting the white balance to Auto when using the flash. Access the menu in the recording Aim the unit at a sheet of white paper A or similar object so that it mode... -
Page 43: Setting The Application Menu
Setting the Application Menu _ Exposure Compensation [ In some situations the illumination of the background and your subject may differ. Auto exposure systems may not always calculate the exposure correctly. This feature allows you to manually compensate the exposure. Item Details of Setting •... - Page 44 Setting the Application Menu (Continued) _ Night mode _ ISO Sensitivity [ _ Auto Review [ ISO is the sensitivity to light. When setting the Auto review to ON, It is convenient to take pictures without you can check the picture for about 2 the flash.
-
Page 45: Using The Playback Zoom
Using the Playback Zoom Select the picture in the playback Roll the jog ball upwards to display Set the zoom magnification. mode. (P27) the target zoom frame • After enlarging the picture, The magnification is restored by pressing the jog ball. •... -
Page 46: Marking The Picture As A "Favorite
Marking the Picture as a “Favorite” Pictures registered as a Favorite can be displayed as thumbnails ( ) or watched on the Slide show ( _ Attaching the Background music After selecting Select/Unselect in step 1, select Yes in Background music select screen. -
Page 47: Playing Back Still Pictures On The Slide Show
Playing back Still Pictures on the Slide Show Sequentially playing back the pictures allows you to tell a story using a Slide Show feature. • You cannot watch a slide show of the motion image. Item Details of Setting • You can stop slide show when Slide show All the pictures are pressing the jog ball during slide show. -
Page 48: Setting The Still Pictures To Be Printed (Dpof Print)
Setting the Still Pictures to be Printed (DPOF print) DPOF allows you to select which pictures you would like to print and how many of each you would like. Access the menu in the playback Select the picture. (Only when Select the number of printing and selecting Single print) press the jog ball. - Page 49 _ About printing with date _ About DPOF • If the file is not based on the DCF standard, the DPOF setting cannot be When selecting ON from Print date of DPOF is the abbreviation for Digital designated. Step 1, you can print the picture with the Print Order Format.
-
Page 50: Preventing Accidental Erasure Of Files (Lock Setting)
Preventing Accidental Erasure of Files (Lock setting) To prevent accidentally erasing precious photos, we strongly recommend using this feature. _ To cancel all locked files When you select Unlock all in step 1 and then select Yes on the confirmation screen, all the lock settings are cancelled. -
Page 51: Adding Audio To The Still Picture (Audio Dubbing)
Adding Audio to the Still Picture (Audio dubbing) This is an enjoyable function to add a narration or sound to still pictures. • When you delete the audio added or already included in the picture, select Erase [ ] on Step 1. And then select Yes. -
Page 52: Resizing The Still Picture
Resizing the Still Picture This function is useful when you want to reduce the volume of still pictures for e-mail or website. • It is not possible to resize pictures in a size lower than/equal to 320a240 or with an aspect ratio that is not 4:3. •... -
Page 53: Altering The Color Of The Still Picture (Color Creator)
Altering the Color of the Still Picture (Color Creator) You can add a nostalgic effect to still pictures with this function. • Motion images, still pictures with audio or Locked picture cannot be altered. • Pictures recorded with other equipment may not be altered. •... -
Page 54: Connecting To Pc
Connecting to PC _ Operating Environment SD Viewer Ver.2.1 SD-Jukebox Ver.4 Windows 98SE, Windows Me, Windows 98SE, Windows Me, Windows 2000, Windows XP Windows 2000 SP2 or later, Windows XP ® ® (Windows 98SE, Me) Intel Pentium II 300 MHz or higher ®... - Page 55 _ Installing the USB driver (Only for Windows 98SE/Me) Be sure to install the USB driver from the provided CD-ROM before connecting this unit to the PC. Close all software programs (even permanently resident software) running on Windows. • If you click on icons other than the USB driver, installation of the respective software begins.
- Page 56 Connecting to PC (Continued) _ Installing the SD Viewer Click on [Next]. Click on [Finish]. When the Set Up menu started, click • The installation of SD Viewer is on [SD Viewer Ver.2.1E] completed. • The Set Up menu starts automatically. Carefully read End User Licence •...
- Page 57 _ Features of SD-Jukebox Ver.4 _ Uninstalling the software • Records high quality music onto an SD Memory Card that can be played back Read License Agreement carefully, on this unit. Click on [Start] # [Control Panel], and click [Yes], if you accept the •...
- Page 58 Connecting to PC (Continued) _ Connecting this unit to PC • When the Power/Card Access Lamp of this unit is blinking, do not remove this When using Windows 98SE/Me, unit from the USB cradle nor connect only after installing the driver. Connect the USB cable and the AC disconnect the USB cable.
- Page 59 _ Checking that this unit is _ Removing the USB connection recognized correctly by the PC cable safely If the USB connection cable is removed or the power switched off while the PC is working, an error dialog box may appear. In such cases, click on [OK] to close the dialog box.
- Page 60 Connecting to PC (Continued) Click on [OK]. • The USB connection cable can be safely removed. Confirm that the [USB Mass Storage Device] is selected, click on [OK]. Click on [USB Mass Storage Device], and click on [Stop].
- Page 61 Before using for the first time, click on Memory Card can be displayed. [Readme] from [Start] #[All Programs] • You can input the recorded date to # [Panasonic] # [SD Viewer the still pictures. (D-snap)], please read the • Pictures in a memory card can be supplementary explanation or updated copied to a PC.
- Page 62 Connecting to PC (Continued) Closing the SD Viewer If the Memory card has been inserted, the pictures in the Memory card are displayed. • If the Memory card is not inserted, this message “There is no supported memory card” is displayed. Click on [OK] to start the SD Viewer.
- Page 63 _ About data in the card The following files are included in the folders on the card. • You can record up to 9999 pictures in • To read the PDF operating instructions, Adobe Acrobat Reader the folders such as 100_PANA folder. DCIM 5.0 or higher is needed.
-
Page 64: Lcd Monitor Display
LCD Monitor Display _ When taking pictures _ When playing back pictures _ When playing back music Audio player mode Recording mode Playback mode Stop/Play/Fast-forward/Fast-rewind Flash mode Stop/Play/Reading display [ Night mode Audio quality (EQ) Still picture with audio/Motion White balance image/Voice Repeat playback Picture quality setting... -
Page 65: Menu Screen Display
Menu Screen Display _ Menu in the recording mode REC mode Short cut menu When you press the MENU button for about 1 second, the short cut menu appears. It can carry out menu functions quickly. Still picture (P20) Quality mode (P39) Still picture + Audio (P23) REC mode (Refer to next column) Burst (P24) - Page 66 Menu Screen Display (Continued) _ Menu in the playback mode Play mode Short cut menu When you press the MENU button for about 1 second, the short cut menu appears. It can carry out menu functions quickly. Play (P27, 28, 29, 30) Arrange (P51, 53) Thumbnail (P35) Play mode (Refer to next column)
- Page 67 _ Menu in the music playback mode Short cut menu When you press the MENU button for about 1 second, the short cut menu appears. It can carry out menu functions quickly. Power save (P32) Play mode (P66) Playlist (P34) Thumbnail (P35) Repeat play (P33) Controller (P33)
-
Page 68: Cautions For Use
Cautions for Use _ About this unit Do not spray insecticides or volatile Do not use benzine, thinner or alcohol chemicals onto this unit. for cleaning this unit. Keep this unit away from magnetized • If this unit is sprayed with such •... - Page 69 _ Battery If the battery is dropped, check that Do not throw the battery into a fire. the terminal is not deformed. • If you heat or burn the battery, it may The battery is a rechargeable lithium cause an explosion. •...
- Page 70 • The ambient temperature or that of the battery itself is too high or too low. Charge the battery after warming the temperature of periphery or battery adequately. • The SD Multi Camera, battery or AC adaptor may be defective. Contact your nearest Panasonic dealer.
-
Page 71: Memory Card
_ Memory card _ Picture data When the power/card access lamp is • As a result of improper operations, Blinking (when the card is being read), recorded data may be damaged or do not remove the card, turn the erased. We are not responsible for the power off, or subject it to vibration or loss caused by the erasure of the impact. - Page 72 Cautions for Use (Continued) Maximum number of still pictures recordable on an SD Memory Card 1600 a 1200 1280 a 960 640 a 480 Picture size Picture quality Fine Normal Fine Normal Fine Normal 16MB 32MB 64MB 128MB 1299 256MB 1196 1414 2595...
- Page 73 _ LCD monitor _ Format • In a place with drastic temperature • Format the card on this unit. If changes, condensation may form on formatting the card using PC, use the LCD monitor. Wipe it with a soft, SD-Jukebox Ver.4 (supplied). dry cloth.
-
Page 74: Messages
Messages The confirmation/error message is displayed on the LCD monitor. Messages Countermeasures NO CARD Insert the memory card. NO TRACK Insert the card with music files. NO PICTURE NO VOICE Insert the card with the file recorded. CHECK CARD Remove the card once and then clean its terminal. CARD ERROR Remove the card once and then clean its terminal. - Page 75 Messages Countermeasures PLEASE WAIT Processing the data. Please wait for a while. LOW BATTERY The battery remaining is insufficient. Recharge the battery. NO SELECTED DATA There is no data that can be displayed as a thumbnail. CARD FULL Change the card or delete unnecessary data. FILE LOCKED Delete the file after releasing the protection.
-
Page 76: Trouble Shooting
Trouble Shooting Question Answer The power is not turned on. Is the battery inserted correctly? Check the direction of the battery. Is the battery remained enough? The power is immediately turned off. Is the battery exhausted? Recharge the battery or insert the fully charged battery. Cannot record. - Page 77 Question Answer Cannot remove the battery. Pull out the projection part to remove it. During Playback an [k] Indication is The data was either recorded in a different format, or data is damaged. displayed. Playing back or recording do not function Turn the power off.
-
Page 78: Specifications
Specifications SD Multi Camera Information for your safety Power source DC 4.8 V (AC Adaptor) DC 3.7 V (Battery) Power consumption 2.1 W (When recording the still picture) 1.1 W (When playing back the still picture) 0.3 W (When playing back music, setting power save, turning the LCD monitor off) Image sensor 1/3.2q CCD, Primary color filter Pixels... - Page 79 Image Compression JPEG Video Compression QuickTime Motion JPEG Voice Compression QuickTime Linear PCM Music Expansion AAC, MP3, WMA Dimensions (W Approx. 2-1/32q 4-3/32q 17/32q (51.5 103.7 13.5 mm) (Thinnest part 13/32q (9.9 mm)) Approx. 2.01 oz. (57 g) (without Battery and Memory Card) Weight Approx.
- Page 80 Specifications (Continued) USB Cradle: Panasonic VSK0643 Information for your safety Input DC 4.8 V 1.0 A Output DC 4.8 V 530 mA AC Adaptor: Panasonic VSK0626 Information for your safety Power source AC110-240 V 50/60 Hz Power consumption DC Output DC 4.8 V 1.0 A...
- Page 81 Memo...
-
Page 82: Limited Warranty (For U.s.a. Only)
If your product does not work properly because of a defect in materials or workmanship, Panasonic Consumer Electronics Company or Panasonic Sales Company (collectively referred to as “the warrantor”) will, for the length of the period indicated on the chart below, which starts with the date of original purchase (“warranty period”), at its option either (a) repair your product with new or... - Page 83 Carry-In or Mail-In Service For Carry-In or Mail-In Service in the United States call 1-800-211-PANA (1-800-211-7262). For assistance in Puerto Rico call Panasonic Sales Company (787)-750-4300 or fax (787)-768-2910. Limited Warranty Limits And Exclusions This warranty ONLY COVERS failures due to defects in materials or workmanship, and DOES NOT COVER normal wear and tear or cosmetic damage.
-
Page 84: Customer Services Directory (For U.s.a. Only)
1-800-332-5368 (Customer Orders Only) For hearing or speech impaired TTY 1-800-237-9080 (Fax Only) users, (Monday–Friday 9 am to 8 pm, EST.) Panasonic Services Company TTY: 1-866-605-1277 20421 84th Avenue South, Kent, WA 98032 (Accepts Visa, MasterCard, Discover Card, American Express, and Personal Check) Service in Puerto Rico Matsushita Electric of Puerto Rico, Inc. -
Page 85: Index
Index Audio dubbing ....51 Erasing ......36 Reset file No..... 18 Audio player ..... 31 Exposure Compensation ..43 Reset settings ....18 Auto power off ....18 Resize ......52 Auto Review ..... 44 Flash .........37 Format ......18, 73 Self timer ...... -
Page 86: Spanish Quick Use Guide/Guía Rápida Para El Usuario En Español
Spanish Quick Use Guide/ Guía rápida para el usuario en español ■ Preparación Cargar la batería. Insertar la tarjeta. Insertar la batería. - Page 87 ■ Grabación ■ Reproducción Sacar la fotografía. Encender. 1 Pasar al modo reproducción [ Pasar al modo grabación [ ]. 2 Seleccionar la fotografía que se desea ver. 2...
- Page 88 VQT0F01 50 A ) F0803Sn0 (...