Advertisement
Available languages
Available languages
Model • Modèle • Modelo
SPAC8499
For service, contact your nearest
service depot or call:
1-800-263-2629
to recommend a depot in
your area.
Pour obtenir le service, consultez
votre succursale régionale de
service ou téléphonez:
1-800-263-2629
qui vous recommandera
un centre régional.
Para obtener servicio, comuníquese con
su departamento de servicio más
cercano o llame al teléfono:
1-800-263-2629
para que le recomienden un
representante en su zona.
Printed in China (P.R.C.)
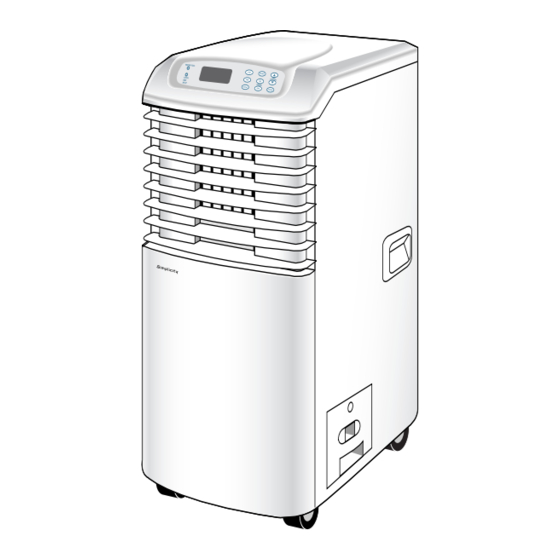
Portable 4 Season Home Comfort
The model number can be found on the serial plate located on the
back panel of the unit.
All repair parts available for purchase or special order when you visit
your nearest service depot. To request service and/or the location of
the service depot nearest you, call the TOLL FREE NUMBER.
When requesting service or ordering parts, always provide the
following information:
• Product Type
• Model Number
• Part Number
• Part Description
Appareil de confort au foyer portatif 4 saisons
Le numéro de modèle se trouve sur la plaque d'information sur la
paroi arrière de l'appareil.
Toutes les pièces de rechange ou commandes spéciales sont
disponibles de votre centre régional de service autorisé. Pour exiger
le service et-ou le nom de votre centre de service régional, signalez
le NUMÉRO SANS FRAIS.
Ayez les renseignements suivants à la portée de la main lors de la
commande de pièce ou service:
• Genre de produit
• Numéro de modèle
• Numéro de pièce
• Description de la pièce
Aparato de confort doméstico para 4 estaciones
El número del modelo se encuentra en la placa de información
ubicada en el tablero posterior de la unidad.
Todos los repuestos disponibles a la venta, o encargos especiales
se pueden obtener a través de su departamento de servicio más
cercano. Para solicitar servicio y/o la ubicación del departamento de
servicio más cercano, llame a nuestro número de teléfono DE
LLAMADA GRATIS.
Cuando solicite servicio o encargue repuestos, siempre suministre la
siguiente información:
• Tipo de producto
• Número del modelo
• Número del repuesto
• Descripción del repuesto
Danby Products Limited, Guelph, Ontario Canada N1H 6Z9
Danby Products Inc., Findlay, Ohio USA 45840
Advertisement

Related Manuals for Danby Simplicity SPAC8499


Summary of Contents for Danby Simplicity SPAC8499
- Page 1 1-800-263-2629 para que le recomienden un representante en su zona. Danby Products Limited, Guelph, Ontario Canada N1H 6Z9 Danby Products Inc., Findlay, Ohio USA 45840 Printed in China (P.R.C.) Portable 4 Season Home Comfort The model number can be found on the serial plate located on the back panel of the unit.
- Page 2 Danby Products Limited, Guelph, Ontario Canada N1H 6Z9 Danby Products Inc., Findlay, Ohio USA 45840 PORTABLE 4 SEASON HOME COMFORT Table of contents ..... .
-
Page 3: Table Of Contents
Introduction ........... . Electrical and Unit Specifications . - Page 4 Se garantiza que este producto de calidad se encuentra libre de defectos de fabricación en material y mano de obra, siempre que la unidad se use bajo las condiciones de funcionamiento normales propuestas por el fabricante. Esta garantía se encuentra disponible solamente para la persona a quien Danby o un distribuidor autorizado de Danby vendió originalmente esta unidad, y no se puede transferir.
-
Page 5: Cuidado Y Mantenimiento
Cuidado y Mantenimiento PRECAUCIÓN Antes de limpiar o reparar esta unidad, se recomienda desconectarla del tomacorriente. 1) No use gasolina, bencina, diluyentes ni ningún otro producto químico para limpiar esta unidad, ya que estas substancias pueden perjudicar la terminación de la unidad y deformar las piezas de plástico. -
Page 6: Introduction
Dealer’s Name and Address: This information will be required if your unit requires servicing and/or for general inquiries. To contact a Customer Service Representative, call Danby TOLL FREE. Do not leave this unit unattended in a space where people or animals who cannot react to a failed unit are located. - Page 7 Rated Volts Amps Wall Outlet Fuse Size Time Delay Fuse (or circuit breaker) Model SPAC8499 1380W/830W 57 Pints (27 L / 24 Hrs) Less than 54 dB(A) 115 V / 60 Hz 5.5 L (11.6 Pints) 8.5 L (18 Pints) 38 kg (83.7 lb.)
- Page 8 Instrucciones para la operación con el control remoto (cont’d) 6. Graduación de la oscilación: Oprima el botón “Swing” en el control remoto para activar la opción de oscilación automática del aire. El símbolo “ "aparecerá en la ventana LCDpor un momento confirmando que la opción "oscilación"...
- Page 9 Instrucciones para la operación con el control remoto 1. Para enviar una señal: Cuando se enciende la unidad principal (botón I/O), aparece este símbolo (1A) en la ventana LCD del control remoto. El control remoto debe estar apuntando directamente al tablero de control en la unidad principal cuando se inician los comandos.
-
Page 10: Window Installation
Energy-Saving Tips Your Simplicity appliance is designed to be highly efficient in energy savings. Follow these recommendations for greater efficiency. 1) Select a thermostat setting that suits your comfort needs and leave at that chosen setting. 2) The air filter is very efficient in removing airborne particles. -
Page 11: External Water Tank Instructions
External Water Tank Feature: This unit is equipped with a secondary “External Water Tank” feature. (tank quick connect to be installed by customer) The main unit is inclusive of a factory installed “quick connect” fitting located at the rear of the unit. When the external tank is connected to the main unit, it will increase total running time/operation (air conditioner &... - Page 12 Propiedades del control remoto La unidad portátil de control remoto le permite controlar todos los aspectos operativos (excluyendo los programas de horario automático) de su Artefacto de Confort Doméstico Portátil para 4 Estaciones, desde la conveniencia de su sillón favorito. A continuación presentamos algunos puntos importantes para la operación de la unidad con el control remoto portátil.
- Page 13 Graduación del RELOJ DE ENCENDIDO Y APAGADO AUTOMÁTICO Antes de graduar el reloj de encendido y apagado automático (AUTO-ON y AUTO-OFF), se debe graduar y hacer funcionar el reloj de la hora del día. También se debe seleccionar el MODO de operación adecuado.
- Page 14 External Water Tank Instructions (cont'd) 3. Position the external water tank on the support tray, making sure the quick connect on the water tank is aligned with the factory installed quick connect at the back of the cabinet. See Fig.37 Fig.37 4.
-
Page 15: Operating Instructions
Window / Patio Door Kit Installation Your window kit has been designed to fit most standard “vertical” and “horizontal” window applications. Now with the addition of a 3rd slider section, (Fig.2b), it is possible to install this kit in a patio door application (up to a maximum height of 80"). - Page 16 Graduación del RELOJ DE APAGADO AUTOMÁTICO 1) Antes de graduar el reloj de APAGADO AUTOMÁTICO, se debe graduar y hacer funcionar el RELOJ DE LA HORA DEL DÍA. 2) Oprima la tecla de TIMER-OFF (RELOJ DE APAGADO AUTOMÁTICO) para iniciar la secuencia de tiempo de APAGADO AUTOMÁTICO.
- Page 17 Graduación del RELOJ DE ENCENDIDO AUTOMÁTICO (continúa) 5) Ahora se han registrado todas las graduaciones. APAGUE LA UNIDAD USANDO EL CONMUTADOR I/O. 6) Para graduar el reloj de ENCENDIDO AUTOMÁTICO, la unidad deberá estar en la posición “off” (apagada) o sea no funcionando. 7) Oprima la tecla de TIMER-ON (RELOJ DE ENCENDIDO AUTOMÁTICO) para iniciar la secuencia de tiempo de ENCENDIDO AUTOMÁTICO.
- Page 18 I/O: Power Switch On / Off. MODE Indicator Lights: Illuminate under the different mode settings Fig. 6; COOL Mode: DRY (Dehumidifier) Mode: HEAT Mode: FAN Mode: Green Light: Remains on while compressor is operating. Green light turns off when desired temperature is achieved.
- Page 19 Setting TIME OF DAY (Clock) Instructions: 1) Push and hold the CLOCK key pad for three (3) seconds. The clock display will flash indicating “12.00” for approximately 10 seconds. Fig. 8. 2) Push either the ^ or key pad, to enter the correct time of day.
- Page 20 Instrucciones para el reloj automático NOTA: No puede graduar los programas del horario automático con el control remoto portátil. El RELOJ DE LA HORA DEL DÍA se debe graduar antes de que el RELOJ AUTOMÁTICO pueda funcionar. La opción del RELOJ AUTOMÁTICO ofrece una selección especial de programas de selección múltiple y encendido/apagado totalmente automático entre 0-23 horas, 50 minutos, bajo cualquiera de los modos de su unidad de Confort Doméstico Portátil de 4 Estaciones.
- Page 21 Instrucciones para la operación del ventilador 1) Oprima la tecla I/O (encendido/apagado) para encender la unidad. 2) Oprima la tecla de MODO hasta que la palabra FAN (VENTILADOR) aparezca en la ventana de visualización de cristal líquido (LCD según sus siglas en inglés). Figura 25. Cada vez que se oprima la tecla de MODO, se adelantará...
- Page 22 Air Conditioner Operating Instructions (cont’d) 5) Press the FAN key to select the desired fan speed setting (Low-Med-High). See Fig. 14. Your selection will be displayed in the LCD window (each depression of the fan key will advance to a different setting). 6) Press the SWING key to activate the automatic air swing (oscillating) feature (the “air swing”...
- Page 23 However, it is not recommended to operate your Dehumidifier, below temperatures of 15.5°C (60°F), this could result in icing-up conditions of the evaporator coils, minimizing efficiency.
- Page 24 Instrucciones para la operación de la calefacción 1) Oprima la tecla I/O (encendido/apagado) para encender la unidad. Oprima la tecla de MODO hasta que la palabra HEAT (CALOR) aparezca en la ventana de visualización de cristal líquido (LCD según sus siglas en inglés). Figura 20. Cada vez que se oprima la tecla de MODO, se adelantará...
- Page 25 Instrucciones de operación para SECAR (Deshumidificador) (continúa) 6) Para conectar la opción de desagüe continuo, retire el tanque de agua del armario. Dentro del armario (zona del tanque de agua), encontrará una sección de la manguera colgada al lado del tanque de agua, que tiene un tapón/tapa en el extremo.
- Page 26 DRY (Dehumidifier) Operating Instructions (cont’d) 6) To connect the continuous drain option. Remove the water tank from the cabinet. Inside the cabinet (water tank area) you will find a section of hose hanging beside the water tank, which is plugged/capped at the end. Remove the plug...
- Page 27 Heater Operating Instructions 1) Press the MODE key until the word Heat is displayed in the LCD window. Fig. 20. Each depression of the MODE key will advance to a different mode setting (Cool-Dry-Heat-Fan). The red indicator light will come on indicating the “Heating”...
- Page 28 Instrucciones de operación para SECAR (Deshumidificador) 1) Oprima la tecla I/O (encendido/apagado) para encender la unidad. 2) Oprima la tecla de MODO hasta que la palabra DRY (SECAR) aparezca en la ventana de visualización de cristal líquido (LCD según sus siglas en inglés). Figura 17. Cada vez que se oprima la tecla de MODO, se adelantará...
- Page 29 Instrucciones de operación del acondicionador de aire (continúa) 5) Oprima la tecla FAN (VENTILADOR) para seleccionar la graduación de velocidad del ventilador que se desea (Baja- Mediana-Alta). Ver Figura 14. Su selección aparecerá en la ventana LCD (cada vez que se oprima la tecla del ventilador, se avanzará...
- Page 30 Fan Operating Instructions 1) Press the I/O (on/off) key pad to switch on the unit. 2) Press the MODE key until the word FAN is displayed in the LCD window. Fig. 25. Each depression of the MODE key will advance to a different mode setting (Cool-Dry-Heat-Fan).
- Page 31 Auto-Timer Instructions NOTE: Auto-Timed programs cannot be set with the hand held remote control. The TIME OF DAY CLOCK must be set before the AUTO-TIMER feature will operate. The AUTO-TIMER feature offers a unique selection of multiple choice, fully automatic on/off (start/stop) programs between 0 - 23 hrs, 50 min.
- Page 32 Instrucciones para graduar la HORA DEL DÍA (Reloj): 1) Presione y sostenga la tecla de CLOCK (RELOJ) durante tres (3) segundos. La visualización del reloj centelleará indicando “12.00” durante unos 10 segundos. Figura 8. 2) Presione ya sea la tecla para entrar la hora correcta del día.
- Page 33 Funciones del teclado (Figura 5) El panel de control sobre esta unidad "ilumina" automáticamente cuando cualquier almohadilla(bloc) clave es deprimida. Este rasgo "de iluminación" "auto-desactivará" (la vuelta - de) automáticamente aprox. 30 segundos después de que la almohadilla(el bloc) pasada(última) clave es deprimida. I/O: Conmutador de corriente –...
- Page 34 Setting the AUTO-ON TIMER (cont’d) 5) All of the settings are now registered. TURN THE UNIT “OFF” USING THE I/O SWITCH. 6) To set the AUTO-ON timer, the unit must be turned to the “off” position (non-operational). 7) Press the TIMER-ON key pad to initiate the AUTO-ON time sequence.
- Page 35 Setting the AUTO-OFF TIMER Before setting the AUTO-OFF timer, the time of day clock must be set/operational. 1) To set the AUTO-OFF timer, the unit must be turned on (I/O switch) and operational. 2) Press the TIMER-OFF key pad to initiate the AUTO-OFF time sequence.
- Page 36 INSTALACIÓN DEL JUEGO PARA LA VENTANA/PUERTA DE PATIO Su juego para la ventana ha sido diseñado para que se adapte a la mayoría de aplicaciones estándar de ventanas verticales y horizontales. Ahora con la adición de una tercera sección de corredera (Fig.
- Page 37 Instrucciones para la instalación del tanque de agua (continúa) 3. Ponga el tanque de agua a la posición correcta sobre la reborde apoyante. Asegúrese de que el conector rápido sobre el tanque de agua está alineado con el conector rápido, instalado a la factoría, localizado al posterior del armario.
- Page 38 Setting the AUTO-ON & AUTO-OFF TIMER Before setting the AUTO-ON & AUTO-OFF Timer, the time of day clock must be set/operational. You must also select the appropriate operating MODE. After the appropriate settings have been made, turn off the unit. 1) Press the TIMER-ON key pad to initiate the AUTO-ON time sequence.
- Page 39 Upper Control Buttons I/O: Power switch (On/Off). Mode: Selects the operating mode (Auto–Cool–Dry/Dehumidifier–Heat–Fan). The "auto" mode is a built in feature activated from the hand held remote unit only. Under "auto" mode, your unit will automatically select the required operating mode based on temperature selection.
- Page 40 El tanque de agua externo Esta unidad viene equipada con un "tanque de agua externo" secundario (el tanque con el conector rápido tiene que estar instalado por el consumidor). El conector rápido está instalado por la factoría y viene con la unidad principal. Se encuentra por la parte trasera de la unidad.
- Page 41 Sugerencias para ahorrar energía Su artefacto Simplicity ha sido diseñado para un rendimiento muy eficaz en ahorro de energía. Siga estas recomendaciones para una mayor eficacia. 1. Seleccione una graduación del termostato que se adapte a su requisitos de confort y déjelo en la graduación seleccionada. 2.
- Page 42 Remote Control Operating Instructions 1. Sending Signal: When the main unit is turned on (I/O button), this symbol (1A) will appear in the remote LCD window. The remote must be aimed directly at the control panel on the main unit when initiating commands.
- Page 43 SPECIAL NOTE: (Air Conditioner & Dehumidifier Modes Only) • This unit can operate without the secondary external water tank being installed, providing the primary "internal" water tank is correctly installed.
- Page 44 Tamaño del fusible Fusible temporizado (o disyuntor) 1380 vatios (alto) 12 amperios 830 vatios (bajo) 7.2 amperios Tamaño AWG del cable * Tipo enchufe Modelo SPAC8499 8400Btu/h 1380W/830W 57 pintas (27/24 horas) Menos de 54 dB (A) 115 V /60 Hz 5.5 L (11.6 Pints)
- Page 45 Esta información será necesaria si se requiere dar servicio a la unidad y/o para toda solicitud de información al respecto. Para comunicarse con un Representante de Servicio al Cliente, tenga la bondad de llamar por teléfono sin cargo alguno a Danby, al número: 1-800-263-2629...
-
Page 46: Care And Maintenance
Care and Maintenance CAUTION Before cleaning or servicing this unit, it is recommended that the unit be disconnected from any electrical supply outlet. 1) Do Not use gasoline, benzene, thinner or any other chemicals to clean this unit ,as these substances may cause damage to the finish and deformation of plastic parts. -
Page 47: Warranty
This quality product is warranted to be free from manufacturer’s defects in material and workmanship, provided that the unit is used under the normal operating conditions intended by the manufacturer. This warranty is available only to the person to whom the unit was originally sold by Danby or by an authorized distributor of Danby, and is non-transferable. First 2 Years During the first 2 year (2), any electrical parts of this product found to be defective, including any sealed system units, will be repaired or replaced, at warrantor’s option, at no charge to the ORIGINAL purchaser. - Page 48 Introducción ........... 48 Especificaciones eléctricas y de la unidad .
- Page 49 En vertu de la présente, Danby Products Limitée (Canada) ou Danby Products Inc. (E.- U. d’A.) ne peut être tenue responsable en cas de blessures corporelles ou des dégâts matériels, y compris à l’appareil, quelle qu’en soit les causes. Danby ne peut pas être tenue responsable des dommages indirects dus au fonctionnement défectueux de l’appareil.
- Page 50 Table des matières Page Introduction ... 25 Spécifications électriques de l’appareil ... 26 Conseils pour la conservation d’énergie ... 27 Directive d’installation dans la fenêtre ... 27 Instructions d’installation du réservoir d’eau externe ... 28 Instructions d’utilisation... 30 Soins et entretien ... 45 Garantie ...
- Page 51 Soins et entretien PRÉCAUTION Avant le nettoyage ou la réparation de cet appareil, nous recommandons que l’appareil soit débranché de toute source de courant électrique. 1) Ne jamais utiliser d’essence, benzine, diluant ou autres produits chimiques sur le climatiseur car ces matières risquent d’endommager le fini de la peinture et de déformer les pièces en plastique.
- Page 52 Instructions d’utilisation de la télécommande (suite) 6. Réglage du balayage: Appuyez sur la touche “Swing” de la télécommande pour activer la fonction de balayage automatique (par oscillation). Le symbole " temporairement sur l'affichage ACL de la télécommande pour indiquer que la fonction de balayage est activée ou arrêtée.
- Page 53 Nom du marchand et adresse: ___________________________________________ Ces renseignements sont nécessaires si l’appareil exige le service et–ou pour obtenir des renseignements. Pour consulter un Représentant de service au client, téléphonez Danby SANS FRAIS. Ce symbole représente une précaution ou un avertissement Cet appareil ne doit jamais fonctionner dans une pièce où...
- Page 54 Tension nominale Ampères Prise de courant Fusible Fusible à retardement (ou disjoncteur) Modèle SPAC8499 Moins que 54 dB(A) Commande à touches douces 1050 Watts (9,0 amp.) 1 380 Watts (Haut) 12 amp. 830 Watts (Bas) 7,2 amp. 1050 W (9,0 amp.) Taille du fil AWG Type à...
- Page 55 Instructions d’utilisation de la télécommande 1 Envoyez un signal: Lorsque l’appareil est mis en marche (touche I/O), le symbole (1A) est indiqué sur l’affichage ACL de la télécommande. La télécommande doit être pointée directement vers le panneau de commande de l’appareil pour activer les commandes.
- Page 56 Caractéristiques de la Télécommande La télécommande à main permet la programmation de toutes les fonctions (à l’exception des programmes de minuterie automatique AUTO-TIMED) de votre appareil de confort au foyer 4 saisons du confort de votre divan préféré. Voici quelques renseignements sur le fonctionnement de l’appareil par la télécommande.
- Page 57 Conseil pour la conservation d’énergie Votre appareil Simplicity est doté d’une conception à très haute économie énergétique. Les procédés suivants vous aideront à obtenir un meilleur rendement. 1) Une fois votre thermostat réglé pour votre confort, ne changez pas sa position. 2) Le filtre est très efficace pour l’élimination des particules suspendues dans l’air.
- Page 58 Le réservoir d’eau externe: Cet appareil est équipé d'un "deuxième réservoir d'eau externe" (le raccord rapide doit être installé par le client). L'unité primaire comprend un "raccord rapide" installé à l'usine et situé à l'arrière de l'appareil. Lorsque le réservoir d'eau externe est branché...
- Page 59 Réglage du minuteur AUTO–ON et AUTO–OFF Il faut s’assurer que l’heure actuelle est réglée et fonctionne avant de régler la minuterie AUTO ON et AUTO-OFF. Vous devez aussi choisir le MODE de fonctionnement approprié. Une fois que le réglage est complété, arrêtez l’appareil. 1) Appuyez la touche TIMER–ON pour mettre en marche la séquence de minuterie AUTO–ON.
- Page 60 Réglage du minuteur d’arrêt automatique Il faut s’assurer que l’horloge est réglée et fonctionne avant de régler le minuteur pour la mise en marche automatique. 1) Pour régler l’arrêt automatique, l’appareil doit être en marche (touche I/O). 2) Appuyez sur la touche TIMER OFF pour initialiser la séquence d’...
- Page 61 Instructions d’installation du réservoir d’eau externe (suite): 3. Mettez le réservoir d’eau externe à la bonne position sur le rebord de soutien. S’assurez que le raccord rapide du réservoir d’eau est aligné sur le raccord rapide intstallé à l’usine à l’arriére du caisson. Voir Fig.37 Fig.37 4.
- Page 62 Installation du jeu de fenêtre / porte patio La conception du jeu de la fenêtre permet l’ajustement de l’appareil à la plupart des fenêtres à coulissement “vertical” ou “horizontal”. L’incorporation d’une troisième section coulissante, (Fig.2b) permet l’installation du jeu dans une porte patio (jusqu’à...
- Page 63 Réglage du minuteur de mise en marche automatique (l’horloge doit être réglée) (suite) 5) Le réglage est maintenant complété. ARRÊTEZ L’APPAREIL “OFF” EN UTILISANT L’INTERRUPTEUR I/O. 6) Pour régler le minuteur à MISE EN MARCHE AUTOMATIQUE, l’appareil doit être à la position “off” (ne fonctionne pas).
- Page 64 Instructions pour le minuteur automatique REMARQUE: Les programmes du minuteur automatique ne peuvent pas être programmer avec la télécommande à main. L’horloge doit être réglée pour obtenir le fonctionnement du MINUTEUR AUTOMATIQUE. Le mode du MINUTEUR AUTOMATIQUE est un unique programme à...
- Page 65 FONCTION DES TOUCHES DE COMMANDE Fig. 5 Les touches du panneu de commande “‘s’allument” automatiquement lorsqu’une touche est appuyée. Cette “illumination” s’arrête automatiquement (s’éteind) environ 30 secondes après le dernier appui sur une touche. I/O (Mise en marche/arrêt): Interrupteur de mise en marche / arrêt.
- Page 66 Réglage de l’HEURE (horloge): 1) Appuyez sur la touche CLOCK pendant trois (3) secondes. L’affichage indique “12.00” pendant environ 10 secondes. Fig. 8. 2) Appuyez sur la touche pour obtenir l’heure exacte. Chaque appui sur la touche augmente ou décroît l’heure indiquée une minute à...
- Page 67 Instructions d’utilisation du ventilateur 1) Appuyez sur la touche I/O (mise en marche/arrêt) pour mettre l’appareil en marche. 2) Appuyez sur la touche MODE jusqu’à ce que le mot FAN (ventilateur) soit indiqué sur l’ACL. Fig. 25. Chaque appui sur la touche MODE change le réglage de mode (Refroidissement–déshumidification- chaleur–ventilation).
- Page 68 Instructions d’utilisation du radiateur 1) Appuyez sur la touche MODE jusqu’à ce que le mot HEAT (chaleur) soit indiqué sur l’ACL. Fig. 20. Chaque appui sur la touche MODE change le réglage de mode (Refroidissement–déshumidification- chaleur–ventilation). La lampe rouge s’allume pour indiquer le fonctionnement du mode de chauffage (il peut se produire un bref délai de 5 à...
- Page 69 Instructions d’utilisation du climatiseur (suite) 5) Appuyez sur la touche FAN pour choisir la vitesse du ventilateur de votre choix (Low–Med–High). Voir la Fig. 14. Votre choix est indiqué sur l’ACL. Chaque appui sur la touche de ventilation change le réglage). 6) Appuyez sur la touche SWING pour activer le balayage d’air (oscillation) (le symbole “air swing”...
- Page 70 Instructions d’utilisation du déshumidificateur 1) Appuyez sur la touche I/O (mise en marche/arrêt) pour mettre l’appareil en marche. 2) Appuyez sur la touche MODE jusqu’à ce que le mot DRY (déshumidificateur) soit indiqué sur l’ACL. Fig. 17. Chaque appui sur la touche MODE change le mode (Refroidissement–chaleur-déshumidification–...
- Page 71 Instructions d’utilisation du déshumidificateur (suite) 6) Raccord de l’option d’écoulement continu. Enlevez le réservoir d’eau du caisson. A l’intérieur du caisson (section du réservoir) il se trouve une section de boyau qui est suspendue à côté du réservoir. Celui–ci est bouché. Enlevez le bouchon du bout du boyau et installez le raccord du boyau d’écoulement (trouvé...