TRENDnet TFM-PCIV92A User Manual
Hide thumbs
Also See for TFM-PCIV92A:
- Quick installation manual (29 pages) ,
- Specifications (2 pages) ,
- Datasheet (2 pages)
Table of Contents
Advertisement
Quick Links
Advertisement
Table of Contents

Related Manuals for TRENDnet TFM-PCIV92A


Summary of Contents for TRENDnet TFM-PCIV92A
-
Page 2: Table Of Contents
TABLE OF CONTENT 1. Contents of Package 2. Comprehensive Modem Installation Instructions Modem Installation Hardware Installation System Setup 2.3.1 Setup Instructions for Windows 98 2.3.2 Uninstall Modem from Windows 98 2.3.3 Setup Instructions for Windows Me 2.3.4 Uninstall Modem from Windows Me 2.3.5 Setup Instructions for Windows NT4.0 2.3.6... -
Page 3: Contents Of Package
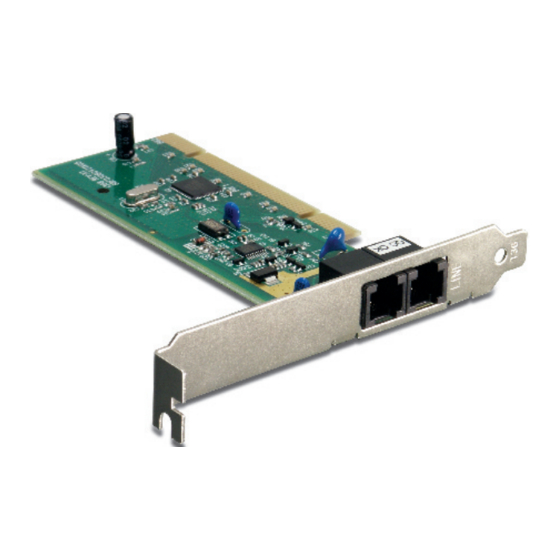
Section 1 Contents of Package One 56K (V.92) High Speed Internal PCI Data/Fax/Voice Modem One Quick Installation Guide One Driver CD-ROM with User’s Guide One RJ-11 Telephone Cable Please contact your local dealer if there is any content missing. Section 2 Comprehensive Modem Installation Instructions Section 2.1 Modem Installation... - Page 4 Fasten the modem bracket firmly with the screw saved in step 5. Reassemble your computer cover and re-plug cables for peripheral. Plug one end of telephone cord into the "LINE" jack at the modem's bracket. Plug another end of the telephone cord into the telephone wall jack 10.
-
Page 5: System Setup
Section 2.3 System Setup Section 2.3.1 Setup instructions for Windows 98 STEP 1. After you complete the modem hardware installation, turn on your PC. The Windows system will automatically detect your new added devices. Windows system will prompt you with an “Add New Hardware Wizard”. -
Page 6: Uninstall Modem From Windows 98
Section 2.3.2 Uninstall Modem from Windows 98 STEP 1. Open Control Panel window, then click Add/Remove Programs icon. STEP 2. Choose Agere Systems PCI Soft Modem device in stall/Uninstall tab, then click on Add/Remove… . STEP 3. Click Yes to ensure to remove Agere Systems PCI Soft Modem device and its drivers. STEP 4. -
Page 7: Setup Instructions For Windows Me
Section 2.3.3 Setup instructions for Windows Me STEP 1. After you complete the modem hardware installation and turn on your PC, Windows system will automatically detect and install your new added devices. Windows system will prompt you with an Add New Hardware Wizard. Click on Cancel. -
Page 8: Uninstall Modem From Windows Me
Section 2.3.4 Uninstall Modem from Windows Me STEP 1. Open Control Panel window, then click on Add/Remove Programs icon. STEP 2. Choose Agere Systems PCI Soft Modem device in Install/Uninstall tab, then click on Add/Remove... STEP 3. Click Yes to ensure to remove Agere Systems PCI Soft Modem device and its drivers. STEP 4. -
Page 9: Setup Instructions For Windows Nt4.0
Section 2.3.5 Setup instructions for Windows NT4.0 STEP 1. Insert the Modem Driver CD-ROM disk attached with your modem into the CD-ROM drive device, Then run <CD-ROM letter>:\Drivers\ NT4\Setup.exe as shown in figure. STEP 2. And then, a prompt screen will ask you to ensure to install the modem driver. Then click OK. -
Page 10: Uninstall Modem From Windows Nt4.0
Section 2.3.6 Uninstall Modem from Windows NT4.0 STEP 1. Open Control Panel window, then click Add/Remove Programs icon. STEP 2. Choose Agere Systems PCI Soft Modem device in stall/Uninstall tab, then click on Add/Remove… . STEP 3. Click Yes to ensure to remove Agere Systems PCI Soft Modem device and its drivers. STEP 4. -
Page 11: Setup Instructions For Windows 2000
Section 2.3.7 Setup instructions for Windows 2000 STEP 1. After you complete the modem hardware installation and turn on your PC, Windows system will automatically detect your new added devices. Windows system will prompt you with an Add New Hardware Wizard. Click on Cancel. - Page 12 STEP 4. The prompt screens will be warning you that the digital signature of programs have not found as shown in figure. Please always click on Yes. STEP 5. If there is no error message while the system is installing, your modem has been set up properly and functionally.
-
Page 13: Uninstall Modem From Windows 2000
Section 2.3.8 Uninstall Modem from Windows 2000 STEP 1. Open Control Panel window and choose Add/Remove Programs icon. STEP 2. Select Agere Systems PCI Soft Modem device in Change or Remove Programs tab, then click on Change/Remove. STEP 3. Click Yes to ensure to remove Agere Systems PCI Soft Modem device and its drivers. STEP 4. -
Page 14: Setup Instructions For Windows Xp
Section 2.3.9 Setup instructions for Windows XP STEP 1. After you complete the modem hardware installation and turn on your PC, Windows system will automatically detect and install your new added devices. Windows system will prompt you with an Add New Hardware Wizard. Click on Cancel. - Page 15 STEP 4. The prompt screens will be warning you that the digital signature of programs have not found as shown in figure. Please always click on Yes. STEP 5. If there is no error message while the system is installing, your modem has been set up properly and functionally.
-
Page 16: Uninstall Modem From Windows Xp
Section 2.3.10 Uninstall Modem from Windows XP STEP 1. Open Control Panel window, then click on Add or Remove Programs icon. STEP 2. Choose Agere Systems PCI Soft Modem device in Change or Remove Programs tab, then click on Change/Remove. STEP 3. -
Page 17: Testing Your Modem
Section 2.4 Testing Your Modem Before you set up your software, start with a quick test to check that your modem is working. Once you have determined that your modem is setup properly, go on to Section 2.5 Install Communication Software to install your communications software. -
Page 18: Troubleshooting
Section 3 Troubleshooting Your modem is designed to provide reliable and trouble-free functionality, however, should you experience any difficulty, the information contained in this section will assist you in determining and resolving the source of the problem. Problem: Modem does not respond to AT commands Possible solutions: Make sure the modem is not configured with a conflicting COM port and IRQ setting. - Page 19 when transferring binary files). Make sure the data speed is not faster than your computer capability. Operating too many applications at the same time may cause communication problem. Close unnecessary application in your system. Problem: Modem exhibits poor voice recording or playback Possible solutions: Make sure the correct modem type is selected in the Voice/FAX software.
-
Page 20: Appendix 1 Modem Specifications
Appendix 1 Modem Specifications Modulation standards : V.92, V.90, V.34, V.32bis, V.32, V.29, V.27ter, V.22bis, V.23,V.22, V.21,V.17, Bell212/103 Compression : V.44, V.42bis, MNP Class 5 Error Correction : V.42, MNP Class 2-4 Host Interface : PCI bus FAX Group : Group III FAX Command : EIA/TIA 578 class 1 - 19 -... -
Page 21: Appendix 2 At Command Set
Appendix 2 AT command set Executing commands Your modem is in Command Mode upon power-on and is ready to receive and execute AT commands. The modem remains in Command Mode until it makes a connection with a remote modem. Commands may be sent to the modem from an attached terminal or a PC running a communication program. - Page 22 Command prefix Pause the time specified in S-register S8 Flash hook Wait for quiet answer Disable data calling tone transmission Bong tone detection Return to command mode Disables echo Enables echo Hang up the telephone line Pick up the telephone line Reports modem identify string and driver version number Calculate ROM checksum and report it to DTE Verifies ROM checksum and report OK or ERROR...
- Page 23 Command prefix Sn=x Write x to S-register n; refer to S-register summary for the details Read from S-register n; refer to S-register summary for the details Select tone dialing Choose numeric form result code Choose verbose form result code Reports DTE connect speed result code, disable protocol result codes Reports DTE connect speed result code, enable protocol result codes Reports DCE connect speed result code, enable protocol result codes Enables result code 0-4;...
- Page 24 Command prefix &Q6 Same as &Q0 &Q8 Select MNP error control mode. If fail to connect, the modem will fallback according to current setting in S36 &Q9 Select V42 or MNP error control mode. If fails to establish, the modem will fallback according to current setting in S36 &S0 DSR always ON...
- Page 25 Command prefix n = 14 44000 BPS n = 15 45333 BPS n = 16 46666 BPS n = 17 48000 BPS n = 18 49333 BPS n = 19 50666 BPS n = 20 52000 BPS n = 21 53333 BPS -V90? Reports current V.90 setting...
-
Page 26: Appendix 3: S-Register Summary
Appendix 3 S-Register Summary Register Function Default Range Units No. of rings to start auto-answer 0 0-255 ring Ring count 0-255 ring Escape character 0-255 ASCII Carriage return character 0-127 ASCII Line feed character 0-127 ASCII Backspace character 0-32,127 ASCII Wait before dialing 2-65 second... - Page 27 Register Function Default Range Units 101 X2 is selected 110 X3 is selected 111 X4 is selected Bit 7 33/67 M/B ratio is selected(&P1, &P2) 39/61 M/B ratio is selected(&P0) S28* Control V.34 modulation Disables V.34 modulation Enables V.34 modulation S30* Inactivity timer 0-255...
- Page 28 Register Function Default Range Units Auto rate 32K BPS 34K BPS 36K BPS 38K BPS 40K BPS 42K BPS 44K BPS 46K BPS 48K BPS 50K BPS 52K BPS 54K BPS 56K BPS S48* Error control feature 7,128 Negotiation enabled 128 Negotiation disabled S89* Sleep mode timer...
-
Page 29: Appendix 4 Result Codes Summary
Appendix 4 Result Codes Summary Verbose Code Numeric Code CONNECT RING NO CARRIER ERROR CONNECT 1200 EC* NO DIAL TONE BUSY NO ANSWER DELAYED BLACKLISTED BLACKLIST FULL CONNECT 300 EC* CONNECT 2400 EC* CONNECT 4800 EC* CONNECT 7200 EC* CONNECT 9600 EC* CONNECT 12000 EC* CONNECT 14400 EC* CONNECT 16800 EC*... - Page 30 Verbose Code Numeric Code CONNECT 38000 EC* CONNECT 38400 EC* CONNECT 38666 EC* CONNECT 40000 EC* CONNECT 41333 EC* CONNECT 42000 EC* CONNECT 42666 EC* CONNECT 44000 EC* CONNECT 45333 EC* CONNECT 46000 EC* CONNECT 46666 EC* CONNECT 48000 EC* CONNECT 49333 EC* CONNECT 50000 EC* CONNECT 50666 EC*...
-
Page 31: Appendix 5: Government Compliance
Appendix 5 Government compliance notices FCC compliance This equipment complies with Part 68 of the FCC Rules. On this equipment is a label that contains, among other information, the FCC registration number and Ringer Equivalence Number (REN) for this equipment. You must, upon request, provide this information to your telephone company. - Page 32 DOC compliance information NOTICE: The Canadian Department of Communications label identifies certified equipment. This certification means that the equipment meets certain telecommunications network protective, operational and safety requirements. The Department does not guarantee the equipment will operate to the user’s satisfaction. Before installing this equipment, users ensure that it is permissible to be connected to the facilities of the local Telecommunications Company.
- Page 33 TFM-PCIV92A – 3 Years Warranty If a product does not operate as warranted above during the applicable warranty period, TRENDnet shall, at its option and expense, repair the defective product or part, deliver to customer an equivalent product or part to replace the defective item, or refund to customer the purchase price paid for the defective product.
- Page 34 CONNECTION WITH THE SALE, INSTALLATION MAINTENANCE OR USE OF TRENDNET’S PRODUCTS. TRENDNET SHALL NOT BE LIABLE UNDER THIS WARRANTY IF ITS TESTING AND EXAMINATION DISCLOSE THAT THE ALLEGED DEFECT IN THE PRODUCT DOES NOT EXIST OR WAS CAUSED BY CUSTOMER’S OR ANY THIRD PERSON’S MISUSE, NEGLECT, IMPROPER INSTALLATION OR TESTING, UNAUTHORIZED ATTEMPTS TO REPAIR...