Table of Contents
Advertisement
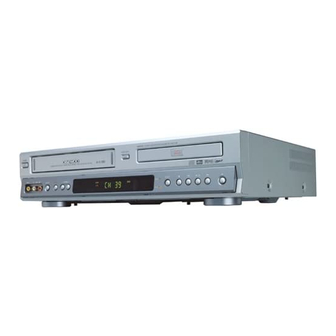
DVD-Video(USA)_DV6T811N-LT 02.4.16 4:40 PM ˘ ` A
DVD-VIDEO PLAYER
Owner's Manual
DV6T811N
In the initial settings, exclusive channel for
DVD/Video is set to CH 3. Set the TV channel
to CH3 before using it.
Region code of DVD/Video player for home is
1 or ALL. In inserting a disc with other region
code, it does not operate. Please only use a
disc with region code 1 or ALL.
displayed in operating the product, please
wait for a while, then use it. If "
mark continues to be displayed in pressing a
button after that, it means the button does not
function in the currently played disc.
Press a product button on the REMOTE then
use the product.
• DVD operation : [DVD] button
• Video operation : [VCR] button
[Hi-Fi]
is a 'Prohibition' mark. If this mark is
Prohibition"
Advertisement
Table of Contents

Related Manuals for Daewoo DV6T811N


Summary of Contents for Daewoo DV6T811N
- Page 1 DVD-Video(USA)_DV6T811N-LT 02.4.16 4:40 PM ˘ ` A DVD-VIDEO PLAYER Owner’s Manual DV6T811N [Hi-Fi] In the initial settings, exclusive channel for DVD/Video is set to CH 3. Set the TV channel to CH3 before using it. Region code of DVD/Video player for home is 1 or ALL.
-
Page 2: Important Safeguards
DVD-Video(USA)_DV6T811N-LT 02.4.16 2:37 PM ˘ ` 1 Important Safeguards CAUTION RISK OF ELECTRIC SHOCK DO NOT OPEN CAUTION: TO REDUCE THE RISK OF ELECTRIC SHOCK, DO NOT REMOVE COVER (OR BACK). NO USER- SERVICEABLE PARTS INSIDE. REFER SERVICING TO QUALIFIED SERVICE PERSONNEL. WARNING : TO REDUCE THE RISK OF FIRE OR ELECTRIC SHOCK, DO NOT EXPOSE THIS APPLIANCE TO RAIN OR MOISTURE. - Page 3 DVD-Video(USA)_DV6T811N-LT 02.4.16 2:37 PM ˘ ` 2 This set has been designed and manufactured to assure personal safety. Improper use can result in electric shock or fire hazard. The safeguards incorporated in this unit will protect you if you observe the following procedures for installation, use and servicing.
- Page 4 DVD-Video(USA)_DV6T811N-LT 02.4.16 2:37 PM ˘ ` 3 11 GROUNDING OR POLARIZATION This unit is equipped with a polarized alternating -current line plug (a plug having one blade wider than the other). This plug will fit into the power outlet only one way. This is a safety feature. If you are unable to insert the plug fully into the outlet, try reversing the plug.
- Page 5 DVD-Video(USA)_DV6T811N-LT 02.4.16 2:37 PM ˘ ` 4 21 SERVICING Do not attempt to service this unit yourself as opening or removing covers may expose you to dangerous voltage or other hazards. Refer all servicing to qualified service personnel. 22 DAMAGE REQUIRING SERVICE Unplug this unit from the wall outlet and refer servicing to qualified service personnel under the following conditions.
-
Page 6: Advantages Of This Product Are
DVD-Video(USA)_DV6T811N-LT 02.4.16 2:37 PM ˘ ` 5 Advantages of This Product Are ... • DVD, VCD, CD, CD-R(MP3), CD-RW, VHS, S-VHS playback function • DVD one-touch record function • Watching DVD for recording broadcast • Integrated REMOTE (VCR, DVD) • Ultra power savings : less than 3W for stand-by mode •... - Page 7 DVD-Video(USA)_DV6T811N-LT 02.4.16 2:37 PM ˘ ` 6 • Slow Forward / reverse (DVD) playback • Fast Forward / reverse playback • Search of title, chapter, and time in DVD disc, and search of track and time in VCD and CD •...
-
Page 8: Read Carefully Before Using
DVD-Video(USA)_DV6T811N-LT 02.4.16 2:37 PM ˘ ` 7 Read Carefully before Using Cautions in use of DVD-Video player are described below. Please read carefully before using a DVD-Video player. Installation place and handling • When you place this player near other devices, they may affect poorly together. •... - Page 9 DVD-Video(USA)_DV6T811N-LT 02.4.16 2:37 PM ˘ ` 8 In recording important screen • Be sure to record the screen and check whether recording is performed properly. We beg you to understand compensation of recording if recording is not performed by badness of used tape or video. Copyright •...
-
Page 10: Table Of Contents
DVD-Video(USA)_DV6T811N-LT 02.4.16 2:37 PM ˘ ` 9 Contents Product Information Important Safeguards ... 1 Advantages of This Product Are ..5 Read Carefully before Using ... 7 Contents ... 9 Identification of Controls ... 11 Remote Control ... 14 Installation Connecting with TV... - Page 11 DVD-Video(USA)_DV6T811N-LT 02.4.16 2:37 PM ˘ ` 10 DVD Operation Skipping from a current scene to a desired scene... 48 Confirming the current PLAY mode on screen ... 55 Selecting an AUDIO language, SUBTITLE language and 3D AUDIO ... 56 Selecting ZOOM and Multi Angle ... 57 Memorizing a scene ...
-
Page 12: Identification Of Controls
DVD-Video(USA)_DV6T811N-LT 02.4.16 4:40 PM ˘ ` 11 Identification of Controls Main body (front panel) & * ! POWER (STANDBY/ON) button Use to power the device on/off if AC power supply is connected. @ Place to insert videotape # COPY button Use to copy contents of disc into a videotape. - Page 13 DVD-Video(USA)_DV6T811N-LT 02.4.16 2:37 PM ˘ ` 12 Operation Display Window $ & ! VCR Operation @ REC and TIMER REC display : Recording , : TIMER Recording , : To be Timer-recorded, : To be Timer-recorded state ERROR (No Tape or Tape without tab) # Copying Use to copy contents of disc into videotape.
- Page 14 DVD-Video(USA)_DV6T811N-LT 02.4.16 2:37 PM ˘ ` 13 Main body (Rear Panel) ! POWER CORD It is a jack for supplying power to the unit. Connect to outlet in a wall. @ DIGITAL OUTPUT (COAXIAL, OPTICAL) Jack To enjoy sound quality of theater level in home, connect this jack with amp or unit embedded with digital audio decoder.
-
Page 15: Remote Control
DVD-Video(USA)_DV6T811N-LT 02.4.16 2:38 PM ˘ ` 14 Remote Control MENU TITLE/PBC OPEN/CLOSE SETUP ENTER REPEAT ZOOM & PREV. PLAY/PAUSE PROGRAM CLK/CNT SPEED/ANGLE TV/VCR TRACKING /S-VHS Child Lock!!! Press the power [ ] button of the remote for about 8 seconds. No buttons of front panel and remote can be operated now and Lock indicator (“... - Page 16 DV6T811N-LT(GB) 02.4.16 5:10 PM ˘ ` 15 Instructions in Using REMOTE • Operate REMOTE within 7m from the unit. • Do not press 2(two) buttons at the same time. MENU TITLE/PBC DISPLAY OPEN/CLOSE OUTPUT SETUP ENTER REPEAT ZOOM AUDIO SUBTITLE PREV.
-
Page 17: Connecting With Tv
DVD-Video(USA)_DV6T811N-LT 02.4.16 2:38 PM ˘ ` 16 Connecting with TV In the initial SET, exclusive channel for video is set to CH 3. To change this setting, set again in “CHANNEL SET” screen in VCR operation. In connecting RF cable to TV, set TV channel to CH3. How to Connect with RF cable OUTSIDE ANTENNA OR WALL ANTENNA OUTLET... - Page 18 DVD-Video(USA)_DV6T811N-LT 02.4.16 2:38 PM ˘ ` 17 How to Connect with Audio/Video jack OUTSIDE ANTENNA OR WALL ANTENNA OUTLET £ (If there is AUDIO/VIDEO INPUT jack in TV) Connect VIDEO OUT jack in DVD-Video to VIDEO IN jack in TV, and AUDIO OUT jack in DVD-Video to AUDIO IN jack in TV with connecting cable of Audio/Video jack.
-
Page 19: Connecting With Cable Box
DVD-Video(USA)_DV6T811N-LT 02.4.16 2:38 PM ˘ ` 18 Connecting with Cable Box You should install a distributor additionally. How to connect CONVERTER BOX A/B Switch RF CABLE RF CABLE If your cable system only requires you to use a converter box for some channels (i.e., pay-TV channels), follow these steps: Find the primary incoming RF cable. - Page 20 DVD-Video(USA)_DV6T811N-LT 02.4.16 2:38 PM ˘ ` 19 How to watch general broadcasting with recording CATV ¡ Set Channel Select switch of Converter Box to CH 3 or 4 as same as video exclusive channel. Press [SET] button in [VCR] operation to set video exclusive channel in “CHANNEL SET” screen. ™...
-
Page 21: Connecting With Other Vcr Or Camcorder
DV6T811N-LT(GB) 02.4.16 5:13 PM ˘ ` 20 Connecting with Other VCR or Camcorder How to Connect with Jack in Front Panel REAR PANEL OF PLAYBACK VCR(CAMCORDER) FRONT PANEL OF DVD-VIDEO VIDEO (L) AUDIO (R) REAR PANEL OF DVD-VIDEO REAR PANEL OF TV... - Page 22 DVD-Video(USA)_DV6T811N-LT 02.4.16 2:38 PM ˘ ` 21 ¡ Connect AUDIO/VIDEO OUT jack in Camcorder(or playback video) to AUDIO/VIDEO IN jack in rear panel (or front panel) of DVD-Video with connecting cable. ™ Connect “ANT. IN” jack in TV to “RF.OUT” jack in DVD-Video with RF cable. £...
-
Page 23: Connecting With Audio
DVD-Video(USA)_DV6T811N-LT 02.4.16 2:38 PM ˘ ` 22 Connecting with Audio How to Connect with Stereo Unit such as Audio REAR PANEL OF STEREO UNIT ¡ Connect Audio jack. Connect AUDIO OUT in rear panel of DVD-Video to IN jack of stereo sound unit. ™... -
Page 24: Connecting Tv With S-Video/Component Jack, Amp With Digital Audio Out Jack
DVD-Video(USA)_DV6T811N-LT 02.4.16 2:38 PM ˘ ` 23 Connecti n g TV wi t h S-Vi d eo/Component Jack, Amp wi t h Di g i t al Audi o Out Jack Use in S-VIDEO or COMPONENT In jack attached in TV or amp supporting Dolby Digital. How to Connect REAR PANEL OF DVD-VIDEO CONNECTING CABLE... -
Page 25: Clock Set
DVD-Video(USA)_DV6T811N-LT 02.4.16 3:42 PM ˘ ` 24 Clock Set Set TV to CH 4 (or 3). Press [VCR] button on remote control to change into VCR Mode and follow the procedure below. SETUP SETUP/ENTER ENTER RETURN REPEAT ZOOM AUDIO PREV. PLAY/PAUSE PROGRAM CLK/CNT... -
Page 26: Output Select
DVD-Video(USA)_DV6T811N-LT 02.4.16 2:38 PM ˘ ` 25 Output Select To Select DVD Press [DVD] button. If DVD mode is correctly selected, DVD on the operation display window is lighted. Then, REMOTE button works as DVD function. Press the [DVD] button, then the mode of DVD-Video Player becomes to the OPERATION mode. To Select VCR Press [VCR] button. -
Page 27: Dvd Playback
DVD-Video(USA)_DV6T811N-LT 02.4.16 4:44 PM ˘ ` 26 DVD Playback MENU TITLE/PBC DISPLAY OPEN/CLOSE OUTPUT SETUP ENTER SUBTITLE REPEAT ZOOM AUDIO PREV. NEXT PLAY/PAUSE PROGRAM SEARCH CLK/CNT MARK SPEED/ANGLE TV/VCR TRACKING 100/SYSTEM /S-VHS Press [ ] button to power on. Press [DVD] button of REMOTE to change into DVD mode. Press [OPEN/CLOSE] button to open the disc tray. -
Page 28: Vcr Playback
DVD-Video(USA)_DV6T811N-LT 02.4.16 4:44 PM ˘ ` 27 VCR Playback MENU TITLE/PBC DISPLAY OPEN/CLOSE OUTPUT SETUP ENTER SUBTITLE REPEAT ZOOM AUDIO PREV. NEXT PLAY/PAUSE PROGRAM SEARCH CLK/CNT MARK SPEED/ANGLE TV/VCR TRACKING 100/SYSTEM /S-VHS Press [ ] button to power on. Press [VCR] button of remote control to change into VCR mode. Insert the desired tape. - Page 29 DVD-Video(USA)_DV6T811N-LT 02.4.16 2:38 PM ˘ ` 28 Various Playback Methods If you want fast forward playback, press [ ] button in Playback mode. You can watch fast playing screen. If you want fast reverse playback, press [ ] button in Playback mode. You can watch fast rewinding screen.
-
Page 30: Recording
DVD-Video(USA)_DV6T811N-LT 02.4.16 2:38 PM ˘ ` 29 Recording To Record With VCR MENU TITLE/PBC DISPLAY OPEN/CLOSE OUTPUT SETUP ENTER REPEAT SUBTITLE ZOOM AUDIO PREV. NEXT PLAY/PAUSE PROGRAM SEARCH CLK/CNT MARK SPEED/ANGLE TV/VCR TRACKING 100/SYSTEM /S-VHS Press [ ] button to power on. •... - Page 31 DVD-Video(USA)_DV6T811N-LT 02.4.16 2:38 PM ˘ ` 30 To Enjoy Another TV Channel or DVD during recording To Copy From DVD To Videotape This product incorporates copyright protection technology that is protected by method claims of certain U.S patents and other intellectual property rights owned by Macrovision Corporation and other rights owners. Use of this copyright protection technology must be authorized by Macrovision Corporation, and is intended for home and other limited viewing uses only unless otherwise authorized by Macrovision Corporation.
- Page 32 DVD-Video(USA)_DV6T811N-LT 02.4.16 2:38 PM ˘ ` 31 One Touch timer Recording (OTR) When your urgent business happens suddenly in watching TV or you want to record the current TV program for the desired time, follow the procedures below. First, follow the steps 1 to 4 in “Recording With VCR”. Press [REC] button as much as you want.
-
Page 33: Memorizing Tv Channels
DVD-Video(USA)_DV6T811N-LT 02.4.16 3:42 PM ˘ ` 32 Memorizing TV Channels To Memorize Automatically Channels Set TV to Ch 3. Prior to the setting, press [VCR] button of your REMOTE to change into VCR mode. Press [SETUP/ENTER] button. Press [ ] button to move into CHANNEL SET, and then select CHANNEL SET with [ button. -
Page 34: To Memorize Channels Manually
DVD-Video(USA)_DV6T811N-LT 02.4.16 2:38 PM ˘ ` 33 To Memorize Channels Manually When the desired broadcasting finished or you want to add unmemorized channels owing to poor signals to the memory, follow the procedures below. After pressing [SETUP/ENTER] button, select “CHANNEL SET”. Select “Add/Remove Channels”. - Page 35 DVD-Video(USA)_DV6T811N-LT 02.4.16 2:38 PM ˘ ` 34 To Delete Channels Manually After memorizing automatically channels, when the same broadcasting is memorized in more than two channels, or you want to delete badly displayed channels, follow the procedures below. Selecting cable or antenna viewing You must set the viewing mode for your VCR, choosing either CABLE (cable system connection) or ANTENNA (antenna connection).
- Page 36 DVD-Video(USA)_DV6T811N-LT 02.4.16 2:38 PM ˘ ` 35 To Set Cable Box To Set Output Channel Press [SETUP/ENTER] button and select “CHANNEL SET” . Select “Output channel selection”. By pressing [ video on the desired one of 3CH or 4CH. Press [SETUP/ENTER] button and select “CHANNEL SET”. Select “Cable Box Setup”.
-
Page 37: Timer Recordings
DVD-Video(USA)_DV6T811N-LT 02.4.16 2:38 PM ˘ ` 36 Timer Recordings TIMER RECORDINGS Power on TV. Make sure that current time is set correctly. Insert a recordable tape with recording tab. Prior to the setting, press [VCR] button to change to VCR mode. Press [SETUP/ENTER] button and select “TIMER RECORDINGS”. - Page 38 DVD-Video(USA)_DV6T811N-LT 02.4.16 2:38 PM ˘ ` 37 To Confirm or Cancel TIMER RECORDINGS Set proper “RECORDING SPEED”. Select one of SP/EP with [ ] and [ ]buttons. For more information on recording speed, see “Types of Recording Speed” in the page 39. Press [RETURN] button to complete the setting.
- Page 39 DVD-Video(USA)_DV6T811N-LT 02.4.16 2:38 PM ˘ ` 38 Various TIMER RECORDINGS One Time TIMER RECORDINGS It is available of TIMER RECORDINGS at the desired specified time. Daily TIMER RECORDINGS Once you set TIMER RECORDINGS of the desired program telecasted at the same time day after day, it is available of daily recordings.
- Page 40 DVD-Video(USA)_DV6T811N-LT 02.4.16 2:38 PM ˘ ` 39 Using video cassettes Before you play or record on a video cassette tape, be certain to read this information on the proper care and use of video cassettes. Only use video cassettes that bear the VHS mark: There are four types of video cassettes: T-60, T-90, T-120, and T-160.
-
Page 41: Watching And Recording Cable Tv
DVD-Video(USA)_DV6T811N-LT 02.4.16 2:38 PM ˘ ` 40 Watching and Recording Cable TV To Watch and Record Promptly Cable TV TIMER RECORDINGS of Cable TV Power on converter and then, set a channel to watch or to record. Power on DVD-video and then, set the channel of DVD-video to the converter-connected channel (one of CH03/04/EXTERNAL INPUT). -
Page 42: Using Advanced Features
DVD-Video(USA)_DV6T811N-LT 02.4.16 2:38 PM ˘ ` 41 Using advanced features Play the tape automatically This feature allows the VCR to automatically start playing when you insert a tape with the safety tab removed. Press [SETUP/ENTER] button and select “FUNCTIONS”. Move into “FUNCTIONS”... - Page 43 DVD-Video(USA)_DV6T811N-LT 02.4.16 2:38 PM ˘ ` 42 Switch the VCR to TV or VCR mode automatically This feature controls whether the TV/VCR switch changes automatically to the VCR mode when the VCR is turned Press [SETUP/ENTER] button and select “FUNCTIONS”. Move into “FUNCTIONS”...
-
Page 44: Indexing Viss Signals / Searching Viss Signals
DVD-Video(USA)_DV6T811N-LT 02.4.16 2:38 PM ˘ ` 43 Indexing VISS Signals What’s VISS? VISS is a quick and convenient search system for a recorded program by means of the program’s address indexed in the beginning of the recorded program. Provided that there are various recorded programs in a tape, VISS must be a typical function in searching for a preferred program. -
Page 45: Counter 0 Stop
DVD-Video(USA)_DV6T811N-LT 02.4.16 2:38 PM ˘ ` 44 Counter 0 Stop The function is to search any scene that you wish to watch again more easily by indexing while playing or recording it. Memorizing a desired scene Please press [VCR] button on your REMOTE for VCR mode, then manage it. Searching a memorized scene Please press [VCR] button on your REMOTE for VCR mode, then manage it. -
Page 46: Displaying Clock/Counter
DVD-Video(USA)_DV6T811N-LT 02.4.16 2:38 PM ˘ ` 45 Displaying Clock/Counter Above all, press [VCR] button of remote control and follow the procedure below. CHECK UP! • In addition, it is available of grasping current position of DVD. First, prior to the beginning, press [DVD] button of remote control to change into DVD mode. -
Page 47: Changing The On-Screen Menu Language
DVD-Video(USA)_DV6T811N-LT 02.4.16 2:38 PM ˘ ` 46 Changing the on-screen menu language You may select the language in which you would like the VCR’s menu to be displayed: English, Spanish, or French. Please press [SETUP/ENTER] button. Press [ ] button until is located in “LANGUAGE SELECT”, then select “LANGUAGE SELECT”... -
Page 48: Hi-Fi Stereo Playback
DVD-Video(USA)_DV6T811N-LT 02.4.16 2:38 PM ˘ ` 47 Hi-Fi Stereo Playback Playing a tape in Hi-Fi high-quality • “Hi-Fi” signal lights up in the top of a screen. • Pressing [AUDIO] button changes menus one by one. Hi-Fi LINEAR If there are some noises made in recording, please “Linear” to reduce them. Recording Stereo Broadcast •... -
Page 49: Skipping From A Current Scene To A Desired Scene
DVD-Video(USA)_DV6T811N-LT 02.4.16 2:38 PM ˘ ` 48 Skipping from a current scene to a desired scene To skip chapter in a DVD Before setting it, you should change into DVD mode by pressing [DVD] button on remote control. To play it fast Before setting it, you should change into DVD mode by pressing [DVD] button on remote control. - Page 50 DVD-Video(USA)_DV6T811N-LT 02.4.16 2:38 PM ˘ ` 49 To play it slow Before setting it, you should change into DVD mode by pressing [DVD] button on remote control. Press [ ] button to play it slow in PAUSE. Every time you press the button, slow play speed changes like the below orders. Also you can return to normal speed by pressing [ ] button.
-
Page 51: Random Play
DVD-Video(USA)_DV6T811N-LT 02.4.16 2:38 PM ˘ ` 50 Playing a programmed order Before setting it, you should change into DVD mode by pressing [DVD] button on remote control. Available only in STOP. RANDOM PLAY Before setting it, you should change into DVD mode by pressing [DVD] button on remote control. - Page 52 DVD-Video(USA)_DV6T811N-LT 02.4.16 2:38 PM ˘ ` 51 Repeating a defined period (DVD) You may repeat a desired chapter or track. Before setting it, you should change into DVD mode by pressing [DVD] button on remote control. A certain disc may not be repeated. While in playing, press [REPEAT] button.
- Page 53 DVD-Video(USA)_DV6T811N-LT 02.4.16 2:38 PM ˘ ` 52 Repeating a defined period (VCD, CD) While in playing, press [REPEAT] button. In REPEAT mode, you may see the right figure. Press [SETUP/ENTER] button in the position to repeat. The beginning of REPEAT position (A) is set in the right figure.
-
Page 54: Search Dvd
DVD-Video(USA)_DV6T811N-LT 02.4.16 2:38 PM ˘ ` 53 SEARCH DVD (with a Title, Chapter number) Before setting it, you should change into DVD mode by pressing [DVD] button on remote control. SEARCH DVD (with time) Before setting it, you should change into DVD mode by pressing [DVD] button on remote control. - Page 55 DVD-Video(USA)_DV6T811N-LT 02.4.16 2:38 PM ˘ ` 54 SEARCH VCD and CD (with a track number) Before setting it, you should change into DVD mode by pressing [DVD] button on remote control. SEARCH VCD and CD (with time) Before setting it, you should change into DVD mode by pressing [DVD] button on remote control.
-
Page 56: Confirming The Current Play Mode On Screen
DVD-Video(USA)_DV6T811N-LT 02.4.16 2:38 PM ˘ ` 55 Confirming the current PLAY mode on screen confirming the current disc mode Before setting it, you should change into DVD mode by pressing [DVD] button on remote control. While in playing, press [DISPLAY] button. It shows a disc type, the current title, chapter number, time elapsed and REPEAT mode. -
Page 57: Selecting An Audio Language, Subtitle Language And 3D Audio
DVD-Video(USA)_DV6T811N-LT 02.4.16 2:38 PM ˘ ` 56 Selecting an AUDIO language, SUBTITLE language and 3D AUDIO Selecting an audio language A user may select an audio language and subtitle language if a disc includes Multi-language. Before setting it, you should change into DVD mode by pressing [DVD] button on remote control. -
Page 58: Selecting Zoom And Multi Angle
DVD-Video(USA)_DV6T811N-LT 02.4.16 2:38 PM ˘ ` 57 Selecting ZOOM and Multi Angle Using a zoom function A user can enlarge the current screen about 1.3, 1.5 or 2 times. Before setting it, you should change into DVD mode by pressing [DVD] button on remote control. -
Page 59: Memorizing A Scene
DVD-Video(USA)_DV6T811N-LT 02.4.16 2:38 PM ˘ ` 58 Memorizing a scene Once memorizing a scene, a user may watch it anytime. To memorize a scene Before setting it, you should change into DVD mode by pressing [DVD] button on remote control. For VCD playback, set to “PBC OFF”... -
Page 60: Displaying Menus In A Disc
DVD-Video(USA)_DV6T811N-LT 02.4.16 2:38 PM ˘ ` 59 Displaying menus in a disc If a disc includes menus, a user may use them. To display menus in a disc Before setting it, you should change into DVD mode by pressing [DVD] button on remote control. -
Page 61: Basic Setup Mode
DVD-Video(USA)_DV6T811N-LT 02.4.16 2:39 PM ˘ ` 60 Basic SETUP mode While STOP or RESUME STOP, press [SETUP/ENTER] button to set menus. Before setting it, you should change into DVD mode by pressing [DVD] button on remote control. While STOP or RESUME STOP, press [SETUP/ENTER] button. -
Page 62: Language Setup
DVD-Video(USA)_DV6T811N-LT 02.4.16 2:39 PM ˘ ` 61 LANGUAGE Setup A user can set OSD language, Audio, Subtitle and Disc Menu. Before setting it, you should change into DVD mode by pressing [DVD] button on remote control. In case a disc does not include setting languages information, the... -
Page 63: Video Setup
DVD-Video(USA)_DV6T811N-LT 02.4.16 2:39 PM ˘ ` 62 VIDEO Setup A user can set up a connected TV condition and screen. Before setting it, you should change into DVD mode by pressing [DVD] button on remote control. While STOP or RESUME STOP, press [SETUP/ENTER] button. Selecting TV Aspect. -
Page 64: Audio Setup
DVD-Video(USA)_DV6T811N-LT 02.4.16 2:39 PM ˘ ` 63 AUDIO Setup A user may select audio menu according to a user’s speaker set. Before setting it, you should change status into DVD by pressing [DVD] button on the remote control. While STOP or Resume STOP, press [SETUP/ENTER] button. Select a digital output. - Page 65 DVD-Video(USA)_DV6T811N-LT 02.4.16 2:39 PM ˘ ` 64 Select a Dynamic Range. Dynamic range can differs by users and their watching environment. High-density audio programs like movies have wide dynamic range. In the dynamic range, explosion sounds 20dB higher and rustle of leaves sounds 50dB less than conversation.
-
Page 66: Others Setup
DVD-Video(USA)_DV6T811N-LT 02.4.16 2:39 PM ˘ ` 65 Others Setup Before setting it, you should change into DVD mode by pressing [DVD] button on remote control. “Parental Lock” activates only if you set a password and the unit goes into Lock status. When the disc has no parental function even if the disc for adult only,... - Page 67 DVD-Video(USA)_DV6T811N-LT 02.4.16 2:39 PM ˘ ` 66 Settling a user’s PARENTAL The initial password is 3308. In case you forget newly- input password, you can use 3308 as a password. Entering a password. If selecting “PARENTAL” by moving [>], a password display appears.
-
Page 68: About Dvd
DVD-Video(USA)_DV6T811N-LT 02.4.16 2:39 PM ˘ ` 67 About DVD Playable Disc • DVD, Video CD(Version 1.1, 2.0), S-VCD and Audio CD Disc type Playable Possible Video CD Possible Possible CD-G Possible CD-ROM Possible CD-R Possible CD-RW Possible DVD-R Possible DVD-ROM Impossible DVD-RAM Impossible... - Page 69 DVD-Video(USA)_DV6T811N-LT 02.4.16 2:39 PM ˘ ` 68 Terms related with DVD A DVD (abbreviation of Digital Versatile Disc or Digital Video Disc) can include 135 minutes of video information. And for audio, it can hold up to 8 kinds of languages and 32 kinds of subtitle languages.
-
Page 70: Cleaning Disc
DVD-Video(USA)_DV6T811N-LT 02.4.16 2:39 PM ˘ ` 69 Lt/Rt It indicates L/R of Dolby Digital 2CH Downmix output. L/R/C/SW/LS/RS In Dolby Digital and dts, a total 6 channels are used. 3 channels for front, 2 channels for surround and 1 channel for subwoofer. They are a front left, a front right, a center, a subwoofer, a rear left and a rear right. -
Page 71: Basic Information About Vcr And Videotape
DVD-Video(USA)_DV6T811N-LT 02.4.16 2:39 PM ˘ ` 70 Basic information about VCR and Videotape Terms related with VCR Automatic fine tuning, a circuit that automatically adjusts TV reception to optimum condition. CABLE Cable television. Extended play, the slowest recording speed. Designed to store the maximum amount of program material on a single video cassette. - Page 72 DVD-Video(USA)_DV6T811N-LT 02.4.16 2:39 PM ˘ ` 71 What is a record tab of a videotape? • The tab on a videotape enables a user to record and prevents the recorded area from rerecording. • To record it, a user should use a videotape with a tab. •...
-
Page 73: Before Doubting About Troubles (Dvd)
DVD-Video(USA)_DV6T811N-LT 02.4.16 2:39 PM ˘ ` 72 Before doubting about troubles (DVD) Symptom • The recorder does not play. • No sound comes through. • A disc is playing but screen does not appear or poor screen appears. • Sound is irregular •... - Page 74 DVD-Video(USA)_DV6T811N-LT 02.4.16 2:39 PM ˘ ` 73 Symptom • “ANGLE” button does not work while a DVD is playing. • “MENU” does not appear while a DVD is playing. • Screen shakes or appears only in black and white. (or Subtitle shakes) Checks “ANGLE”...
-
Page 75: Before Doubting About Troubles (Vcr)
DVD-Video(USA)_DV6T811N-LT 02.4.16 2:39 PM ˘ ` 74 Before doubting about troubles (VCR) Symptom Power • “Power On” does not work. • It does not work even in “Power On”. Input and ejection • A videotape is not inputted in. • On inputting a videotape, the tape is re-ejected. - Page 76 DVD-Video(USA)_DV6T811N-LT 02.4.16 2:39 PM ˘ ` 75 Symptom • Noise appears on screen after recording. • While in playing, noise appears. • Sound and screen are irregular. • Sound comes out but screen does not appear. • Screen is irregular and stripes appears. •...
- Page 77 DVD-Video(USA)_DV6T811N-LT 02.4.16 2:39 PM ˘ ` 76 Symptom • Recording a TV program is impossible. • Once pressing “REC”, a videotape is ejected automatically. • Timer recording of Cable TV does not work. • In spite of pressing “CHANNEL”, a channel can not be set.
- Page 78 DVD-Video(USA)_DV6T811N-LT 02.4.16 2:39 PM ˘ ` 77 Symptom Others • VISS index search does not work. • Cable broadcasting can not be selected. Checks Are you playing a tape that is not recorded in this recorder? (Try to record it with the recorder.) You may start recording it in “REC-PAUSE”.
-
Page 79: Specifications
DVD-Video(USA)_DV6T811N-LT 02.4.16 2:39 PM ˘ ` 78 Specifications Power Consumed electricity Weight Dimension (WxHxD) Operative temperature Installation condition Received channels Signal type Antenna Input/output VIDEO input AUDIO input VHF output VIDEO output (common use of DVD and VCR) VIDEO output (DVD only) AUDIO output (common use of DVD and VCR) AUDIO output (DVD only) Playable tape... -
Page 80: Region Code
DVD-Video(USA)_DV6T811N-LT 02.4.16 2:39 PM ˘ ` 79 Region Code The product and all DVD disc have region codes. So if both codes are not coincided each other, it does not work. Legion codes are like the below. - Page 81 DVD-Video(USA)_DV6T811N-LT 02.4.16 3:41 PM ˘ ` 80 Warranty Daewoo Electronics Corporation of America warrants each new electronic product manufactured by it to be free from defective material and workmanship and agrees to remedy any such defect or to furnish a new part (at the Company’s option) in exchange for any part of any unit of its manufacture which under normal installation, use...