Chapters
Table of Contents

Related Manuals for Miele T 8623C


Summary of Contents for Miele T 8623C
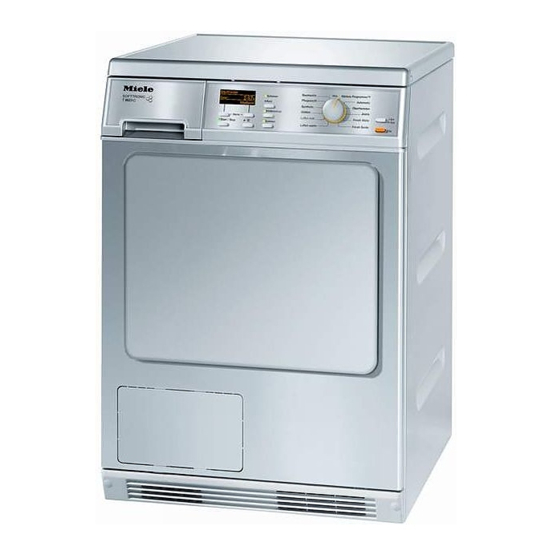
- Page 1 Operating instructions for condenser tumble dryer T 8623 C To avoid the risk of accidents or damage to the machine it is essential to read these instructions before it is installed and used for the first time. M.-Nr. 06 874 400...
-
Page 2: Caring For The Environment
Ensure that any plastic wrappings, Energy saving tips bags etc. are disposed of safely and kept out of the reach of babies and To avoid unnecessarily long drying young children. Danger of suffocation! times and high consumption of energy: Rather than just throwing these –... -
Page 3: Table Of Contents
Warning and Safety instructions ........ - Page 4 External drainage via a sink or gully ....... . 44...
- Page 5 Electrical connection U.K........
-
Page 6: Warning And Safety Instructions
The manufacturer cannot be increasingly available on the market. If held liable for the consequences of an using, do so at your own risk, and inadequate earthing system (e.g. follow the instructions provided on the electric shock). - Page 7 Repairs should only be undertaken by a Miele approved technician. Ensure current is not supplied to the machine until after maintenance or repair work has been carried out. Faulty components must only be replaced by genuine Miele original spare parts.
- Page 8 If the water is drained externally electiricty supply when: through the drain hose instead of – it is switched off at the wall socket being collected in the condensed water and the plug is withdrawn, or container, make sure the drain hose is securely attached if you hang it in a –...
- Page 9 Do not allow children to play on or near it or to play with its controls. Supervise – items which contain damaged its use by the elderly or infirm.
-
Page 10: Operating The Tumble Dryer
I-On/0-Off button b Display with Menu buttons To switch the machine on or off or to See the next page for more interrupt a programme. information. h Door button... -
Page 11: Display
Further programmes , you can select one of the following programmes: – Selecting different drying levels (e.g. Hand iron, Normal ... ) – Standard pillows or the duration of the Warm air, Cool – Large pillows air and Timed drying hygiene – Sportswear programmes –... -
Page 12: Cottons
Because of this, the time displayed can alter during the They are used to alter or confirm the course of a programme. value displayed above the vertical line. In the same way, the Woollens... -
Page 13: Before Using For The First Time
^ Select the language you require by pressing the left hand Menu button Select programme under ~. ^ You can now load the laundry into the ^ Confirm your selection by pressing dryer and select a programme as the right hand Menu button under... -
Page 14: Notes On Laundry Care
... Dry at low temperature dried if specified as suitable by the s ....Do not tumble dry manufacturer on the care label, as... -
Page 15: How To Dry Correctly
^ Press the Door button to open the The headings numbered (A, B, C ...) show the operating sequence and can door. be used as a brief guide to using your ^ Load the laundry loosely into the machine. drum. -
Page 16: Cottons
15 minutes to 2 hours for the Warm air and Cool air programmes To select a drying level and 1 to 2 hours for the Timed drying (Programmes with drying levels: hygiene programme. Cottons, Minimum iron, Delicates, Auto- To Select a Further programme... - Page 17 It will go out a few With programmes with drying levels, minutes later to save energy. e.g. Machine iron , Hand iron etc. the...
-
Page 18: Extra Options
Extra options Short For drying fabrics which can withstand higher temperatures and have q on the care label. Do not use on minimum iron or delicate fabrics. – The programme duration is shorter. Anti-crease Helps prevent creasing, if laundry is... -
Page 19: Delay Start
The Cottons start of a programme can be delayed 1:01 Start in: from 30 minutes up to a maximum of 24 hours, allowing you to make use of Normal night-time economy electricity rates, for example. -
Page 20: Programme Chart
– Do not use Extra dry for jersey fabrics (e.g. T-shirts, underwear), as they have a tendency to shrink. Extra options Low temperature (select this option for delicate fabrics with the r symbol on the care label), Short, Anti-crease Hand iron r, Hand iron rr**, Machine iron Fabric type Cottons or linen fabrics, e.g.: table linen, bed linen, starched... -
Page 21: Delicates Normal
Max. load: 2 kg* Fabric type Woollen fabrics Note – This programme only fluffs up woollen garments. They are not dried completely by this programme. – Remove garments as soon as the programme has finished and leave to finish drying at room temperature. - Page 22 Note – Do not select the longest drying time to start with. Check the items as you are drying them to find the optimum time. You can use the Warm air programme to help remove odours from cotton clothing which has been worn but it still clean (select a duration of between 1/2 and 1 hour).
- Page 23 Item For drying microfibre fabrics, ski wear, fine, closeweave cotton garments (poplin) or tablecloths which are suitable for drying in a tumble dryer and have been treated to provide a water and dirt resistant finish. Notes – This programme includes a proofing fixing phase.
- Page 24 Programme chart Hygiene programmes In the Hygiene programmes the temperature is held constant for a longer period of time to deactivate micro-organisms, e.g. germs or house dustmites and also reduce the number of allergens in the laundry. These programmes should not be interrupted as this would prevent the micro-organisms from being deactivated.
-
Page 25: Changing The Programme Sequence
Interrupting a programme started (this prevents unintentional ^ Switch the dryer off. alterations). If an attempt is made to change a To continue drying selection, Option not possible will ^ Switch the dryer on. appear in the display. -
Page 26: Cleaning And Care
^ Open the shutter and empty out the A message will appear in the display. water. ^ To replace the container, hold it at a slight angle (as when removing it) and push it in gently until you feel it click into position. -
Page 27: Cleaning The Fluff Filters
Cleaning them whilst dry Parts Department, or use a vacuum cleaner. Tip: You can also use a vacuum cleaner ^ Also clean the door seal (2) with a to remove the fluff. damp cloth. ^ Once clean, push the filter back into the door holder until it clicks into position. -
Page 28: Cleaning Them With Water
^ Lock both dials. ^ Turn dial a and pull the filter by the dial out of the door opening as shown b. Do the same on the other side. ^ Rinse all the filters under hot, running water. -
Page 29: Cleaning The Tumble Dryer
Disconnect the machine from the mains electricity supply. ^ Clean the housing and control panel with a slightly damp cloth and a mild detergent or soapy water. ^ The drum and other stainless steel parts can be cleaned with a suitable... -
Page 30: Cleaning The Condenser Unit
Detergent residue, hair and fine fluff from the dryer can get through the fluff filters and block the condenser unit. Dust from the room in which the dryer is installed can also get into the condenser unit and cause a blockage. -
Page 31: Checking The Condenser Unit
^ Pull the condenser unit out of its housing by the handle. Checking the condenser unit ^ Use a shower head or similar to rinse the unit out as shown. ^ Hold the condenser unit up to the light as shown. -
Page 32: Replacing The Condenser Unit
^ With the handle facing upwards, push the condenser unit back into position in its housing. ^ Turn the lever down to the horizontal position, making sure that the hook on the lever clicks into the groove. When replacing the inner cover after cleaning, ensure that the rubber seal fits correctly into the groove. -
Page 33: Problem Solving Guide
Problem solving guide With the help of the following notes, minor faults in the performance of the machine, some of which may result from incorrect operation, can be put right without contacting the Service Department. Repair work to electrical appliances should only be carried out by a suitably qualified person in strict accordance with current local and national safety regulations. - Page 34 Problem solving guide Problem Possible cause Remedy Clean out airways – The dryer is not working – Cleaning the filters is appears after the efficiently or economically. usually all that is required. programme has However, if the message finished Possible cause: The fluff...
-
Page 35: Other Problems
Other problems Problem Possible cause Remedy The drying Please check all the possible causes and switch the dryer process goes off and then back on again. on too long or Ventilation to and from the dryer Open a door or window while even switches may be insufficient (e.g. - Page 36 Problem solving guide Problem Possible cause Remedy Water leaks from the – The inner cover of the – Ensure that the machine after the condenser unit has not condenser unit is condenser unit has been locked properly positioned correctly been cleaned.
- Page 37 – Is the plug correctly inserted into the socket and switched on? – Is the door closed properly? – Has the fuse or circuit breaker tripped? The interior drum The lighting switches off Switch the dryer off and lighting does not come automatically (to save then on again.
-
Page 38: Changing The Lamp
^ To close the cover push it upwards You will find the interior lamp cover at the top of the drum aperture. and press it on the left and right until you hear it click into position. Ensure that it is fitted into position securely, as any moisture could cause a short circuit. -
Page 39: After Sales Service
After Sales service Future updates (PC) In the event of any faults which you cannot remedy yourself, or if the The indicator or check light marked PC machine is under guarantee, please on the fascia panel is the interface contact used by the Miele service technicians –... -
Page 40: Installation
Installation Front view a Mains connection cable e Service panel for condenser unit b Condensed water container f Four height-adjustable screw feet c Control panel g External drainage options (e.g. via wash basin, wash basin drain outlet, d Door or gully). -
Page 41: Rear View
Building under a continous worktop / in a kitchen run A building-under kit* with a coverplate to replace the machine lid is required. It must be fitted by a suitably qualified person to ensure electrical safety. N.B. If you wish to push your machine... -
Page 42: Levelling The Machine
This water can run out if the machine is tipped up when it is being moved. It is a good idea to run ^ The screw feet can be adjusted to the Cool air programme for... -
Page 43: External Condensed Water Outlet
Drain hose length ... . 1.50 m Maximum delivery head ..1.50 m Maximum drain hose length . -
Page 44: External Drainage Via A Sink Or Gully
Otherwise water could leak out of the dryer and cause damage. A non-return valve is required: – If the tumble dryer is connected to a sink drain outlet (see the following section). – If the tumble dryer is to be... - Page 45 Installation ^ Fit adapter 1 to the sink drain outlet using nut 2. If this nut has a flat disc in it you should take the disc out first. ^ Attach the end of the hose 4 to adapter 1.
-
Page 46: Electrical Connection
The regulations (BS 7671 in the UK). -
Page 47: Consumption Data
All data without a "star" against it was calculated using EN 61121:2005. Before testing in accordance with EN 61121, dry a 3 kg load of cotton laundry with 70% residual moisture as per the above standard using the Cottons Normal programme without any extra options. -
Page 48: Technical Data
Suitable for stacking Weight 54 kg Drum volume 111 litres Maximum capacity 6 kg dry weight Capacity of condensed water container approx. 3.5 litres Drain hose length 1.5 m Maximum delivery head 1.5 m Maximum drain hose length Length of connection cable... - Page 49 Settings menu J for changing default settings The Settings menu is used to alter the dryer's electronics to suit different requirements. Settings can be altered at any time.
-
Page 50: Settings Menu J
Settings menu J Language J To open the Settings menu ^ Close the door. The display can be set to appear in ^ Switch the dryer on. one of several different languages. ^ Press both menu buttons at the same... -
Page 51: Time (Of Day)
Settings menu J Time (of day) Drying levels First select either a 24 hour or 12 You can alter the drying levels for the Cottons and Minimum iron hour clock or to not have a clock displayed at all. You can then set the programmes. -
Page 52: Airways Indicator
You can decide at what level of fluff dryer on. Otherwise the dryer cannot this reminder should be given. be operated. You will have an idea of how often this To activate the lock code should be done after a few drying programmes. - Page 53 The following will appear in the display: Lock code activated. Entry OK Once the machine is switched off, it can only be used again if the lock code is entered. To use the dryer when the lock code is activated...
-
Page 54: Buzzer
Settings menu J Buzzer Standby is activated: The buzzer has two volumes. – if a programme is not selected within Normal (Factory default) 10 minutes of the machine being The buzzer sounds at the end of a switched on. programme. - Page 56 Alteration rights reserved/2906 M.-Nr. 06 874 400 / 00 en - GB...