Table of Contents
Advertisement
Digital
Video
Recorder
PROGRESSIVE
DB
Y
ON
/
S
T
A
N
Operation Guide
SCAN
D WN
O
SET
U
P
R
U
R
N
R
ET
EN ER
T
U
P
CH-DVR 1500
DISPLAY
1
1
4
4
7
7
C-SKIP
+10
V L
I
VE
D
VD
/T
D
ECOR
E
SO R
U
C
DVD/TV LIVE SOURCE
REC
VID
EO
-
R
-
A
U
D
IO
L
EO
S-
VID
TM
TM
TM
BOOKMARK
CH+
ENTER
CH-
PLAY
2
2
3
3
5
5
6
6
8
8
9
9
0
0
C
C
TIMER
REC MODE
EDIT
Advertisement
Table of Contents

Related Manuals for CyberHome CH-DVR 1500

Summary of Contents for CyberHome CH-DVR 1500
- Page 1 Digital Video Recorder PROGRESSIVE SCAN Operation Guide ECOR EN ER D WN CH-DVR 1500 DISPLAY BOOKMARK ENTER PLAY C-SKIP SO R DVD/TV LIVE SOURCE TIMER REC MODE EDIT...
- Page 2 CAUTION RISK OF ELECTRIC SHOCK RISK OF ELECTRIC SHOCK DO NOT OPEN DO NOT OPEN CAUTION: TO REDUCE THE RISK OF ELECTRIC SHOCK, DO NOT REMOVE THE COVER (OR BACK). NO USER-SERVICEABLE PARTS INSIDE. REFER TO QUALIFIED SERVICE PERSONNEL FOR SERVICING. Explanation of warning symbols The lightning flash with arrowhead symbol, within an equilateral triangle, is intended to alert the user to the presence...
-
Page 3: Table Of Contents
INTRODUCTION Features ....... . . 4 Optical disc compatibility ....5 Caring for optical discs . -
Page 4: Features
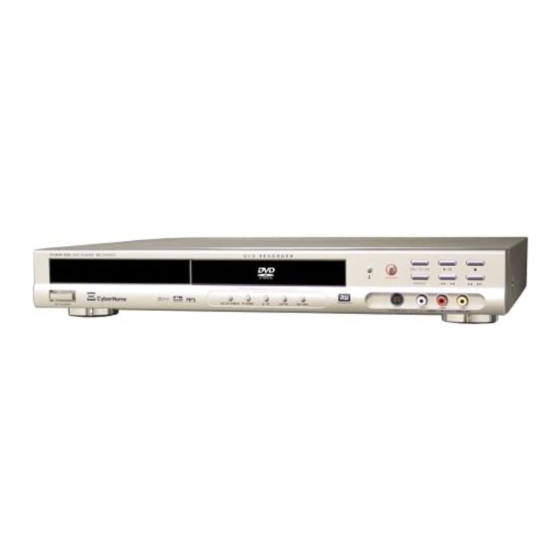
CH-DVR 1500 Personal DVD+R/RW Recorder and Progressive Scan Player / TAND The CH-DVR 1500 is a DVD Recorder/Player with Progressive Scan Video Output. DVD+R/RW Recording gives you the ability to create your own DVD discs from your home movies, favorite TV programs and more. Because of the outstanding compatibility of DVD+R/RW discs, the discs you create will be suitable for playback in most DVD players. -
Page 5: Introduction
Optical disc compatibility This unit is compatible with a wide range of available optical discs for recording and playback. Discs suitable for Recording and Playback You must us DVD+R or DVD+RW discs to record on this unit. DVD+R: These discs can only be written to once. Existing recordings can be hidden but not deleted. -
Page 6: Checking The Package Contents
Keep in mind that any obstructions between the remote control and the receiver will effect performance. CH DVR 1500 DVD PLAYER RECORDER ON / STANDBY RF Cable for TV Blank DVD+RW Discs (3) &... -
Page 7: Functional Overview
Remote Control DISPLAY DIGEST BOOKMARK HIDE AUDIO SUBTITLE MUTE ENTER PLAY C-SKIP DVD/TV LIVE SOURCE TIMER EDIT REC MODE FUNCTIONAL OVERVIEW STANDBY - Turns the unit on and sends the unit to Standby mode. MENU / PBC - Accesses Menus on DVD Discs. -
Page 8: Front Panel Functions
Front Panel CH DVR 1500 DVD PLAYER RECORDER ON / STANDBY ON / STANDBY - Turns the unit on and sends the unit to standby mode. The main power switch on the back of the unit must be turned on before using the standby button. -
Page 9: Front Vfd Display
Front VFD Display PLAYBACK INDICATORS These indicators show the playback status of a DVD, CD or other optical disc - Currently Playing: Stopped: TITLE INDICATOR Displays the number of the current Title on a DVD disc. CHAPTER / PRESET INDICATOR Displays the number of the current Chapter or Track on DVDs, Music CDs and other discs. -
Page 10: Back Panel Connections
Back Panel ANTENNA IN / OUT - For Antenna or Cable TV connection. Passthrough connection to TV does not transfer the output signal from the DVD Recorder. *Some units do not have a Passthrough connector. In this case, use the included splitter (See page 13). VIDEO INPUT 1 - Composite Video input for recording. -
Page 11: Connections
Connecting the video output to your TV In order to use the DVD Recorder, you’ll need to make a video connection to your TV. The capabilities of your TV and the cables you have on hand will determine the connections you can use. There are 3 possible connection types: Composite Video - The most widely used connection. - Page 12 S-Video This is a higher quality connection than standard composite video, and requires a special S-Video cable not included. The S-Video connector is distinguishable by its 4 pins, as shown below. If your TV has an S-Video input, it’s recommended that you use this type of connection for better picture quality.
-
Page 13: Audio Output Connections
Audio Output Connections This unit features a variety of audio line outputs for connection to a receiver or other audio equipment. Use the included A/V cable to connect the stereo audio outputs for connection to a TV or stereo receiver. Optical and Coaxial digital audio outputs send an encoded digital bitstream, suitable for receivers with Dolby or DTS decoding capability. -
Page 14: A/V Input Connections
Back AV Inputs (VIDEO IN 1, S-VIDEO IN 1) VIDEO IN 1 S-VIDEO IN 1 Front AV Inputs (VIDEO IN 2, S-VIDEO IN 2) CH DVR 1500 DVD PLAYER RECORDER ON / STANDBY Audio/Video source such as camcorder supporting S-VIDEO Out... -
Page 15: Powering On The Unit
STANDBY MODE. Press STANDBY on the remote control or front panel to bring the system out of standby mode. The system is now ready to use. CH DVR 1500 DVD PLAYER RECORDER PROGRESSIVE SCAN VIDEO DOWN ENTER ON / STANDBY... -
Page 16: Selecting The Dvd Function
Select the DVD Playback Mode Press the DVD/TV LIVE button on the remote control or the receiver’s front panel to select the DVD mode. FRONT PANEL DVD/TV LIVE SOURCE TIMER DVD / TV LIVE SOURCE REC MODE EDIT Inserting a Disc Press the OPEN/CLOSE button on the remote or front panel to open the disc tray. -
Page 17: Basic Disc Playback
Basic Disc Playback Starting, Pausing and Stopping Disc Play FRONT PANEL PLAY DVD / TV LIVE SOURCE PLAY - To begin playback of a disc, press PLAY/PAUSE. PAUSE - To freeze the video on a single frame, press the PLAY/PAUSE (Front Panel) or PAUSE (Remote Control) key during playback. -
Page 18: Advanced Disc Playback
Advanced Playback Slow Motion Playback This unit supports slow motion playback to 1/8 normal speed. PLAY Press the SLOW MOTION button repeatedly to step through all options for slow playback. With DVDs, you can choose from ½,1/4 or 1/8 speed. Jumping to a Specific Title, Chapter or Time Along with displaying playback information, the DISPLAY key also provides a convenient way to navigate DVD, Audio... -
Page 19: Using The Zoom Feature
Repeating a Segment You Define Unlike the REPEAT 1/ALL key, which allows you to repeat segments already defined on a disc, such as tracks and chapters, the REPEAT A-B key lets you define your own segments to repeat. DVD/TV LIVE SOURCE TIMER EDIT REC MODE... -
Page 20: Using Subtitles
Muting the sound Press the MUTE button on the remote to temporarily cancel the audio signal at any time. Press MUTE again to resume normal audio. DISPLAY DIGEST BOOKMARK HIDE AUDIO SUBTITLE MUTE Changing the audio track Most DVD discs are recorded with multiple audio tracks. These can contain multiple languages and different audio formats, such as 5.1Channel, 2 Channel and DTS. -
Page 21: Viewing Jpg Files
Viewing JPG Files Slide Shows You can view JPG picture files stored on CD-R/RW discs individually or in slide show mode on your TV. JPG is the standard format for pictures stored on digital cameras, the Internet and many other applications. When you insert a disc with JPG files, a Slide Show will automatically begin. -
Page 22: Playing Mp3
Playing MP3 Files The MP3 Player When you insert a disc containing MP3 files, the player will launch the MP3 Player - an on-screen interface for playing MP3 music files. Track List > 001 A FILE1.MP3 002 A FILE2.MP3 003 A FILE3.MP3 FILE1.MP3 T: 001/003 E: 00:00:25 TRACK LIST - A list of the tracks and folders on the... -
Page 23: Recording
Introduction to Recording You already know that DVD discs provide the highest quality video playback available. Now, with DVD+R/RW recording, you can create your own DVDs from your home movies, favorite TV shows or virtually any other video source. Recording to DVD+R/RW is easy. The process is similar in many ways to your old VCR, but with many new enhancements. -
Page 24: Setting Recording Options
Setting Recording Options There are several recording options and other settings that should be understood and checked before you begin recording. Setting the Record Speed The Record Speed determines the quality of your recordings as well as the maximum amount of video you can record on a disc. -
Page 25: Tv Tuner Setup
TV Tuner Setup Choose Cable or Antenna It's important that this option is set correctly before scanning for available channels. Press SETUP and navigate with the DOWN key to the VIDEO SETUP menu. Press ENTER. Then, navigate to the CABLE/ANTENNA option and press ENTER. SETUP SYSTEM SETUP Language... -
Page 26: The Title Navigator Screen
The Title Screen When you insert a DVD+RW or DVD+R disc, the Title Screen will appear. The Title Screen displays thumbnail images and information for each title (recording) on the disc, as well as the amount of free space available for recordings. CH 44 8:00:00 PM, Jan 2, 2003 Length: 0:30:00 Quality: HQ... - Page 27 Use the UP/DOWN ARROW keys to select an Input Source, and press ENTER. INPUT SOURCE INPUT SOURCE VIDEO IN 1 S-VIDEO IN 1 VIDEO IN 2 S-VIDEO IN 2 VIDEO IN 1 S-VIDEO IN 1 VIDEO IN 2 S-VIDEO IN 2 Recording In Live Recording mode, you may record with no specific end point, or specify the length of the recording - in multiples of 30...
-
Page 28: Timer Recording
Selecting Titles to Overwrite You can select titles to overwrite by pressing REC from the Title Screen. In the example below, the recorder is in DVD mode with the Title Screen displayed and TITLE 2 selected. When the recording is started from this location by pressing REC twice, a new title will replace TITLE 2 - and TITLE 3 if the recording is of sufficient length. - Page 29 Use the UP/DOWN ARROW keys to select an entry and press ENTER. Entry Freq Start Length 08/15/05 20:00 1:00 Use the UP/DOWN ARROW keys to select option values, and the LEFT/RIGHT ARROW keys to move among the fields. Entry Freq Start Length 08/15/05...
-
Page 30: Editing Your Recordings
EDITING YOUR RECORDINGS Editing Overview Your DVD Recorder’s capabilities go far beyond simply recording in Live and Timer modes. A vast array of editing options are also available, allowing you to tailor your recordings to your own personal requirements. You can divide your recordings into sections, or Chapters, that provide the user-friendly navigation made popular on motion picture DVDs. -
Page 31: Edit Title
Edit Title By default, your recordings are named according to the Input Source used. You can change the name of a title using the EDIT TITLE function. Use the UP/DOWN ARROW keys to select the EDIT TITLE option and press ENTER. EDIT Erase Title Erase Title... -
Page 32: Deleting Chapter Markers
Remove Chapter You can delete chapter markers, making one longer chapter out of two. Removing a Chapter Marker is basically like adding a chapter, but in reverse. In the example below, the title contains 3 chapters. During playback, press EDIT to access the EDIT MENU. Use the DOWN Arrow Key to select REMOVE CHAPTER. -
Page 33: The Hide Button
Hiding Video Segments with the HIDE Button You can hide video segments “on the fly” with the HIDE button. Recall that the HIDE CHAPTER function requires that a video segment be defined as a chapter first before it can be hidden. -
Page 34: New Picture
New Picture The Index Screen shows a thumbnail image representing each title on the disc. By default, this image is taken from the first frame of the recording. However, you may change this image to that of any frame contained in the title using the NEW PICTURE function. -
Page 35: The Dvd Recorder Setup Menu
THE DVD RECORDER SETUP MENU Using the SETUP MENU The DVD Recorder’s SETUP MENU is where various settings are configured, including Recording Options, Playback Options, Languages, Parental Control Settings and more. DIGEST BOOKMARK DISPLAY HIDE AUDIO SUBTITLE MUTE Press SETUP to enter the SETUP MENU. Use the UP/DOWN ARROW keys to select a sub-menu and press ENTER. -
Page 36: Video Setup
Video Setup SETUP VIDEO SETUP Language Aspect Ratio Video Setup Video Output Audio Setup Output Format System Setup Disc Media Record Mode Timer Record ASPECT RATIO Default setting: 4:3 PanScan You can setup your DVD Player to work with normal and wide screen televisions. -
Page 37: System Setup
System Setup SETUP SYSTEM SETUP Language Channel Search Video Setup Add/Del Channel Audio Setup Cable/Antenna System Setup Date and Time Disc Media Version Record Mode Parental Level Timer Record Password Factory Reset Screen Saver Auto Shutdown CHANNEL SEARCH Default setting: CONFIRM Confirm the Channel Search to automatically scan for available channels. -
Page 38: Disc Media Options
Disc Media Options SETUP DISC MEDIA Language Finalize Video Setup Erase Audio Setup System Setup Disc Media Record Mode Timer Record FINALIZE Default setting: CONFIRM This option is only available when a DVD+R disc is being used. DVD+R discs must be FINALIZED before they will be playable in standard DVD Players. -
Page 39: Troubleshooting
Common Problems & Solutions Playback The DVD Recorder Does Not Power On The AC Power cord may be loose or not plugged in. Make sure the power cord is secure in the AC socket and the connector on the back of the player. The unit may be in Standby Mode. -
Page 40: Video Performance
DISC TYPES SUPPORTED DVD+RW..... . Playback, Recording DVD+R ..... . . Playback, Recording DVD-RW . -
Page 41: Index
a-b repeat ........19 angles (multi-angle playback) ....19 antenna.