Advertisement
Quick Links
Owner's Manual & Safety Instructions
Save This Manual
operating, inspection, maintenance and cleaning procedures. Write the product's serial number in the
back of the manual (or month and year of purchase if product has no number). Keep this manual and the
receipt in a safe and dry place for future reference.
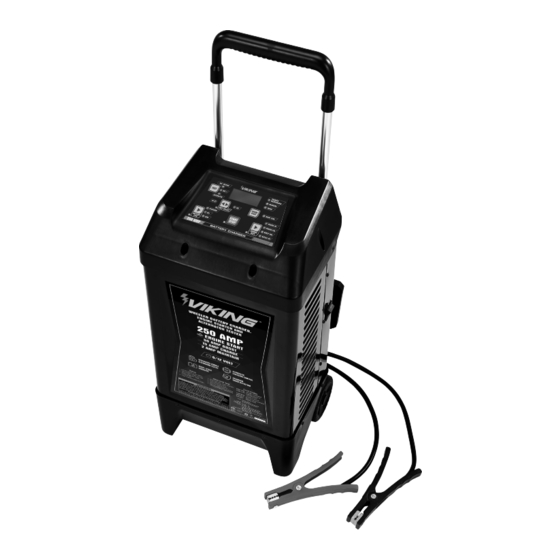
WHEELED BATTERY CHARGER,
ENGINE STARTER AND
ALTERNATOR TESTER
email our technical support at: productsupport@harborfreight.com
When unpacking, make sure that the product is intact
and undamaged. If any parts are missing or broken,
please call 1-888-866-5797 as soon as possible.
©
Copyright
2022 by Harbor Freight Tools
No portion of this manual or any artwork contained herein may be reproduced in
any shape or form without the express written consent of Harbor Freight Tools.
Diagrams within this manual may not be drawn proportionally. Due to continuing
improvements, actual product may differ slightly from the product described herein.
Tools required for assembly and service may not be included.
Keep this manual for the safety warnings and precautions, assembly,
Visit our website at: http://www.harborfreight.com
®
. All rights reserved.
read this material before using this product.
Failure to do so can result in serious injury.
SaVe tHiS ManuaL.
23g
59466
Advertisement

Related Manuals for Harbor Freight Tools VIKING 59466

Summary of Contents for Harbor Freight Tools VIKING 59466
- Page 1 No portion of this manual or any artwork contained herein may be reproduced in Failure to do so can result in serious injury. any shape or form without the express written consent of Harbor Freight Tools. Diagrams within this manual may not be drawn proportionally. Due to continuing SaVe tHiS ManuaL.
-
Page 2: Table Of Contents
table of contents Safety ............2 Maintenance ..........13 Specifications ..........5 Parts List and Diagram ......14 Setup ............2 Warranty ............ 16 Operation ............ 7 WarninG SyMBOLS anD DeFinitiOnS This is the safety alert symbol. It is used to alert you to potential personal injury hazards. - Page 3 iMpOrtant SaFety inStructiOnS 1. SaVe tHeSe inStructiOnS – 9. To reduce risk of electric shock, unplug charger This manual contains important safety and from outlet before attempting any maintenance or operating instructions for this battery charger. cleaning. Turning off controls will not reduce this risk. 2.
- Page 4 Stay clear of fan blades, belts, pulleys, and If unreadable or missing, contact other parts that can cause injury to persons. Harbor Freight Tools for a replacement. c. Check polarity of battery posts. POSITIVE (POS, P, +) battery post usually has larger 20.
-
Page 5: Specifications
21. Unplug the Battery Charger from its 27. Before moving charger, disconnect power supply electrical outlet before connecting its cables and battery, then allow charger to cool. to a battery, or performing any inspection, 28. People with pacemakers should consult their maintenance, or cleaning procedures. - Page 6 Setup read the entire iMpOrtant SaFety inFOrMatiOn section at the beginning of this manual including all text under subheadings therein before set up or use of this product. tO preVent SeriOuS inJury: DO nOt pLuG in cHarGer untiL DirecteD tO DO SO. Functions retractable control panel...
-
Page 7: Operation
control panel 1. Volt Select: Battery Voltage selection button. Press 6. LeD indicators: to cycle between the 6V and 12V selections. a. cHarGeD Illuminates when battery Maintenance: is fully charged. 2. Battery type: Press to cycle through b. cHarGinG: Illuminates when selections below. - Page 8 preparing to charge use this charger only on flooded lead-acid batteries. Other batteries may be damaged or may overheat, leak, or catch fire. DO nOt pLuG in cHarGer untiL DirecteD tO DO SO. tO preVent SeriOuS inJury: Wear anSi-approved splash-resistant safety goggles and heavy-duty rubber work gloves whenever connecting, disconnecting, or working near battery.
- Page 9 Operating instructions read the entire iMpOrtant SaFety inFOrMatiOn section at the beginning of this manual including all text under subheadings therein before set up or use of this product. tO preVent SeriOuS inJury: DO nOt pLuG in cHarGer untiL DirecteD tO DO SO. charging Battery installed in Vehicle a SparK near Battery May cauSe Battery eXpLOSiOn.
- Page 10 note: Volt Select, Battery type and charge rate d. If the error LED illuminates, correct the problem cannot be changed during charging. To change selection, immediately. See ERROR Messages on press Start/StOp to stop, make new selection, page 13 for Display message meaning. and then press Start/StOp to resume charging.
- Page 11 13. When disconnecting Charger, always do 14. After use clean, then store the Charger so in reverse sequence of connecting indoors out of children’s reach. procedure and break first connection while as far away from battery as practical. engine Starting (starting assist) a SparK near Battery May cauSe Battery eXpLOSiOn.
- Page 12 note: If the engine turns over but does not start, a. If the battery is under 9 volts or in extremely cold weather, press cHarGe rate and run stop trying to start the engine. There is likely a BOOSt 50a to charge the battery for 5 minutes problem with the vehicle’s starting system.
-
Page 13: Maintenance
Maintenance instructions procedures not specifically explained in this manual must be performed only by a qualified technician. tO preVent SeriOuS inJury: unplug the charger, disconnect any battery, and allow charger to cool completely before performing any inspection, maintenance, or cleaning procedures. tO preVent SeriOuS inJury FrOM tOOL FaiLure: Do not use damaged equipment. -
Page 14: Parts List And Diagram
pLeaSe reaD tHe FOLLOWinG careFuLLy THE MANUFACTURER AND/OR DISTRIBUTOR HAS PROVIDED THE PARTS LIST AND ASSEMBLY DIAGRAM IN THIS MANUAL AS A REFERENCE TOOL ONLY. NEITHER THE MANUFACTURER OR DISTRIBUTOR MAKES ANY REPRESENTATION OR WARRANTY OF ANY KIND TO THE BUYER THAT HE OR SHE IS QUALIFIED TO MAKE ANY REPAIRS TO THE PRODUCT, OR THAT HE OR SHE IS QUALIFIED TO REPLACE ANY PARTS OF THE PRODUCT. - Page 15 assembly Diagram 59466 For technical questions, please call 1-888-866-5797. Page 15...
-
Page 16: Warranty
Limited 90 Day Warranty Harbor Freight Tools Co. makes every effort to assure that its products meet high quality and durability standards, and warrants to the original purchaser that this product is free from defects in materials and workmanship for the period of 90 days from the date of purchase.