HILTI VC 300-17 X - Cutting Hood Manual
- Instructions manual (18 pages) ,
- Original operating instructions (48 pages) ,
- Manual (62 pages)
Advertisement
Information about the documentation About this documentation
- Read this documentation before initial operation or use. This is a prerequisite for safe, trouble-free handling and use of the product.
- Observe the safety instructions and warnings in this documentation and on the product.
- Always keep the operating instructions with the product and make sure that the operating instructions are with the product when it is given to other persons.
Explanation of symbols used
Warnings
Warnings alert persons to hazards that may occur when handling or using the product. The following signal words are used in combination with a symbol:
 | Draws attention to an imminent hazard that will lead to serious personal injury or fatality. |
 | Draws attention to a potential hazard that could lead to serious personal injury or fatality. |
 | Draws attention to a potentially dangerous situation that could lead to minor personal injury or material damage. |
Symbols in the documentation
The following symbols are used in this document:
 | Read the operating instructions before use |
 | Instructions for use and other useful information |
Symbols in the illustrations
The following symbols are used in illustrations:
 | The numbering reflects the sequence of operations shown in the illustrations and may deviate from the steps described in the text. |
 | Item reference numbers are used in the overview illustration and refer to the numbers used in the key in the product overview section. |
 | This symbol is intended to draw special attention to certain points when handling the product. |
Product-dependent symbols
Symbols on the product
The following symbols are used on the product:
 | Warning: hot surface |
 | Transport by crane is not permissible. |
Product information
Hilti products are designed for professional use and may be operated, serviced and maintained only by trained, authorized personnel. This personnel must be informed of any particular hazards that may be encountered. The product and its ancillary equipment can present hazards if used incorrectly by untrained personnel or if used not in accordance with the intended use. The type designation and serial number are stated on the rating plate.
- Write down the serial number in the table below. You will be required to state the product details when contacting Hilti Service or your local Hilti organization to inquire about the product.
Product information
| Wet / dry vacuum cleaner | VC 300-17 X |
| Generation | 01 |
| Serial no. |
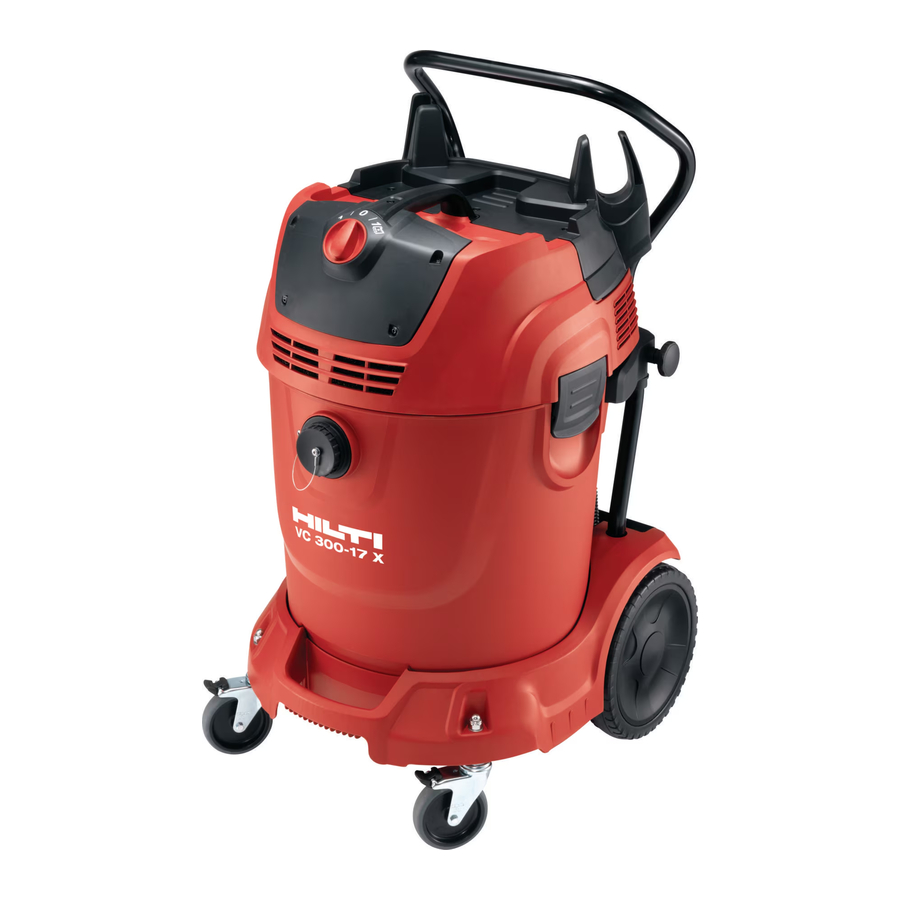
Description
Product overview

- Control switch
- Intake fitting
- Waste material container
- Catch
- Suction head
- Container handle
- Supply cord hook
- Catch for filter cover
- Drain hose (optional)
- Grip recesses
- Filter cover
Use as directed
The product described here is a general-purpose industrial vacuum cleaner for commercial use. It can be used to pick up wet or dry materials.
Hilti products are designed for professional use and may be operated, serviced and maintained only by trained, authorized personnel. The product and its ancillary equipment may present hazards when used incorrectly by untrained personnel or when used not as directed.
- Before beginning work with the product, find out how to operate it correctly and about any hazards associated with the materials you will be working with and how these materials can be disposed of safely.
- Do not use the product for continuous, stationary operation in automatic or semi-automatic systems.
- To reduce the risk of injury, use only genuine Hilti tools and accessories.
- Use an antistatic suction hose in order to avoid electrostatic effects.
- Do not pick up objects or materials that could cause injury by piercing through the dust bag (e.g. pointed or sharp objects).
- Do not stand on the product (do not use it as a substitute for a ladder).
This product is suitable for the following applications in commercial use:
- Collecting large quantities of dust fromHilti diamond grinders, diamond cutters, rotary hammers and core drilling machines using dry-cutting core bits.
- Picking up drilling slurry (mineral materials) withHilti diamond core bits or Hilti diamond saws and liquids up to a temperature of < 60°C (140°F).
- Picking up oil or liquid substances with a temperature of up to < 60°C (140°F).
- Wet and/or dry cleaning of wall and floor surfaces.
Items supplied
Wet/dry vacuum cleaner including filter element, suction hose complete with hose connector, plastic dust bag, operating instructions.
To help ensure safe and reliable operation, use only genuine Hilti spare parts and consumables. Spare parts, consumables and accessories approved by Hilti for use with the product can be found at your local Hilti Center or online at: www.hilti.com
Control switch
| Symbol | Meaning |
 | Switching on |
 | Switching off |
 | Switching on, with filter cleaning |
Automatic filter cleaning
The appliance is equipped with a filter cleaning system for fine dust. The filter is cleaned automatically every 7.5 seconds by a blast of air.
Technical data
 Note
Note
For details of the rated voltage, current, frequency and/or input power, please refer to the appliance's country-specific type identification plate.
When powered by a generator or transformer, the generator or transformer's power output must be at least twice the rated input power shown on the rating plate of the appliance. The operating voltage of the transformer or generator must always be within +5% and -15% of the rated voltage of the appliance.
| VC 300-17 X | |
| Weight | 63.1 lb (28.6 kg) |
| Mains connection (type) | SJTW A 3/14 AWG |
| Maximum volumetric flow rate (air) | 2 x 157 CFM (2 x 74 ℓ/s) |
| Container capacity | 17 liq. galUS (65 ℓ) |
| Water capacity | 13 liq. galUS (48 ℓ) |
| Suction hose connector (C-DN/C-ID) | 1.6 in (40 mm) |
| Vacuum (max.) | 3.7 psi (254 mbar) |
| Ambient temperature (max.) | 104 ℉ (40 ℃) |
| Automatic filter cleaning, all | 7.5 s |
| Protection class | I |
| Protection class | IPX4 |
Before use
Risk of injury presented by the appliance running away out of control. The vacuum cleaner may run away out of control if the wheel brakes are not engaged.
- Engage the wheel brakes so that the vacuum cleaner stands securely.
Operating the appliance for the first time
- Open the two catches.
- Lift the vacuum cleaner top section away from the waste material container.
- Remove the accessories and packaging from the waste material container.
- Fit a suitable dust bag in accordance with the instructions.
- Fit the vacuum cleaner top section onto the waste material container and close the two catches.
- Check to ensure that the vacuum cleaner top section is fitted correctly and secured.
- Connect the suction hose to the appliance.
Fitting/changing the fabric dust bag
Risk of injury. Sharp pointed objects may pierce through the dust bag.

- Check that no objects have pierced through the dust bag.
- Pull the plug out of the power outlet.
- Open the two catches.
- Lift the vacuum cleaner top section away from the waste material container.
- Close the cap at the mouth of the dust bag.
- Clean the waste material container with a cloth.
- Secure the new fabric dust bag in the waste material container.
- Fit the vacuum cleaner top section onto the waste material container and close the two catches.
Fitting/changing the plastic dust bag

- Disconnect the supply cord plug from the power outlet.
- Open the two catches.
- Lift the vacuum cleaner top section away from the waste material container.
- Use a cable tie to close the plastic dust bag below the punched holes.
- Remove the plastic dust bag.
- Clean the waste material container with a cloth.
- Fit a new plastic dust bag (see instructions printed on it) in the waste material container.
- Fit the vacuum cleaner top section onto the waste material container and close the two catches.
Operation

Electrical hazards. Fatal or serious injury may result if the vacuum cleaner is not correctly connected to the electric supply.
- Connect the vacuum cleaner only to a properly earthed/grounded power source.
Risk of injury. Damage to the filter system may allow harmful dust (health hazard) to escape.
- In an emergency (e.g. filter ruptured), switch the vacuum cleaner off, unplug the supply cord from the power outlet and have the vacuum cleaner checked by a trained and qualified person before further use.
Risk of injury presented by the appliance running away out of control. The vacuum cleaner may run away out of control if the wheel brakes are not engaged.
- Engage the wheel brakes so that the vacuum cleaner stands securely.
6.1 Picking up dry dust
Note
Before picking up dry dust, especially dust from mineral materials, always check to ensure that the correct dust bag is fitted in the container. The material picked up by the vacuum cleaner can then be disposed of cleanly and easily.
Risk of injury. Hazardous material that has been picked up may escape if a filter element is not used.
- Never use the appliance without a filter element.
- Check that the filter element is dry and that the correct type of dust bag is fitted.
Picking up liquids
Risk of injury. Hazardous material that has been picked up may escape if a filter element is not used.
- Never use the appliance without a filter element.
- Check the container level monitoring system.
- If possible, use a separate filter element for wet applications.
- After picking up liquids, open the two catches.
- Lift the vacuum cleaner top section away from the waste material container and place it on a level surface so that the filter element can dry.
- Empty the waste material container and use a water hose to rinse it out. Use a brush to clean the electrodes and clean the filter element, after allowing it to dry, by wiping it off with your hand.
- Allow the waste material container to dry.
After use of the vacuum cleaner
- Switch off the electric tool.
- To switch the appliance off, turn the control switch to the
![]() position.
position. - Unplug the vacuum cleaner's supply cord from the power outlet.
- Coil up the supply cord and hang it on the hook.
- Empty the container and clean the appliance by wiping it with a damp cloth.
- Coil up the suction hose.
- Store the vacuum cleaner in a secure, dry place where it is inaccessible to unauthorized users.
Emptying dry dust from the waste material container
- Disconnect the supply cord plug from the power outlet.
- Lift the vacuum cleaner top section away from the waste material container and place it on a level surface.
- Remove the dust bag from the waste material container or grip the container by the recess provided and empty it by tipping out the contents.
- Fit the vacuum cleaner top section onto the waste material container and close the two catches.
Emptying the waste material container when no dust bag is fitted (picking up liquids)
- Disconnect the supply cord plug from the power outlet.
- Lift the vacuum cleaner top section away from the waste material container and place it on a level surface.
- Grip the waste material container by the recess provided and empty it by tipping out the contents.
- Clean the edge of the waste material container with a cloth.
- Fit the vacuum cleaner top section onto the waste material container and close the two catches.
Draining off waste water
Note
Observe local regulations regarding the treatment of waste water.

- Remove the cap from the draining hose.
- Take the draining hose out of the holder.
- Lay the draining hose on the ground or floor.
- The waste water drains away.
Care, maintenance, transport and storage
Care and maintenance

Danger of electric shock! Carrying out care and maintenance while the supply cord is connected to the power outlet presents a risk of serious injuries including burns.
- Always unplug the supply cord before carrying out all care and maintenance tasks.
Care
- Carefully remove stubborn dirt from the tool.
- Clean the air vents carefully with a dry brush.
- Use only a slightly damp cloth to clean the casing. Do not use cleaning agents containing silicone as they can attack the plastic parts.
Maintenance
Danger of electric shock! Improper repairs to electrical components may lead to serious injuries including burns.
- Repairs to the electrical section of the tool or appliance may be carried out only by trained electrical specialists.
- At regular intervals, check all visible parts and the controls for signs of damage and make sure that they all function correctly.
- Do not operate the power tool if signs of damage are found or if parts malfunction. Have damage repaired immediately byHilti Service.
- After cleaning and maintenance, refit all guards or protective devices and check that they function correctly.
Note
To help ensure safe and reliable operation, use only genuine Hilti spare parts and consumables. Spare parts, consumables and accessories approved by Hilti for use with the product can be found at your local Hilti Center or online at: www.hilti.com
Automatic filter cleaning
Note
Do not attempt to clean the filter element by knocking it against a hard object and do not use pointed instruments. This will reduce the life of the filter element.
Do not use compressed air to clean the filter element. This may cause tears in the filter material.
The condition of the filter element deteriorates with use.
- Replace the filter element at least every six months.
- However, if used intensively, the filter element should be replaced more often.
Fitting/changing the filter element

- Disconnect the supply cord plug from the power outlet.
- Open the filter cover catches.
- Open the filter cover.
- Carefully remove the filter element, gripping it at the areas provided in the holder.
- Clean the sealing surface with a cloth.
- Fit the new filter element.
- Close the filter cover by flipping the cover catch forward.
- Close the filter cover catch.
Checking the container level monitoring system

- Engage the wheel brakes so that the vacuum cleaner stands securely.
- Disconnect the supply cord plug from the power outlet.
- Open the two catches.
- Lift the vacuum cleaner top section away from the waste material container and place it on a level surface.
- Check the cut-out contacts and clean them with a brush if necessary (if dirty).
- Check the seal at the vacuum cleaner top section and clean it with a cloth if necessary.
- Fit the vacuum cleaner top section onto the waste material container and close the two catches.
Checks after cleaning and maintenance
- After cleaning or carrying out maintenance, check that the vacuum cleaner is assembled correctly and that it functions faultlessly.
- Test each of the functions.
Transport
Do not carry the appliance when it is full of waste material.
The appliance may not be lifted directly by crane.
- Remove the power conditioner (if applicable) or loose accessory tools from the holder.
- Empty the appliance before carrying it to another location.
- Do not tip the appliance or transport it lying on its side after using it to pick up liquids.
- Use the tapered adapter to connect both ends of the hose together conveniently for transport.
Storage
- Store the vacuum cleaner in a secure, dry place where it is inaccessible to unauthorized users.
Troubleshooting
If the trouble you are experiencing is not listed in this table or you are unable to remedy the problem by yourself, please contact Hilti Service.
| Trouble or fault | Possible cause | Action to be taken |
The vacuum turbine doesn't start | No electric power. |
|
| The probes are clogged with dirt. |
| |
The vacuum turbine switches itself off | The container is full. |
|
| The vacuum turbine doesn't start after cleaning the waste material container. | The automatic cut-out is active. |
|
| The probes are clogged with dirt. |
| |
Suction power drops | The suction nozzle, tube, hose or the filter are blocked. |
|
| The filter is clogged. |
| |
| Remove the filter cover. |
| |
| The drainage hose leaks. |
| |
Dust is blown out of the appliance | The filter is fitted incorrectly. |
|
Safety
Important safety instructions
READ ALL INSTRUCTIONS BEFORE USING THIS APPLIANCE. Failure to follow all the instructions listed below may result in electric shock, fire and/or serious injury. KEEP THESE INSTRUCTIONS IN A SAFE PLACE.
General safety instructions
In addition to the safety instructions given in the various sections of these operating instructions, the following points must be strictly observed at all times.
- Read all the instructions. Failure to follow all the instructions listed below may result in electric shock, fire and/or serious injury.
- If the appliance is used in conjunction with an electric tool, read and follow the operating instructions for the electric tool and all the warnings.
- Modification of the appliance is not permitted.
- Use the right appliance for the job. Do not use the appliance for purposes for which it was not intended. Use it only as directed and when in faultless condition.
- Before beginning work with the appliance, find out how to operate it correctly and about any hazards associated with the materials it will be picking up and how these materials can be disposed of.
- Take the influences of the surrounding area into account. Do not use the appliance where there is a risk of fire or explosion.
- The appliance may only be used by persons who are familiar with it, have been trained on how to use it safely and who understand the resulting hazards. The appliance is not intended for use by children. Children must be supervised in order to ensure that they don't play with the appliance.
- Store appliances in a secure place when not in use. When not in use, appliances must be stored in a dry, high place or locked away out of reach of children.
Personal safety
- Stay alert, watch what you are doing and use common sense when operating the product. Do not use the vacuum cleaner while you are tired or under the influence of drugs, alcohol or medication. A moment of inattention while operating the appliance may result in serious personal injury.
- The user and any other persons in the vicinity must wear suitable eye protection, a hard hat, ear protection, protective gloves, safety footwear and breathing protection while the appliance is in use or while maintenance work on it is being carried out.
- Engage the wheel brakes so that the vacuum cleaner stands securely. If the wheel brakes are disengaged the vacuum cleaner may run away out of control.
- If devices are provided for the connection of dust extraction and collection facilities, ensure these are connected and properly used.
Use and care of the appliance
- Never leave the appliance unattended.
- Activate the filter cleaning system when picking up hazardous dusts, especially when the appliance is used in conjunction with electric tools that generate dust.
- Protect the appliance from frost.
- Clean the water level limiting device regularly with a brush, in accordance with the instructions, and check it for signs of damage.
- When fitting the top section of the vacuum cleaner, take care to avoid pinching your fingers or damaging the supply cord.
- Check the appliance and its accessories for any damage. Guards, safety devices and any slightly damaged parts must be checked carefully to ensure that they function faultlessly and as intended. Check that moving parts function faultlessly, without sticking, and that no parts are damaged. In order to ensure faultless operation of the appliance, all parts must be fitted correctly and must meet the necessary requirements.
- Have the apppliance serviced by a qualified repair person using only identical replacement parts.
- Always lead the supply cord, the extension cord and the suction hose away to the rear when working.
- Always unplug the supply cord from the power outlet when the appliance is not in use (during breaks), before cleaning and maintenance and before changing the filter or accessories. This prevents unintentional starting of the appliance.
- Never pull the vacuum cleaner by the supply cord to a new working position. Do not run the wheels of the vacuum cleaner over the supply cord.
- Do not transport the appliance by crane.
Electrical safety
- The plug on the supply cord of the appliance must match the outlet. Do not change the plug in any way. Do not use adapter plugs with earthed (grounded) appliances. Unmodified plugs and matching outlets reduce risk of electric shock.
- Insert the plug in a suitable earthed/grounded power outlet which has been correctly and safely installed and is in compliance with local regulations. If you are in doubt about the effectiveness of the power outlet's earth/ground connection, have it checked by a qualified specialist.
- Avoid body contact with earthed or grounded surfaces such as pipes, radiators, cookers, stoves and refrigerators. There is an increased risk of electric shock if your body is grounded.
- Do not expose the appliance to rain or wet conditions.
- Check to ensure that the supply cord does not lie in a puddle of water.
- Check the appliance's supply cord at regular intervals and have it replaced by Hilti Service if damage is found. Check extension cords at regular intervals and replace them if found to be damaged.
- Do not touch the supply cord or extension cord if they are damaged while working. Pull the plug out of the power outlet.
- The electric supply cord may be replaced only with a cord of the type specified in the operating instructions.
- Do not abuse the cord. Never use the cord to carry the appliance or pull the plug from an outlet. Keep cord away from heat, oil, sharp edges or moving parts.
- When operating an electric appliance outdoors, use only extension cords of a type suitable for outdoor use. Use of an extension cord suitable for outdoor use reduces the risk of electric shock.
- In the event of an interruption in the electric supply, switch the appliance off and unplug it from the power outlet.
- Use the power outlet on the appliance only for the purposes described in the operating instructions.
- Never operate the appliance when it is dirty or wet. Dust (especially dust from conductive materials) or dampness on the surface of the appliance can, under unfavorable conditions, lead to electric shock. Have dirtied or dusty appliances checked at regular intervals by Hilti Service, especially if they are used frequently for working on conductive materials.
- If use of the appliance in a damp environment cannot be avoided, use a ground fault circuit interrupter.
Workplace
- Ensure that the workplace is well lit.
- Ensure that the workplace is well ventilated. Exposure to dust at a poorly ventilated workplace may result in damage to the health.
- Keep the workplace tidy. Objects which could cause injury should be removed from the working area.
- Do not operate the appliance in explosive atmospheres, such as in the presence of flammable liquids, gases or dust. Electric appliances cause sparks which may ignite the dust or fumes.
- Use extra care when working on stairs.
The material picked up
- Do not use the appliance to pick up flammable or explosive dusts (magnesium or aluminum dust etc.) or dusts that present a health hazard. Do not use the appliance to pick up materials hotter than 60°C (140°F), (e.g. glowing cigarette ends, hot ash).
- Do not use the appliance to pick up flammable, explosive or aggressive liquids (coolants and lubricants, gasoline, solvents, acids (pH < 5), alkalies (pH > 12.5), etc.).
- Do not pick up objects or materials that could cause injury by piercing through the dust bag (e.g. pointed or sharp objects).
- Switch the appliance off immediately if foam or liquids escape from it.
- Wear protective gloves when using the appliance to pick up hot materials at temperatures of up to 60°C (140°F).
- When working with mineral drilling slurry, wear protective clothing and avoid skin contact with the slurry (pH > 9: caustic).
- Avoid contact with alkaline or acidic liquids. If contact accidentally occurs, rinse with water. In the event of the liquid coming into contact with the eyes, rinse the eyes with plenty of water and consult a doctor.
Documents / Resources
References
Download manual
Here you can download full pdf version of manual, it may contain additional safety instructions, warranty information, FCC rules, etc.
Advertisement
Thank you! Your question has been received!


Need Assistance?
Do you have a question about the VC 300-17 X that isn't answered in the manual? Leave your question here.