Paradyne 3160 Quick Reference
Zhone acculink 3160 dsu-csu combo: quick reference
Hide thumbs
Also See for 3160:
- Operator's manual (296 pages) ,
- Quick reference (24 pages) ,
- Supplementary manual (5 pages)
Table of Contents
Advertisement
Quick Links
Download this manual
See also:
Operator's Manual
Advertisement
Table of Contents

Related Manuals for Paradyne 3160


Summary of Contents for Paradyne 3160
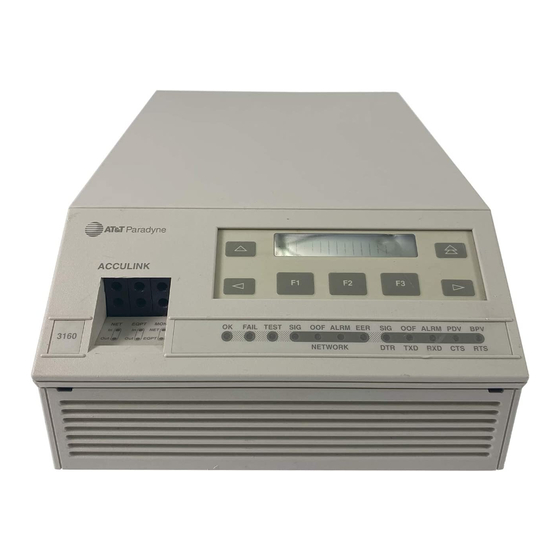
- Page 1 ACCULINK 3160 DSU/CSU QUICK REFERENCE Document No. 3160-A2-GL11-80...
-
Page 2: Warranty, Sales, Service, And Training Information
Copyright 2000 Paradyne Corporation. All rights reserved. Printed in U.S.A. Notice This publication is protected by federal copyright law. No part of this publication may be copied or distributed, transmitted, transcribed, stored in a retrieval system, or translated into any human or computer language in any form or by any means, electronic, mechanical, magnetic, manual or otherwise, or disclosed to third parties without the express written permission of Paradyne Corporation, 8545 126th Ave. -
Page 3: Quick Reference
Complete documentation for this product is available at www.paradyne.com. Select Library Technical Manuals Select the following document: 3160-A2-GB24 ACCULINK DSU/CSU, Models 3160-A4, 3161, 3164-A2, and 3165-A4 Operator’s Guide To request a paper copy of a Paradyne document: Within the U.S.A., call 1-800-PARADYNE (1-800-727-2396) Outside the U.S.A., call 1-727-530-8623... -
Page 4: Installation Procedure
115 Vac power outlet. 2. Attach the DSU/CSU network connection to the T1 network using the appropriate cable. Attach the 3160 DSU/CSU to the customer premises equipment via the DTE (DSX-1) and/or port connectors. 3. Power on the DSU/CSU to perform the power-on self-test. - Page 5 PORT 2 Modem Port Power Serial Port 10BaseT SNMP Manager Cabling Examples PSTN Modem Port Network Port Network Port 3160 DSU/CSU NETWORK T1 Network 3164 DSU/CSU Power SNMP Manager Modem SNMP Manager 3164 DSU/CSU Network Port COM Port COM PORT MODEM...
-
Page 6: Configuration Procedures
Configuration Procedures For detailed configuration procedures see Chapter 4, Configuration , and Appendix C, Configuration Options , of the Operator’s Guide . Displaying/Editing Configuration Options To display/edit configuration options: 1. From the top-level menu screen (which you can access by pressing the select Cnfig. - Page 7 Configuring the 10BaseT Port To configure the 10BaseT port: 1. From the top-level menu screen, select Cnfig. 2. Select Activ. 3. Select Edit. 4. Select User. 5. Press F1 (Next) until the ENET Use configuration option appears. 6. Select the appropriate protocol for your network. 7.
-
Page 8: Allocating Data Ports
Configuring the Data Ports Network DS0s must be mapped to the Data Ports for data. To configure the DataPort: 1. From the top-level menu screen, select Cnfig. 2. Select Activ. 3. Select Edit. 4. Select Port. 5. Press the Function key under the port to be configured. 6. -
Page 9: Block Or Acami Assignment Method
Block or ACAMI Assignment Method The Assign By configuration option screen appears after you select a port. To assign by the block or ACAMI method: 1. Press F2 for Block or F3 for ACAMI. 2. Press F1 (Next) to display the next configuration option (Port Rate). 3. -
Page 10: Allocating Ds0 Channels From The Dte Drop/Insert Interface To The Network Interface
Allocating DS0 Channels from the DTE Drop/Insert Interface to the Network Interface By using the configuration options, you can allocate DS0 channels from the DTE Drop/Insert (DSX-1) interface to the network interface and specify which DS0 channels carry Robbed Bit Signaling (RBS) information for voice channels. To allocate DS0 channels from the DTE Drop/Insert (DSX-1) interface to the network interface: 1. -
Page 11: Configuration Options
Configuration Options Configuration options are accessed from the Cnfig branch of the front panel menu. Stat DevHS STest Perf TStat ENET T elco User Prt n Near Cur 24T ot Intvl Cur 8T ot Intvl Rlpbk Lpbk LLBDN 54DN FT1DN LLBUP 54UP FT1UP... - Page 12 Table 1. DTE Interface Configuration Options Option Factory 1 DTE Port: DTE Port: DTE Framing: DTE Framing: DTE Coding: DTE Coding: Equal: Equal: (DTE Line (DTE Line Equalizer) Extrn DLB: (External DTE (External DTE Loopback) Send Ones: Send Ones: Factory 2 Enab Enab Disab...
- Page 13 Table 2. Port Configuration Options (1 of 2) Option Factory 1 Port Type: Port Type: Base Rate: Base Rate: Net DCLB: Net DCLB: Port LB: Port LB: All Ones: All Ones: Rcv Yellow: Rcv Yellow: (Received Yellow) Tx Clock: Tx Clock: InvertTxC: (Invert Tx Clock) (Invert Tx Clock)
- Page 14 Table 2. Port Configuration Options (2 of 2) Option Factory 1 EDL: EDL: Err Rate: (Excessive Error (Excessive Error Rate) a e) Near-end: Near end: Far end: Far-end: Mgmt Link: Mgmt Link: Factory 2 Enab Enab Disab Disab 10E–4 10E–4 10E–5 10E–5 10E–6...
- Page 15 Table 3. Network Interface Configuration Options Option Factory 1 NET Framing: NET Framing: NET Coding: NET Coding: LBO: LBO: ANSI PRM: ANSI PRM: Mgmt Link: Mgmt Link: NET LLB: NET LLB: NET PLB: NET PLB: BitStuff: BitStuff: Circuit Ident: Circuit Ident: Factory 2 B8ZS B8ZS...
- Page 16 Table 4. DTE Channel Configuration Options Line 1 Displays: Line 2 Displays: N1 N2 N3 ... N24: N1 N2 N3 ... N24: D1 D2 D3 ... D24: Meaning — Unassigned Channel D1, D2 ... D24 assigned to this DTE channel Prt1 Channel Prt2...
- Page 17 Table 5. Data Port Channel Configuration Options (1 of 2) Option Factory 1 Assign To: Assign To: Assign By: Assign By: Port Rate: 1152 (1008) 1216 (1064) 1280 (1120) 1344 (1176) 1408 (1232) 1472 (1288) 1536 (1344) Factory 2 Prt n Prt n Block Block...
- Page 18 Table 5. Data Port Channel Configuration Options (2 of 2) Option Factory 1 Start At: Line 1 Displays: Line 2 Displays: N1 N2 N3 ... N24: (If assigned to NET) (If assigned to NET) D1 D2 D3 ... D24: D1, D2 ... D24 (If assigned to DTE) N1, N2 ...
- Page 19 Table 6. General Configuration Options Option Factory 1 Gen Yellow: Gen Yellow: (Generate Yellow) Clock Src: Clock Src: Clock Rate: Clock Rate: Tst Timeout: Tst Timeout: Tst Duration: Tst Duration: Factory 2 Enab Enab Disab Disab Prt1 Prt1 2048 2048 1544 1544 Enab...
- Page 20 Table 7. User Configuration Options (1 of 3) Option Factory 1 Self-Test: Self-Test: FP Access: FP Access: FP Pass: FP Pass: Dial-In: Dial-In: Password: Password: Com Use: Com Type: Com Type: Com Clk: Com Clk: Com Rate: Com Rate: (Communication Port (Communication Port Rate) R t )
- Page 21 Table 7. User Configuration Options (2 of 3) Option Factory 1 CStop Bits: CStop Bits: (Communication Port (Communication Port Stop Bits) Bit ) Ignore DTR: Ignore DTR: CmInActTm: (COM Port Inactivity (COM Port Inactivity Timeout) CmDiscTm: (COM Port (COM Port Disconnect Time) Modem Use: Modem Type:...
- Page 22 Table 7. User Configuration Options (3 of 3) Option Factory 1 MoDiscTm: (Modem Port (Modem Port Disconnect Time) ENET Use: ENET IP Adr: ENET IP Adr: ENET NetMask: ENET NetMask: DefGatewayAdr: DefGatewayAdr: TnSession: TnSession: (Telnet Session) TnPaswd: TnPaswd: (Telnet Password) TnInActTm: (Telnet Inactivity (Telnet Inactivity...
- Page 23 Table 8. Alarm Configuration Options Option Factory 1 Alrm Msg: SNMP Trap: SNMP Trap: TrapDisc: TrapDisc: DialOut: DialOut: Call Retry: Call Retry: Dial Delay: AltDialDir: Err Rate: (Excessive Error (Excessive Error Rate) Rate) Factory 2 Disab Disab Modem Modem Both Both Enab Enab...
- Page 24 Table 9. General Management Configuration Options (1 of 2) Option Factory 1 SNMP Mgt: SNMP Mgt: NMS Valid: NMS Valid: Num Sec Mgrs: Num Sec Mgrs: NMS n IP Adr: NMS n IP Adr: NMS n Acs: NMS n Acs: System Name: System Name: System Location:...
- Page 25 Table 9. General Management Configuration Options (2 of 2) Option Factory 1 Com NetMask: Com NetMask: Com Link: Com Link: Modem IP Adr: Modem IP Adr: Mdm NetMask: Mdm NetMask: Alt Mdm IP Adr: Alt Mdm IP Adr: Alt Mdm NetMask: Alt Mdm NetMask: Modem Link: Modem Link:...
- Page 26 Table 10. Management Trap Configuration Options Option Factory 1 Num Trap Mgrs: Trap n IP Adr: Trap n IP Adr: Trap n Dst: Trap n Dst: Gen Trap: Gen Trap: Entp Trap: Entp Trap: Link Trap: Link Trap: Trap I/F: Trap I/F: Factory 2 2–6...
-
Page 27: Important Safety Instructions
Important Safety Instructions 1. Read and follow all warning notices and instructions marked on the product or included in the manual. 2. This product is intended to be used with a 3-wire grounding type plug – a plug which has a grounding pin. This is a safety feature. Equipment grounding is vital to ensure safe operation. - Page 28 11. In addition, if the equipment is to be used with telecommunications circuits, take the following precautions: — Never install telephone wiring during a lightning storm. — Never install telephone jacks in wet locations unless the jack is specifically designed for wet locations. —...
-
Page 29: Government Requirements And Equipment Return
The DSU/CSU’s configuration must correspond to the T1 line’s parameters. The 3160 DSU/CSU’s internal modem connects to the Public Switched Telephone Network using a USOC Type RJ11C jack. The Facility Interface Code 02LS2 along with the RJ11C jack should be specified to the telephone company when ordering a dial line for the modem. - Page 30 5. The telephone company may make changes in its facilities, equipment, operations, or procedures that could affect the operation of the equipment. If this happens, the telephone company will provide advance notice in order for you to make the necessary modifications in order to maintain uninterrupted service. 6.
-
Page 31: Notice To Users Of The Canadian Telephone Network
Notice to Users of the Canadian Telephone Network The Industry Canada label identifies certified equipment. This certification means that the equipment meets telecommunications network protective, operational and safety requirements as prescribed in the appropriate Terminal Equipment Technical Requirements document(s). The Department does not guarantee the equipment will operate to the user’s satisfaction.