Advertisement
Quick Links
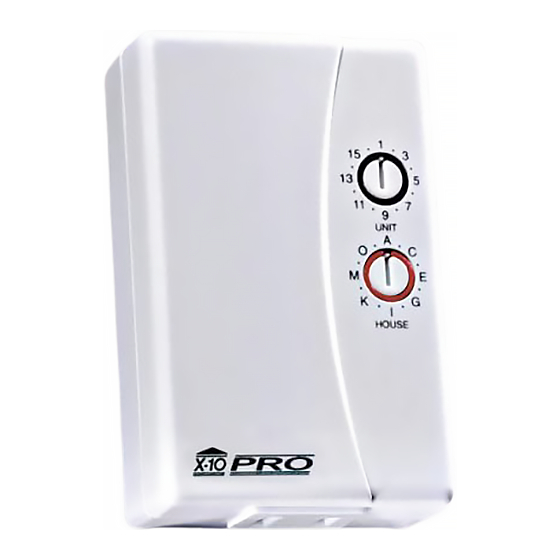
2-Way Appliance Module AM14A (2 pin)
INSTALLATION AND OPERATING INSTRUCTIONS
1. Set the black Unit Code dial on the front of the Module to the desired
number between 1 and 16.
2. Set the red Housecode dial to the same letter as your X-10 Controllers or
the same letter as used with your CM11A 2-Way Computer Interface and
ActiveHome software.
3. Make sure the lamp or appliance you want to control is turned on, and
unplug it from its outlet.
4. Plug the lamp or appliance into the module.
5. Plug the module into the AC outlet.
To turn the module on/off, press the number corresponding to its Unit Code
on any X-10 controller, then press on/off.
Note: the AM14A is a 2-Way module so you can poll it (ask it for its status)
from the CM11A 2-Way Computer Interface and ActiveHome software.
ActiveHome will ask the AM14A for its status and the module will report
back to indicate whether it is on or off. The ActiveHome software will then
update the graphics on your computer monitor screen to show the status of the
module. See your owner's manual for the ActiveHome system for more
information.
If you return your Warranty Registration Card with this form you qualify to purchase one
of the items listed below, at a special price. This price includes postage and handling so the
price you see below is the price you pay. This is a one time offer for returning your Warranty
Registration Card but if you purchase more than one unit, and send in more than one
Warranty Registration Card, you may purchase one item for each card. You may choose any
one of the following items.
o An LM465 Lamp Module for $10.00
o An AM486/AM466 Appliance Module for $10.00.
o A Wall Switch Module for $10.00
o A 3-Way Wall Switch Module for $15.00
o A 220V 15A Heavy Duty Appliance Module for $15.00 (single phase wiring only)
o A 220V 20A Heavy Duty Appliance Module for $15.00 (single phase wiring only)
1.
Indicate in the box, which one item you would like.
2.
Fill in the shipping label on the back of this form.
3.
Send this form with your Warranty Card and your check or money order made payable
to X-10 (USA) Inc. to the return address shown on the back of this form (NJ, CA, TX,
and IL residents add applicable sales tax). Allow 2-3 weeks for delivery.
X-10 (USA) INC. LIMITED 1-YEAR WARRANTY
X-10 (USA) Inc. warrants X-10 products to be free from defective material and
workmanship for a period of one (1) year from the original date of purchase at retail. X-10
(USA) Inc. agrees to repair or replace, at it's sole discretion, a defective X-10 product if
returned to X-10 (USA) Inc. within the warranty period and with proof of purchase.
If service is required under this warranty:
1. Return the defective unit postage prepaid to X-10 (USA) Inc. (see address on back).
2. Enclose a check for $4.00 to cover postage and handling.
3. Enclose a dated proof of purchase.
4. X-10 is not responsible for shipping damage.
Units to be returned should be packed carefully.
5. For additional warranty information, contact X-10 (USA) Inc.
Your Name ....................................................................................................................
Address ..........................................................................................................................
........................................................................................................................................
Date Purchased .................. 19....... Store where purchased ............................................
Specify 2 pin o or 3 pin o
AM14A-3/96
Advertisement

Related Manuals for X10 AM14A


Summary of Contents for X10 AM14A
- Page 1 To turn the module on/off, press the number corresponding to its Unit Code on any X-10 controller, then press on/off. Note: the AM14A is a 2-Way module so you can poll it (ask it for its status) from the CM11A 2-Way Computer Interface and ActiveHome software.
- Page 2 2-Way Appliance Module AM15A (3 pin) INSTALLATION AND OPERATING INSTRUCTIONS 1. Set the black Unit Code dial on the front of the Module to the desired number between 1 and 16. 2. Set the red Housecode dial to the same letter as your X-10 Controllers or the same letter as used with your CM11A 2-Way Computer Interface and ActiveHome software.
- Page 3 2-Way Lamp Module LM14A INSTALLATION AND OPERATING INSTRUCTIONS 1. Set the black Unit Code dial on the front of the Module to the desired number between 1 and 16. 2. Set the red Housecode dial to the same letter as your X-10 Controllers or the same letter as used with your CM11A 2-Way Computer Interface and ActiveHome software.
- Page 4 1/3 H.P. for motors; 400W for TVs; 500W for lamps (because of the in- rush current from a cold lamp). 2-Way versions AM14A (2 pin), AM15A (3 pin). Wall Switch Module WS467 For controlling important indoor and out- door security lights.