Black & Decker Flex BDH1200FVAV - Car Handheld Vacuum Manual
- Instruction manual (21 pages) ,
- Instruction manual (7 pages)
Advertisement
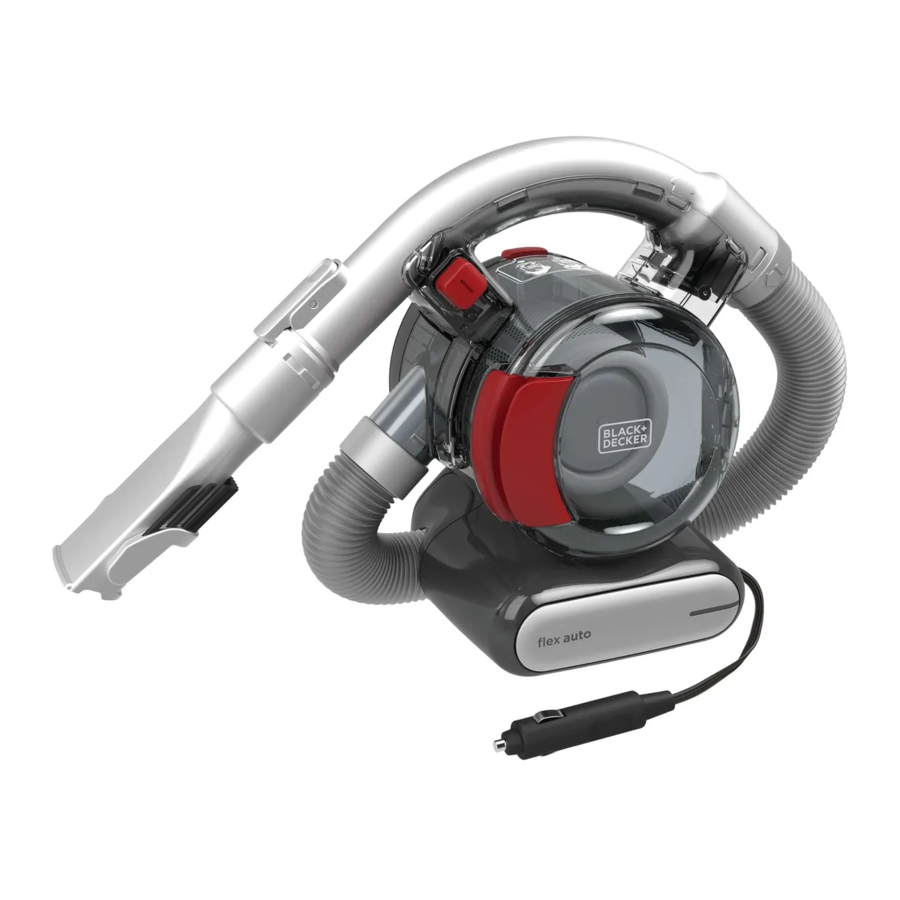
PRODUCT FEATURES

- On/off power switch
- Removable handle
- Locking ring
- Hose
- Door latch
- Accessory clip
- 2-in-1 nozzle accessory
- Crevice tool
- 12v Vehicle adaptor
ASSEMBLY
MOUNTING ACCESSORIES (FIGURES A - C)
The 2-in-1 nozzle (7) has a brush that can be folded forward for dusting and upholstery cleaning (figure A). The crevice tool (8) allows for vacuuming in narrow and hard-to-reach places.

- To attach an accessory, press the accessory clip (6) and slide the accessory onto the handle (2).
- To remove an accessory, press the accessory clip and remove the accessory as shown in figure B.


To unwrap and extend the handle and hose:
The handle and hose can be unwrapped from the main appliance for extended reach when cleaning. Grab the handle and lift upwards. Unwrap the handle and hose from the main appliance. The hose can extend up to approximately 4 feet (1.21m). To place the handle and hose back onto the main appliance, wrap the hose back underneath and around the vac making sure that the hose fits between the two "feet" of the appliance. Align the handle with its cradle and click back into place. The handle (2) can be removed from the hose allowing the accessories to be connected directly to the hose cuff (10) when desired.
To remove the handle:
- Unclip the handle (2) from the appliance.
- Rotate the locking ring (3) counterclockwise to release the clips.
- Pull the hose away from the handle.
- Fit the accessory directly to the hose cuff (10).
To refit the handle:
- Remove the accessory from the hose.
- Push the hose into the handle (2). Rotate locking ring (3) clockwise until it clicks into place.
OPERATION
CONNECTING TO THE VEHICLE'S POWER SUPPLY
- Make sure that the appliance is switched off.
- Remove the vehicle's socket plug from the socket.
- Plug the 12v vehicle adaptor (9) into the socket.
SWITCHING ON AND OFF
- To switch on, slide the on/off switch (1) to the right.
- To switch off, slide the on/off switch left.
 NOTE: The appliance can be used for periods of up to 30 minutes without noticeably affecting the power of a normally charged car battery in good condition.

Extended use will drain the battery power.
- Do not run the vehicle's engine while cleaning. This can shorten the life of the appliance.
- This appliance is intended for household use only and not for commercial or industrial use.
VACUUMING
- When operating the appliance, make sure that the hose is not trapped, twisted, or blocked.
- The handle (2) can be easily removed from the appliance allowing for further reach.
- With the handle (2) removed, the appliance can be carried using the built-in handle.
- The handle (2) can also be removed from the hose (4) so you can connect an accessory directly to the hose cuff (10) when required.
CLEANING AND MAINTENANCE
Do not, under any circumstances, immerse the appliance in water. A damp cloth and soapy water should be used to clean the exterior of the appliance. Always make sure the appliance is completely dry before reuse or storage.
EMPTYING THE DUST CONTAINER
(FIGURE D):

The dust container must be emptied regularly, preferably after every use.
- Pull the door latch (5) and open the dust container door (11).
- Tilt appliance to empty dirt.
- Tap the back end of appliance if debris does not fall out easily or remove filters for better access.
CLEANING FILTERS
(FIGURES E - G):

Both the plastic pre-filter (12) and the pleated filter (13) are re-usable and should be cleaned regularly.
- Unwrap the hose (4) and handle (2) from the main part of the appliance.
- Pull the door latch (5) and open the dust container door (11) and empty contents into a waste basket.
- Push and hold the release button on the opposite side of the handle from the dust container door (11).
- Rotate the handle toward the back of the appliance as shown in figure E.
- Pull the dust container to the side, away from the base of the appliance.
- Remove the pleated filter from the pre-filter by pulling firmly as shown in figure F.
- Tap the filters vigorously to remove loose dust.
- If necessary, wash the filter (13) in warm, soapy water as shown in figure G.
- Make sure that the filter is dry before refitting it to the appliance.
- Refit the pleated filter into the plastic pre-filter.
TO REPLACE THE DUST CONTAINER
- Slide the container back onto the base and rotate the handle toward the front of the appliance until an audible click is heard. Ensure that the container is fully fastened back onto the base.
- Close the container door and make sure it clicks into place.
CLEANING THE DUST CONTAINER
(FIGURE H - I):

- Unwrap the hose (4) and handle (2) from the main part of the appliance.
- Push and hold the release button on the opposite side of the handle from the dust container door (5).
- Rotate the handle toward the back of the appliance as shown in figure H.
- Pull the dust container to the side, away from the base of the appliance.
- Remove the pre-filter (12) and filter (13) from the appliance by twisting the filter to the right and pulling it from the appliance.
- Once filters are removed, wipe the dust container (14) and pre-filter (12) with a damp cloth, or rinse with warm soapy water and allow to dry as shown in figure I.
TO REPLACE THE DUST CONTAINER
- Slide the container back onto the base and rotate the handle toward the front of the appliance until an audible click is heard. Ensure that the container is fully fastened back onto the base.
TROUBLESHOOTING
If the product does not work, follow the instructions below. If this does not solve the problem, please contact your local BLACK+DECKER repair facility.
- Make sure the vehicle adaptor (9) is plugged into the socket correctly.
- Make sure your vehicle battery system is of the 12 V negative ground type.
MAINTENANCE
Use only mild soap and damp cloth to clean the vac. Never let any liquid get inside the vac; never immerse the battery/motor housing in liquid.
Make sure the vacuum is completely dry before using it.

To assure product SAFETY and RELIABILITY, repairs, maintenance and adjustment (other than those listed in this manual) should be performed by authorized service centers or other qualified service organizations, always using identical replacement parts.
SERVICE INFORMATION
All BLACK+DECKER Service Centers are staffed with trained personnel to provide customers with efficient and reliable power tool service. Whether you need technical advice, repair, or genuine factory replacement parts, contact the BLACK+DECKER location nearest you. To find your local service location, call:
1-800-544-6986
or visit
www.blackanddecker.com
IMPORTANT SAFETY INSTRUCTIONS
SAFETY GUIDELINES - DEFINITIONS
It is important for you to read and understand this manual.
The information it contains relates to protecting YOUR SAFETY and PREVENTING PROBLEMS. The symbols below are used to help you recognize this information.

Indicates an imminently hazardous situation which, if not avoided, will result in death or serious injury.
Indicates a potentially hazardous situation which, if not avoided, could result in death or serious injury.

Indicates a potentially hazard ous situation which, if not avoided, may result in minor or mod er ate injury.
NOTICE: Used without the safety alert symbol indicates potentially hazardous situation which, if not avoided, may result in property damage.
When using an electrical appliances, basic precautions should always be followed, including the following:
READ ALL INSTRUCTIONS BEFORE USING THE APPLIANCE.
Read all safety warnings and all instructions. Failure to follow the warnings and instructions listed below may result in electric shock, fire and/or serious injury.
Some household dust contains chemicals known to the State of California to cause cancer, birth defects or other reproductive harm such as asbestos and lead in lead based paint.

To reduce the risk of fire, electrical shock or injury:
- The intended use is described in this manual. The use of any accessory or attachment or the performance of any operation with this appliance other than those recommended in this instruction manual may present a risk of personal injury.
- Do not allow to be used as a toy. Close supervision is necessary when any appliance is used by or near children.
- Keep children and animals at a safe distance when using this appliance.
- Never pull the power lead to disconnect the plug from the cigarette lighter socket. Keep the lead away from heat, oil and sharp edges.
- Be careful not to pinch the lead in the vehicle's doors, windows or levers.
- Do not use automotive vac to pick up liquids, toxic substances, flammable or combustible liquids such as gasoline or use in areas where they may be present.
- Do not operate in the presence of explosives and/or flammable fumes or liquids.
- Do not operate any appliance with a damaged cord or after the appliance malfunctions, is left outdoors, dropped into water or is damaged in any manner. Return the appliance to any authorized service facility.
- Keep hair, loose clothing, and all parts of body away from openings and moving parts.
- Do not insert accessories when unit is running.
- Do not put any object into unit openings. Do not use with any openings blocked; keep free of dust, lint, hair, and anything that may reduce air flow.
- Do not operate the unit without a filter in place. Replace a damaged filter promptly.
- Do not vacuum burning or smoking materials, such as lit cigarette butts, matches or hot ashes.
- Do not use on or near hot surfaces.
- Do not use without dust bag and/or filters in place.
- When not in use, the appliance should be stored in a dry place. Children should not have access to stored appliances.
- Before use, check the appliance for damaged or defective parts. Check for breakage of parts, damage to switches and any other conditions that may affect its operation.
- Have any damaged or defective parts repaired or replaced by an authorized repair agent.
- Regularly check the power lead for damage. Replace the lead if it is damaged or defective.
- Never attempt to remove or replace any parts other than those specified in this manual.
- The appliance is designed for use with 12V negative ground vehicle battery systems.
- To reduce risk of damage to cigarette lighter connector and cord, pull by cigarette lighter connector rather than cord when disconnecting charger.
- Make sure cord is located so that it will not be stepped on, tripped over, or otherwise subjected to damage or stress.
- Do not operate appliance with damaged cord or cigarette lighter connector – replace it immediately.
- To reduce risk of electric shock, unplug appliance before attempting any maintenance or cleaning. Turning off controls will not reduce this risk.
- Do not leave appliance when plugged in. Unplug from outlet when not in use and before servicing.
- Do not use on wet surfaces. Do not expose to rain. Store indoors.
- Do not pull or carry by cord, use cord as a handle, close a door on cord, or pull cord around sharp edges or corners. Do not run appliance over cord. Keep cord away from heated surfaces.
- Do not unplug by pulling on cord. To unplug, grasp the plug, not the cord.
- Turn off all controls before unplugging.
Do not operate the appliance with systems which have positive ground or a different voltage.
- The cigarette lighter socket may not be live when the ignition is off and/or the key is removed. If in doubt, consult your vehicle's owner's manual for information regarding the above.
- Use only as described in this manual. Use only manufacturer's recommended attachments.
- Do not use the appliance near water. Do not immerse the appliance in water.
Risk of Fire. Do not replace any vehicle fuse with a rating higher than recommended by the vehicle manufacturer. This product is rated to draw 10 amperes from a 12V vehicle outlet. Ensure that the electrical system in your vehicle can supply this product without causing the vehicle fusing to open. This can be determined by making sure the fuse in the vehicle which protects the outlet is rated higher than 10 amperes. Information on the vehicle fuse ratings are typically found in the vehicle operator's manual. If a vehicle fuse opens repeatedly, do not keep on replacing it. The cause of the overload must be found. On no account should fuses be patched up with tin foil or wire as this may cause serious damage elsewhere in the electrical circuit or cause fire.
Do not look into the air vents when the unit is switched on, as sometimes there is a possibility of small debris being discharged from the air vents, especially after cleaning / replacement of the filters as debris inside the unit can be disturbed.
Symbols
- The label on your tool may include the following symbols. The symbols and their definitions are as follows:
| V | volts | |
| Hz | hertz | |
| min | minutes | |
 or DC or DC | direct current | |
 | Class I Construction (grounded) | |
 | Class II Construction (double insulated) | |
 | Read instruction manual before use | |
 | Use proper eye protection | |
| A | amperes | |
| W | watts | |
 or AC or AC | alternating current | |
| no | no load speed | |
 | earthing terminal | |
| safety alert symbol | |
| .../min or rpm | .revolutions or reciprocation per minute | |
 | Use proper respiratory protection | |
 | Use proper hearing protection | |
SAVE THESE INSTRUCTIONS
To register your new product, call 1-800-544-6986 or visit www.BlackandDecker.com/NewOwner

Documents / Resources
References
Download manual
Here you can download full pdf version of manual, it may contain additional safety instructions, warranty information, FCC rules, etc.
Download Black & Decker Flex BDH1200FVAV - Car Handheld Vacuum Manual
Advertisement
Thank you! Your question has been received!


Need Assistance?
Do you have a question about the Flex BDH1200FVAV that isn't answered in the manual? Leave your question here.