Advertisement
Quick Links
REVOLUTION
T M
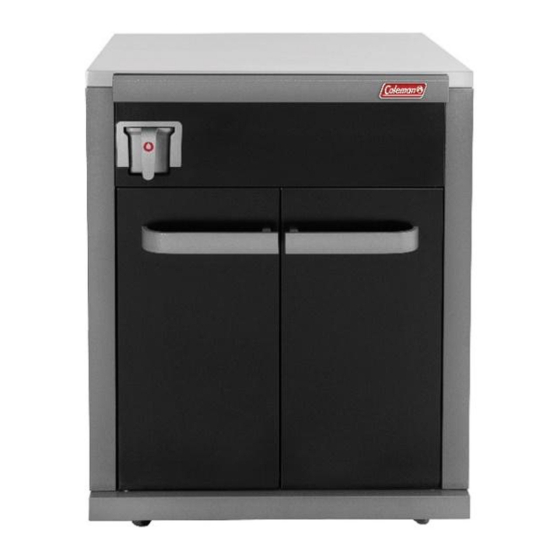
STORAGE MODULE no drawer
(not include FlareFree cup)
ASSEMBLY MANUAL
REVSTOGLND / REVSTOMAND
LIMITED 5-YEAR WARRANTY
Read and save the manual for future reference.
Assemble your barbecue immediately. Missing or damaged parts
should be claimed within 3 0 days of purchase.
For product inquiries, parts, warranty and troubleshooting support,
please call 1300 659 489.
www.colemanbbqs.com.au
Manual Revision #: 2023.09.15 EK
Advertisement

Summary of Contents for Coleman REVOLUTION REVSTOGLND
- Page 1 REVOLUTION STORAGE MODULE no drawer (not include FlareFree cup) ASSEMBLY MANUAL REVSTOGLND / REVSTOMAND LIMITED 5-YEAR WARRANTY Read and save the manual for future reference. Assemble your barbecue immediately. Missing or damaged parts should be claimed within 3 0 days of purchase. For product inquiries, parts, warranty and troubleshooting support, please call 1300 659 489.
- Page 2 HE AV Y A R T I C L E N E E D S 2 T O LIFT THIS MANUAL MUST REMAIN WITH THE PRODUCT AT ALL TIMES To ORDER non-warranty replacement parts or accessories, or to register your warranty, please visit us on the web at www.colemanbbqs.com.au CAUTION Sharp edges.
- Page 3 P A R T S L I S T F O R REVSTOGLND / REVSTOMAND...
- Page 4 P A R T S L I S T F O R REVSTOGLND / REVSTOMAND ASSEMBLY PARTS DESCRIPTI IMAGE REVSTOGLND REVSTOMAND Top shelf REVSTG1001AU REVSTG1001AU Front panel REVSTG2004AU REVSTG3009AU Middle shelf REVSC010010 REVSC030010 Upper SRT2018001 SRT2018001 magnet Left panel REVCONW0102AU REVCONW0302AU Drainage SRT2018010...
- Page 5 E X P L O D E D D I A G R A M F O R REVSTOGLND / REVSTOMAND Back panel REVCONW0104AU REVCONW0304AU Right panel REVCONW0103AU REVCONW0303AU Left door REVSI02002 REVSI03005 Right door REVSI02003 REVSI03006 Bottom SRT2018002 SRT2018002 magnet Magnet REVSI01009...
- Page 6 P A R T S L I S T F O R REVSTOGLND / REVSTOMAND 2.5"Wheels SRT2018004 SRT2018004 with brake 2.5"Wheels SRT2018005 SRT2018005 Clip SRTCL001 SRTCL001 Side shelf G532Y20002 G532Y10003 M6*12 SRT2018018 SRT2018018 M4*12 SRT2018013 SRT2018013 M4*8 SRT2018014 SRT2018014 M4*8 SRT2018015 SRT2018015...
- Page 7 Installation guide 1 DESCRIPTION IMAGE Bottom shelf Wheel rack 2.5"Wheels with brake 2.5"Wheels M6*12...
- Page 8 Installation guide 2 DESCRIPTION IMAGE Back panel M4*12...
- Page 9 Installation guide 3 DESCRIPTION IMAGE Left panel M4*12...
- Page 10 Installation guide 4 DESCRIPTION IMAGE Right panel M4*12...
- Page 11 Installation guide 5 DESCRIPTION IMAGE Top shelf Front panel M4*8...
- Page 12 Installation guide 6 DESCRIPTION IMAGE M4*12 1.5m...
- Page 13 Installation guide 7...
- Page 14 Installation guide 8 DESCRIPTION IMAGE M4*8...
- Page 15 Installation guide 9 DESCRIPTION IMAGE Middle shelf...
- Page 16 Before proceeding to the next Installation Guide, ensure you've correctly assembled the Flare Free cup from the Coleman Revolution BBQ package. Fit it snugly into the module front panel cutout. Installation guide 10 DESCRIPTION IMAGE Drainage tube M4*8...
- Page 17 Installation guide 11 DESCRIPTION IMAGE Magnet frame M4*12...
- Page 18 Installation guide 12 DESCRIPTION IMAGE Upper magnet Bottom magnet...
- Page 19 Installation guide 13 DESCRIPTION IMAGE Left door Installation guide 14 DESCRIPTION IMAGE Right door...
- Page 20 Installation guide 15 Connecting the Module to the BBQ DESCRIPTION IMAGE M6*16 M6 Nut φ6*16 Washer Clip...
- Page 21 Insert the fastening clips from the bottom upwards, applying some force. This may require a bit of effort, but it ensures the units are securely connected as intended.
- Page 22 Installation guide 16 Connecting the Module to another Module DESCRIPTION IMAGE M6*12 M4*12 M6 Nut φ6*16 Washer CLIP Insert the fastening clips from the bottom upwards, applying some force. This may require a bit of effort, but it ensures the units are securely connected as intended.
- Page 23 To attach the right-side shelf provided with your Revolution BBQ, refer to the steps outlined below.If you've acquired a Coleman Revolution Sink Module, it's recommended to utilise part G532Y20002 or G532Y10003 (front panel of the side shelf) included with this Module or the Sink...
- Page 24 © 2 0 2 3 The Coleman Company, Inc. Coleman are registered trademarks of ® The Coleman Company, Inc. used under license. www.colemanbbqs.com.au...


