Table of Contents
Advertisement
Quick Links
Advertisement
Table of Contents

Related Manuals for Kaffit X Series


Summary of Contents for Kaffit X Series
- Page 1 Model X Series Fully-Automatic Coffee Machine Model X580...
- Page 2 Dear Customer, Thanks a lot for purchasing X� series Coffee machine. This is a multifunction coffee machine for Espresso, Americano, various milk beverages, chocolate beverages and hot water. We believe the machine adapts to your customer needs to the greatest extent. Hope you enjoy it and also wish you have excellent experience from it.
-
Page 3: Table Of Contents
Content � For your safety �� �.� Proper use �� �.� Prerequisites for using the coffee machine �� �.� Explanation of safety symbols �� �.� General safety concerns when using the coffee machine �� � Description of machine �� �.�Machine overview ��... - Page 4 Content �.� Program setting menu tree �� �.� Care �� �.� Beverage �� �.� System �� �.� Operation panel �� �.� User �� �.� Language �� �.� Statistics �� �.�� Help �� �.�� IOT function �� � Cleaning and maintenance ��...
-
Page 5: For Your Safety
�.For your safety �.� Proper use �.�.� Coffee machine �. The X� series are commercial machines for preparing drinks and are intended for use in food services, offices, hotel, convenience store and other similar environments. �. The X� series are designed to process whole coffee beans, chocolate powder, milk powder and fresh milk. -
Page 6: Explanation Of Safety Symbols
�.� Explanation of safety symbols Observation of these safety instructions is imperative to ensure personal safety and the intactness of machine. Symbols and signal words indicate the level of hazards as follows: WARNING WARNING indicates a potential danger, if not avoided, will may result in death or moderate injury. - Page 7 WARNING Danger of suffocation �. Plastic packaging materials could cause children to suffocate. �. Ensure that children and persons with reduced physical, sensory, or mental capabilities have no access to plastic packaging materials. CAUTION Risk of scalding �. Hot liquids and steam escape during cleaning and can lead to scalding. Keep hands away from the spouts and nozzles during this process.
- Page 8 CAUTION Irritation from cleaning agent �. Cleaning tablets, milk system cleaning agent, and descaling agent can lead to irritations. �. Observe the hazard warnings on the label of the respective cleaner. �. Avoid contact with your eyes and skin. �. Wash your hands after contact with cleaning agent. Consult a doctor if necessary.
-
Page 9: Description Of Machine
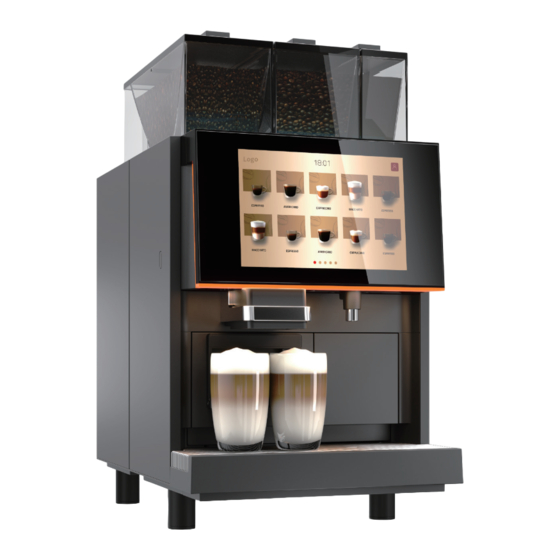
�. Description of machine �.� Machine overview The X� series coffee machines are available with numerous options. A sample configuration is illustrated here.Please note that your coffee machine may look different from the configuration shown here. Left bean hopper Right bean hopper Powder hopper Operation panel Coffee and milk spout... - Page 10 Open the operation panel Mixer Power switch Rear of machine Antenna connection Power cord connection USB Connection Tap water connection MDB connection Waste water drainage hose connection...
-
Page 11: Screen Interface
�.� Screen interface X� series are available with three different kinds of user operation, interface, standard, self-service and professional interface, to satisfy the needs of different scenarios. See page �� for specific way of interface switchover. �.�.� Standard interface Touching 'Member' icon can start up member Logo function setting Standard interface is designed to use for... - Page 12 �.�.� Symbols on the screen Symbol Name Description Member Access to membership setting Logo Logo Access to the menu setting scroller Tips for drinking pages and current page Add drinks Close Close current page Alert View the exception message Boiler temperature Display boiler temperature Thermoblock temperature Display thermoblock temperature...
-
Page 13: Scope Of Delivery
The scope of delivery may vary, depending on the device configuration Part Picture Quantity Tap water connection pipe � Tap water connector � Waste water drainage hose � � Milk pipe � Model X Series Fully-Automatic Coffee Machine Model X680/X685 User manual �... - Page 14 �.� Technical data Screen dimensions ��.� Inches Boiler capacity �.� liters Water tank capacity � liters Drip tray capacity � liters Grounds container capacity �� pieces Coffee spout height Height �=��� millimeters Height �=��� millimeters Permissible Water pressure �.�~� bar Left bean hopper capacity ����g Right bean hopper capacity...
-
Page 15: Installation
�. Installation �.� Installation tips �. Only an instructed service-engineer may install the machine. �. The manufacturer is not liable for injuries caused by an improper mounting of the unit. �. Installation must use original accessory. �. Installation personnel will carry out the initial commissioning process for your coffee machine and walk you through the basic functions. -
Page 17: Installation Location
�.� Installation location �. The installation location must be dry and protected against water spray �. Some condensate, water, or steam can always be discharged from a coffee machine �. Do not use the coffee machine outdoors. �. The machine has to be installed on a solid, level and heat-resistant base. �. - Page 18 �.�.� Tap water connection The distance between the machine and the water connection should not be more than � meter (to connect the appliance, use the supplied original hose only). The water pressure must be between �-�bar.If the water pressure is more than �...
-
Page 19: Start-Up For The First Time
�. Start-up for the first time �.� Material filling Adding material into the machine. See page�� for specific operation. Please use water tank supply for first time use �.� Initially start-up program setting After switch on the machine initially,access to the setting of start-up program for the first time is available. -
Page 20: Operation
�. Operation �.� Coffee beans filling �.Use the key to unlock bean hopper �. Lift bean hopper lid lid(if need) �.Add coffee beans �.Attach lid and lock it (if need) Never put any objects into the bean hopper or grinder. Otherwise, splinters may be ejected, leading to injury. -
Page 21: Powder Filling
�.� Powder filling �.Use the key to unlock powder �.Lift powder hopper lid hopper lid (if need) �.Fill in suitable powder for fully �. Attach lid and lock it (if need) automatic coffee machine. �.Do not pour ground coffee into powder hopper. �.Do not pour any liquids into powder hopper. -
Page 22: Milk Connection
�.� Milk connection �.Connect milk pipe to machine �. Insert the milk pipe into the milk container Store milk in a cooler �.� Empty bean hopper �.Use the key to unlock the operation �.Lift the front operation panel panel(if need) �.Pull the locking slide towards the �.Remove bean hopper upwards front as possible... - Page 23 �. Empty and dry the bean hopper �.Attach the bean hopper �.Push the locking slide all the way in Must guarantee the totally dry after cleaning bean hopper,then place it back Pay attention to the position of screen during the operation! Carelessly touch may lead to the falling of screen and may cause the crush hazard of arm or finger.
-
Page 24: Empty Powder Hopper
�.� Empty powder hopper �. Use the key to unlock the �.Lift the front operation panel operation panel (if need ) �. Pull the locking slide towards the �. Remove the powder hopper forward if possible upwards �. Empty and dry the powder �. -
Page 25: Switch On Machine
�.� Switch on machine Process of switch on the machine please see page �� start-up for the first time/start-up program. Pay attention to the position of screen during the operation! Carelessly touch may lead to the falling of screen and may cause the crush hazard of arm or finger. - Page 26 �.�.� Beverage preparation in 'self-service' interface Logo �. Place an appropriate cup under �. Touch beverage icon the beverage outlet �. Beverage in preparing Cancel beverage preparation by touching ‘Stop' Process bar Touch ‘Order’ to select another desired beverage Change parameter during the beverage preparation...
- Page 27 �.�.� Beverage preparation in 'professional' interface �. Place an appropriate cup under �. Touch latte icon the beverage outlet �. Beverage in preparing Process bar Logo Cancel beverage preparation �. Queuing function can be used when beverage in preparation Touch espresso beverage icon when preparing cafe latte, espresso will be displayed in the queuing list as below.
-
Page 28: Steam Output
�.� Steam output(Optional) Steam wand is suitable for manually heating and foaming of milk and also applies to heat other drinks Logo �. Hold a suitable container under �.Touch steam icon and starts the steam spout dispensing steam �.Steam is releasing �.Wipe the steam wand with a damp cloth after use Touch steam icon, some steam will be released to help for cleaning... -
Page 29: Program Setting
�. Program setting �.� Access to the menu Logo �.Touch logo icon on the upper-left �.Input PIN code and touch complete corner �.Select the target menu �.PIN codes can be set in the start-up program for the first time. If PIN codes are not be set,the default codes are empty �.Enter different PIN codes can obtain different menu rights. -
Page 30: Program Setting Menu Tree
�.� Program setting menu tree Maintenance Rinsing Cleaning Descaling Common functions Beverage Beverage Setting Beverage display System Water supply Maintenance Accessory Switch on/off Reset Operation panel Service Main Beverage Advanced Advertising scenarios page preparation settings User Administrator Maintenance Maintenance PIN Code PIN code rights language... - Page 31 �.� Maintenance �.�.� Overview of cleaning menu Maintenance Rinsing 冲洗 Cleaning Descaling Common functions Brew unit Brew unit cleaning Coffee Screen rinsing with tablet circuit cleaning Milk frother Milk system Steam Restart rinsing cleaning circuit machine Internal milk Switch off pipe rinsing Mixer rinsing...
- Page 32 �.�.� Cleaning Cleaning brew unit Immediately carry out tablets clean- ing program of brew unit after tapping start, if the message of 'brew unit cleaning with cleaning tablets' appears on the screen. Cleaning tablets are needed in the process of cleaning.
- Page 33 �.�.� Common function Screen cleaning Machine will be locked for �� seconds after tapping 'Screen cleaning'. Now use a cloth to clean the surface of screen. Restart machine Restart machine system after tapping 'Restart'.
-
Page 34: Beverage
�.� Beverage �.�.� Beverage setting overview Beverage Beverage Setting 冲洗 Beverage display Overview Display type Recipe Column per row Personal preference Price �.�.� Beverage Settings Enter 'Overview' settings �. Change beverage icon Change beverage icon after tapping edit icon. Image uploaded from USB stick can be used as beverage icon. - Page 35 �. Beverage status Select ‘Active’ can prepare this beverage. Select 'Inactive', the beverage will be locked and cannot be prepared. �. Delete the beverage Tap 'Delete' key beneath beverage will delete the beverage from bever- age list. �. Add new beverage Tap 'Add' that you can select new drink that you want to add from popup list.
- Page 36 Recipe setting Take Latte for example,after touching latte beverage symbol you will be able to access to recipe page, beverage parameter setting modification is permitted. Check current recipe The order from left to right is the sequential order of beverage flow- ing out: Hot milk-Hot milk foam-Cof- fee.
- Page 37 Addable recipe parameter Coffee Parameter Value range Remarks Bean hopper Left or right Default: left Powder weight �~��g Default:��g Pre-brew volume �~��ml Default:�ml Coffee quantity ��~���ml Default:��ml Single brewing yes or no Default: yes Brewing times �~�times Default:� Hot milk and milk foam Parameter Value range Remarks...
- Page 38 Pause Parameter Value range Remarks Time �~��seconds Default: � seconds Test Tap 'test' to prepare the drink using the modified recipe after recipe setting is completed, and test if the drink can satisfy the expectation. Personal preference Option: Active Inactive Inactive Default:...
- Page 39 �.�.� Beverage Display Two modes of beverage display are available: grid layout and menu cards. Grid layout Menu cards Logo Logo Grid layout Grid layout parameter setting as follows: Parameter Value range Remarks Column per �x� �x� �x� �x� �x� �x� �x� Default: �x�...
-
Page 40: System
�.� System �.�.� Overview of system menu System Water supply 冲洗 Maintenance Accessory Switch on/off reset water supply mode Rinsing Barreled water Auto switch off Beverage reset Cleaning Water hardness Milk cooler Factory reset Descaling Water filter Auto switch offby time setting Empty grounds container SYRUP Power off... - Page 41 �.�.� Maintenance parameter setting Rinsing Rinsing parameter setting as below: Parameter Set range Remarks Warm-up rinsing �� minutes �~� hours Default: �� minutes Brew unit auto rinsing Off �~�� minutes Default: Off Milk frother auto rinsing Off �~�� minutes Default: Off Milk frother auto rinsing Off...
- Page 42 �.�.� Accessories Barreled water �.Select ‘Dismantle’ if the machine isn't connected water barrel; �.Select 'Installation' here, then tap "complete" if the water barrel needs to use, and machine will restart to complete settings. �.Default setting: 'Dismantle'. Milk cooler �. Select ‘Dismantle’ if the machine isn't connecting the milk cooler;...
- Page 43 Syrup �. Select ‘Dismantle’ if not use syrup. �. Select ‘Installation’ here if use syrup. Select syrups quantity here �. Default setting: 'Dismantle'. Payment Device RFID、MDB and POS payment options are available for X� series �. Firstly, select the corresponding payment device, for example, ‘MDB payment device’;...
- Page 44 �.�.� Switch off Auto switch off countdown Setting the auto switch off countdown here, like auto switch off the machine in � hours. Parameter Set range Remarks �~�� hours Never Auto switch off Default:/ switch off countdown Auto switch off by time setting Setting the time of auto switch off...
-
Page 45: Operation Panel
�.� Operation panel �.�.� Service scenarios Select interface mode displayed on the screen. Specific introduction of each interface mode displayed on the screen see page � . �.�.� Main page Member function Option: Active Inactive �. Select 'Active', tap membership key Logo in the upper-right corner of screen, then create member and favorite... - Page 46 LOGO Change Touch edit key to change logo displayed on the screen. Load new Logo Logo image from USB stick. Backgrounds of LOGO image used in start-up page, professional mode and self-service mode are must be black �.�.� Beverage Preparation Cancel beverage Option: Active...
- Page 47 Continue to order �. Select ‘Active', touch 'order' to Option: Active Inactive select next drink. �. Select 'Inactive', ‘Order’ will not be displayed. �.�.� Advertising AD - Standby Set advertisement videos when the machine is in standby. Advertising resourc- es could be loaded from USB stick. Parameter Set range Remarks...
- Page 48 AD ‒ Beverage in production Set advertisement videos when the beverage is in production. Parameter Set range Remarks Volume �~���% Default:��% Single image play time �~��� seconds Default: � seconds Video requirements:MP� format,proportion �:�,recommended resolution ratio���x���,Video bitrate less than ����kbps and ���M, image format:PNG,JPG,JPEG, recommended resolution ratio:���x���...
- Page 49 Illumination Option: Active Inactive �.Select 'Active', screen, bean hoppers and powder hoppers are illuminated. �.Touch desired position for illumi- nation setting, for example touch the ‘left bean hopper’; �.Enter the color menu to set the color for standby and alarm illumination.
-
Page 50: User
�.� User Different user rights can be assigned with corresponding PIN code. �.�.� Administrator PIN Code Set admin PIN code, which is formed from � digits. Input correct pin code can view all rights of menu. �.�.� Maintenance PIN code Set maintenance PIN code here, which is formed from �... -
Page 51: Language
�.�Language Display available languages here. Select language. Default language setting is English. �.� Statistics View the history records of various beverage preparation data, total drink numbers, care and maintain here. �.�.� Beverage Quick search Data can be viewed by � week, � month, �... - Page 52 �.�.� Descaling/empty system History records of descaling and emptying water system can be viewed here. �.�� Help About View Machine Information Information regarding this machine could be viewed here including, Ctr version (PCB software) HMI version (Screen software) Android system version Calibra- tion file version Serial number of machine IMEI information of machine...
-
Page 53: Iot Function
�.�� IOT function IOT function applies to machines of X series Wifi and �G internet connection are available .Specific using methods need to connect service personnel for help �. Cleaning and maintenance The perfect coffee experience depends on a perfectly cleaned coffee machine. -
Page 54: Parts Preparation
�.� Parts preparation Parts Usage Cleaning tablet Brew unit cleaning with tablet Tablet key Add brew unit cleaning tablet Milk system cleaning agents Milk system cleaning Descaling powder Descaling Open the front panel, bean hopper and powder hopper Milk hose brush Clean milk hose manually Clean the hoppers, screen, machine Damp cloth... -
Page 55: Daily Cleaning
�.� Daily cleaning �.�.� Brew unit rinsing/ Milk frother rinsing/ Mixer rinsing �. Every automatic rinsing intervals could be set in menu / mainte nance setting,then rinsing will be processed automatically after reaching the setting condition. �. Immediately rinse can be selected manually. - Page 56 �.�.� Empty drip tray The drip tray is below the coffee grounds container. Clean the drip tray as needed (at least once per day). �. Remove the drip tray �. Pour out waste water �. Clean it thoroughly with fresh water �.
-
Page 57: Weekly Cleaning
�.� Weekly cleaning �.�.� Cleaning milk frother manually �. Switch off the machine and open the operation panel. �. Press the buckle and pull up the nozzle of milk frother �. Disconnect the pipe connection �. Pull out milk frother froward �. - Page 58 �.�.� Cleaning brew unit manually �. Switch off the coffee machine �. Remove grounds container and and disconnect mains plug firstly drip tray.Now Brewing unit is fully accessible �. With one hand reach into the chute �. Slowly guide the brewing unit all under the brew unit and push the the way down, tilt and pull locking up and release it...
- Page 59 �.�.� Clean the bean hopper Bean hoppers can be cleaned when needed and at regular intervals (recommendation: weekly). �.Switch off coffee machine firstly and disconnect mains plug. �.Remove the bean hopper lid; �.Open the display panel by using the key and lift the panel up; �.Pull the lock plate in the bean hopper to release the hopper;...
- Page 60 �.�.� Clean the mixer �. Switch off the coffee machine firstly and disconnect mains plug. �. Open the display panel by using �. Release the lock plate in the mixer the key and lift the panel up to release the mixer �.
-
Page 61: Brew Unit Cleaning If Presents
�.� Brew unit cleaning if presents A message ‘brew unit cleaning with tablet’ will appear on the screen when the coffee system need to be cleaned with a tablet.Total duration is approx. �� minutes. �. Access to “maintenance/cleaning ” �) Touch ‘START’ button menu �. -
Page 62: Milk System Cleaning If Presents
�.� Milk system cleaning if presents A message ‘milk system cleaning ’ will appear on the screen when the milk system need to be cleaned with cleaning liquid.Total duration is approx. �� minutes. �. Access to “maintenance/cleaning ” �.Touch ‘START’ button menu �.Touch 'Confirm' to start the cleaning �. - Page 63 �.�.� Coffee circuit descaling If descaling is not be carried out in time, the screen of machine will be locked after reaching the preset compulsory descaling, and the machine cannot continue to use until descaling process has been completed. �. Access to “maintenance/descaling ” �.
-
Page 64: Messages And Explanation
�. Messages and explanation �.� Operational messages When an error occurs, the machine displays an error message, which indicated by a red triangle in the upper- right corner of operator panel. Tap this symbol to obtain more information. Information Possible solutions Check whether the water tank is installed correctly or Place water tank place it back... - Page 65 Information Possible solutions Low water level of water Fill water tank with fresh water tank Pour out the water in the drip tray,if drip tray has been emptied but message is still remaining Empty drip tray Clean and dry the two metal water level sensors in front of the drip tray Fill left bean hopper Fill left bean hopper with coffee beans...
-
Page 66: Error Message
�.� Error message The error message will appear automatically when the entire system is affected by an error. Restart machine if serious problems appeared. �. Switch off the machine by main switch when restart the machine �.Please contact service technician if the machine cannot be started or if you are unable Error code Error description... - Page 67 Error code Error description Possible solutions E� Boiler heating too slow E� Thermoblock heating too slow E�� Boiler heating error �.Try to restart the E�� Thermoblock heating error machine �.If error message is still remaining after restart, please switch off the E��...
- Page 68 Error code Error description Possible solutions E��� Coffee multi-way valve error �.Try to restart the machine �.If error message is E��� Steam multi-way valve error still remaining after restart, please switch off the machine and E��� Mixer error contact customer service E���...
-
Page 69: Decommissioning
�. Decommissioning �.� Preparing for decommissioning �. Clean the machine by using all cleaning and rinsing function. �. Cleaning after empty bean hopper and powder hopper. �. Clean beverage spout and milk pipe manually. �. Clean brew unit manually. �. Clean mixer manually. �. -
Page 70: Transport And Storage
��. Transport and storage ��.� Transport Protect the machine from mechanical damage and adverse environmental conditions during transport and storage. �. Protect the machine from falling or tipping over. �. Restore external packaging of machine well to use in transportation. �. - Page 71 ��. Disposal When disposal of coffee machine,some internal spare parts are still worth using again,Pay attention to deal with old parts in an environmentally neutral way. �. Beans, powder and coffee grounds can be composted. �. Observe the information on the label when disposing of any unused cleaning agent.