Table of Contents
Advertisement
Advertisement
Table of Contents

Related Manuals for AEG ProSense 6000 Series


Summary of Contents for AEG ProSense 6000 Series
- Page 1 EN User Manual | Washing Machine LF694ABC...
-
Page 2: Table Of Contents
FOR PERFECT RESULTS Thank you for choosing this AEG product. We have created it to give you impeccable performance for many years, with innovative technologies that help make life simpler – features you might not find on ordinary appliances. Please spend a few minutes reading to get the very best from it. -
Page 3: Safety Information
SAFETY INFORMATION Before beginning the installation and use of this appliance, carefully read the supplied instructions. The manufacturer is not responsible for any injuries or damage that are the result of incorrect installation or usage. Always keep the instructions in a safe and accessible location for future reference. - Page 4 1.2 General Safety • This appliance is for washing domestic-type, machine- washable laundry only. • This appliance is designed for single household domestic use in an indoor environment. • This appliance may be used in, offices, hotel guest rooms, bed & breakfast guest rooms, farm guest houses and other similar accommodation where such use does not exceed (average) domestic usage levels.
-
Page 5: Safety Instructions
2. SAFETY INSTRUCTIONS 2.1 Installation • WARNING: This appliance is designed to be installed / connected to a grounding connection in the building. • Always use a correctly installed The installation must comply with shockproof socket. relevant national regulations. • Make sure that the parameters on the rating plate are compatible with the •... -
Page 6: Product Description
• Make sure that there is access to the tap elements, including heat pumps, piping after the installation. and related equipment including hoses, valves, filters and aquastops, printed 2.4 Use circuit boards, electronic displays, pressure switches, thermostats and sensors, software and firmware including WARNING! reset software, door, door hinge and Risk of injury, electric shock, fire, burns... -
Page 7: Technical Data
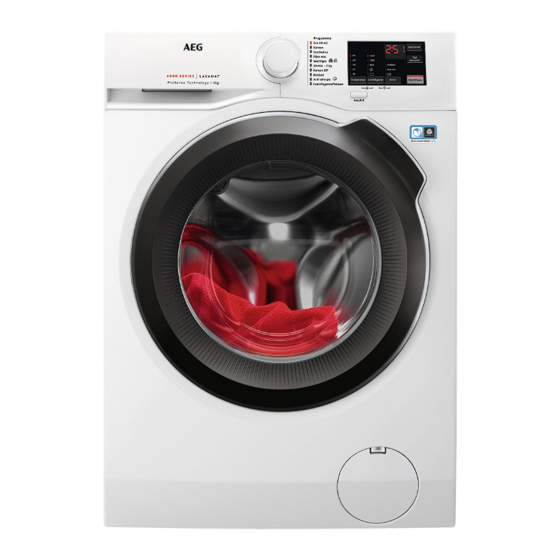
3.2 Appliance overview 11 12 Worktop Drain hose Detergent dispenser Inlet hose connection Control panel Mains cable Door handle Transit bolts Rating plate Hose support Drain pump filter Feet for levelling the appliance The rating plate reports the model name (A), product number (B), electrical ratings (C) and serial number (D). -
Page 8: Installation
Water supply pressure Minimum 0.5 bar (0.05 MPa) Maximum 10 bar (1.0 MPa) Cold water Water supply Maximum Load Cotton 9 kg Spin Speed Maximum spin speed 1351 rpm Connect the water inlet hose to a water tap with a 3/4'' thread. 5. - Page 9 We recommend that you keep the A correct adjustment of the appliance packaging and the transit bolts for any level prevents the vibration, noise and transport of the appliance. the movement of the appliance when in operation. 5. Put the plastic caps, that you find in the user manual bag, in the holes.
- Page 10 4. Connect the water inlet hose to the cold water tap with 3/4" thread. You can extend the drain hose to maximum 400 cm. Contact the authorized service centre for the other drain hose and the extension. It is possible to connect the drain hose in different ways: 1.
- Page 11 6. Position the hose directly to a built-in drain pipe in the room wall and tighten it with a clamp. 5.6 Electrical connection At the end of installation you can connect the The end of the drain hose must always mains plug to the mains socket.
-
Page 12: Accessories
Read carefully the instructions supplied with the accessory. Only appropriate accessories approved by AEG ensure the safety standards of the appliance. If unapproved parts are used, any claims will be invalidated. 6.2 Fixing plate kit If you install the appliance on a plinth that is not an accessory supplied by AEG, secure the appliance in the fixing plates. -
Page 13: Dial And Buttons
Start/Pauze touch button • No spin option Extra touch button • Rinse hold option • Vlekken option Temperatuur touch button • Voorwas option Aan/Uit push button • Only rinse option Centrifugeren reduction options touch button 7.2 Display The digital indicator can show: •... - Page 14 8.2 Introduction Activate the No spin option • Set this option to deactivate all spin phases. Only the drain phase is available. The options/functions are not selectable • The related indicator comes on. with all washing programmes. Check the • Set this option for very delicate fabrics. compatibility between options/functions •...
-
Page 15: Programmes
8.6 Startuitstel Use this option for items with normal or light soil or items to refresh. With this option you can delay the start of a Touch this button once to decrease the programme in a more convenient time. duration. Touch repeatedly the button to set the In case of smaller load, touch this button required delay. - Page 16 Programme Programme description All fabrics, except woollens and delicate fabrics. To spin the laundry and to Centrifugeren/Pompen drain the water in the drum. During this cycle the drum rotates slowly to ensure a gentle wash. It can seem that the drum doesn't rotate or doesn't rotate properly, but this is normal for this programme.
- Page 17 Programme Default tempera‐ Reference spin speed Maximum load ture Spin speed range Temperature range 1400 rpm 9 kg Centrifugeren/Pompen 1400 rpm - 800 rpm According to Commission Regulation EU 2019/2023, this programme at 40 °C is able to clean normally soiled cotton laundry declared to be washable at 40 °C or 60 °C, together in the same cycle.
-
Page 18: Settings
Suitable detergents for washing programmes Universal pow‐ Liquid Uni‐ Liquid for Delicates Programme Special der 1) versal coloureds woollens Eco 40-60 ▲ ▲ ▲ ▲ ▲ ▲ Katoen ▲ ▲ ▲ Synthetica ▲ ▲ Fijne was ▲ ▲ Wol/Zijde ▲ ▲... -
Page 19: Before First Use
10.2 Acoustic signals 10.3 Permanent Extra Rinse The acoustic signals operate when the With this option you can permanently have an programme is completed (sequence of extra rinse when you set a new programme. sounds for about 2 minutes). • To activate/deactivate this option touch To deactivate/activate the acoustic signals, the Temperatuur button and the touch the Tijd besparen and the Startuitstel... - Page 20 12.3 Filling the detergent and 2. Press the lever down to remove the additives dispenser. 3. To use powder detergent, turn the flap Compartment for prewash phase, soak programme or stain remover. Compartment for washing phase. Compartment for liquid additives (fabric conditioner, starch).
- Page 21 5. Measure out the detergent and the fabric Cancelling the delay start after the conditioner. countdown has started 6. Carefully close the detergent dispenser. To cancel the delay start: 1. Touch the Start/Pauze button to pause the appliance. The related indicator flashes.
- Page 22 12.10 Cancelling a running will be adjusted accordingly and could programme increase or decrease. After further 30 seconds, the water filling starts. 1. Press the button Aan/Uit to cancel the In this case, for 30 seconds, it is possible to programme and to deactivate the pause the appliance and remove the appliance.
-
Page 23: Hints And Tips
The programme or the delay start continues. • The drum still turns at regular intervals to 4. The door can be opened when the prevent the creases in the laundry. programme is complete, or set spinning • The door stays locked. or draining programme/option and than •... - Page 24 • Follow the washing instructions on the laundry care labels. • Do not wash white and coloured items together. • Some coloured items can discolour with the first wash. We recommend that you wash them separately for the first couple of times.
-
Page 25: Care And Cleaning
– there is large amounts of foam during • With adequate pre-treatment, stains and washing. limited soiling can be removed; the • When using detergent tabs or pods, laundry can then be washed at a lower always put them inside the drum, not in temperature. - Page 26 14.2 Removing foreign objects 14.5 Maintenance wash With the low temperature programmes it is possible that some detergent stays in the drum. Perform a maintenance wash regularly. Make sure that pockets are empty and all To do this: loose elements are tied up before running your cycle.
- Page 27 2. Run a short cotton programme at high 3. Make sure that all detergent residue is temperature or use if is available removed from the upper and lower part of programme Machine clean. Add a small the recess. Use a small brush to clean quantity of powder detergent into empty the recess.
- Page 28 • The appliance does not drain the water. • The drum does not turn. • The appliance makes an unusual noise because of the blockage of the drain pump. • The display shows the alarm code WARNING! • Disconnect the mains plug from the mains socket. •...
- Page 29 WARNING! Make sure that the impeller of the pump can rotate. If it does not rotate, contact the Authorised Service Centre. Make sure also that you tighten the filter correctly to prevent leakages. 14.10 Cleaning the inlet hose and the valve filter It is recommended to clean both the filters of the inlet hose and valve occasionally to remove any deposit, collected over the time:...
-
Page 30: Troubleshooting
0° C or drop below, remove the remaining water from the inlet hose and the drain pump. 1. Disconnect the mains plug from the mains socket. 2. Close the water tap. 3. Put the two ends of the inlet hose in a container and let the water flow out of the hose. - Page 31 • Make sure that the water tap is open. • Make sure that the pressure of the water supply is not too low. For this infor‐ The appliance does not fill mation, contact your local water authority. with water properly. •...
- Page 32 Problem Possible solution • Set the spin programme. • Make sure that the drain filter is not clogged. Clean the filter, if necessary. Re‐ The spin phase does not op‐ erate or the washing cycle fer to "Care and cleaning". lasts longer than usual.
-
Page 33: Consumption Values
16. CONSUMPTION VALUES 16.1 Introduction See the web link www.theenergylabel.eu for detailed information about Energy Label. The QR code on the energy label supplied with the appliance provides a web link to the information related to the performance of the appliance in the EU EPREL database. Keep the energy label for reference together with the user manual and all other documents provided with this appliance. -
Page 34: Quick Guide
Power consumption in different modes Off (W) Stand-by (W) Delay start (W) 0.50 0.50 4.00 Time to Off/Standby mode is 15 minutes maximum. 16.4 Common programmes These values are indicative only. Programme rpm 1) Litres hh:mm °C Katoen 2.75 4:00 1400 95°C Katoen... - Page 35 Connect the mains plug to the mains socket. 2. Set the desired options (1) by means of the corresponding touch buttons. To start Open the water tap. the programme, touch the Start/Pauze Load the laundry. (2) button. 3. The appliance starts. Pour the detergent and other treatment in the At the end of the programme, remove the proper compartment of the detergent...
-
Page 36: Environmental Concerns
Programmes Load Product description All fabrics, except woollens and very delicate fabrics. Programme 9 kg Centrifugeren/Pompen for spinning and draining the water. Tested for Staphylococcus aureus, Enterococcus faecium, Candida albicans, Pseudomonas aeruginosa and MS2 Bacteriophage in external test performed by Swissatest Testmaterialien AG in 2021 (Test Report No. 202120117). - Page 40 135968550-A-102023...