Kenwood KM330 Service Manual
Hide thumbs
Also See for KM330:
- Instructions manual (184 pages) ,
- Manual (109 pages) ,
- Instructions manual (18 pages)
Advertisement
Quick Links
Spares - KM330 / KM630 series - Disassembly & re-assembly instructions
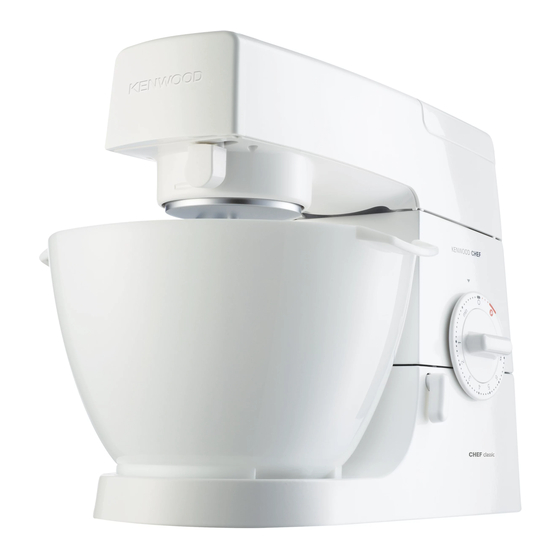
KM330 series Chef / KM630 series Major - (Pinto)
The following procedures are aimed to help with dismantling and service repairs.
Always disconnect the appliance from mains supply prior to removal of the covers and suitably protect the finish on the
casings.
Click on the pictures to open a larger version in a seperate window.
To access the gearbox:
Remove the high speed outlet cover.
Pull back the slow speed lever to
unlock and remove the slow speed
outlet cover.
Please note the correct position of the
spigot prior to removal.
* The positioning of the spigot
determines the position of the
attachments, when fitted.
Remove the top cover.
http://www.kenwoodservice.co.uk/product-files-kar/guide-KM330.htm
Page 1 of 15
30/04/2009
Advertisement

Related Manuals for Kenwood KM330


Summary of Contents for Kenwood KM330
- Page 1 Spares - KM330 / KM630 series - Disassembly & re-assembly instructions Page 1 of 15 KM330 series Chef / KM630 series Major - (Pinto) The following procedures are aimed to help with dismantling and service repairs. Always disconnect the appliance from mains supply prior to removal of the covers and suitably protect the finish on the casings.
- Page 2 Spares - KM330 / KM630 series - Disassembly & re-assembly instructions Page 2 of 15 Remove the plastic washer and drive belt. Dismantling gearbox involves removal of the large pulley. Either of the following methods will assist: Use a stall plug: Fit the stall plug in the slow speed outlet.
- Page 3 Spares - KM330 / KM630 series - Disassembly & re-assembly instructions Page 3 of 15 Use a mincer. Attach the mincer and position a screwdriver between the cutter blades and close to the scroll to stop it rotating. Please note, it is advisable to...
- Page 4 Spares - KM330 / KM630 series - Disassembly & re-assembly instructions Page 4 of 15 Removing / replacing the planet hub assembly: The hub nut is secured by an engineering adhesive, and may prove difficult to remove. Use an 8mm...
- Page 5 Spares - KM330 / KM630 series - Disassembly & re-assembly instructions Page 5 of 15 Apply threadlock 60026 to the hub nut prior to re-assembly. Regreasing the gearbox: With machine upside down, remove the slow speed lever knob as shown, and undo the two gearbox cover screws and remove the cover.
- Page 6 Spares - KM330 / KM630 series - Disassembly & re-assembly instructions Page 6 of 15 Remove the red plug, then re-grease with the appliance running on the lowest speed setting. * The special food-grade grease is a stock item. To remove the motor & control module: Remove all top covers as detailed above.
- Page 7 Spares - KM330 / KM630 series - Disassembly & re-assembly instructions Page 7 of 15 Loosely refit the top cover and the liquidiser outlet cover to serve as a stand. Use a mat to protect the casing, and turn the appliance upside down.
- Page 8 Spares - KM330 / KM630 series - Disassembly & re-assembly instructions Page 8 of 15 Operate the head lift lever, restrain the pedestal at the same time, and allow the machine to open slowly. Remove the two screws securing the quadrant bracket.
- Page 9 Spares - KM330 / KM630 series - Disassembly & re-assembly instructions Page 9 of 15 The motor assembly, control module and body cover can now be lifted out of the body. The date code can be found on the flat face of the motor housing.
- Page 10 Spares - KM330 / KM630 series - Disassembly & re-assembly instructions Page 10 of 15 Control module dismantled. To remove the pedestal: With the machine upside down, and the quadrant screws removed, move the body cover out of position to expose the hinge pin, then remove the circlip.
- Page 11 Spares - KM330 / KM630 series - Disassembly & re-assembly instructions Page 11 of 15 Slide out the hinge pin. Use a screwdriver if necessary. Pedestal removed. http://www.kenwoodservice.co.uk/product-files-kar/guide-KM330.htm 30/04/2009...
- Page 12 Spares - KM330 / KM630 series - Disassembly & re-assembly instructions Page 12 of 15 Re-assemble in reverse order. Ensure the body cover locates under the hinge pin at both ends. Please note correct position for the head lift cam & spring. The flat edge of the cam should be fitted against the pedestal, as shown.
- Page 13 Spares - KM330 / KM630 series - Disassembly & re-assembly instructions Page 13 of 15 Correct method of fitting feet: Insert the foot so that it is fully flush with the pedestal, as shown. Then using a pin punch & mallet, lock the pin into position.
- Page 14 Spares - KM330 / KM630 series - Disassembly & re-assembly instructions Page 14 of 15 Position of the head lift lever: With the machine closed, the lever knob should hang vertically. The lever should swing back and up, to open the machine.
- Page 15 Spares - KM330 / KM630 series - Disassembly & re-assembly instructions Page 15 of 15 Click here to return to the top of the page. Back. http://www.kenwoodservice.co.uk/product-files-kar/guide-KM330.htm 30/04/2009...