DeLonghi D34528DZ - Digital Dual Zone PremiumFry Deep Fryer 3 lb Manual
- Brochure & specs (29 pages) ,
- Owner's manual (26 pages) ,
- Instructions for use manual (11 pages)
Advertisement
- 1 IF THE UNIT HAS A CORD WITH MAGNETIC CONNECTOR
- 2 DESCRIPTION OF THE APPLIANCE
- 3 THERMAL SAFETY DEVICE
- 4 OPERATING INSTRUCTIONS
- 5 FILLING WITH OIL OR FAT
- 6 PREHEATING
- 7 PROGRAMMING THE DEVICE
- 8 STARTING FRYING
- 9 END OF FRYING
- 10 OIL COUNTER FUNCTION
- 11 LARD FUNCTION
- 12 HOW LONG THE OIL OR FAT LASTS
- 13 FRYING NON-FROZEN FOOD
- 14 FRYING FROZEN FOODS
- 15 MODELS FITTED WITH OIL DRAIN TAP
- 16 CLEANING
- 17 IMPORTANT SAFEGUARDS
- 18 WARNINGS
- 19 Limited Warranty
- 20 Documents / Resources
IF THE UNIT HAS A CORD WITH MAGNETIC CONNECTOR
First, connect the magnetic connector to the appliance as shown in figure 8, making sure the protruding part of the connector (X) is correctly inserted into the corresponding outlet on the appliance. Then plug the cord into the outlet.


Never leave the appliance plugged into the outlet if the magnetic connector is not fitted to the deep fryer, figure 9. If the magnetic connector does not remain in place, check that it has been inserted correctly, (see figure 8). If the problem persists, contact an authorized service center. When the appliance is in operation, always leave free space around the magnetic connector to prevent it from becoming detached. Use type MC-316 cords provided by a De'Longhi authorized service center only.

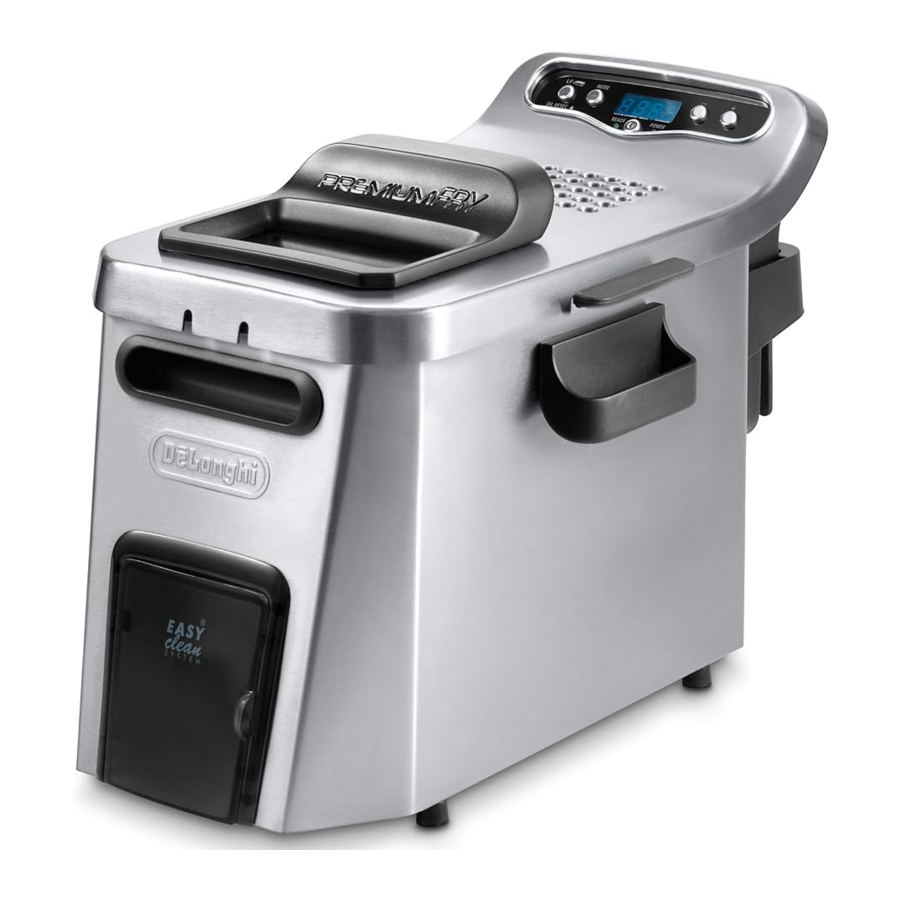
DESCRIPTION OF THE APPLIANCE

- Display
- "-/+" buttons to increase/decrease time and temperature
- MODE button to select time/temperature modes
- START/STOP button
- Red POWER on light
- Green "at temperature" READY light
- LF button to melt the lard + counter reset
- Safety micro-switch
- Basket with folding handle
- Maximum food quantity indicator
- Removable bowl
- Oil MIN-MAX levels
- Basket support
- Slot for fitting the control unit
- Handles
- Casing
- Oil drain tap (if fitted)
- Oil drain tap cover (if fitted)
- Cover with handle
- Filter (if present)
- Viewing windows (if present)
- Electrical heating element
- Thermal safety device reset
- Filter oil
THERMAL SAFETY DEVICE
The appliance is fitted with a thermal safety device that stops the appliance from heating in the event of incorrect use or irregular operation. Once the appliance has cooled, using a toothpick or similar, delicately press the safety device reset button (W) marked RESET (see Fig. 1). If the appliance does not start operating again, contact a service centre authorised by the manufacturer.

OPERATING INSTRUCTIONS
Before using the deep fryer for the first time, carefully clean, using warm water and dishwashing detergent, the basket, the bowl and the cover. The control unit, power cable and heating element may be cleaned using a damp cloth. Check that water does not enter into the control unit and that there is no residual water in the bottom of the removable bowl. Carefully dry all the parts.
Check that the control unit is properly fastened to the deep fryer body. The safety micro-switch (H) will prevent the appliance from operating unless the control unit is correctly positioned (N).
FILLING WITH OIL OR FAT
- Hook the handle as shown in fig. 10. Be carefull to fix well the handle with the basket.
![]()
- Turn the folding handle of the basket until it locks into place (pos. 2, Fig. 2). Remove the basket (I) by lifting it upwards.
![]()
- Before pouring the oil, make sure that the oil drain tap (Q) is well-shut.
- If oil is used, pour it into the bowl (K) until reaching the maximum level indicated (see fig. 3). Never exceed this limit, as oil may overflow from the container. The level of oil must always be between the maximum and minimum limits (L). For best results, use good quality peanut oil.
![]()


PREHEATING
- Place the food to be fried in the basket (I), without exceeding the maximum level indicated on the basket (fig. 6). Check that the handle of the basket is correctly positioned (pos. 2 in Fig. 2).
![]()
- Connect to the mains supply. Both lights (E) and (F) come on.

PROGRAMMING THE DEVICE
Use the "-/+" buttons (B) to set the temperature from 248°F to 374°F (120°C to 190°C).
Pressing the button once increases or decreases the temperature by 41°F (5°C).
Use the MODE (C) button to access the temperature or time settings.
Use the "-/+" buttons (B) to adjust cooking time from 0 to 60 minutes. Pressing the button once increases or decreases time by 30 seconds. After setting the temperature and time, press the START/STOP button (D) (if the time has not been set, the deep fryer will not begin the heating process). The deep fryer begins the heating process. The red light (E) comes on. During this process, you can still modify temperature and cooking time using the "-/+" buttons (B) and the MODE (C) button to modify the selection.
When the appliance reaches the set temperature, the green light (F) comes on and the deep fryer emits two "beeps".
STARTING FRYING
- As soon as the green indicator light (F) comes on, lower the basket (I) into the oil very slowly to avoid the hot oil splashing or overflowing.
- Close the cover.
- Press the START/STOP button (D). The display (A) shows a countdown of the remaining cooking time. During this process, you can still modify temperature and cooking time using the "-/+" buttons (B) and the MODE (C) button.
At the end of the countdown the deep fryer emits three beeps. Lights (E) and (F) go off. The temperature returns to the value set previously. If the START/STOP button (D) is not pressed, the appliance does not begin the countdown and after 30 minutes the preset settings are restored. - A significant amount of steam will be released. This is completely normal.
- It is normal for steam to be given off from the cover and condensation to drip from the edge of the cover.
![]()
To avoid burns, never put your hands above the cover filter or deep fryer itself while in use. Before ope-ning the cover, lift it slightly to allow steam to escape from one side.
END OF FRYING
- At the end of the cooking time, the deep fryer emits three "beeps". Lift the basket (I) and check that the food has been cooked to the required colour.
- Unplug from the outlet:
- Drain excess oil by hooking the basket (I) to the support (M) on the bowl.
- Note: If cooking requires two phases or more than one cooking cycle is to be performed, at the end ofthe first phase, hook the basket (I) to the support on the bowl (M) and wait for the light to go out. Then slowly lower the basket (I) into the oil again.
OIL COUNTER FUNCTION
This function monitors the length of time the oil has been used and automatically indicates when it should be replaced. After about 5 hours of operation, "OIL" is displayed and the appliance emits a beep. The intermittent message is displayed at three minute intervals.
Replace the oil and reset the device by holding the "counter reset" button (G) down for at least 3 seconds.
When the appliance is reset, it emits a beep.
The appliance is now ready for the new oil countdown.
N.B.:
- When "OIL" is displayed, this does not prevent normal operation of the appliance.
- The life of the oil depends on what foods are being fried. For example, coating with breadcrumbs accelerates deterioration of the frying oil. In this case, you are recommended to replace it before "OIL" is displayed and the appliance emits a beep.
- Use of the Lard Function automatically resets the oil counter.
LARD FUNCTION
This function is useful when you want to use lard instead of oil.
- Before pouring the oil, make sure that the oil drain tap (Q) is well-shut.
- Cut the lard into pieces and place them directly in the bowl (K). You are recommended to use the following quantities: MIN 7.7 lb (3500 g); MAX 5 lb (2300 g).
- Set the required temperature and cooking time, then press the button (G). "LF" appears on the display and the deep fryer starts melting the fat and bringing it to a temperature of 284°F (140°C). After about 15 minutes, the lard will be completely melted.
- The temperature now rises to the level set previously.
- As soon as the green light (F) comes on, lower the basket (I) into the melted fat very slowly to avoid it splashing or overflowing.
- Close the cover.
- Press the START/STOP button (D). The display (A) shows a countdown of the remaining cooking time. During this process, you can still modify temperature and cooking time using the "-/+" buttons (B) and the MODE (C) button.
At the end of the countdown the deep fryer emits three beeps. Lights (E) and (F) go off. The temperature returns to the value set previously. If the START/STOP button (D) is not pressed, the appliance does not begin the countdown and after 30 minutes the preset settings are restored. - A significant amount of steam will be released. This is completely normal.
- During frying, it is normal for steam to escape from the cover and condensate to drip from the edge.
![]()
To avoid burns, never put your hands above the cover filter or deep fryer itself while in use. Before opening the cover, lift it slightly to allow steam to escape from one side.
N.B.: Use of the "lard function" automatically resets the oil counter
HOW LONG THE OIL OR FAT LASTS
The level of oil or fat must never fall below the minimum. Every now and then it must be completely changed. The life of the oil or fat depends on what foods are being fried. Food coated in breadcrumbs, for example, dirties the oil more than simple frying. As with any deep fryer, the oil or fat deteriorates after being heated a number of times! Therefore, even if used correctly, it should be completely changed on a regular basis.
FRYING NON-FROZEN FOOD
Never overfill the basket, as this may cause a sudden drop in the temperature of the oil and thus greasier and less uniform frying. Check that the food is sliced into thin, even pieces. If the slices are too thick, the food will not be well cooked inside, despite its appearance, while even slices will be perfectly cooked at the same time. Carefully dry the food before immersing it in the oil or fat, to avoid oil being sprayed; furthermore, wet food will be less crisp after cooking (especially potatoes).
Foods with a high water content (fish, meat, vegetables) should be crumbed before frying, making sure the excess flour or breadcrumbs are removed before immersing the food in the oil.
When cooking food in batter, you should first immerse the basket empty. Then, when the set temperature has been reached, immerse the food directly in the hot oil to avoid the batter sticking to the basket.
When referring to the following table, please keep in mind that the cooking times and temperatures are approximate, and must be adjusted according to the quantity of food and personal tastes.
| Food | Max. quantity | Temperature | Time (minutes) | |||
| gr | lb | °C | °F | |||
| Fresh potato chips | Half portion | 800 | 1.8 | 174 | 345 | 9 - 12 |
| Whole portion | 1300 | 3 | 174 | 345 | 13 - 17 | |
| Fish | Sardines | 600 | 1.3 | 140 | 285 | 10-12 |
| Shrimp | 600 | 1.3 | 140 | 285 | 8 - 10 | |
| Sole | 500 | 1.1 | 140 | 285 | 6 - 8 | |
| Meat | Pork cutlets | 500 | 1.1 | 163 | 325 | 8 - 9 |
| Chicken cutlets | 500 | 1.1 | 163 | 325 | 8 - 10 | |
| Meatballs | 700 | 1.5 | 163 | 325 | 8 - 10 | |
| Vegetables | Artichokes | 400 | 0.9 | 152 | 305 | 15-17 |
| Cauliflower | 600 | 1.3 | 152 | 305 | 10-11 | |
| Mushrooms | 500 | 1.1 | 152 | 305 | 8 - 10 | |
| Eggplant | 200 | 0.4 | 152 | 305 | 9 - 11 | |
| Zucchini | 500 | 1.1 | 152 | 305 | 13-15 | |
FRYING FROZEN FOODS
Frozen foods are stored at very low temperatures. Consequently, they significantly lower the temperature of the liquid used for cooking. For optimum results, do not overfill the basket. Frozen foods are often covered with a layer of ice; this ice should be removed before cooking. Immerse the basket in the oil very slowly to prevent the oil from boiling over. The cooking times are approximate and must be adjusted according to the initial temperature of the food being fried and the temperatures indicated on the packaging of the food.
| Food | Max. quantity | Temperature | Time (minutes) | |||
| gr | lb | °C | °F | |||
| Precooked frozen fries | 600 | 1.3 | 180 | 355 | 9 -11 | |
| Potato croquettes | 600 | 1.3 | 180 | 355 | 9 -11 | |
| Fish | Fish fillets | 500 | 1.1 | 180 | 355 | 7 - 8 |
| Meat | Chicken cutlets (3) | 300 | 0.6 | 180 | 355 | 5- 6 |
MODELS FITTED WITH OIL DRAIN TAP

to avoid the risk of burns, do not drain the oil or fat while hot.
Proceed as follows:
- Remove the basket.
- Open the cover (R).
- Open the tap (Q) by turning it anticlockwise.
- Run the liquid into a container (see the figure below), making sure it doesn't overflow.
![]()
- Remove any deposits form the bowl using a sponge or tissue paper.
- Close the tap by turning it clockwise.
- Close the cover (R).
It is good practice to separate the oil or fat used for frying fish from that used for frying other food. - If lard or fat is used, make sure it does not cool down too much, otherwise it will solidify.

N.B.: the bowl is fitted with a removable filter (X) which retains coarse frying residues. After emptying the oil from the bowl completely, remove the filter by pulling as shown in the figure 7. Wash with washing up liquid then replace in the appliance.

CLEANING
Before cleaning, make sure the appliance is unplugged from the mains.
Never immerse the deep fryer in water and never place it under running tap water (see fig. 4).

 If water leaks into the control unit it could cause electric shock. Check that the oil has cooled down, then remove the control unit and drain the oil. Remove residues from the removable bowl using a sponge or absorbent paper.
Apart from the control unit, power cable and heating element, all other parts are dishwasher safe (see fig. 5).

Never use abrasive pads as they would ruin the deep fryer. After cleaning, carefully dry all parts to prevent splashes of hot oil during operation.
IMPORTANT SAFEGUARDS
The use of all electrical appliances implies the observance of some fundamental rules.
- Read all the instructions.
- Avoid contact with hot surfaces. Use the special handles.
![shock hazard]() To avoid electric shock, never immerse the cable, plug or deep fryer itself in water or other liquids.
To avoid electric shock, never immerse the cable, plug or deep fryer itself in water or other liquids.- Take maximum care when the appliance is being used by or near children.
- When not in use and before cleaning, always unplug from the outlet. Allow to cool before installing orremoving components and before cleaning.
- Do not use the appliance if the plug or cable appear damaged or if the appliance appears to be malfunctioning or has been damaged in any way. Take the appliance to your nearest service center for advice or repair.
- The use of accessories not recommended by the manufacturer could cause damage.
- Do not use the appliance outdoors.
- Do not leave the cord hanging from the edge, on top of the deep fryer or in contact with hot surfaces.
- Do not place the appliance on or near hot plates or gas rings. Do not place in a hot oven.
- Extreme caution must be used when moving the appliance containing hot oil or other hot liquids.
- Plug the cable into the appliance first then into the wall socket. To turn the unit off press the ON/OFF button then unplug from the outlet.
- Never use the appliance for purposes other than those for which it was specifically designed.
- Be sure that the handle is assembled and fastened properly and attached to the basket. See instructions regarding handle.
A DEEP FRYER FALLING FROM A HIGH PLACE MAY CAUSE SERIOUS BURNS. NEVER LEAVE THE CORD HANGING FROM THE EDGE OF THE SUR- FACE THE DEEP FRYER IS RESTING ON WHERE IT COULD BE GRASPED BY A CHILD OR GET IN THE WAY OF THE USER. DO NOT USE EXTENSION CORDS.
KEEP OUT OF REACH OF CHILDREN

SAVE THESE INSTRUCTIONS
THIS PRODUCT IS INTENDED FOR HOUSHOLD USE ONLY.
WARNINGS
- Turn the deep fryer on only after filling it with oil or fat. Operating the appliance without oil or fat causes serious damage.
- If heated empty, a thermal cut-out device trips and shuts the appliance down.
- Connect the cable to an outlet rated at about 120 V.
![shock hazard]() The appliance is fitted with a polarized safety plug (a plug with one blade larger than the other), to reduce the risk of electric shock, it can be inserted into the outlet in one direction only. This is a safety feature. If you cannot fully insert the plug into the outlet, try the other way. If the plug is not suitable for the socket, have the obsolete outlet replaced by a qualified electrician. Do not tamper with the polarized plug protection system."
The appliance is fitted with a polarized safety plug (a plug with one blade larger than the other), to reduce the risk of electric shock, it can be inserted into the outlet in one direction only. This is a safety feature. If you cannot fully insert the plug into the outlet, try the other way. If the plug is not suitable for the socket, have the obsolete outlet replaced by a qualified electrician. Do not tamper with the polarized plug protection system."- Clean the bowl, basket and cover of the appliance thoroughly with hot water and mild detergent beforeusing for the first time. Dry thoroughly.
- If oil leaks from the appliance, contact an authorized technical service center.
- To guarantee safe use, do not attempt to insert excessively bulky food or utensils into the deep fryer.
- Do not allow the appliance to be used by children without supervision.
- Never allow children to play with the appliance.
![]()
To avoid burns, do not touch metal parts as these could become extremely hot. Use oven mitts.- Do not open the oil drain tap (if present) when the oil is still hot.
- The appliance may give off a "new" smell the first time you use it. This is completely normal. Ventilate theroom.
- When the appliance is not in use and before cleaning, unplug from the outlet.
Do not use extension cords
A short power-supply cord (or detachable power-supply cord) is to be provided to reduce the risk resulting from becoming entangled in or tripping over a longer cord.
Limited Warranty
If repairs become necessary, see contact information below:
U.S. Residents:
Please contact our toll free hotline at 1-800-322-3848 or log onto our website at www.delonghi.com.
For all accessories, spare parts or replacement parts, please contact our parts division at 1-800-865-6330.
Residents of Canada: Please contact our toll free hotline at 1-888-335-6644 or log onto our website at www.delonghi.com.
Register this product on-line and receive a free trial issue of Cook's Illustrated. Visit http://www.delonghiregistration.com/select.html Visit www.delonghi.com for a list of service centers near you. (U.S. and Canada Only)
De'Longhi America, Inc.
250 Pehle Avenue, Suite 405
Saddle Brook, NJ 07663
1 800 322 3848
De'Longhi Canada, Inc.
6150 McLaughlin Road
Mississauga, Ontario
L5R 4E1 Canada
1 888 335 6644

Documents / Resources
References
Download manual
Here you can download full pdf version of manual, it may contain additional safety instructions, warranty information, FCC rules, etc.
Download DeLonghi D34528DZ - Digital Dual Zone PremiumFry Deep Fryer 3 lb Manual
Advertisement
Thank you! Your question has been received!


Need Assistance?
Do you have a question about the D34528DZ that isn't answered in the manual? Leave your question here.