Table of Contents
Advertisement
Advertisement
Table of Contents

Related Manuals for MSI Katana 15


Summary of Contents for MSI Katana 15
- Page 2 USER GUIDE NOTEBOOK...
-
Page 3: Table Of Contents
Turkey EEE regulation ....................1-9 Ukraine restriction of hazardous substances ............1-9 Vietnam RoHS......................1-9 Upgrade and Warranty .....................1-10 Acquisition of Replaceable Parts ................1-10 Safety Instructions ......................1-11 MSI Highlights ......................1-14 Introductions ................2-1 Unpacking ........................2-2 Product Overview ......................2-3 Top-open View ......................2-3 Front Side View .......................2-6 Right Side View .......................2-7... - Page 4 How to Use USB Power Share Function (optional) ............3-29 Video: How to Use RAID Function (optional) .............3-30 Video: How to Use F3 Recovery on MSI notebook preloaded system (optional) ..3-31 Video: How to Use Backup and System Restore with “MSI Center Pro” (optional) ...3-32...
-
Page 5: Copyright And Trademarks Notice
Copyright and Trademarks Notice Copyright © Micro-Star Int’l Co., Ltd. All rights reserved. The MSI logo used is a registered trademark of Micro-Star Int’l Co., Ltd. All other marks and names mentioned may be trademarks of their respective owners. No warranty as to accuracy or completeness is expressed or implied. -
Page 6: Fcc-B Radio Frequency Interference Statement
FCC-B Radio Frequency Interference Statement This equipment has been tested and found to comply with the limits for a Class B digital device, pursuant to part 15 of the FCC rules. These limits are designed to provide reasonable protection against harmful interference in a residential installation. -
Page 7: Ce Conformity
CE Conformity This device is in compliance with the essential safety requirements and other relevant provisions set out in the European Directive. Battery Regulations European Union: Batteries, battery packs, and accumulators should not be disposed of as unsorted household waste. Please use the public collection system to return, recycle, or treat them in compliance with the local regulations. -
Page 8: Weee Statement
Chemical Substances Information In compliance with chemical substances regulations, such as the EU REACH Regulation (Regulation EC No. 1907/2006 of the European Parliament and the Council), MSI provides the information of chemical substances in products at: https://csr.msi.com/global/index... -
Page 9: Rohs Statement
Vietnam RoHS As from December 1, 2012, all products manufactured by MSI comply with Circular 30/2011/TT-BCT temporarily regulating the permitted limits for a number of hazardous substances in electronic and electric products. -
Page 10: Upgrade And Warranty
5 years at most since the product has been discontinued, depending on the official regulations declared at the time. Please contact the manufacturer via http:// www.msi.com/support/ for the detailed information about the acquisition of spare parts. 1-10... -
Page 11: Safety Instructions
• Always use the AC/DC adapter and power cord approved by MSI, or a compatible one purchased from MSI. • Place the power cord in a way that people are unlikely to step on it. - Page 12 WARNING: Do not ingest battery. If the coin / button cell battery is swallowed, it can cause severe internal burns and can lead to death. Keep new and used batteries away from children. Keep the notebook away from humidity and high temperature. Always keep the strong magnetic or electrical objects away from the notebook.
- Page 13 • Users should contact the local authorized point of collection for recycling and disposing of their end-of-life products. • Visit the MSI website and locate a nearby distributor for further recycling information. • Users may also reach us at gpcontdev@msi.com for information regarding proper disposal, take-back, recycling, and disassembly of MSI products.
-
Page 14: Msi Highlights
MSI Highlights Explore more exclusive features of MSI notebooks for all series, please visit: http://www.msi.com and https://www.youtube.com/user/MSI Features and configurations may vary by models. It is recommended to consult with local retailers for detailed information. Enhance Your Creativity with MSI Pen MSI Pen features a customizable remote function for presentation and other application. - Page 15 1-15...
- Page 16 1-16...
-
Page 17: Introductions
Introductions... -
Page 18: Unpacking
Introductions Congratulations on becoming the owner of this notebook, the finely designed notebook. You will have a delightful and professional experience in using this exquisite notebook. We are proud to tell users that this notebook is thoroughly tested and certified by our reputation for unsurpassed dependability and customer satisfaction. -
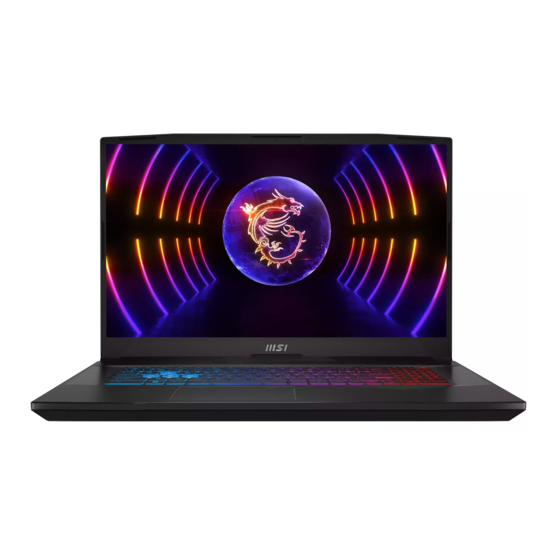
Page 19: Product Overview
Product Overview This section provides the description of basic aspects of the notebook. It will help you to know more about the appearance of this notebook before using it. Please be aware that the figures shown here are for reference only. Top-open View... - Page 20 Introductions Webcam/ Webcam LED/ Internal Microphone • This built-in webcam can be used for picture taking, video recording or conferencing, and so on. • The built-in webcam may optionally equipped with IR Camera module, which supports infrared facial recognition function. •...
- Page 21 Keyboard The built-in keyboard provides all the functions of a notebook keyboard. Refer to How to Use the Keyboard for details. Status LED Caps Lock Glows when the Caps Lock function is activated.
-
Page 22: Front Side View
Introductions Front Side View Blank below... -
Page 23: Right Side View
Right Side View Status LED Battery Status • LED glows when the battery is being charged. • LED turns amber while the battery is in low capacity status. • Continuously blinking if the battery fails. If the problem persists, please contact your local authorized retailer or service center. - Page 24 Introductions Audio Port Connectors Make high quality sound blaster with stereo system. Combo Audio Connector • A connector for headsets with attached microphones • The Combo Audio Connector supports 4-Pole 3.5mm headphone jack. USB 3.2 Gen 1 Port (Type C) USB 3.2 Gen 1, the SuperSpeed USB, supports high-speed data transfer for connected devices, such as storage devices, hard drives, or video cameras.
-
Page 25: Left Side View
Left Side View Power Connector This connector is to connect the AC/DC adapter and supply power for the notebook. Ventilator The ventilator is designed to cool the system. DO NOT block the ventilator for air circulation. USB 3.2 Gen 1 Port USB 3.2 Gen 1, the SuperSpeed USB, supports high-speed data transfer for the connected devices, such as storage devices, hard drives, or video cameras. -
Page 26: Rear Side View
Introductions Rear Side View Ventilator The ventilator is designed to cool the system. DO NOT block the ventilator for air circulation. 2-10... -
Page 27: Bottom Side View
Bottom Side View Ventilator The ventilator is designed to cool the system. DO NOT block the ventilator for air circulation. Battery Reset Hole (optional) Whenever the system firmware (EC) is upgraded or the system hangs, please 1) power off the notebook; 2) remove the AC power; 3) use a straightened paperclip and insert it to this hole for 10 secs;... - Page 28 Introductions SSD Slot (optional) This notebook is equipped with a SSD M.2 slot that supports the SSD device with PCIe interface. Contact the authorized dealer or service center for product service. Stereo Speakers This notebook may be equipped with built-in stereo speakers which deliver the high quality sound, and supports the HD audio technology.
-
Page 29: How To Use The Keyboard
How to Use the Keyboard This notebook provides a full functioned keyboard. To ensure that the keyboard will be functioning properly, it is a must to install the necessary applications before using the keyboard function keys. Use the FN keys on the keyboard to activate the specific applications or tools. With the help of these keys, users will be able to work more efficiently. -
Page 30: Enable Quick Fn Launch Keys
• Webcam is turned off under default settings. MSI Center • This notebook may be pre-installing with a versatile utility, MSI Center, providing users an astonished and efficient solution in multitasking. • Use this key to switch the User Scenario in MSI Center. 2-14... -
Page 31: Screen Capture
Keyboard Backlight LED Settings Press repeatedly to select a backlight LED level according to your preference. LCD Settings • f9: Decrease the LCD brightness. • f10: Increase the LCD brightness. Switch Display Switch the display output mode between the LCD, external monitor and both. -
Page 32: Use Multiple Monitors
Crosshair • Enable or disable the Crosshair function, provided by MSI Center. • To use this function, it is required to install MSI Center. Media Switch Use both keys to switch PLAY/ PAUSE of the media. Display Off Use both keys to turn OFF the screen. -
Page 33: Specifications
Specifications The specifications listed here is reference only, and may vary and change without notice. Visit MSI official website at www.msi.com, or contact the local retailers to learn about the details of the product you purchased. It is always recommended to use an authorized AC/DC adapter and a power cord to supply power to the notebook for “full power performance”... - Page 34 Introductions Storage SSD (option 1) 1 x M.2 slot, supports PCIe SSD device SSD (option 2) 2 x M.2 slot, supports PCIe SSD device I/O Port 2 x USB 3.2 Gen 1 1 x USB 2.0 • Power Share function is optionally supported 1 x USB 3.2 Gen 1 Type-C Audio 1 x Mic-in/ Headphone-out combo...
-
Page 35: How To Get Started
How to Get Started... -
Page 36: Begin To Use The Notebook
How to Get Started Begin to Use the Notebook For a new user of this notebook, we would like to suggest you follow the illustrations below to begin to use the notebook. -
Page 37: How To Use The Notebook Comfortably
How to Use the Notebook Comfortably If you are a beginner to the notebook, please read the following instructions to assure your own safety, and make yourself comfortable during the operations. ▶ Good illumination is essential in the work area. ▶... -
Page 38: How To Manage Power Supply
How to Get Started How to Manage Power Supply This section provides users basic safety precautions to take when using an AC/DC adapter and battery power properly. AC/DC Adapter Ensure that your notebook is connected to an AC power source via the AC adapter before turning it on for the first time. - Page 39 ▶ Battery type • This notebook may be equipped with a high-capacity Li-ion or Li-polymer battery pack depending on the model you have. • The rechargeable battery pack is an internal power source of the notebook. ▶ Battery charging behavior To optimize battery life and avoid a sudden power loss, read the tips below: •...
-
Page 40: How To Set Up A Power Plan In Windows Os
How to Get Started How to Set Up a Power Plan in Windows OS * For selected models with Windows 11 operating system installed. A power plan is a collection of hardware and system settings that manages how your computer uses and conserves power. Power plans can save energy, maximize system performance, or balance energy conservation with performance. - Page 42 How to Get Started...
-
Page 43: Create Your Own Power Plan
Create Your Own Power Plan You are allowed to create your own Power Plan and customize it to meet personal requirements. Click [Create a power plan] in [Power Options]. Start with an existing plan and give the new power plan a name. Click [Next] to continue. -
Page 44: How To Set Up Windows Hello (Optional)
How to Get Started How to Set Up Windows Hello (optional) Windows Hello is a more secure, personal way to get an instant access to your Windows operating system using fingerprint or facial recognition. The feature requires fingerprint reader or a infrared camera that supports it. Once you’re set up, you’ll be able to sign in with a quick swipe or glance. - Page 45 3-11...
-
Page 46: Setting Up Windows Hello Pin
How to Get Started Setting up Windows Hello PIN A Windows Hello PIN is a fast, secure way to sign in to your device, apps and services. The figures shown here are for reference only, they may be varied from the actual ones. Select [PIN (Windows Hello)], and then click [Set up] to continue. - Page 47 3-13...
-
Page 48: Setting Up Windows Hello Face
How to Get Started Setting up Windows Hello Face * For selected models only Your device just got more personal. Start using your face to unlock your device and verity your identity. Select [Facial Recognition (Windows Hello)], click [Set up] to open up the Windows Hello setup wizard, and then click [Get Started] to continue. - Page 49 3-15...
-
Page 50: How To Use The Touchpad
How to Get Started How to Use the Touchpad The touchpad integrated in your notebook is a pointing device that is compatible with standard mouse, allowing you to control the notebook by pointing the location of the cursor on the screen. ▶... -
Page 51: About Hdd And Ssd
▶ Point and Click When you have moved and placed the cursor over an icon, a menu item or a command that you want to execute, simply tap slightly on the touchpad or press the left button to select. This procedure, called as point and click is the basics of operating your notebook. -
Page 52: How To Connect The Internet In Windows Os
How to Get Started How to Connect the Internet in Windows OS * For selected models with Windows 11 operating system installed. The figures shown here are for reference only, they may be varied depending on the different version of Windows operating system installed. Wireless LAN Wireless LAN is a wireless broadband connection that allows you to connect to the Internet without using any cables. - Page 53 3-19...
-
Page 54: Wired Lan
How to Get Started Wired LAN Use cables to connect to the Internet. Before setting up the connection of Dynamic IP/ PPPoE or Broadband (PPPoE) or Static IP, contact your Internet Service Provider (ISP) or network administrator for assistance of setting up Internet connection. ▶... - Page 55 3-21...
- Page 56 How to Get Started 3-22...
- Page 57 ▶ Broadband (PPPoE) Connection Open up [Settings], find and click [Network & internet]. Select [Dial-up] within the [Network & internet] selection menu. Select [Set up a new connection]. 3-23...
- Page 58 How to Get Started Select [Connect to the Internet] under [Choose a connection option], and then click [Next]. Select [Set up a new connection anyway]. Click [Broadband (PPPoE)]. Fill User name, Password, and Connection name fields. Then click [Connect]. 3-24...
-
Page 59: How To Set Up Bluetooth Connection In Windows Os
How to Set Up Bluetooth Connection in Windows * For selected models with Windows 11 operating system installed. Bluetooth pairing is a process in which two Bluetooth devices communicate with each other through an established connection. The figures shown here are for reference only, they may be vary depending on the different version of Windows operating system installed. - Page 60 How to Get Started 3-26...
- Page 61 3-27...
-
Page 62: How To Connect External Devices
How to Get Started How to Connect External Devices This notebook may be equipped with various connecting I/O (input/output) ports, such as USB, HDMI™ , DisplayPort, and mini DisplayPort. Users will be able to connect diverse peripheral devices to the notebook. To connect these devices, refer to the instruction manuals of each device first, and then connect the device to the notebook. -
Page 63: How To Use Usb Power Share Function (Optional)
How to Use USB Power Share Function (optional) This notebook may be optionally supported USB Power Share function via Type-A USB ports, providing portable charging power output for various USB devices, such as mobile phones and power banks, while the notebook is in hibernation and shutdown status. It is always suggested to use the official authorized cable to perform this function. -
Page 64: Video: How To Use Raid Function (Optional)
How to Get Started Video: How to Use RAID Function (optional) * For selected models with Windows 11 operating system installed. This notebook may support RAID function of different levels. RAID allows users to store data on multiple hard disk drives or solid state drives. Contact the local dealer for further and correct information and be noted that the supported RAID functions may vary depending on the models users purchased. -
Page 65: Video: How To Use F3 Recovery On Msi Notebook Preloaded System (Optional)
Video: How to Use F3 Recovery on MSI notebook preloaded system (optional) * For selected models with Windows 11 operating system installed. Watch the instruction video at: https://www.youtube.com/watch?v=caSZR08b2fc, to backup or restore the operating system when it is needed. YouTube... -
Page 66: Video: How To Use Backup And System Restore With "Msi Center Pro" (Optional)
How to Get Started Video: How to Use Backup and System Restore with “MSI Center Pro” (optional) * For selected models with Windows 11 operating system installed. Watch the instruction video at: https://www.youtube.com/watch?v=C3M1Di0QF_k, to backup or restore the operating system when it is needed. - Page 67 3-33...