Table of Contents
Advertisement
Quick Links
Customer Support Information:
FREE tech support 24 hours a day, 7 days a week: Call 724-746-5500 or fax 724-746-0746.
Mailing address: Black Box Corporation, 1000 Park Dr., Lawrence, PA 15055-1018
World-Wide Web: www.blackbox.com • E-mail: info@blackbox.com
© Copyright 2000. Black Box Corporation. All rights reserved.
MARCH 2000
4
3
2
1
T
RE SE
R
PO WE
8
ER
PO W
7
6
SE LE
CT
5
4
3
2
1
US
ST AT
T
RE SE
SW621A-R2
SW622A-R2
SW629A-R2
Advertisement
Table of Contents

Related Manuals for Black Box ServSwitch Jr. SW621A-R2


Summary of Contents for Black Box ServSwitch Jr. SW621A-R2
- Page 1 Customer Support Information: FREE tech support 24 hours a day, 7 days a week: Call 724-746-5500 or fax 724-746-0746. Mailing address: Black Box Corporation, 1000 Park Dr., Lawrence, PA 15055-1018 World-Wide Web: www.blackbox.com • E-mail: info@blackbox.com © Copyright 2000. Black Box Corporation. All rights reserved.
- Page 2 ServSwitch system that’s just right for you. The ServSwitch ™ family from Black Box—the one-stop answer for all your KVM- switching needs! This manual will tell you all about your new ServSwitch™ Jr. unit, including how to install, operate, and troubleshoot it. For an introduction to the ServSwitch Jr.
- Page 3 TRADEMARKS USED IN THIS MANUAL BLACK BOX and the logo are registered trademarks, and ServSwitch and ServSwitch Jr. are trademarks, of Black Box Corporation. Apple and Macintosh are registered trademarks of Apple Computer, Inc. IBM, PC/AT, PS/2, RS/6000, and ThinkPad are registered trademarks, and PC/XT is a trademark, of International Business Machines Corporation.
- Page 4 FCC/IC/CE STATEMENTS FEDERAL COMMUNICATIONS COMMISSION AND INDUSTRY CANADA RADIO-FREQUENCY INTERFERENCE STATEMENTS This equipment generates, uses, and can radiate radio frequency energy and if not installed and used properly, that is, in strict accordance with the manufacturer’s instructions, may cause interference to radio communication. It has been tested and found to comply with the limits for a Class A computing device in accordance with the specifications in Subpart J of Part 15 of FCC rules, which are designed to provide reasonable protection against such interference when the equipment is...
- Page 5 SERVSWITCH™ JR. NORMAS OFICIALES MEXICANAS (NOM) ELECTRICAL SAFETY STATEMENT INSTRUCCIONES DE SEGURIDAD 1. Todas las instrucciones de seguridad y operación deberán ser leídas antes de que el aparato eléctrico sea operado. 2. Las instrucciones de seguridad y operación deberán ser guardadas para referencia futura.
- Page 6 NOM STATEMENT 12. Precaución debe ser tomada de tal manera que la tierra fisica y la polarización del equipo no sea eliminada. 13. Los cables de la fuente de poder deben ser guiados de tal manera que no sean pisados ni pellizcados por objetos colocados sobre o contra ellos, poniendo particular atención a los contactos y receptáculos donde salen del aparato.
-
Page 7: Table Of Contents
SERVSWITCH™ JR. Contents Chapter Page 1. Specifications ..................... 8 2. Introduction ..................... 11 2.1 The Complete Package ..............11 2.2 Operating Features ................11 2.3 The Front Panel ................12 2.4 The Rear Panel .................. 14 2.5 Cable Requirements ................. 16 2.6 Equipment Requirements .............. -
Page 8: Chapter Page
5.2.15 ServSwitch Jr. Doesn’t Work with Dongle-Protected Software ..........38 5.2.16 ServSwitch Jr. Doesn’t Work with IBM ThinkPad ....38 5.3 Calling Black Box ................39 5.4 Shipping and Packaging ..............39 Appendix A: NVRAM Factory Defaults ............40 Appendix B: Cable Product Codes ..............41... -
Page 9: Specifications
SERVSWITCH™ JR. 1. Specifications Compliance — CE, FCC Part 15 Subpart J Class A, IC Class/classe A Standards — With original Serv cabling: VGA (color or monochrome/ page white) video; With original Serv cabling (minimal) or coaxial cabling (recommended): SVGA video; With coaxial cabling: XGA (color or monochrome), RS/6000, or SGI video Interfaces —... - Page 10 CHAPTER 1: Specifications Keyboard commands; User Controls — Front-mounted switches: SW621A-R2: All membrane type: (1) for resetting the Switch, (2) for port selection; SW622A-R2: All membrane type: (1) for resetting the Switch, (4) for port selection; SW629A-R2: All pushbutton type: (1) for resetting the Switch, (8) for port selection Indicators —...
- Page 11 SERVSWITCH™ JR. All models: 5 VDC at up to 1 A from the keyboard-power Power — leads of the attached computers; SW629A-R2 only: If you attach the optional external in-line power supply PS255 (available separately): Input: 115 to 230 VAC at 50 to 60 Hz through detachable input cord into IEC 320 male inlet;...
-
Page 12: Introduction
Switch, and the cabling you’ll need for the Switch. 2.1 The Complete Package Your ServSwitch Jr. package includes the ServSwitch Jr. unit and this manual. If anything arrived damaged, contact Black Box. 2.2 Operating Features Some of the useful features of your ServSwitch Jr.: •... -
Page 13: The Front Panel
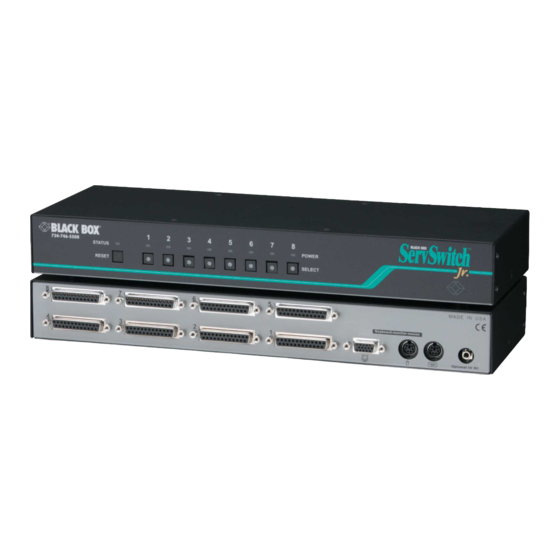
To familiarize yourself with these, refer to Figure 2-1 below and the descriptions that follow for 2- or 4-port models, or refer to Figure 2-2 on the next page and the descriptions that follow for 8-port models. ® BLACK BOX 724-746-5500 POWER RESET Figure 2-1. - Page 14 CHAPTER 2: Introduction STATUS POWER RESET SELECT Figure 2-2. The front panel of an 8-port ServSwitch Jr. (SW629A-R2). Panel Label Description STATUS Status LED: Flickers when the Switch receives data from the attached keyboard or mouse, remains dark otherwise. Reset Button: Press to reset the unit and reinitialize the shared RESET keyboard and mouse;...
-
Page 15: The Rear Panel
SERVSWITCH™ JR. 2.4 The Rear Panel All cable connections are made at the ServSwitch Jr.’s rear panel. To familiarize yourself with the Switch’s connectors and what they’re used for, refer to Figure 2-3 below and the descriptions that follow for 2- or 4-port models, or refer to Figure 2-4 on the next page and the descriptions that follow for 8-port models. - Page 16 CHAPTER 2: Introduction Optional 5V DC Figure 2-4. The rear panel of an 8-port ServSwitch Jr. (SW629A-R2). Panel Label Connector Description [Numbered DB25 F Connect the sharing computers to these ports with special “CPU Adapter Cables.” At the Switch end, Ports] these cables have a DB25 male connector;...
-
Page 17: Cable Requirements
ServSwitch Jr. NOTE To share an IBM 9515, 9517, or 9518 monitor, you will need special cabling. Call Black Box for technical support; we can give you a quote on these types of cable. 2.6 Equipment Requirements If the CPUs you will be controlling through your ServSwitch Jr. are not all of the same type, you will have to be careful to choose a common monitor, keyboard, and mouse that adequately support all of the CPUs. -
Page 18: Installation
CHAPTER 3: Installation 3. Installation 3.1 Rackmounting (Optional) If you want to mount the ServSwitch Jr. in a 19", 23", or 24" rack, you will need a ServSwitch Rackmounting Kit. The Switch is pre-drilled to accept the Kit’s rackmounting screws. See Appendix C for more information. 3.2 Connecting the Monitor, Keyboard, and Mouse CAUTION! Make sure that the monitor, keyboard, and mouse you plan to use can... -
Page 19: Connecting The Cpus
To go even farther, you might want to use Station Extenders or CAT5 KVM Extenders (see Appendix B), but please call Black Box Tech Support to discuss your application. 1. After you verify that the ServSwitch Jr. is powered OFF, plug the DB25 male composite connector of the first CPU’s CPU Adapter Cable into port 1 on the... -
Page 20: Powering Up The System
CHAPTER 3: Installation 3.4 Powering Up the System Power up the connected CPUs one by one, giving each one time to boot completely before turning ON the next one. (After you turn ON the first CPU, the ServSwitch Jr. itself will begin operating; it gets its power from the CPUs and has no ON/OFF switch.) The Switch emulates all keyboard and mouse functions for automatic boot-up, although you might have to issue the Mode command Mn (see Section 4.3.11) to get proper keyboard communication. -
Page 21: Operation
SERVSWITCH™ JR. 4. Operation The first part of this chapter, Section 4.1, gives you some guidelines that you should follow to make sure your ServSwitch Jr. works properly with your equipment. Section 4.2 summarizes the ServSwitch Jr.’s keyboard commands, and Section 4.3 describes these commands in detail. - Page 22 CHAPTER 4: Operation Because the ServSwitch Jr. currently only supports “stream mode” (continuous) mouse data but the IBM ThinkPad has to handle mouse data in “prompt mode” (burst-on-request), don’t try to attach any ThinkPad computers to the Switch, either directly or through docking stations. Use only the generic Microsoft mouse driver MOUSE.COM, version 4.0 at least and preferably version 9.01 or higher.
-
Page 23: Monitor
SERVSWITCH™ JR. 4.1.3 M ONITOR The ServSwitch Jr. is designed to support standard VGA video, including VGA monochrome (“page white”). It does not support PCs that use CGA, EGA, or proprietary versions of VGA that depart from the original specifications. Consult your PC’s manual, and if that doesn’t tell you whether or not the PC uses standard VGA, consult with the PC’s or the video card’s manufacturer. - Page 24 For CPU-to-monitor distances over 55 feet (16.8 m), you might require different cabling or an Extender system such as our Station Extender or CAT5 KVM Extender (see Appendix B). Please call Black Box Technical Support to discuss your application. One last note of caution about video: The IBM 9515, 9517, and 9518 monitors that come with some PS/2 systems are not normal VGA monitors and require special cabling in order for video to be correctly sized and synchronized.
-
Page 25: Keyboard-Command Summary
SERVSWITCH™ JR. 4.2 Keyboard-Command Summary Table 4-3 on this page and the next page summarizes the commands that can be sent to the ServSwitch Jr. To enter any command at the shared keyboard, first press and release the left Control key, represented by “[Ctrl].” (This cues the Switch to look for commands from the keyboard.) Then enter the command followed by any arguments you wish to specify (the port number, for example). - Page 26 CHAPTER 4: Operation Command Keystroke Sequence Description Stop Scanning [Ctrl] X Turns Scan mode OFF (the port being scanned at the time the command is entered is given access to the shared monitor, keyboard, and mouse). Note: Scan can also be stopped by entering a Select Port command.
-
Page 27: The Commands In Detail
SERVSWITCH™ JR. 4.3 The Commands in Detail 4.3.1 S ELECT A ORT FROM THE HARED EYBOARD To select a port from your keyboard, press and release your keyboard’s left Control key ([Ctrl]), then press the number key corresponding to the number of your desired port ([1], [2], [3], etc.). -
Page 28: Send Null Byte
CHAPTER 4: Operation If you’re using a PS/2 type mouse with a DOS or Windows 3.x CPU, don’t issue this command if the CPU doesn’t have a mouse driver loaded—many such CPUs will crash if you send them unexpected mouse data. (CPUs running UNIX ®... -
Page 29: Reset Recent Windows Mouse Driver
SERVSWITCH™ JR. 4.3.6 R (CPU PS/2 M ESET ECENT INDOWS OUSE RIVER S WITH OUSE ORTS If the currently selected CPU is running Windows NT (or possibly Windows 98 or Windows 2000, depending on your mouse-driver version) and the PS/2 mouse gets “out of sync”... -
Page 30: Set Scan-Delay Time
CHAPTER 4: Operation 4.3.10 S ELAY Issue the Set Scan-Delay Time command to set how long, in seconds, the ServSwitch Jr. will pause at each of the CPU ports when it’s scanning them. The factory-default setting is 5 seconds. To set a different delay time, press and release the left Control key, type [T] followed by the new delay time in seconds (1 to 15), and press [ENTER]. -
Page 31: Set Keyboard Typematic
SERVSWITCH™ JR. • you don’t know which mode the CPU uses or the port is set for, but the keyboard’s behavior makes you suspect that the port’s setting is wrong. To set the keyboard mode of the currently selected port on a ServSwitch Jr., press and release the left Control key, type [M], and press the numeral key of the mode number ([1], [2], or [3]). - Page 32 CHAPTER 4: Operation Table 4-5. Typematic Rate Decimal Binary Repeat Rate in Value Bit Values Keys per Second [xx]00000 [xx]00001 26.7 [xx]00010 [xx]00011 21.8 [xx]00100 [xx]00101 18.5 [xx]00110 17.1 [xx]00111 [xx]01000 [xx]01001 13.3 [xx]01010 [xx]01011 10.9 [xx]01100 [xx]01101 [xx]01110 [xx]01111 [xx]10000 [xx]10001 [xx]10010...
-
Page 33: Set Mouse Mode
SERVSWITCH™ JR. 4.3.13 S OUSE 4.3.13.A Translate PS/2 to RS-232 Mouse If all of the CPUs attached to your ServSwitch Jr. have PS/2 mouse ports, you can plug a PS/2 mouse into the Switch and control them all without having to reconfigure the system at all. -
Page 34: Troubleshooting
POWER LED should flash three times, and the unit should be restored to the factory-default settings listed in Appendix A. Now reconfigure the Switch to your desired settings. If you’re still having difficulty, refer to Section 5.2. If it doesn’t help you to solve your problem, call Black Box for technical support. -
Page 35: Common Problems
G. If swapping ports doesn’t solve the problem, try plugging a known-good keyboard and mouse directly into the CPU that’s having the problem. If the CPU boots, the Switch might be defective; call Black Box. H. If the CPU still doesn’t boot, the CPU’s keyboard or mouse port (or other components) might be defective. -
Page 36: Can't Switch Ports From Keyboard
CHAPTER 5: Troubleshooting 5.2.2 Y ’ WITCH ORTS FROM THE EYBOARD A. Can you do anything from the keyboard? If not, the keyboard cable has probably come loose. Reconnect it. B. The ServSwitch Jr. might have lost power for less than three seconds. (This can cause the keyboard to lock up.) Disconnect the keyboard and plug it back in. -
Page 37: Mouse Driver Doesn't Load
SERVSWITCH™ JR. 5.2.6 Y ’ OUSE RIVER OESN A. What type of mouse are you using? If it’s an RS-232 serial mouse, see steps B and D. If it’s a PS/2 mouse (either a regular type or a wheel mouse), see steps C and D. If it’s a Microsoft BallPoint mouse, see step D. -
Page 38: Mouse Doesn't Move Pointer/Cursor
A. If you are trying to use an IBM 9515, 9517, or 9518 monitor, you need special cables to carry the video correctly. Call Black Box for technical support. B. Check the settings of your monitor, especially the sync or color controls. -
Page 39: Can't Access High-Resolution Mode
SERVSWITCH™ JR. 5.2.12 Y ’ IDEO ESOLUTION ESOLUTION A. If you’re using XGA, you must use coaxial cables (see Section 4.1.3 and Appendix B). B. Check your video driver. It might not be set up correctly for your desired resolution. 5.2.13 O NE OR ORE OF... -
Page 40: Calling Black Box
• If you are shipping the Switch for repair, make sure you include the CPU Adapter Cables you’re using with it. If you are returning the Switch, make sure you include its manual as well. Before you ship, contact Black Box to get a Return Authorization (RA) number. -
Page 41: Appendix A: Nvram Factory Defaults
SERVSWITCH™ JR. Appendix A: NVRAM Factory Defaults The table below shows, for the ServSwitch Jr.’s saveable options, the default values stored in nonvolatile memory (NVRAM) when the Switch is shipped from the factory. It also shows what commands or actions can change these settings for the Switch’s current operating period, as well as what commands or actions can save changed settings to NVRAM, so that they become the new defaults. -
Page 42: Appendix B: Cable Product Codes
1000 ft. (300 m) away. If your monitor/keyboard/mouse-sharing system has cabling requirements that can’t be met by what you see here, call Black Box for a possible quote on custom cables or adapters. Standard CPU Adapter Cables:... - Page 43 SERVSWITCH™ JR. Station Extenders: CPU to ServSwitch Jr. (RS-232 Mouse): AC254A ServSwitch Jr. to Station (RS-232 Mouse): AC255A CPU to ServSwitch Jr. (PS/2 Style Mouse): AC257A ServSwitch Jr. to Station (PS/2 Style Mouse): AC258A Station-Extender Cables: EHN250-0zzz, where “zzz” = 050, 100, 150, or 200 CAT5 KVM Extenders (Kits include local and remote modules and interconnecting cables): Single-Access Kit (remote user station only): ACU1001A Dual-Access Kit (local and remote user stations contend): ACU1009A...
-
Page 44: Appendix C: Rackmounting The Servswitch Jr
APPENDIX C: Rackmounting the ServSwitch Jr. Appendix C: Rackmounting the ServSwitch Jr. If you want to mount your ServSwitch Jr. in a 19", 23", or 24" rack, use the corresponding ServSwitch Rackmounting Kit: product code RMK19M, RMK23M, or RMK24M respectively for the 2- and 4-port models, or product code RMK19S, RMK23S, or RMK24S respectively for the 8-port model. - Page 45 NOTES...
- Page 46 NOTES...
- Page 47 NOTES...