Nikon COOLPIX 5000 Manual
Hide thumbs
Also See for COOLPIX 5000:
- Owner's manual (51 pages) ,
- Pocket manual (14 pages) ,
- Software manual (7 pages)
Table of Contents
Advertisement
Quick Links
Product Documentation
The documentation for this product includes the manuals listed below. Please
be sure to read all instructions thoroughly to get the most from your camera.
Quick-Start Guide
The Quick-Start Guide takes you through the process of unpacking and set-
ting up your Nikon digital camera, taking your first photographs, and trans-
ferring them to your computer.
Guide to Digital Photography
The Guide to Digital Photography (this manual) provides complete operat-
ing instructions for your camera.
Nikon View 4 Reference Manual
The Nikon View 4 Reference Manual can be found in electronic format on
the reference CD provided with your camera. For information on viewing
the Reference Manual, see "Connections" in this manual.
i
Advertisement
Table of Contents

Related Manuals for Nikon COOLPIX 5000


Summary of Contents for Nikon COOLPIX 5000
- Page 1 Nikon View 4 Reference Manual The Nikon View 4 Reference Manual can be found in electronic format on the reference CD provided with your camera. For information on viewing the Reference Manual, see “Connections” in this manual.
-
Page 2: For Your Safety
For Your Safety To prevent damage to your Nikon product or injury to yourself or to others, read the following safety precautions in their entirety before using this equip- ment. Keep these safety instructions where all those who use the product will read them. - Page 3 Use appropriate cables When connecting cables to the input and output jacks, use only the cables provided or sold by Nikon for the pur- pose, to maintain compliance with product regulations. Keep out of reach of children...
-
Page 4: Caring For The Camera And Battery
• The monitor is lit by a fluorescent back- light. Should the monitor begin to dim or flicker, contact your Nikon service rep- resentative. • Do not apply pressure to the monitor, as this could cause damage or malfunction. - Page 5 Batteries • When you turn the device on, check the battery-level displayed in the control panel to determine whether the battery needs to be replaced. The battery needs to be replaced when the battery-level in- dicator is flashing. • Ready a spare battery and keep it fully charged when taking photographs on im- portant occasions.
-
Page 6: Notices
• Nikon reserves the right to change the specifications of the hardware and software described in these manuals at any time and without prior notice. • Nikon will not be held liable for any damages resulting from the use of this product. - Page 7 CAUTIONS Modifications The FCC requires the user to be notified that any changes or modifications made to this device that are not expressly approved by Nikon Corporation may void the user's authority to operate the equipment. Interface Cables Use the interface cables sold or provided by Nikon for your equipment. Using other interface cables may exceed the limits of Class B Part 15 of the FCC rules.
- Page 8 Notice Concerning Prohibition of Copying or Reproduction Note that simply being in possession of material that has been digitally copied or reproduced by means of a scanner, digital camera or other device may be punishable by law. • Items prohibited by law from being copied or reproduced Do not copy or reproduce paper money, coins, securities, government bonds, or local government bonds, even if such copies or reproductions are stamped “Sample.”...
- Page 9 QUALCOMM Incorporated. PRINT Image Matching is a trademark of Seiko Epson Corporation. All other trade names mentioned in this manual or the other documentation provided with your Nikon product are trademarks or registered trademarks of their respective holders.
-
Page 10: Table Of Contents
Table of Contents Product Documentation ... For Your Safety ... Caring for the Camera and Battery ... Notices ... Introduction: Before You Begin ... Overview: About This Manual ... Getting to Know the COOLPIX5000: The Parts of the Camera and Their Functions ... Principal Features ... - Page 11 Where Do I Go from Here?: Doing More with Your Digital Camera ... 61 How Do I Make Prints?: From Data to Paper ... 62 Taking Pictures for Printing ... 62 Printing Images on a Color Printer ... 63 Digital Print-Order Format (DPOF) ... 64 Printing from Removable Media ...
- Page 12 Shooting Menu Options ... 100 Keeping Colors True: The White-Balance Menu ... 102 Measuring Light: The Metering Menu ... 105 Making Movies and Taking Photographs in a Sequence: The Continuous Menu ... 108 Getting Sharper Photos: The Best Shot Selector Menu ... 112 Adjusting Contrast and Brightness: The Image Adjustment Menu ...
- Page 13 Television Playback: Connecting Your Camera to a Video Device ... 178 Connections: Your Camera and Your Computer ... 179 Before You Begin: Installing Nikon View 4 ... 180 Getting Connected: Connecting to Your Computer ... 182 Technical Notes: Camera Care, Options, and Resources ... 189 Caring for Your Camera ...
-
Page 15: Introduction: Before You Begin
Overview Introduction 2–3 Before You Begin Getting to Know the COOLPIX5000 4–19 Menu Guide This chapter is divided into the following sections: Overview 20–30 Read this section for a description of how this manual is organized and for an explanation of the symbols and conventions used. -
Page 16: Overview: About This Manual
For detailed information on taking pictures with your Nikon digital camera, refer to “Taking Photographs: The Details,” which provides a complete description of when and how to use camera controls and advanced custom shooting options. - Page 17 Visit these sites to keep up-to-date with the latest product information, tips, answers to frequently-asked questions (FAQs), and general advice on digital imaging and photography. Additional information may be available from the Nikon representative in your area. See the URL below for contact information: http://www.nikon-image.com/eng/ This icon marks tips, additional information you may find helpful when using your camera.
-
Page 18: Getting To Know The Coolpix5000
Getting to Know the COOLPIX5000 This section lists some of the more notable features of your COOLPIX5000 and introduces camera controls and displays. Principal Features Your COOLPIX5000 boasts: • An effective pixel count of 5.0 million for photographs up to 2,560 1,920 pixels in size, large enough for photo-quality prints in sizes up to A3 (11˝... - Page 19 • External Speedlights and flash accessories ( The camera is equipped with an accessory shoe that allows direct attach- ment of most Nikon Speedlights. An optional sync cable attached to the shoe can be used for off-camera flash photography. • Converter lenses (...
-
Page 20: Where To Find It-Parts Of The Coolpix5000
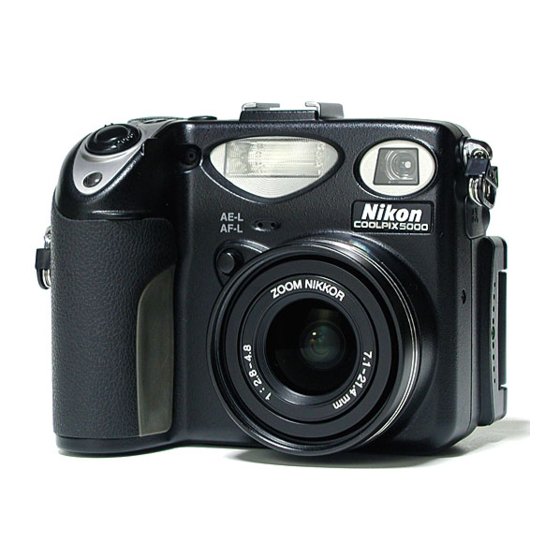
Where to Find It—Parts of the COOLPIX5000 Take a few moments to familiarize yourself with camera controls and displays. You may find it helpful to bookmark this section and refer to it as you read through the rest of the manual. The parts of the camera are identified below. - Page 21 Photocell ... 51 Accessory shoe ... 192 Built-in Speedlight ... 82 Viewfinder window ... 8 Microphone ... 109 Lens ... 33, 191 Self-timer lamp ... 80 Eyelet for camera strap ... 33 Battery-chamber cover ... 34 Coupling contacts for MB-E5000 battery pack ...
-
Page 22: How To Use It-Camera Controls And Displays
How to Use It—Camera Controls and Displays A The Viewfinder Red (flash-ready) lamp Green (autofocus) lamp Photographs can be framed in the viewfinder or in the monitor. Note that when your subject is within 1.5 m (4´11˝) of the camera, the final picture will differ slightly from the image seen in the viewfinder. - Page 23 B The Monitor Like the viewfinder, the monitor can be used to frame photographs. During shooting, the monitor shows the view through the camera lens together with icons indicating the status of various camera settings (see list on following page). The monitor is also used to display pictures during quick review ( 56) and playback (...
- Page 24 When the mode selector is set to tor indicate the status of the following camera settings. The indicators displayed (playback) mode are described in “Playing Images Back” ( User Set A 1 Digital zoom ... 70 2 Zoom indicator ... 69 3 Current folder ...
- Page 25 C The Control Panel The indicators in the control panel show the status of the following camera settings: 1 Sensitivity (ISO equivalency) indicator ... 96 2 White balance indicator (appears when button is used to set white balance; shutter-speed/ap- erture display shows white bal- ance mode selected) ...
- Page 26 D The Power Switch The power switch turns the camera on and off. When the power is turned on, the camera will beep once and indicators will appear in the control panel. E The Shutter-Release Button The COOLPIX5000 has a two-stage shutter-release button. Press the shutter-release button halfway to focus (1).
- Page 27 G The Zoom Button Use the zoom button to frame photographs. Press the end of the button labeled to zoom out from your subject, increasing the area visible in the final photograph. Press photo) to zoom in, enlarging small or distant ob- jects to fill the frame.
- Page 28 Situation Exposure mode (User Set 1, 2, 3) Exposure mode (User Set 1, 2, 3) Camera in mode Camera in mode (User Set 1, 2, 3) Camera in mode (User Set 1, 2, 3) Camera in mode appears next to item in shooting menu Full-frame playback Full-screen review...
- Page 29 I The Button By default, the User Set can be selected by rotat- ing the command dial while pressing the ton. Using the Controls option in the setup menu 148), you can choose the function assigned to button in User Sets 1, 2, and 3. Depend- ing on the function selected, the then be used in combination with the command dial to control white balance or metering without accessing the shooting menu, or to select the focus or...
- Page 30 L The /ISO Button /ISO button controls two settings: flash mode and, when used in combination with the command dial, sensitivity (ISO equivalency, avail- able only in User Sets 1, 2, and 3). Situation Camera in mode Camera in mode (User Set 1, 2, 3) M The /MF/...
- Page 31 N The /SIZE Button /SIZE button controls image quality and size. Situation Camera in mode O The AE/AF Lock Button Pressing the AE/AF lock (AE-L/AF-L) button when the camera is in focus locks focus ( posure ( 106). Focus and exposure remain locked while the button is held down, even if you remove your finger from the shutter-release button.
- Page 32 P The Multi Selector The multi selector is used to navigate through cam- era menus, to page through images in quick review and playback, and to highlight thumbnails in thumbnail review and playback. Q The MONITOR ( ) Button The MONITOR ( ) button turns the monitor on and off and controls the display of indicators in the monitor.
- Page 33 R The MENU Button Press the MENU button to display the menu for the current operating mode. If the menu has more than one page, pressing the MENU button a sec- ond time will display the next page. When the last page is displayed, you can exit the menu by press- ing the MENU button again.
-
Page 34: Menu Guide: Using Camera Menus
Menu Guide Changes to some settings can be made with the help of menus that appear in the monitor. The options available depend on the operating mode. Mode Menu SET-UP (User Set SHOOTING 1, 2, 3) PLAY BACK Description The SET-UP menu contains options for basic camera setup (e.g., formatting memory cards, setting the time and date). - Page 35 Viewing the Menus When the camera is on, the menu for the current operating mode can be dis- played by pressing the MENU button. Menu for current Press operating mode displayed...
- Page 36 Making a Selection To navigate through the menus, press the multi selector in the direction you want to go. Highlight menu item Highlight option • To go back one step, press the multi selector to the left. • The selection for some options is made from a sub-menu. Repeat steps 3 and 4 to select the desired setting from the sub-menu.
- Page 37 Making Selections with the Command Dial icon appearing next to a highlighted item in the SHOOTING menu indi- cates that a selection can be made directly from the main menu using the com- mand dial. The current selection for these items is shown by the icon that appears in the main menu.
- Page 38 Multi-Page Menus To move between pages of a multi-page menu, or to access the SET-UP menu from the SHOOTING and PLAY BACK menus: Position cursor in main menu Highlight page number, or S for SET-UP menu • You can also go from one page to another of a multi-page menu by press- ing the multi selector up or down to scroll to the other page.
- Page 39 Accessing the Shooting Menu The SHOOTING menu is only available when User Set 1, 2, or 3 is selected in (shooting) mode. To access the SHOOTING menu from the SET-UP menu for User Set A: Highlight User Setting Highlight 1, 2, or 3 •...
-
Page 40: Index To Menu Options
Index to Menu Options SHOOTING Menu, Page 1 The SHOOTING menu contains two pages of advanced shoot- ing options. It is available when User Set 1, 2, or 3 is selected (shooting) mode. USER SETTING Select User Set A for automatic, “point-and-shoot” photog- raphy, User Set 1, 2, or 3 for complete control over camera settings. - Page 41 SHOOTING Menu, Page 2 LENS Choose settings for optional converter lenses. EXPOSURE OPTIONS Lock exposure for a series of photographs or set the time limit for long time-exposures (BULB). FOCUS OPTIONS This menu contains options for controlling autofocus, includ- ing manual focus-area selection, single or continuous autofo- cus, and focus confirmation.
- Page 42 SET-UP Menu The options available in the SET-UP menu depend on the op- erating mode and, in lected. User Setting Select User Set A for automatic, “point-and-shoot” photog- raphy, User Set 1, 2, or 3 for complete control over camera settings.
- Page 43 CF Card Format Format memory cards for use in your Nikon digital camera. Speedlight Options Options for controlling flash exposure, controlling the built-in Speedlight when a flash accessory is attached, and confirm- ing shutter release. Shutter Sound Control the beep produced by the camera to confirm such operations as shutter release.
- Page 44 PLAY BACK Menu The PLAY BACK menu contains options for deleting images, managing the images stored on the memory card, and play- ing photos back in automatic “slide shows.” Delete Delete all or selected images; cancel the current print order; remove transfer marking from all images.
-
Page 45: Tutorial: Getting Started
Tutorial This chapter is divided into the following three sections: First Steps This section details the steps you will take before using your camera for the first time. Taking Photographs Read this section for a step-by-step guide to the basics of taking pictures with the COOLPIX5000. Review and Deletion Learn how to review and delete pictures while set- ting up your next shot. -
Page 46: First Steps: Getting Ready To Use Your Camera
First Steps Before using your camera for the first time, you will need to complete the steps shown below. Attach the Camera Strap Insert the Battery Insert the Memory Card (Format the Memory Card) Check the Battery Level Choose a Language Set the Time and Date Getting Ready to Use Your Camera STEP... -
Page 47: Step 1-Attach The Camera Strap
Step 1—Attach the Camera Strap Attach the strap securely to the two eyelets on the camera body as shown below. To avoid losing the lens cap, use the cord provided to attach it to the camera strap as shown. Removing and Replacing the Lens Cap When removing or replacing the lens cap, press the tabs on either side of the cap to release the latch. -
Page 48: Step 2-Insert The Battery
Step 2—Insert the Battery Your camera is powered by a single rechargeable Nikon EN-EL1 lithium-ion battery (provided) or a non-rechargeable 2CR5 (DL245) lithium battery (avail- able separately). .1 Charge the battery The rechargeable Nikon EN-EL1 lithium-ion battery supplied with your camera is not fully charged at shipment. - Page 49 Although the COOLPIX5000 can be used with non-rechargeable 2CR5 (DL245) lithium batteries, available at a variety of retail outlets, we recommend the re- chargeable Nikon EN-EL1 Li-ion battery included with your camera. This lithium- ion battery, for use exclusively with COOLPIX5000, 995, 885, 775, and 880 digital cameras, can be recharged with the EH-21 AC adapter/battery charger (available separately).
-
Page 50: Step 3-Insert The Memory Card
Step 3—Insert the Memory Card In place of film, your Nikon digital camera uses CompactFlash cards or IBM Microdrive instructions on inserting memory cards. .1 Turn the camera off .2 Insert the memory card Open the card-slot cover (1) and make sure the eject button is pressed all the way down (2). -
Page 51: Formatting Memory Cards
Formatting Memory Cards While the memory card provided with your camera is formatted at shipment, other memory cards must be formatted before first use. To format a memory card: Set mode selector to turn camera on Highlight page tab Position cursor in SET-UP menu Press MENU button to display PLAY BACK menu Highlight SET-UP menu page tab (S) - Page 52 Confirmation dialog displayed During Formatting Do not remove the memory card, remove the battery, or unplug the AC adapter (available separately) while formatting is in progress. Before Formatting Formatting permanently deletes all data on the memory card. Before format- ting, be sure to transfer to a computer any images you would like to keep. CF Card Format The CF Card Format option is also available in the UP menu (...
-
Page 53: Step 4-Check The Battery Level
Step 4—Check the Battery Level Before using the camera, check the battery level in the control panel or moni- tor to make sure that the battery is charged. .1 Turn the camera on .2 Check the battery level in the control panel or monitor The battery level is shown by the battery level indicator in the control panel. -
Page 54: Step 5-Choose A Language
Step 5—Choose a Language Camera menus and messages can be displayed in your choice of German, English, French, Japanese, and Spanish. Set mode selector to turn camera on Highlight page tab Position cursor in SET-UP menu Press MENU button to display PLAY BACK menu Highlight SET-UP menu page tab (S) Highlight Language... - Page 55 Display options Make selection and return to SET-UP menu. If you have yet to set the time and date, proceed to Step 6.6 on the following page to set the time and date. Choose a language from: Deutsch (German) English Français (French) Japanese Español (Spanish)
-
Page 56: Step 6-Set The Time And Date
Step 6—Set the Time and Date Information on the time and date of recording is included with all photographs and movies taken with your Nikon digital camera. To set the camera’s internal clock to the correct time and date: Set mode selector to... - Page 57 Display DATE menu Edit selected item. Repeat steps 6.8– 6.9 until all items have been set. Choose order in which year, month, and day will be displayed Any photographs taken before the time and date have been set will have a time stamp of “0000.00.00 00:00.”...
-
Page 58: Taking Photographs: The Basics
Taking Photographs This section details the basic steps involved in taking photographs in User Set A. In this automatic, “point-and-shoot” mode, the majority of settings are con- trolled by the camera in response to lighting conditions and focus distance, producing the best possible results in most situations. Ready the Camera Adjust Camera Settings Frame the Photograph... -
Page 59: Step 1-Ready The Camera
Step 1—Ready the Camera Before using your camera, complete the following steps: .1 Remove the lens cap If you turn the camera on with the lens cap in place, an error message will appear in the monitor. To clear the message from the screen, turn the camera off and remove the lens cap. - Page 60 .4 Check indicators in the control panel or monitor Before taking photographs, be sure that the battery is charged and that enough memory is available on the memory card. If the battery is low, a low-battery icon ( indicating that the battery should be recharged or replaced without de- lay.
- Page 61 Controlling the Monitor Press the MONITOR ( or to turn the monitor on or off. Monitor shows camera settings and view through lens Monitor off Viewfinder Focus If images in the viewfinder appear blurred even when the subject is in focus, viewfinder focus can be adjusted using the viewfinder diopter control.
-
Page 62: Step 2-Adjust Camera Settings (Optional)
Step 2—Adjust Camera Settings (Optional) In User Set A, you can use the the settings listed in the following table. The first time you use the camera, these settings will be set to the default values shown below. These settings are suited to most situations, and the description in this section assumes that the defaults are used. - Page 63 Restoring User Set A If you have selected User Set 1, 2, or 3 to use advanced camera settings, you can restore User Set A as shown below. If you later return to User Set 1, 2, or 3, the settings in effect in the last time you used the selected mode will auto- matically be restored.
-
Page 64: Step 3-Frame The Photograph
Step 3—Frame the Photograph After adjusting camera settings, you are ready to frame your photograph. .1 Ready the camera To prevent blurred photographs caused by unsteady hands (camera shake), hold the camera steadily in both hands. Photographs can be framed in the monitor (A) or viewfinder (B). .2 Frame your subject Frame your subject using the zoom button. - Page 65 Don’t Block the Shot To avoid dark or partially obscured pictures, keep your fingers and other ob- jects away from the lens and flash window. Ridges on the camera grip keep your fingers from blocking the photocell when holding the camera. Placing your fingers above these ridges may block the photocell, preventing cor- rect flash exposure.
-
Page 66: Step 4-Focus And Shoot
Step 4—Focus and Shoot .1 Focus In User Set A, the camera automatically fo- cuses on the subject in the center of the frame, shown by the focus target in the viewfinder. To focus, press the shutter-re- lease button halfway. Check the status of the green (autofocus) and red (flash) lamps next to the viewfinder. - Page 67 Focusing on an Off-Center Subject: Focus Lock Depending on the effect you want to achieve, your subject may not be at the center of the final composition. If your subject is not at the center of the frame when the shutter-release button is pressed halfway, the camera will focus on the background and the main subject may not be in focus.
-
Page 68: Step 5-Check The Results
Step 5—Check the Results After each shot, the green lamp will blink as the picture is recorded to the memory card. If the monitor is on, the shot you have just taken will be displayed briefly in the monitor. The following operations can be performed while the photo- graph is displayed: A confirmation dialog will be displayed. -
Page 69: Step 6-Put The Camera Away
Press shutter-release button all the way down to take new photograph while saving photo displayed in mon- itor to memory card. Any additional shots you take while earlier pictures are being saved will be stored in temporary memory buffer before being saved to mem- Take new Shutter ory card. -
Page 70: Review And Deletion: Quick Review
Using the quick re- view function on your Nikon digital camera, on the other hand, you can view the results of earlier attempts while setting up the next shot, and use what you see to change camera settings or to choose a better angle. -
Page 71: Quick Review
Quick Review When you press the review mode, the most recent picture on the memory card will be displayed at the top left cor- ner of the monitor. The following operations can be performed: View other photos View photo full screen Return to Shutter... -
Page 72: Full-Screen Review
Full-Screen Review From quick review, press the ter full-screen review. The picture displayed in quick-review mode will be displayed full screen. The following operations can be performed: View other photos View multiple images Delete current photo button to en- Description Press the multi selector up or left to view images re- corded before the current photo, down or right to view images recorded after the current photo. - Page 73 Playback Mode ( The review function described in this section allows you to view photos with- out leaving shooting mode. Your Nikon digital camera is also equipped with a full playback mode, which can be accessed by setting the mode selector to In addition to the full-screen and thumbnail review functions described in this section, playback mode can be used to view movies.
-
Page 74: Thumbnail Review
Thumbnail Review Pressing the ) button in full-screen review displays a menu of four thumbnail images. The fol- lowing operations can be performed while thumb- nails are displayed: Highlight images Page through images Change number of images displayed Delete selected image Return to Shutter... -
Page 75: Where Do I Go From Here
Where Do I Go from Here? Doing More with Your Digital Camera As the name indicates, digital cameras produce digi- tal images. As digital data, digital images can be readily transferred to a computer, where they can be stored, viewed, printed, sent to your acquaintan- ces via e-mail, or saved to removable media (for ex- ample, a Zip disk or CD) for delivery to a photo- finisher. -
Page 76: How Do I Make Prints
“print orders” that are stored on the camera memory card. If you have a suit- able printer, you can also print pictures at home using Nikon View 4. Many newer color printers for the home market offer near photo-quality prints at an affordable price. -
Page 77: Printing Images On A Color Printer
Printing Images on a Color Printer If you have a suitable printer, you can install Nikon View 4 and print images directly from the camera or memory card, or follow the steps in “Connections” 179) to transfer selected images to your computer and print copies from your favorite imaging application. -
Page 78: Digital Print-Order Format (Dpof)
Zip disk or other removable media and taking the disk to your photofinisher (check with your photofinisher first for information on pricing and the types of disks and file formats supported). Pictures can be copied to disk using Nikon View 4. For information on the operations that can be performed while the camera is connected to your computer, see the Nikon View 4 Reference Manual. -
Page 79: How Do I Share My Photos
How Do I Share My Photos? Your camera stores photographs in JPEG and TIFF formats, which can be viewed using a wide variety of computer applications. JPEG images can be viewed in web browsers such as Netscape Navigator or Internet Explorer and e-mail soft- ware such as Eudora and Outlook. -
Page 80: Distributing Images Electronically
Once you have taken the images you want to send, you can transfer them to your computer for distribution via e-mail. If your computer is equipped with a USB interface, you can install Nikon View 4 and transfer images directly from the camera. The images to be copied can be selected beforehand using the Auto Transfer option in the playback menu ( 165). -
Page 81: Taking Photographs: The Details
Taking Photographs In “Tutorial: Taking Photographs,” you learned the basic order of operations for taking photographs in User Set A. This chapter details the options avail- able for recording photographs and movies in all User Sets. It is divided into the following sections: Beyond Point-and-Shoot Read this section for information on the most fre- quently-used camera controls: zoom, image quality... -
Page 82: Beyond Point-And-Shoot: Camera Controls
Beyond Point-and-Shoot This section covers operations that can be performed whenever the camera is (shooting) mode. These operations are performed by means of the con- trols in the following table. Control Framing Photographs Making Effective Use of Memory Focusing Near and Far Delaying Shutter Release Throwing Light on Your Subject Bright, Dark, and High-Contrast Subjects... -
Page 83: Framing Photographs: Optical And Digital Zoom
Framing Photographs: Optical and Digital Zoom Your Nikon digital camera offers two kinds of zoom: optical zoom, in which the camera’s telescoping lens can be used to magnify the subject up to 3 , and digital zoom, in which digital processing is used to further magnify the image up to 4 . - Page 84 Digital Zoom At the maximum optical zoom position, holding the ton down for two seconds triggers digital zoom. Maximum optical zoom position While digital zoom is in effect, the zoom factor increases each time pressed, to a maximum of 4 . Pressing cancel digital zoom, press Restrictions on Digital Zoom Digital zoom can only be used when the monitor is on.
-
Page 85: Making Effective Use Of Memory: Image Quality And Size
Making Effective Use of Memory: Image Quality and Size Together, image quality and size determine how much space each photograph occupies on the memory card. This in turn determines the total number of photographs that can be stored. To get an idea of how different settings for image quality and size affect the number of images that can be stored on a memory card, view the following table, which shows the approximate num- ber of photographs that can be stored on 32 MB, 64 MB, and 96 MB cards at... - Page 86 Image Quality To reduce the amount of memory that each photograph occupies, images are compressed as they are saved to the memory card. The camera uses JPEG compression, which analyzes images in blocks eight pixels on a side and selec- tively reduces detail within each block.
- Page 87 The following options are available: Option File Format TIFF FINE JPEG NORMAL JPEG BASIC JPEG Description Maximum image quality. Image stored as TIFF (Tagged Image File Format) file with no compres- sion. Use when fidelity is of paramount impor- tance. Not available in User Set A or at image siz- es of UXGA, SXGA, XGA, or VGA.
- Page 88 Image Size Image size refers to the physical dimensions of the image, measured in pixels. Smaller sizes require less space to store, making them suited to distribution by e-mail and the web. Conversely, the larger the image, the larger the size at which it can be printed without becoming noticeably “grainy.”...
- Page 89 The following options are available: Option Size (pixels) FULL 2560 1920 (NO ICON) UXGA 1600 1200 SXGA 1280 1024 3 : 2 2560 1704 Restrictions on Image Size Image sizes of FULL, UXGA, and 3 : 2 are not available when NOISE REDUC- TION is set to Clear Image Mode ( Print Size The size of images when printed depends on the resolution of the printer (the...
-
Page 90: Focusing Near And Far: The
Or you may want the camera to focus on some- thing closer than 50 cm—for example, to create a close-up of a flower or business card. Your Nikon digital camera offers focus modes for both situa- tions. In addition, a self-timer mode is available for delaying shutter release, either to keep the camera from shaking or to allow you to appear in your own photographs. - Page 91 The following options are available: Option How it works Camera automatically adjusts NO ICON focus according to distance to Autofocus subject. Focus is fixed at infinity. Flash Infinity is disabled. Camera can focus on objects Macro as close as 2 cm (0.8˝, mea- close-up sured from lens).
- Page 92 Autofocus In autofocus and macro close-up modes, the camera adjusts focus automati- cally. In User Set A, the camera adjusts focus continuously while the monitor is on (continuous autofocus; does not focus until the shutter-release button is pressed halfway (single autofocus;...
- Page 93 Locking Autofocus with the AE-L/AF-L Button If desired, focus can be locked using the AE-L/AF-L button on the front of the camera. For more information on using focus lock to focus on an off-center subject, see “Tutorial: Taking Photographs” ( Focus Position your subject in the focus area and press the shutter-release button halfway.
-
Page 94: Delaying Shutter Release: Self-Timer Mode
Delaying Shutter Release: Self-Timer Mode When the self-timer is used, the camera will not take a picture until either ten or three seconds after the shutter-release button is pressed. The ten-second timer is generally used for photographs in which you wish to appear yourself, when it gives you time to position yourself in front of the camera after press- ing the shutter-release button. - Page 95 Compose the photograph Adjust camera settings and frame the picture. Start the timer Press the shutter-release button all the way down to activate the timer. Press once for a ten- second delay, twice for a three-second delay. To stop the timer, press the shutter-release button a third time.
-
Page 96: Throwing Light On Your Subject: The
Throwing Light on Your Subject: The The flash can be adjusted for a variety of situations, as described in the table on the following page under the heading, “When to use it.” To change the flash setting, press the setting is displayed in the control panel or monitor. Press Sensitivity (ISO Equivalency) The built-in Speedlight is able to adjust output for correct flash exposure at... - Page 97 The following options are available: Option How it works Flash fires when Auto lighting is poor. Flash will not fire Flash Cancel even when lighting (off) is poor. Pre-flash fires be- fore main flash. This causes subjects’ pupils to contract Auto with before photo is tak- red-eye...
- Page 98 The Flash-Ready Light A short pause is required between exposures for the flash system to charge. If the shutter-release button is pressed halfway while the flash is charging, the red light next to the viewfinder will flicker. Remove your finger briefly from the shutter-release button and try again.
-
Page 99: Bright, Dark, And High-Contrast Subjects: The Button
Bright, Dark, and High-Contrast Subjects: The To obtain the desired results with certain subject compositions (for example, when large areas of the frame are very bright, very dark, or contain areas of strong contrast), it may be necessary to alter exposure from the value suggested by the camera. - Page 100 Choosing an Exposure Compensation Value As a rule of thumb, select positive values when large areas of the frame are very bright (for example, when photographing an expanse of sunlit water, sand, or snow) or when the background is much brighter than the main subject. Use negative values when large areas of the frame are very dark (for example, when photographing a forest of dark green leaves) or when the background is much darker than the main subject.
-
Page 101: Advanced Photography: User Setting Options
Advanced Photography This section covers operations that can be performed only when User Set 1, 2, or 3 is selected from the menu for tings described in the previous section, in User Sets 1, 2, and 3 the user has access to the following controls: Control Controlling Shutter Speed and Aperture... -
Page 102: User Settings: Choosing A User Set
User Settings: Choosing a User Set The options described in this section are only available when User Set 1, 2, or 3 is selected. To use these options, press the MENU button in mode) to display the menu for the current set. The USER SETTING option will be highlighted;... -
Page 103: Controlling Shutter Speed And Aperture: Exposure Mode
Controlling Shutter Speed and Aperture: Exposure Mode When User Set A is selected, the camera automatically adjusts shutter speed and aperture to produce optimal exposure. In User Sets 1, 2, and 3, you can choose from four exposure modes that give you direct control over shutter speed and aperture. - Page 104 The following options are available: Option How it works Camera sets shutter speed and aperture for best expo- sure. Flexible program can be Programmed used to select additional com- auto binations of shutter speed and aperture that will produce the same exposure.
- Page 105 Programmed Auto In programmed auto, the camera automatically adjusts shutter speed and aperture according to the amount of light available, producing optimal expo- sures in most situations. Adjustments to exposure can be made using expo- sure compensation ( Flexible Program When User Set 1, 2, or 3 is selected, different combinations of shutter speed and aperture can be selected by rotating the command dial.
- Page 106 Shutter-Priority Auto In shutter-priority auto, shutter-speed is controlled by rotating the command dial. Options range from 8 s to Rotate If the selected shutter-speed would result in the photograph being under- or over-exposed, the shutter speed displayed in the control panel and monitor will flash when the shutter-release button is pressed halfway.
- Page 107 Aperture-Priority Auto In aperture-priority auto, aperture is controlled by rotating the command dial. Aperture varies in increments equivalent to Rotate If the aperture value selected would result in the photograph being under- or over-exposed, the aperture value displayed in the control panel and monitor will flash when the shutter-release button is pressed halfway.
- Page 108 Manual In manual exposure mode, you can adjust both shutter speed and aperture as described below: After choosing manual as the exposure mode, remove your finger from the button. Press the button to select shutter speed or aperture in the control panel shutter-speed/ap- erture display or the monitor, where the se- lected item is shown in green.
- Page 109 Press the button to select the other item (shutter speed or aperture). Rotate the command dial to choose a value that will produce the desired exposure. If necessary, repeat steps 4 and 5 until the desired combination of shutter speed and aperture has been achieved. Rotate The Multi Selector The item not currently selected in the control panel shutter-speed/aperture...
-
Page 110: Reacting Faster To Light: Sensitivity (Iso Equivalency)
Reacting Faster to Light: Sensitivity (ISO Equivalency) What Is “Sensitivity”? “Sensitivity” is a measure of how quickly your camera reacts to light. The higher the sensitivity, the less light needed to make an exposure, allowing the same exposure to be achieved with higher shutter speeds or smaller apertures. In a film camera, sensitivity is a characteristic of the film, not the camera. - Page 111 The following options are available: Option Approximately equivalent to an ISO rating of 100, recom- mended except when lighting is poor or when higher shut- ter speeds are required (for example, when photographing a moving object). Noise may appear in photographs taken at settings above this value.
-
Page 112: Focusing At A Preset Distance: Manual Focus
Focusing at a Preset Distance: Manual Focus In User Sets 1, 2, and 3, manual focus can be used in place of autofocus for situations in which you know the distance to your subject. Focus distance can be selected from fifty preset distances, ranging from 0.02 m (0.06´) to infinity. To use manual focus: Measure the distance to your subject Measure or estimate the distance to your subject from the front of the cam-... - Page 113 Take the photograph Press the shutter-release button all the way down to take the photograph. Note that the actual focus distance may differ slightly from the value shown in the control panel and monitor; check focus in the monitor before shoot- ing and adjust the camera position as necessary.
-
Page 114: Shooting Menu Options
Shooting Menu Options In User Sets 1, 2, and 3, many settings can be adjusted from the SHOOTING menu. Menu settings for each User Set are made independently of one an- other, so that, for example, changes to settings in User Set 1 have no effect on settings in User Sets 2 and 3. - Page 115 Any changes to settings in the SHOOTING menu are automatically stored in the selected User Set, and will be recalled the next time the User Set is selected. The SHOOTING menu contains two pages of options: Option USER SETTING WHITE BALANCE METERING CONTINUOUS BEST SHOT SELECTOR...
-
Page 116: Keeping Colors True: The White-Balance Menu
Keeping Colors True: The White-Balance Menu What Is “White Balance”? The color of the light reflected by an object depends on the color of the light source. The human brain is able to detect and compensate for such changes in color, with the result that a white object will look white to humans whether viewed in sunlight, under overcast skies, or indoors under incandescent or fluo- rescent lighting. - Page 117 Use when taking photos indoors under fluorescent light. Use for photos taken outdoors under overcast skies. White balance adjusted to match light produced by Nikon Speedlights. (Auto) and (White Bal (Fluorescent), the sub-menu of- Bulb Type White (W)
- Page 118 Preset White Balance Preset white balance is used to adjust white bal- ance when shooting under mixed lighting or to compensate for light sources with a strong color cast (for example, to make photographs taken under a lamp with a red shade look as though they had been taken under white light).
-
Page 119: Measuring Light: The Metering Menu
Measuring Light: The Metering Menu In User Sets 1, 2, and 3, the metering menu offers a choice of four metering methods that determine how the camera sets exposure (in User Set A, ma- trix metering is used). Choose a metering method suited to your composition and lighting conditions. - Page 120 Locking Exposure: Spot and Center-Weighted Metering When spot or center-weighted metering is selected, pressing the shutter-re- lease button halfway sets exposure for the subject at the center of the frame. If your subject is not in the center of the frame when the shutter-release but- ton is pressed halfway, exposure will be set for an object in the background, with the result that your intended subject will be over- or under-exposed.
- Page 121 Recompose the photograph and shoot Keeping focus and exposure locked, recompose your photograph. Press the shutter-release button all the way down to shoot. Spot AF Area Spot AF-area metering can be used in place of autoexposure lock to meter an off-center subject.
-
Page 122: Making Movies And Taking Photographs In A Sequence: The Continuous Menu
Making Movies and Taking Photographs in a Sequence: The Continuous Menu The options in the “continuous” menu determine whether the camera takes one photograph each time the shutter-release button is pressed, or records a continuous sequence of photographs while the shutter-release button is held down. A movie option is also included for recording short video clips with audio. - Page 123 Option Description Camera takes photos at sizes of SXGA or smaller as long as the shutter-release button is held down. Image quality is set to NORMAL, allowing photos HS Sequence to be taken at approximately three frames per second. While the shutter-release button is held down, the camera records up to one hundred QVGA photos 240 pixels in size.
- Page 124 During Recording While images are being transferred from the buffer to the memory card for permanent storage, the green lamp next to the viewfinder will blink. Do not eject the memory card, or remove or disconnect the power source until the lamp has stopped blinking.
- Page 125 Noise Reduction When NOISE REDUCTION is on or set to Clear Image Mode ( TINUOUS is automatically set to Single, and the options in the CONTINUOUS menu are disabled. Movie/Ultra HS Settings of Movie and Ultra HS only take effect when the monitor is on. If the monitor is turned off, the camera will revert to a setting of Single until the monitor is turned on.
-
Page 126: Getting Sharper Photos: The Best Shot Selector Menu
Getting Sharper Photos: The Best Shot Selector Menu The “best-shot selector” (BSS) option is recom- mended for situations in which inadvertent cam- era movement can produce blurred photographs, for example when: • the camera is zoomed in • you are using macro close-up to take photo- graphs at ranges of less than 50 cm (1´8˝... - Page 127 Restrictions on the Best Shot Selector BSS is not available at “continuous” settings other than Single ( when NOISE REDUCTION is on or set to Clear Image Mode ( ing these settings automatically cancels BSS. Viewing the Current BSS Setting When the best-shot selector is on, a BSS icon ap- pears in the monitor.
-
Page 128: Adjusting Contrast And Brightness: The Image Adjustment Menu
Adjusting Contrast and Brightness: The Image Adjustment Menu In User Set A, the camera automatically performs image compensation for optimal brightness and contrast before recording the photograph to the memory card. In User Sets 1, 2, and 3, the image- adjustment sub-menu gives you control over this image-compensation operation. -
Page 129: Controlling Color: The Saturation Control Menu
Controlling Color: The Saturation Control Menu Saturation control is used to heighten or reduce the vividness of colors. Raise saturation to +1 Maxi- mum for a vivid, photoprint effect when taking photos that will be printed “as is,” without further editing. -
Page 130: Settings For Optional Converter Lenses: The Lens Menu
Settings for Optional Converter Lenses: The Lens Menu With a lens adapter ring (available separately; 191) attached to the camera lens, you can use optional converter lenses for wide-angle, tele- photo, and fisheye photography, as well as an adapter for taking photographs of film. Each of these lenses is suited to a particular combination of settings, including focus mode, zoom position, and metering method. - Page 131 We recommend that you use a film scanner such as the Nikon COOLSCAN to obtain high-quality digital images from negative film. Viewing the Current Lens Setting At settings other than Normal, a converter lens icon appears in the monitor.
-
Page 132: Controlling Exposure: The Exposure Options Menu
Controlling Exposure: The Exposure Options Menu The exposure options sub-menu contains two options for controlling exposure. Taking Multiple Photographs with the Same Exposure: AE Lock When taking a series of photographs that will later be joined to form a single image (for example, when taking shots for a panorama or 360 °... - Page 133 Setting the Time Limit for Long-Time Exposures: Maximum Bulb Duration In manual exposure mode, a shutter speed setting of BULB allows the shutter to remain open as long as the shutter-release button is pressed ( 95). When Maximum Bulb Duration is set to 1 min (the default setting), the maximum for such long time-exposures is sixty seconds.
-
Page 134: Controlling Focus: The Focus Options Menu
Controlling Focus: The Focus Options Menu The focus options sub-menu provides control over focus settings. Focus-Area Selection: AF Area Mode In User Set A, the camera automatically focuses on the subject in the focus area at the center of the frame, shown by the focus brackets in the viewfinder. - Page 135 Auto-Focus Mode In User Sets 1, 2, and 3, you can choose the auto- focus mode that takes effect when the monitor is on (when the monitor is off, single autofocus is used, regardless of the setting chosen in the auto- focus mode sub-menu).
- Page 136 Focus Confirmation Use focus confirmation when you want to know exactly what areas of the frame will be in focus be- fore taking a photograph. Focus confirmation af- fects only the view through the lens in the moni- tor; no indicators of focus appear in the final pho- tograph.
-
Page 137: Making Edges More Distinct: The Image Sharpening Menu
Making Edges More Distinct: The Image Sharpening Menu When you take a photograph, the camera auto- matically outlines edges, making the image appear sharper. In User Sets 1, 2, and 3, the image sharp- ening menu gives you control over the amount of sharpening performed (in User Set A, the camera automatically adjusts sharpening according to the subject). -
Page 138: Varying Settings Over A Series Of Photos: Auto Bracketing
Varying Settings over a Series of Photos: Auto Bracketing In some situations, you may find it difficult to se- lect appropriate exposure-compensation and white-balance settings, and yet not have time to check the results and adjust settings after each shot. The options in the auto bracketing menu can be used to vary these settings automatically over a series of photographs, “bracketing”... - Page 139 Autoexposure Bracketing Autoexposure bracketing is useful when shooting high contrast subjects and in other situations in which you are unsure as to the correct exposure. Selecting On in the auto bracketing menu displays the sub-menu of exposure bracketing options shown at right, where you can choose the num- ber of shots and the amount exposure will vary with each shot.
-
Page 140: Continuous Shooting
Resetting Autoexposure Bracketing Autoexposure bracketing starts over from the highest exposure compensation value when changes are made to any settings that affect exposure, including exposure mode, exposure compensation, shutter speed, aperture, sensitivity, flash mode, and Variable Power ( camera enters sleep mode ( Continuous Shooting If the shutter-release button is held down at settings of Continuous Low and HS Sequence (... - Page 141 White Balance Bracketing White-balance bracketing can be used if you are uncertain whether the option selected in the WHITE BALANCE menu will produce the desired results, or if you want to experiment with differ- ent white balance settings without confirming the view in the monitor before each shot.
-
Page 142: Avoiding "Grainy" Photographs: Noise Reduction
Avoiding “Grainy” Photographs: Noise Reduction When sensitivity (ISO equivalency) settings above ISO 100 equivalent or shutter speeds slower than s are used, “noise” in the form of randomly- spaced brightly-colored pixels may appear in pho- tographs, particularly in shadows. The noise reduc- tion menu offers two options for reducing noise: On and Clear Image Mode. - Page 143 Restrictions on Noise Reduction NOISE REDUCTION settings of On and Clear Image Mode can not be used in combination with BSS ( other than Single ( 108). Clear Image Mode can not be used with image sizes of FULL, 3 : 2, or UXGA. If any of these image sizes is in effect when Clear Image Mode is chosen, image size will be set to SXGA while Clear Image Mode is in effect, reverting to the original size when Clear Image Mode is turned off.
-
Page 144: Restoring Default Settings: Reset All
Restoring Default Settings: Reset All The C (RESET ALL) option in the SHOOTING menu is used to reset settings for the current User Set to their default values. The items listed on the follow- ing page are also reset for all User Sets and for play- back mode. - Page 145 Monitor options Display mode Brightness Shutter sound Controls Memorize AE-L, AF-L *Folders option for playback reset to All Folders. Default Setting NIKON Speedlight options Variable power Speedlight control Shot confirm info.txt Auto off Zoom options Digital tele options Fixed aperture AE&AF...
-
Page 147: Camera Setup: The Set-Up Menu
Camera Setup This chapter details the options available in the SET- UP menu, where you can adjust basic camera set- tings and perform such tasks as formatting memory cards and choosing a folder to store your photo- graphs. The SET-UP Menu... -
Page 148: Set-Up Menu Options
SET-UP Menu Options The SET-UP menu contains options for basic camera setup, including format- ting memory cards and setting the time and date. The options available in the SET-UP menu depend on the operating mode and, in User Set selected. (Shooting) Mode, User Set A The SET-UP menu for User Set A contains six options for basic camera setup. - Page 149 (Shooting) Mode, User Sets 1, 2, 3/ In playback mode, the SET-UP menu contains options for choosing the video mode for television playback and selecting the language in which menus and messages are displayed. The SET-UP menu for User Sets 1, 2, and 3 contains all the options available in the SET-UP menus for playback and User Set A, as well as advanced setup options and options for customizing camera controls.
- Page 150 The following table lists the options available in each operating mode and User Set: Option Folders Shutter Sound Auto Off CF Card Format Seq. Numbers Date Monitor Options Controls Zoom Options Speedlight Opt. info.txt Video Mode Language Disable Delete Playback Folders option accessible from main PLAY BACK menu ( User Set User Set 1, 2, 3...
-
Page 151: Organizing Your Photographs: The Folders Menu
For example, the camera shows the folders “100NIKON” and “101NIKON” as the single folder “NIKON” with no folder number. When the memory card is viewed on a computer, however, folders with the same name but different folder numbers will be treated as separate folders. - Page 152 Creating New Folders Highlight New Display default folder name (NIKON) Highlight letter Edit selected letter. Folder name can in- clude uppercase letters (“A”–”Z”), num- bers, and spaces. Repeat steps 3 and 4 to create new five-letter folder name. Highlight last letter and press multi selec- tor to right to create new folder.
- Page 153 Renaming Existing Folders Highlight Rename Highlight folder name Display list of existing folders (folder NIKON can not be renamed) Display menu Edit name as described in steps 3–5 of “Creating New Folders,” opposite...
- Page 154 Any images it contains that are neither hidden nor protected will, however, be deleted. Disable Delete Folders can not be deleted when Disable Delete ( Display list of folders (folder NIKON not available for deletion) Confirmation dialog displayed. Press multi selector up or down to highlight option, press to right to select: •...
- Page 155 Highlight folder name Folder name shown in monitor (no name displayed when folder NIKON is selected) Ultra HS Each series of one hundred photographs taken at a setting of Ultra HS ( 109) is stored in a separate folder with a name consisting of “N_” followed by a three-digit number assigned by the camera.
-
Page 156: Audio Confirmation: Shutter Sound
Audio Confirmation: Shutter Sound The Shutter Sound sub-menu controls the “beep” made by the camera’s speaker. Option Description The camera beeps once to confirm that: • the camera has been turned on • the shutter-release button has been pressed all the way down to release the shutter •... -
Page 157: Conserving Battery Power: The Auto-Off Menu
Conserving Battery Power: The Auto-Off Menu When operated on battery power, the camera will enter sleep mode if no operations are performed for thirty seconds (or three minutes when menus are displayed). The time limit for sleep mode can be chosen from thirty seconds, one minute, five minutes, and thirty minutes using the Auto Off menu. -
Page 158: Formatting Memory Cards: Cf Card Format
Formatting Memory Cards: CF Card Format The memory card supplied with your camera is al- ready formatted for use in the COOLPIX5000. Other memory cards will however need to be formatted prior to use. For more information on formatting memory cards, see “Tutorial: First Steps” ( 37). -
Page 159: Setting The Time And Date: The Date Menu
The following file-numbering options are available: Option Reset Setting the Time and Date: The Date Menu This option is used to set the camera to the current date and time. For more information, see “Tuto- rial: First Steps” ( 42). File Names Files created by the camera have names of the form “DSCNnnnn.xxx,”... -
Page 160: Adjusting Monitor Settings: Monitor Options
Adjusting Monitor Settings: Monitor Options The monitor options menu is used to set monitor brightness and hue. In User Sets 1, 2, and 3, it also contains an option for specifying whether and when the monitor will turn on automatically. Controlling the Monitor: The Display Mode Menu This option, which is available only in User Sets 1, 2, and 3, is used to specify the conditions under... - Page 161 Adjusting Monitor Brightness: The Brightness Menu This option controls monitor brightness. Press the multi selector up or down to increase or decrease the brightness of the monitor by moving the arrow to the right of the display up or down. The results of any changes are immediately visible in the cen- ter of the display.
-
Page 162: Customizing Camera Controls: The Controls Menu
Customizing Camera Controls: The Controls Menu The options in the Controls sub-menu determine what settings made with the camera buttons are recalled when User Set 1, 2, or 3 is selected, what function is assigned to the button in User Sets 1, 2, and 3, and what function is assigned to the AE-L/AF-L button. - Page 163 Assigning Functions to the In User Sets 1, 2, and 3, you can choose the func- tion assigned to the to select the User Set or adjust white balance and metering without accessing the camera menus, or to adjust flash and focus mode without using the buttons on the back of the camera.
- Page 164 Options for the AE-L/AF-L Button: AE-L, AF-L By default, both focus and exposure are locked when the AE-L/AF-L button is pressed. The op- tions in the AE-L, AF-L menu can be used to set the button to lock only one of focus or exposure. Option Pressing the AE-L/AF-L button locks both focus and ex- AE-L&AF-L...
-
Page 165: Controlling Zoom: Zoom Options
Controlling Zoom: Zoom Options The zoom-options sub-menu contains settings for optical and digital zoom. Digital Tele This sub-menu is used to turn digital zoom on and off. If On is selected, the camera enters digital zoom mode when the more than two seconds at the maximum optical zoom position (digital zoom does not take effect if monitor is off). -
Page 166: Controlling The Flash: Speedlight Options
Controlling the Flash: Speedlight Options This sub-menu contains options for controlling built-in and external Speedlights. Controlling Flash Output: Variable Power This sub-menu is used to adjust flash output. Flash output can be lowered or raised by from –2.0 EV to +2.0 EV in increments of Options for External Speedlights: Speedlight Cntrl This sub-menu is used to control the built-in Speed- light when using external flash accessories con-... - Page 167 Confirming Shutter Release: The Shot Confirm Menu If desired, the flash can be fired at low intensity after the shutter is released to let your subjects know that a picture has been taken. The flash will only fire to confirm shutter release if the flash did not fire when the photograph was taken.
-
Page 168: Storing Photo Info In A Separate File: Info.txt
Storing Photo Info in a Separate File: info.txt While On is selected in the info.txt sub-menu, information about each image recorded is stored in an independent text file (“info.txt”) in the same folder as the image. When the contents of the memory card are viewed from a computer, this file can be read with a text browser such as Notepad or SimpleText. -
Page 169: Choosing A Video Standard: The Video-Mode Menu
Choosing a Video Standard: The Video-Mode Menu The Video Mode menu is used to select the stan- dard used for video output. Adjust this setting to match the standard used in any video device to which you connect the camera. Option NTSC Use when connecting camera to NTSC devices. -
Page 170: Protecting Images From Deletion: Disable Delete
Protecting Images from Deletion: Disable Delete The Disable Delete option is used to protect im- ages from accidental deletion. Select On to dis- able all operations or menu options that delete or erase images, including deletion with the button, the Delete option in the playback menu, and the CF Card Format option in the setup menus. -
Page 171: Playing Images Back: Playback Mode
Playing Images Back This section details the operations that can be performed when the mode selector is set to It is divided into the following three sections: Basic Playback This section covers playback operations that can be performed using the buttons on the back of the camera, the multi selector, and the command dial. -
Page 172: Basic Playback: Full-Frame And Thumbnail Playback
Basic Playback When the mode selector is set to enters playback mode with the most recent pho- tograph displayed in the monitor. This section cov- ers the operations that can be performed in play- back mode using the multi selector, the command dial, and the buttons on the back of the camera. - Page 173 Zoom photo in View photo info Play movie back Display playback MENU menu Playback Tips In single-image playback, photographs are displayed briefly at low resolution while being read from the memory card. This makes it possible to scroll rap- idly through the photographs in memory without waiting for each image to be displayed at full resolution.
- Page 174 Viewing Multiple Images: Thumbnail Playback Pressing the ) button in single image play- back displays a menu of four thumbnail images, where you can select photos or movies for view- ing or delete images. Highlight images Page through images Change number of images displayed...
- Page 175 Taking a Closer Look: Playback Zoom Use the ) button to zoom in on images dis- played in single-image playback. Zoom photo in View other areas of image Cancel zoom Description Zoom increases each time button is pressed, to a maximum of 6.0 . While image is zoomed icon and zoom ratio are displayed in up- per left corner of monitor.
- Page 176 Photo Information Photo information is shown superimposed on images displayed in single-image playback. There are five pages of photo information for each photo. Rotate the command dial to cycle through photo information as follows: Page 1 Page 2 Page 3 Page 1 1 Date of 7 Battery level...
- Page 177 Page 3 (Shooting Information) Page 4 (Exposure Information) Page 5 (Focus Confirmation) 1 Flash status 5 Color saturation 2 Image adjustment 6 Sharpening 3 Sensitivity (ISO 7 Digital zoom equivalency) 8 Lens-converter 4 White balance status 9 File size 1 Thumbnail preview (flashing border marks image highlights—i.e., brightest areas of image) 2 Histogram (shows distribution of...
- Page 178 Movie Playback In single-image playback, movies are indicated by icon in the lower left corner of the display. Movie playback is controlled with the buttons. During playback, sound recorded with the movie is played back over the camera’s built- in speaker, and the zoom button is used to con- trol playback volume.
-
Page 179: The Playback Menu: Managing Images
The Playback Menu The playback menu contains options for deleting images and folders, cancel- ling print-orders, and removing transfer marking from all images, for protect- ing images from deletion, for hiding images, and for playing images back one after the other in automatic “slide shows.” You can also create a digital “print order”... -
Page 180: Deleting Images: The Delete Menu
Deleting Images: The Delete Menu Using the options in the Delete menu, you can: • delete selected photos and movies • delete all images • cancel the current print order ( • reset transfer marking for all images ( Before Deletion Once deleted, images can not be recovered. - Page 181 Deleting Selected Photographs and Movies To delete selected photographs and movies: Highlight Selected Images Highlight image Display menu of thumbnail images Press multi selector up or down to se- lect image for deletion. Selected im- ages are marked by steps 3 and 4 to select additional im- ages for deletion.
- Page 182 Deleting All Photographs and Movies To delete all images on the memory card: Highlight All Images Confirmation dialog displayed. Press multi selector up or down to highlight option, press to right to put choice into effect: • Select No to return to playback menu without deleting images •...
-
Page 183: Selecting A Folder For Playback: The Folders Menu
Selecting a Folder for Playback: The Folders Menu The Folders item in the playback menu can be used to select images in all folders for playback, or play back images in a selected folder. Highlight desired folder. To view images in all folders, select All Folders Ultra HS Each series of one hundred photographs taken at a setting of Ultra HS (... -
Page 184: Automated Playback: The Slide-Show Menu
Automated Playback: The Slide-Show Menu The slide-show option in the playback menu is used for automated sequential playback. When Start is selected in the slide-show menu, all images in the current folder that have not been hidden using Hide Image will be played back one after the other in the order recorded, with a pause between each image. - Page 185 The following operations can be performed while a slide show is in progress: Pause slide show Go forward or back one frame End slide MENU show Changing the Display Interval The slide show menu shown on the opposite page and the pause dialog shown above both contain a Frame Intvl option for changing the length of time each image in the slide show is displayed.
-
Page 186: Safeguarding Valuable Images: The Protect Menu
Safeguarding Valuable Images: The Protect Menu Selecting Protect from the playback menu displays the menu shown at right, where you can select images to protect from accidental deletion. Pro- tected files can not be deleted in review, single- image playback, or from the delete sub-menu. Note, however, that protected images will be de- leted when a memory card is formatted. -
Page 187: Hiding Images During Playback: The Hide-Image Menu
Hiding Images During Playback: The Hide-Image Menu When creating a slide show or showing photo- graphs to an audience, you may want to use the Hide Image option to hide some of the images in the current folder. Hidden images are only visible in the Hide Image menu. -
Page 188: Ordering Prints: The Print-Set Menu
Ordering Prints: The Print-Set Menu Selecting Print Set from the playback menu dis- plays the menu shown at right. Here you can specify photographs to be printed, the number of prints, and the information to be included on each print. This information is stored on the memory card in Digital Print Order Format (DPOF). - Page 189 Use multi selector to specify number of prints. Press up to increase (maximum 9), down to decrease. To deselect image, press multi selector down when number of prints is 1. Repeat steps 1–3 to select additional images. To exit without alter- ing print order, press MENU button.
-
Page 190: Selecting Images For Transfer: The Auto Transfer Menu
Selecting Images for Transfer: The Auto Transfer Menu When the camera is connected to a computer run- ning Nikon View 4, images that have been selected for transfer using the Auto Transfer option can be copied to the computer (... - Page 191 To transfer more than 999 images, select the images to be transferred using Nikon View 4, or select 999 images or less using the Selected Photos option, transfer these images, remove transfer marking using the Delete > Reset Transfer option (see below), mark a new batch of images for transfer, and re- peat the process until all images have been transferred.
-
Page 192: Television Playback: Connecting Your Camera To A Video Device
Television Playback Using the EG-E5000 audio/video cable provided with your camera, you can con- nect the COOLPIX5000 to a television or VCR. The video device will show the same picture as is displayed in the camera monitor. Connect the EG-E5000 to the camera Insert the black plug on the EG-E5000 into the camera’s A / V OUT connector. -
Page 193: Connections: Your Camera And Your Computer
This section describes how to connect your cam- era to a computer running Nikon View 4 using the UC-E1 Universal Serial Bus (USB) cable supplied with your camera. Users whose computers are not... -
Page 194: Before You Begin: Installing Nikon View 4
COOLPIX5000 requires the version of Nikon View 4 provided with the cam- era. If you have a version of Nikon View that was included with another Nikon digital camera, you will need to upgrade to the version provided with the COOLPIX5000 as described in the Nikon View 4 Reference Manual (on CD). - Page 195 Print… command in the Acrobat Reader File menu and follow along during installation of Nikon View 4. Before Starting the Install Before installing image database software or Nikon View 4, be sure to exit all other programs, including Adobe Acrobat Reader and any virus-checking soft- ware.
-
Page 196: Getting Connected: Connecting To Your Computer
Getting Connected: Connecting to Your Computer Once you have installed Nikon View 4, you are ready to transfer photographs and movies to your computer. Images can be transferred either via a direct USB connection between the camera and computer, or by removing the memory card from the camera and inserting it in a card reader or PC card slot. - Page 197 Windows 98/Windows 98 Second Edition (SE) are provided on the Nikon View 4 installer CD. Be sure the CD is inserted in the drive when you first connect your camera. Other versions of Windows do not support USB.
- Page 198 The USB interface supports “hot plug” connection of peripheral devices. This means that the camera can be on or off when you connect it to the computer. If the camera is off when connected, Nikon View 4 will not start until the cam- era is turned on.
- Page 199 Interrupting Transfer To end transfer before all marked images have been copied to the computer, click the Cancel button in the Nikon View 4 transfer progress dialog. When the progress indicator is no longer displayed, you can remove the camera from...
- Page 200 Click OK to exit Nikon View 4, then turn the camera off and reconnect the cable or replace the memory card.
- Page 201 Turn the computer on and wait for the operating system to start up. Insert the memory card into the card reader If Nikon View 4 is installed, it will automatically detect cards from Nikon digital cameras. See the Nikon View 4 Reference Manual ( formation on transferring images to your computer.
- Page 202 Turn the computer on and wait for the operating system to start up. Insert the adapter into the card slot If Nikon View 4 is installed, it will automatically detect cards from Nikon digital cameras. See the Nikon View 4 Reference Manual for information on transferring images to your computer.
-
Page 203: Technical Notes: Camera Care, Options, And Resources
Technical Notes Camera Care, Options, and Resources This chapter provides tips on cleaning and storing your camera, a list of optional accessories available for the COOLPIX5000, information on where to get help on line, troubleshooting advice, and cam- era specifications. -
Page 204: Caring For Your Camera
Caring for Your Camera Cleaning A key to cleaning these glass parts is to not touch them with your fingers. Use a blower (typically a small device with a rubber bulb attached to one end that you pump to produce Lens/ a stream of air out the other) to remove dust or lint. -
Page 205: Optional Accessories
Optional Accessories At the time of writing, the following optional accessories were available for the COOLPIX5000. Contact your retailer or local Nikon representative for details. Rechargeable battery AC adapter/battery charger Battery pack Carrying case ™ CompactFlash memory cards and adapters... - Page 206 ( MC-EU1 remote cord HN-E5000 lens hood HL-E5000 monitor hood The following SB-series Nikon Speedlights can be attached directly to the camera ac- cessory shoe without a sync cable: 50DX, 28DX, 28, 27, 26, 25, 24, 23, and 22s. The...
-
Page 207: Web Resources
• For users in Asia, Oceania, the Middle East, and Africa: http://www.nikon-asia.com/ For Contact Information Contact information for the Nikon representative in your area may be found at: http://www.nikon-image.com/eng/ Use Only Nikon Flash Accessories Use only Nikon Speedlights. Using another make of flash could damage the internal circuitry of the camera or flash. -
Page 208: Troubleshooting
Troubleshooting If your camera fails to function as expected, check the list of common prob- lems below before consulting your retailer or Nikon representative. Refer to the page numbers listed in the rightmost column for information on solving the problems listed here. - Page 209 Problem • Camera is in playback mode. • Battery is exhausted. • Number of exposures remaining is zero: not No photo is taken • Green lamp flickers: camera unable to focus. when shutter-release • Red lamp flickers: flash is charging. button is fully •...
- Page 210 Problem Photos are blurred Randomly-spaced bright pixels (“noise”) appear in image Flash does not fire Possible cause • Camera shook during shot: increase shutter speed. If shutter speed can not be increased without causing underexposure: – Use the flash – Zoom the camera out –...
- Page 211 • Interface cable not correctly connected, or card memory card insert- ed in card reader or card slot See Nikon View 4 Reference Manual for further information on troubleshooting Nikon View 4. Possible cause computer or other make of camera.
- Page 212 • Use approved memo- ry card. • Check that connec- tors are clean. If card is damaged, contact retailer or Nikon repre- sentative. Press multi selector up to highlight FORMAT and press to right to format card, or turn camera off and replace card.
- Page 213 Display Error occurs during shooting: Insufficient memory to record further pictures at current settings. Error appears when you try to transfer images to OUT OF MEMORY computer: Not enough space on memory card to record information needed for transfer. • Memory card has not been formatted for use in COOLPIX5000.
- Page 214 Turn camera off, unplug optional AC adapter (if using), remove and re- insert battery, and turn camera on. If error per- sists, contact retailer or Nikon representative. Solution...
-
Page 215: Specifications
Specifications Type Effective pixels Image size (pixels) Lens Focal length f/-number Construction Digital zoom Autofocus (AF) Focus range Focus-area selection Viewfinder Magnification Frame coverage Diopter adjustment Monitor Frame coverage E5000 digital camera 5.0 million ˝ high-density CCD; total pixels: 5.24 million •... - Page 216 Storage Media File system Compression Exposure Metering Exposure control Range (ISO 100 equivalent) Shutter Speed Aperture Range Sensitivity Self-timer Built-in Speedlight Sync method Type I and II CompactFlash cards Compliant with Design rule for Camera File sys- tems (DCF) and Digital Print Order Format (DPOF) JPEG-baseline-compliant Four mode through-the-lens (TTL) metering: •...
- Page 217 • EH-21 AC adapter/battery charger (available separately) Approximately 100 minutes (as measured at room temperature [20 °C/68 °F] under standard Nikon test conditions: monitor on, zoom adjusted with each shot, flash used in approximately one third of photographs, image quality set to NORMAL) 101.5 81.5...
- Page 218 64 MB (128 MB or more recommended) 15 MB required for installation, with additional amount equivalent to twice the capacity of the camera memory card required when Nikon View 4 is running 640 480 with High Color (800 600 with True...
-
Page 219: Index
Index Symbols 1 , 2 , 3 , 88 3 : 2, 75 100, 200, 400, 800, 97 (shooting) mode, 12 (playback) mode, 12 button, 13 button, 13 button, 15 button, 16 button, 16 button, 17 , 39, 46 , 42 , 77 , 83, 153 , 85... - Page 220 Command dial, 13–14 ™ CompactFlash card. See memory card Compression. See image quality Computer. See e-mail; image database software; Nikon View 4; printing pho- tographs; transfer CONTINUOUS, 108–111 Contrast. See IMAGE ADJUSTMENT Control panel, 11, 46 Controls, 148 Copying images. See transfer Cumulus.
- Page 221 Folders PLAY BACK menu option, 169 SET-UP menu option, 137 Folders, 137 creating, renaming, and deleting, 138–140 numbering, 137, 144–145 selecting for playback, 169 storing images in, 141 Ultra HS, 141, 169 Formatting. See memory card FotoStation, 63, 180 Func., 149 button, 15, 49, 89, 149 HI, 71, 73 Hide Image, 173...
- Page 222 Monochrome. See black-and-white MOV. See image files; movies Movies, 109 playing back, 164 recording, 109 Multi-selector, 18 Nikon View 4, i, 63, 180–186 system requirements for, 204 Noise, 4, 84, 97 NOISE REDUCTION, 128–129 NORMAL, 71, 73 NR. See NOISE REDUCTION NTSC.
- Page 223 Slide Show, 170–171 Speaker, built-in, 4, 7, 164 Specifications, 201–204 Speedlight. See flash Speedlight Cntrl, 152 Speedlight Opt., 152–153 Strap. See camera strap SXGA, 75 T. See zoom, indicator . See zoom, button Telephoto. See LENS; zoom Television playback, 178 Thumbnail display, 160 TIF.