Table of Contents
Advertisement
Quick Links
Advertisement
Table of Contents

Related Manuals for National Instruments NI-7931


Summary of Contents for National Instruments NI-7931
- Page 1 NI-7931...
-
Page 2: Table Of Contents
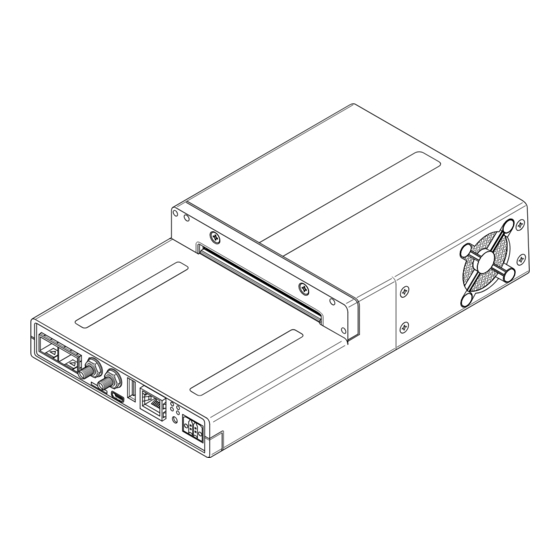
GETTING STARTED GUIDE NI-7932R ™ Controller for FlexRIO This document describes how to begin using the NI-7932R. Figure 1. NI-7932R Related Information For information about the device specifications, refer to the NI-7932R Specifications at ni.com/manuals. Contents FlexRIO Documentation......................2 Safety Guidelines........................3 Electromagnetic Compatibility Guidelines................ -
Page 3: Flexrio Documentation
Configuring the System in Measurement & Automation Explorer (MAX)......9 Setting a System Password..................... 10 Installing Software on the NI-7932R..................10 Adding the NI-7932R to a LabVIEW Project.................11 Adding a FlexRIO Adapter Module to the Target............11 Programming Options......................12 Programming with LabVIEW..................12 Text-based Programming.................... -
Page 4: Safety Guidelines
FlexRIO devices. Safety Guidelines You can impair the protection provided by the NI-7932R if you use it in a Caution manner not described in this document. NI-7932R Getting Started Guide | © National Instruments | 3... -
Page 5: Electromagnetic Compatibility Guidelines
Electromagnetic Compatibility Guidelines This product was tested and complies with the regulatory requirements and limits for electromagnetic compatibility (EMC) stated in the product specifications. These requirements and limits provide reasonable protection against harmful interference when the product is operated in the intended operational electromagnetic environment. This product is intended for use in industrial locations. -
Page 6: What You Need To Get Started
Never touch the exposed pins of connectors. Caution LabVIEW 2015, FlexRIO Support 2015, LabVIEW Real-Time 2015, and LabVIEW FPGA 2015 are the earliest versions of software that support the NI-7932R. NI-7932R Getting Started Guide | © National Instruments | 5... -
Page 7: Preparing The Environment
Do not install a device if it appears damaged in any way. Note Unpack any other items and documentation from the kit. Store the device in the antistatic package when the device is not in use. Preparing the Environment Ensure that the environment you are using the NI-7932R in meets the following specifications. 0 °C to 55 °C Operating temperature (IEC 60068-2-1, IEC 60068-2-2) -
Page 8: Powering On The Ni-7932R
Refer to the MAX Help for information about reinstalling software on the controller. The controller is in safe mode. Refer to the MAX Help for 3 flashes every few seconds information about safe mode. NI-7932R Getting Started Guide | © National Instruments | 7... -
Page 9: Connecting The Ni-7932R To The Host Computer
Check front-panel I/O and adapter module connections for shorts. Remove any shorts and power cycle the controller. If the problem persists, contact National Instruments. Normal operation. Connecting the NI-7932R to the Host Computer Complete the following steps to connect the NI-7932R to the host computer using the USB device port. -
Page 10: Configuring The System In Measurement & Automation Explorer (Max)
Expand Remote Systems in the MAX configuration tree and select the system. MAX lists the system as the model name followed by the serial number, such as NI-7932R-030521C9. Related Information Why Doesn't the Device Appear in MAX? on page 13 NI-7932R Getting Started Guide | © National Instruments | 9... -
Page 11: Setting A System Password
Setting a System Password Complete the following steps to set a system password. Setting a system password is optional. Note The default username for the NI-7932R is . There is no default admin Note password for the NI-7932R, so you must leave the password field blank when logging in until you set a system password. -
Page 12: Adding The Ni-7932R To A Labview Project
Select the General category and check the Enable IO Module box. Select your I/O module from the IO Modules list, and select the CLIP you want to use from the Component Level IP box. Click OK. NI-7932R Getting Started Guide | © National Instruments | 11... -
Page 13: Programming Options
Programming Options Refer to the following table for information about how to program the NI-7932R. Component Programming Option(s) Real-Time controller LabVIEW Real-Time or C/C++ Development Tools for NI Linux Real-Time, Eclipse Edition. FPGA LabVIEW FPGA Related Information For more information about programming with LabVIEW Real-Time, refer to the NI-7931R/ 7932R/7935R User Manual. -
Page 14: Why Can't The Ni-7932R Communicate With The Network
Sometimes a malfunctioning real-time app prevents network communication. • Check the Device Manager to ensure the National Instruments USBLAN adapter is recognized. In Windows 7, select Start»Control Panel»Device Manager»Network adapters»National Instruments»USBLAN adapter. If the USBLAN adapter is not recognized, you must reinstall FlexRIO Support. -
Page 15: Appendix: Front Panel
Appendix: Front Panel NI-7932R Front Panel The following figure shows the NI-7932R front panel connectors, buttons, and LEDs. Figure 3. NI-7932R 1. TRIG 7. LED indicators 2. REF CLK 8. Reset 3. Storage (µSD card) 9. DC power source 4. USB device port 10. - Page 16 Figure 4. NI-7932R LEDs Power Status FPGA User RT User NI-7932R Module Signals The following figure shows the available signals on the NI-7932R. NI-7932R Getting Started Guide | © National Instruments | 15...
-
Page 17: Worldwide Support And Services
GPIO_57 GPIO_67 Worldwide Support and Services The National Instruments website is your complete resource for technical support. At ni.com/ support, you have access to everything from troubleshooting and application development self-help resources to email and phone assistance from NI Application Engineers. -
Page 18: Where To Go Next
National Instruments corporate headquarters is located at 11500 North Mopac Expressway, Austin, Texas, 78759-3504. National Instruments also has offices located around the world. ni.com/support For telephone support in the United States, create your service request at dial 1 866 ASK MYNI (275 6964). - Page 19 CONTAINED HEREIN AND SHALL NOT BE LIABLE FOR ANY ERRORS. U.S. Government Customers: The data contained in this manual was developed at private expense and is subject to the applicable limited rights and restricted data rights as set forth in FAR 52.227-14, DFAR 252.227-7014, and DFAR 252.227-7015. © 2015 National Instruments. All rights reserved. 375088B-01 Sep15...