Advertisement
PRODUCT SAFETY
READ CAREFULLY AND KEEP FOR FUTURE REFERENCE
This appliance can be used by children aged from 8 years and above and persons with reduced physical, sensory or mental capabilities or lack of experience and knowledge if they have been given supervision or instruction concerning use of the appliance in a safe way and understand the hazards involved. Children shall not play with the appliance. Cleaning and user maintenance shall not be made by children unless they are older than 8 and supervised.
Keep the appliance and its cord out of reach of children less than 8 years old.
Bread can burn therefore do not use the appliance near or below combustible materials such as curtains. Never use the appliance below wall cupboards or shelves.
Never operate the appliance by means of an external timer or separate remote-control system.
Do not touch the metal parts of the appliance during use as they may become very hot.
If the supply cord is damaged, it must be replaced by the manufacturer, its service agent or similarly qualified persons in order to avoid a hazard.
 Never use this appliance for anything other than its intended use. This appliance is for household use only. Do not use this appliance outdoors.
Always ensure that hands are dry before handling the plug or switching on the appliance.
Always use the appliance on a stable, secure, dry and level surface.
This appliance must not be placed on or near any potentially hot surfaces (such as a gas or electric hob).
The power cord is not replaceable by the user. Always return the appliance if the power cord is damaged to avoid any hazard.
Do not use the appliance if it has been dropped or if there are any visible signs of damage.
Ensure the appliance is switched off and unplugged from the supply socket after use and before cleaning.
Always allow the appliance to cool before cleaning or storing.
Never immerse any part of the appliance or power cord and plug in water or any other liquid.
Never let the power cord hang over the edge of a worktop, touch hot surfaces or become knotted, trapped or pinched.
Never leave the appliance unattended when in use.
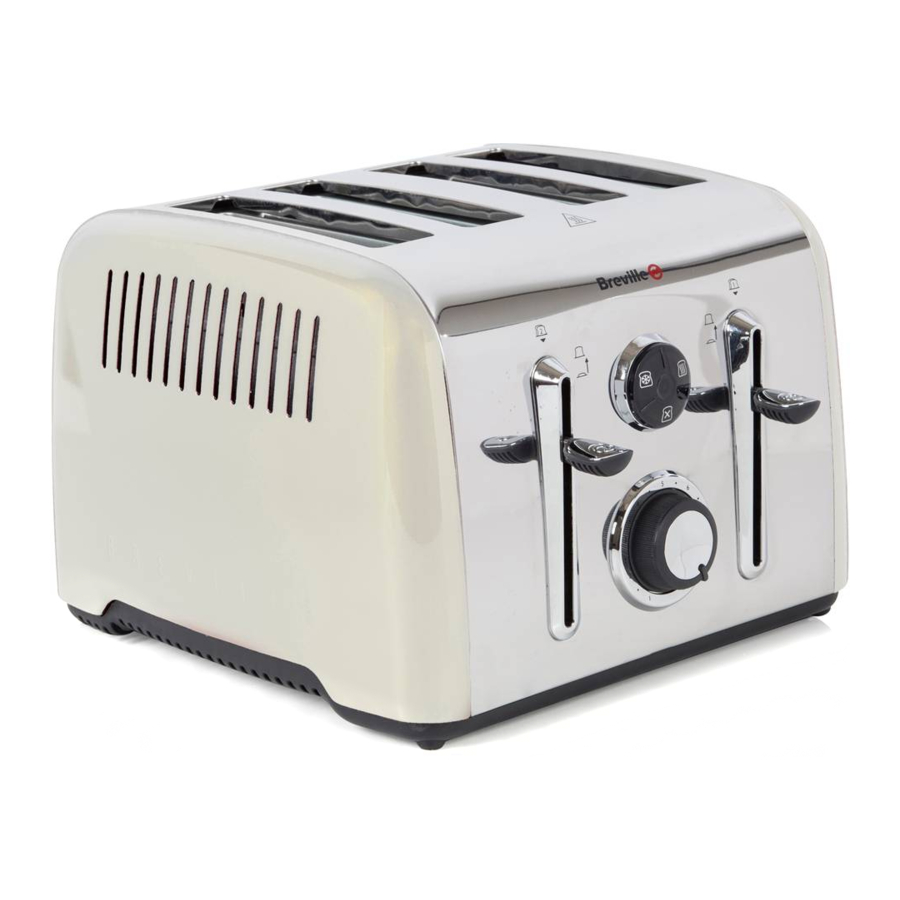
PRODUCT OVERVIEW

1, 2, 3, 4 Bread slots
- Loading handle for slots 1 and 2 with high lift and lift-and-look feature
- Crumb tray (at rear)
- Browning control
- Loading handle for slots 3 and 4 with high lift and lift-and-look feature
- Reheat button
- Cancel button
- Frozen bread button
Due to our policy of continuous improvement, the actual product may differ slightly from the one illustrated in these instructions.
BROWNING CONTROL
The browning control regulates how much the bread is toasted—in other words, the colour of the toast. Lower settings produce lighter toast and higher settings produce darker toast. When setting the browning control, remember that dry or thin slices of bread will toast quicker and require a lower setting. Moist or thick slices of bread will require a higher setting.
CANCEL BUTTON
The toasting process can be stopped at any time by pressing the cancel button.
HIGH LIFT FEATURE
The high lift feature uses the loading handle to help you to remove the toast. When toasting has finished, simply lift the loading handle upwards from its rest position to raise the toast and make it easier to remove.
LIFT-AND-LOOK FEATURE
The lift-and-look feature allows you to check the progress of the toast without cancelling the toasting process. Just lift the loading handle up at any time during toasting and lower it again to resume toasting. If you find your toast is cooked to your preference, press the cancel button to stop further toasting.
FROZEN BREAD FUNCTION
The frozen bread function allows you to toast bread straight from the freezer. Insert the bread into your toaster, press the loading handle down and then press the frozen bread button. Your toaster will extend the toasting time to allow the bread time to defrost. Watch the toast to ensure that it doesn't burn.
REHEAT FUNCTION
The reheat function will heat up toast that has cooled or gone cold. Press the loading handle down then press the reheat button. Watch the toast to ensure that it doesn't burn. Don't use the reheat function on buttered toast.
BREAD SLOTS 1 AND 2
Always use bread slots 1 and 2 when toasting one or two slices of bread. The  symbol above the loading handle indicates that this should be the first handle to be engaged.
BREAD SLOTS 3 AND 4
When toasting more than two slices of bread, use slots 3 and 4 in addition to slots 1 and 2. Lower the handle marked first, then lower the handle marked  . Loading handle will not latch unless loading handle is already in the latched position.
BEFORE FIRST USE
Never force bread into the toasting slots. Bread should fit easily into the toasting slots. Never toast slices of bread that have been buttered. Take extra care when toasting items that contain sugar, jam or preserves, as there is a risk of the ingredients leaking into the toaster, causing overheating. Don't use bent, damaged or broken bread in your toaster as it may cause it to jam.
Carefully remove your toaster from its box. Remove all packaging from inside the toasting slots.
When you first use your toaster, there may be a slight odour as the heating elements warm up for the first time. This is quite normal and not a cause for concern. To remove the odour, simply operate your toaster for the first time without any bread in it.
USING YOUR TOASTER
- Set the level of toasting using the browning control. The higher the number selected, the darker the toast will be.
- Place the bread into the toasting slots. You can toast one, two, three or four slices of bread but only place a single slice in each slot. If you are toasting one or two slices, place them into the right hand pair of slots. Press the loading handle down until it latches. The bread will be lowered into the toaster and toasting will begin. The loading handle will not latch if you are toasting one or two slices of bread and they are placed in the left hand slots, or if your toaster is not connected to the mains supply.
- When toasting has finished, the loading handle will rise and the toasted bread can be removed. You can lift the loading handle upwards beyond its rest position to help you remove the toast.
- If the toast is not done enough it can be toasted again. Turn the browning control to a lower setting and keep a careful eye on the toast to ensure that it doesn't burn.
- Toasting can be stopped at any time by pressing the cancel button.
TOASTING TIPS
- Toasting is a combination of drying and cooking the bread and, because moisture levels differ from one bread to another, toasting times can vary.
- For slightly dry bread, use a lower setting than normal.
- For fresh bread or whole wheat bread, use a higher setting than normal.
- Bread which has a very uneven surface will require a higher setting.
- Thicker cut pieces of bread (including crumpets) will take longer to toast— sometimes significantly longer. This is because more moisture must be evaporated from the bread before toasting can occur. Very thick pieces of bread may require two toasting cycles.
- When toasting raisin or other fruit breads, remove any loose raisins or fruit from the surface of the bread before putting it into your toaster. This will help prevent fruit pieces from falling into your toaster or sticking to the guard wires in the toasting slot.
SINGLE SLICE TOASTING
If you are toasting a single slice of bread, set the browning control to a lower setting than normal. By using a lower setting when toasting a single slice of bread, it will not be over toasted.
IF YOUR TOASTER JAMS
Never use a knife or any other utensil or implement to remove jammed bread. Never insert your fingers into the bread slots.
- Switch the toaster off at the mains supply socket and unplug it.
- Allow the toaster to completely cool down.
- Carefully ease the bread out of the toaster being careful not to damage the heating element.
CLEANING
 Always switch off, unplug and allow the toaster to cool down before moving, cleaning or storing. Never immerse the toaster or power cord and plug in water or any other liquid.
- Clean the outside of your toaster with a damp cloth then dry thoroughly.
- Never use harsh, abrasive or caustic cleaners.
CRUMB REMOVAL
It is important that crumbs are not allowed to build up inside your toaster. Excess crumbs are unhygienic and could catch fire.
Crumbs can be removed by sliding the crumb tray out from the bottom of your toaster. You can then tip the crumbs out. Always make sure that your toaster has completely cooled down and is disconnected from the mains supply before removing crumbs. Never use your toaster without the crumb tray fitted. Always replace the crumb tray before using your toaster.
ELECTRICAL SAFETY
This appliance must be earthed.
If the plug is not suitable for the socket outlets in your home, it can be removed and replaced by a plug of the correct type.
If the fuse in a moulded plug needs to be changed, the fuse cover must be refitted. The appliance must not be used without the fuse cover fitted.
If the plug is unsuitable, it should be dismantled and removed from the supply cord and an appropriate plug fitted as detailed. If you remove the plug it must not be connected to a 13 amp socket and the plug must be disposed of immediately.
If the terminals in the plug are not marked or if you are unsure about the installation of the plug please contact a qualified electrician.
Plug should be ASTA approved to BS1363
Fuse should be ASTA approved to BS1362

Ensure that the outer sheath of the cable is firmly held by the cord grip
REPLACEMENT PARTS
For additional or replacement parts, please visit www.breville.co.uk or call us on 0161 621 6900.
TROUBLESHOOTING
For troubleshooting and FAQs visit:
www.breville.co.uk/faqs
TURN ON YOUR CREATIVITY™
Let the Breville® team help you turn on your creativity with a gateway to a world of food and drinks without limits. You don't have to travel far—just to your computer, tablet or mobile—where you will discover our FREE website with top tips and recipes to inspire your imagination. Join us now at: www.turnonyourcreativity.com

AFTER SALES SERVICE
These appliances are built to the very highest of standards. There are no user serviceable parts. Follow these steps if the unit fails to operate:
- Check the instructions have been followed correctly.
- Check that the fuse has not blown.
- Check that the mains supply is functional.
If the appliance will still not operate, return the appliance to the place it was purchased for a replacement. To return the appliance to the Customer Service Department, follow the steps below:
- Pack it carefully (preferably in the original carton). Ensure the unit is clean.
- Enclose your name and address and quote the model number (located on the rating label) on all correspondence.
- Give the reason why you're returning it.
- If within the guarantee period, state when and where it was purchased and include proof of purchase (e.g. till receipt).
- Send it to our Customer Service Department at the address below:
Customer Service Department
Jarden Consumer Solutions (Europe) Limited
Middleton Road, Royton, Oldham
OL2 5LN, UK.
Telephone: 0161 621 6900 Fax: 0161 626 0391
e-mail: enquiriesEurope@jardencs.com

Documents / Resources
References
High Quality Small Kitchen & Cooking Appliances | Breville
Help Center Breville
High Quality Small Kitchen & Cooking Appliances | Breville
Download manual
Here you can download full pdf version of manual, it may contain additional safety instructions, warranty information, FCC rules, etc.
Advertisement
Thank you! Your question has been received!


Need Assistance?
Do you have a question about the VTT716 that isn't answered in the manual? Leave your question here.