Sunbeam Mixmaster JM6600 - Hand Mixer Manual
- Instruction booklet (16 pages) ,
- Service manual (6 pages)
Advertisement
Please read these instructions carefully and retain for future reference.
Sunbeam's Safety Precautions
SAFETY PRECAUTIONS FOR YOUR SUNBEAM MIXMASTER HAND MIXER.
- Never eject beaters, dough hooks or balloon whisks when the appliance is in operation.
- Ensure fingers are kept well away from moving beaters, dough hooks and balloon whisks.
- When mixing extremely heavy loads the appliance should not be operated for more than 1 minute 30 seconds. This does not apply to any of the recipes detailed in this booklet.

In the case of the mixer overheating due to excessive load, the safety cutout will activate, preventing the mixer from operating. Should this occur, switch the mixer off at the power outlet and allow the mixer to cool for 10 minutes before switching it back on.
Sunbeam is very safety conscious when designing and manufacturing consumer products, but it is essential that the product user also exercise care when using an electrical appliance. Listed below are precautions which are essential for the safe use of an electrical appliance:
- Read carefully and save all the instructions provided with an appliance.
- Always turn the power off at the power outlet before you insert or remove a plug. Remove by grasping the plug - do not pull on the cord.
- Turn the power off and remove the plug when the appliance is not in use and before cleaning.
- Do not use your appliance with an extension cord unless this cord has been checked and tested by a qualified technician or service person.
- Always use your appliance from a power outlet of the voltage (A.C. only) marked on the appliance.
- This appliance is not intended for use by persons (including children) with reduced physical, sensory or mental capabilities, or lack of experience and knowledge, unless they have been given supervision or instruction concerning use of the appliance by a person responsible for their safety.
- Children should be supervised to ensure that they do not play with the appliance.
- The temperature of accessible surfaces may be high when the appliance is operating.
- Never leave an appliance unattended while in use.
- Do not use an appliance for any purpose other than its intended use.
- Do not place an appliance on or near a hot gas flame, electric element or on a heated oven.
- Do not place on top of any other appliance.
- Do not let the power cord of an appliance hang over the edge of a table or bench top or touch any hot surface.
- Do not operate any electrical appliance with a damaged cord or after the appliance has been damaged in any manner. If damage is suspected, return the appliance to the nearest Sunbeam Appointed Service Centre for examination, repair or adjustment.
- For additional protection, Sunbeam recommend the use of a residual current device (RCD) with a tripping current not exceeding 30mA in the electrical circuit supplying power to your appliances.
- Do not immerse the appliance in water or any other liquid unless recommended.
- Appliances are not intended to be operated by means of an external timer or separate remote control system.
- This appliance is intended to be used in household and similar applications such as: staff kitchen areas in shops, offices and other working environments; farm houses; by clients in hotels, motels and other residential type environments; bed and breakfast type environments.
If you have any concerns regarding the performance and use of your appliance, please visit www.sunbeam.com.au or contact the Sunbeam Consumer Service Line.
Ensure the above safety precautions are understood.
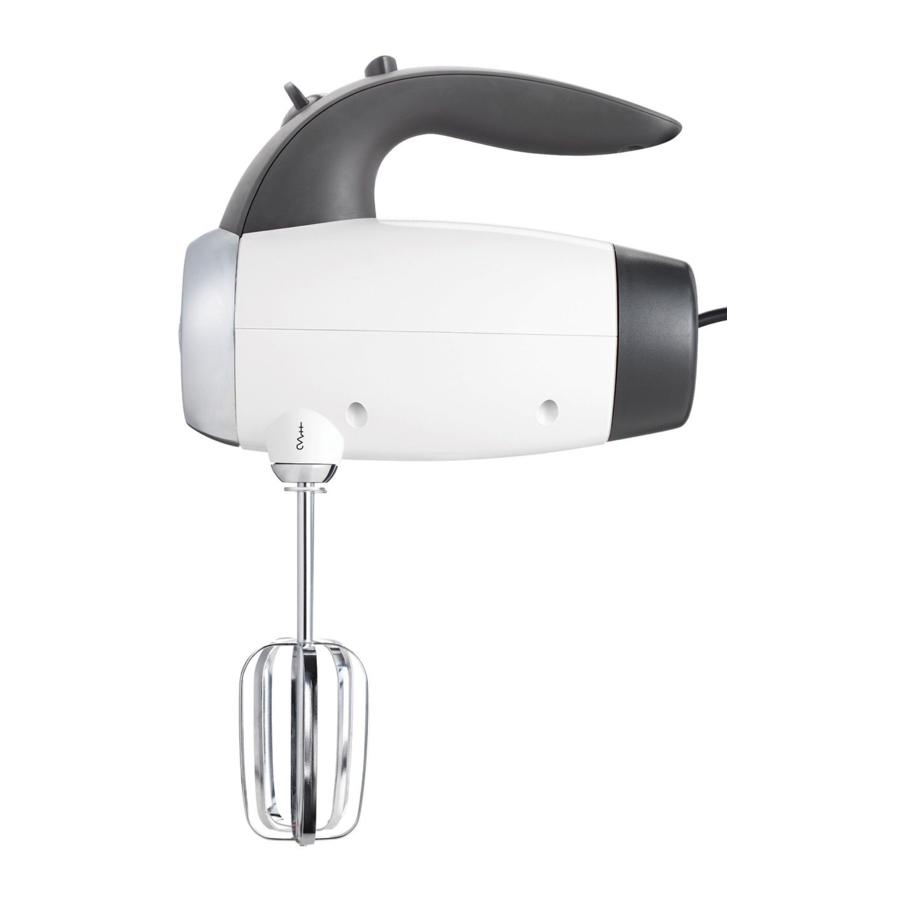
Features of your Mixmaster Hand Mixer

Boost button
Provides an extra burst of power for those extra tough mixing tasks.
Eject button
To effortlessly release the beaters, dough hooks or whisks for easy cleaning, press the speed dial button downwards.
Speeds
6 speed settings for even and thorough mixing.
'V-groove' beaters
Heavy duty 'V-groove' beaters for creaming butter and sugar, plus mixing cake mixes.
Powerful 235 watt motor
Handles the toughest mixing tasks.
Dough hooks
Heavy duty dough hooks take the hard work out of kneading dough and other heavy mixtures.
Balloon whisks
For whisking cream, egg whites, light batters and sponges.
Using your Beatermix Hand Mixer
Before using your MIXMASTER Hand Mixer
Before fitting the beaters, dough hooks or balloon whisks, be sure the power cord is unplugged from the power outlet and the speed control switch is in the 'OFF' position.
- Select the desired attachments, depending on the mixing task to be performed:
- Beaters for creaming butter and sugar, plus mixing cake mixes.
- Dough hooks for kneading dough and other heavy mixtures.
- Balloon whisks for whisking cream, egg whites, light batters and sponges.
- Inserting selected attachment;
Beaters:
Beaters can be inserted into either socket as the beaters are identical.
Dough hooks:
Take the dough hook – illustrated as dough hook (![]() ). Insert dough hook (
). Insert dough hook (![]() ) into the left hole on the underside of the mixer head. Take the dough hook that is hooked at the bottom – illustrated as dough hook (
) into the left hole on the underside of the mixer head. Take the dough hook that is hooked at the bottom – illustrated as dough hook (![]() ), and insert it into the right hole.
), and insert it into the right hole.
Note: Be sure both dough hooks click firmly in place, you may need to twist the dough hook slightly to engage it in position prior to pushing it in place.
Balloon Whisks:
Balloon whisks can be inserted into either socket as they are identical.
Using your MIXMASTER Hand Mixer
- With the speed control switch in the 'OFF' position, plug the power cord into a 230-240V AC power outlet.
- Place the beaters, dough hooks or balloon whisks into the bowl of ingredients to be mixed and using the speed control switch select the desired mixing speed.
Clearly marked instructions for correct mixing speeds for each type of mixture are shown in the mixing guide.
Tip: Always start mixing at slow speeds and increase the speed gradually to prevent ingredients splashing out of the mixing bowl. When adding dry ingredients, particularly flour, lower the speed to prevent the 'snow storm' effect. - Once you have finished mixing, turn the speed switch to the 'OFF' position and unplug the cord from the power outlet.
- To remove the beaters/dough hooks/balloon whisks, place fingers loosely around the spindles and press the eject button.
Note: Never eject the beaters, dough hooks or balloon whisks when the Mixmaster Hand Mixer is in operation.
Mixing Guide
| Mixing Task | Recommended Speed(s) |
| Kneading, Folding & Blending | 1 - 2 (low) |
| Light Mixing | 2 - 3 (low/med) |
| Creaming & Beating | 4 - 5 (med/high) |
| Whipping & Aerating | 5 - 6 (high) |
Mixing Tips
- For even and thorough mixing, slowly guide the beaters/dough hooks/balloon whisks around the sides and through the centre of the bowl in the same direction. Do not overmix.
- Always stop the mixer by moving the speed control switch to the 'OFF' position before raising the beaters/dough hooks/ balloon whisks out of the mixing bowl.
- When adding ingredients or scraping the bowl, stop the mixer and rest it on its base with the bowl below the beaters/dough hooks/balloon whisks to catch any mixture draining from them.
- When folding dry ingredients into delicate mixtures such as sponge cake, use speed 1-2. Do not overmix.
- Always start mixing at slow speeds. Gradually increase to the recommended speed as stated in the recipe.
Beating Egg Whites
Separate the yolk and white carefully ensuring there is no yolk in the egg white.
If some egg yolk is in the egg white, use the egg shell to scoop the yolk out. Even the slightest amount of yolk will prevent the whites beating.
Best results are achieved when using a glass or stainless steel mixing bowl. If using a plastic mixing bowl, rub the inside of the bowl with ½ a lemon. (This helps remove any grease.) Then wash and dry thoroughly.
For best result always ensure that the beaters/balloon whisks and mixing bowl are thoroughly clean and dry.
For maximum volume, beat egg whites at room temperature.
Beat egg whites using 5-6 setting. Beating time can vary depending on the freshness of the eggs.
Whipping Cream
Thickened cream gives the best results.
For maximum volume use well chilled cream. For best results, chill the bowl and beaters/ balloon whisks before whipping.
Use a deeper bowl to prevent splatter. Start by mixing on speed 2, then increase to speed 5-6 as the cream thickens.
If intending to use the cream for piping, add approximately 2 teaspoons of icing sugar per 300ml of cream before mixing. This will help the cream hold its shape.
Oven Temperature Guide
For your information, the following temperature settings are included as a guide. These settings may need to be adjusted to suit the individual range.
| Thermostat Settings | |||
| Description of Oven Temperatures | Degrees Celcius (°C) | Degrees Farenheit (°F) | Gas Mark |
| Very Slow | 120 | 250 | ½ |
| Slow | 140-150 | 300 | 1-2 |
| Moderately Slow | 160 | 325 | 3 |
| Moderate | 180 | 350 | 4 |
| Moderately Hot | 200 | 400 | 6 |
| Hot | 220 | 425 | 8 |
| Very Hot | 240 | 475 | 9 |
Note: If using fan forced ovens be sure to turn the temperature down by 20°C. Also check recipes.
Care and Cleaning
Before cleaning your Sunbeam Mixmaster Hand Mixer, ensure that the power is turned off at the power outlet, then remove the plug.
Wipe over the outside area of the Mixmaster Hand Mixer with a dampened cloth and polish with a soft dry cloth. Wipe any excess food particles from the power cord.
Do not immerse the motor housing in water or any other liquid. Do not use harsh detergents or abrasive cleaners to clean the motor housing as these will scratch and damage the surface.
Wash the beaters/dough hooks/balloon whisks in warm soapy water with a cloth or sponge. Rinse and dry thoroughly. Do not use scouring pads or abrasive cleaners. The beaters/dough hooks/balloon whisks can also be placed in a dishwasher.
Note: Never wind the power cord around the motor after use as the warmth of the motor may cause damage to the power cord.

Documents / ResourcesDownload manual
Here you can download full pdf version of manual, it may contain additional safety instructions, warranty information, FCC rules, etc.
Advertisement
Thank you! Your question has been received!


Need Assistance?
Do you have a question about the Mixmaster JM6600 that isn't answered in the manual? Leave your question here.