
Related Manuals for Makita XUX01Z


Summary of Contents for Makita XUX01Z
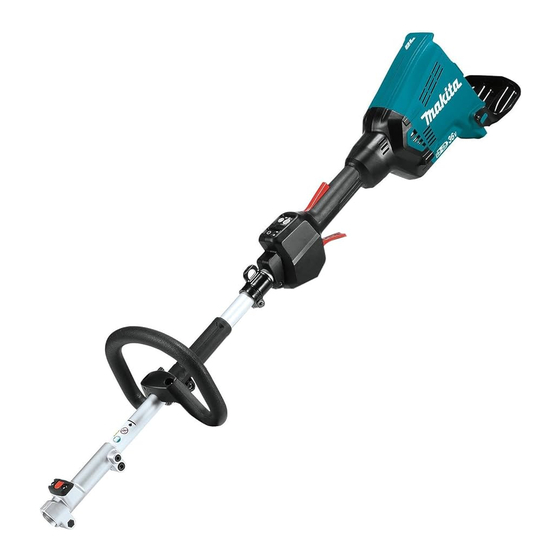
- Page 1 INSTRUCTION MANUAL MANUAL DE INSTRUCCIONES Cordless Multi Function Power Head Herramienta Multifuncional Inalámbrica XUX01 IMPORTANT: Read Before Using. IMPORTANTE: Lea antes de usar.
-
Page 2: Specifications
ENGLISH (Original instructions) SPECIFICATIONS Model: XUX01 No load speed 0 - 5,700/min (without attachment) Medium 0 - 8,200/min High 0 - 9,700/min Overall length 1,011 mm (39-3/4″) Rated voltage D.C. 36 V Net weight 4.1 kg - 7.7 kg (8.9 lbs - 17.0 lbs) •... -
Page 3: General Power Tool Safety Warnings
Personal Safety SAFETY WARNINGS Stay alert, watch what you are doing and use common sense when operating a power tool. Do not use a power tool while you are tired or General power tool safety warnings under the influence of drugs, alcohol or med- ication. A moment of inattention while operating WARNING: power tools may result in serious personal injury. - Page 4 Store idle power tools out of the reach of chil- Service dren and do not allow persons unfamiliar with Have your power tool serviced by a qualified the power tool or these instructions to operate repair person using only identical replacement the power tool.
-
Page 5: Parts Description
Charge the battery cartridge if you do not use SAVE THESE INSTRUCTIONS. it for a long period (more than six months). CAUTION: Only use genuine Makita batteries. Use of non-genuine Makita batteries, or batteries that have been altered, may result in the battery bursting causing fires, personal injury and damage. It will also void the Makita warranty for the Makita tool and charger. PARTS DESCRIPTION... -
Page 6: Functional Description
FUNCTIONAL Status Indicator lamps Blinking DESCRIPTION Overload WARNING: Always be sure that the tool is switched off and the battery cartridge is removed before adjusting or checking function on the tool. Overheat Failure to switch off and remove the battery cartridge may result in serious personal injury from accidental start-up. Installing or removing battery Over cartridge discharge CAUTION:... -
Page 7: Main Power Switch
Switch action Indicator lamps Remaining capacity WARNING: For your safety, this tool is equipped Lighted Blinking with lock-off lever which prevents the tool from unin- 75% to 100% tended starting. NEVER use the tool if it runs when you simply pull the switch trigger without pressing the lock-off lever. -
Page 8: Mounting The Handle
Electronic torque control function Indicator Mode High The tool electronically detects a sudden drop in the rotation speed which may cause a kickback. In this situation, the tool automatically stops to prevent further rotation of cutting tool. To restart the tool, release the switch trigger. Clear the cause of sudden drop in the rotation speed and then turn the tool on. Medium NOTE: This function is not a preventive measure for kickbacks. ASSEMBLY WARNING: Always be sure that the tool is switched off and battery cartridge is removed Reverse button for debris removal before carrying out any work on the tool. Failure to switch off and remove the battery cartridge may result... - Page 9 Mounting the attachment pipe Mount the attachment pipe to the power unit. Turn the lever toward the cutting attachment. Fig.12 ► 1 . Release button 2. Lever 3. Pipe Adjusting the handle/hanger position ► 1 . Lever Adjust the handle and hanger position to obtain confort- able handling of the tool. Align the pin with the arrow mark and insert the attachment pipe until the release button pops up. Loosen the hex socket head bolt on the handle. Move the handle to a comfortable working position and then tighten the bolt.
-
Page 10: Maintenance
► 1 . Buckle ► 1 . Battery guard Hex wrench storage To maintain product SAFETY and RELIABILITY, repairs, any other maintenance or adjustment should CAUTION: Be careful not to leave the hex be performed by Makita Authorized or Factory Service wrench inserted in the tool head. It may cause Centers, always using Makita replacement parts. injury and/or damage to the tool. When not in use, store the hex wrench as illustrated to keep it from being lost. 10 ENGLISH... -
Page 11: Troubleshooting
OPTIONAL WARRANTY ACCESSORIES Warranty Policy Every Makita tool is thoroughly inspected and tested before CAUTION: These accessories or attachments leaving the factory. It is warranted to be free of defects from are recommended for use with your Makita tool workmanship and materials for the period of ONE YEAR specified in this manual. The use of any other from the date of original purchase. Should any trouble accessories or attachments might present a risk of develop during this one year period, return the COMPLETE injury to persons. Only use accessory or attachment tool, freight prepaid, to one of Makita’s Factory or Authorized for its stated purpose. -
Page 12: Especificaciones
ESPAÑOL (Instrucciones originales) ESPECIFICACIONES Modelo: XUX01 Velocidad sin carga Bajo 0 r/min - 5 700 r/min (sin el accesorio) Medio 0 r/min - 8 200 r/min Alto 0 r/min - 9 700 r/min Longitud total 1 011 mm (39-3/4″) Tensión nominal 36 V c.c. -
Page 13: Advertencias Generales De Seguridad Para Herramientas Eléctricas
Cuando utilice una herramienta eléctrica en ADVERTENCIAS DE exteriores, utilice un cable de extensión apro- piado para uso en exteriores. La utilización de SEGURIDAD un cable apropiado para uso en exteriores redu- cirá el riesgo de que se produzca una descarga eléctrica. Advertencias generales de Si no es posible evitar usar una herramienta seguridad para herramientas eléctrica en condiciones húmedas, utilice un eléctricas alimentador protegido con interruptor de cir- cuito de falla a tierra (ICFT). El uso de un ICFT... - Page 14 No permita que la familiaridad adquirida Mantenga los mangos y superficies de asi- debido al uso frecuente de las herramientas miento secos, limpios y libres de aceite o haga que se sienta confiado e ignore los prin- grasa. Los mangos y superficies de asimiento cipios de seguridad de las herramientas. Un resbalosos no permiten una manipulación segura descuido podría ocasionar una lesión grave en ni el control de la herramienta en situaciones...
- Page 15 (3) el producto con el que se utiliza la batería. PRECAUCIÓN: Utilice únicamente baterías No desarme el cartucho de batería. originales de Makita. El uso de baterías no origina- Si el tiempo de operación se ha acortado en les de Makita, o de baterías alteradas, puede ocasio- exceso, deje de operar de inmediato. Podría nar que las baterías exploten causando un incendio, correrse el riesgo de sobrecalentamiento, lesiones personales y daños. Asimismo, esto inva-...
-
Page 16: Descripción De Las Piezas
DESCRIPCIÓN DE LAS PIEZAS Cartucho de batería Palanca de desbloqueo Gatillo interruptor Colgador Mango Botón de liberación Traba (específica del Indicador de velocidad país) Luz de alimentación Botón de encendido Botón de inversión Arnés para hombro principal DESCRIPCIÓN DEL FUNCIONAMIENTO ADVERTENCIA: Asegúrese siempre de que la herramienta esté apagada y que el cartucho de batería haya sido extraído antes de realizar cualquier ajuste o revisión del funcionamiento de la herramienta. El no seguir esta indicación de apagar y quitar el cartucho de batería puede ocasio-... -
Page 17: Protección Contra Sobrecarga
Protección en caso de PRECAUCIÓN: Introduzca siempre com- sobredescarga pletamente el cartucho de batería hasta que el indicador rojo no pueda verse. Si no, podría Cuando la capacidad de la batería sea baja, la herra- accidentalmente salirse de la herramienta y caer al mienta se detendrá automáticamente y el indica- suelo causando una lesión a usted o alguien a su parpadeará. alrededor. Si la herramienta no funciona aun con los interrupto- PRECAUCIÓN: No instale el cartucho de res activados, retire las baterías de la herramienta y batería a la fuerza. Si el cartucho no se desliza al cárguelas. -
Page 18: Ajuste De Velocidad
Para evitar que el gatillo interruptor sea jalado acciden- Interruptor de encendido principal talmente, se proporciona una palanca de desbloqueo. ADVERTENCIA: Desactive siempre el inte- rruptor de encendido principal cuando no vaya a utilizar la herramienta. Para poner la herramienta en modo de espera, oprima el botón de encendido principal hasta que la luz de ali- mentación principal se encienda. Para apagar la herra- mienta, vuelva a oprimir el botón de encendido principal. ► 1 . -
Page 19: Montaje Del Mango
Botón de inversión para la MONTAJE eliminación de residuos ADVERTENCIA: Asegúrese siempre de que ADVERTENCIA: Apague la herramienta y la herramienta esté apagada y que el cartucho de retire el cartucho de batería antes de quitar la batería haya sido extraído antes de realizar cual- maleza o residuos que se hayan enredado y que quier trabajo en la herramienta. - Page 20 Ensamble del aditamento del tubo Ensamble el aditamento del tubo en la unidad motorizada. Gire la palanca hacia el accesorio de corte. Fig.12 ► 1 . Botón de liberación 2. Palanca 3. Tubo Ajuste de la posición del mango/ colgador Ajuste la posición del mango y del colgador para poder ► 1 . Palanca manipular de manera cómoda la herramienta.
-
Page 21: Mantenimiento
Colocación del arnés para hombro Almacenamiento de la llave Allen (hexagonal) ADVERTENCIA: Sea extremadamente cui- dadoso en mantener el control de la herramienta PRECAUCIÓN: Tenga cuidado de no dejar en todo momento. No permita que la herramienta la llave hexagonal insertada en el cabezal de la se desvíe hacia usted ni hacia otra persona alre- herramienta. -
Page 22: Resolución De Problemas
Para mantener la SEGURIDAD y FIABILIDAD del pro- ducto, las reparaciones, y cualquier otra tarea de man- tenimiento o ajuste deberán ser realizadas en centros de servicio autorizados o de fábrica Makita, empleando siempre repuestos Makita. RESOLUCIÓN DE PROBLEMAS Antes de solicitar alguna reparación, primero realice una inspección por su cuenta. Si detecta algún problema que no esté explicado en el manual, no intente desensamblar la herramienta. En vez de esto, solicite la reparación a un centro de servicio autorizado de Makita, usando siempre piezas de repuesto Makita. Estado de la anomalía Causa probable (avería) Remedio El motor no funciona. El cartucho de batería no está Instale el cartucho de batería. instalado. Problema con la batería (bajo voltaje) Recargue la batería. Si la recarga no es efectiva,... -
Page 23: Accesorios Opcionales
DEL PLAZO DE ESTA GARANTÍA. PRECAUCIÓN: Estos accesorios o aditamen- MAKITA RENUNCIA A LA RESPONSABILIDAD POR tos están recomendados para utilizarse con su CUALQUIER GARANTÍA IMPLÍCITA, INCLUYENDO herramienta Makita especificada en este manual. GARANTÍAS DE “COMERCIABILIDAD” Y El empleo de cualquier otro accesorio o aditamento “ADECUACIÓN PARA UN PROPÓSITO ESPECÍFICO”, puede conllevar el riesgo de lesiones personales. DESPUÉS DEL PLAZO DE UN AÑO DE ESTA Utilice los accesorios o aditamentos solamente para GARANTÍA. - Page 24 Para reducir la exposición a estos productos químicos: trabaje en un área bien ventilada y póngase el equipo de seguridad indicado, tal como las máscaras contra polvo que están especialmente diseñadas para filtrar partículas microscópicas. Makita Corporation 3-11-8, Sumiyoshi-cho, Anjo, Aichi 446-8502 Japan 885603-946...