
Related Manuals for Sartorius Genius Series


Summary of Contents for Sartorius Genius Series
- Page 1 (217) 352-9330 | Click HERE Find the Sartorius Stedim Biotech Genius ME215S at our website:...
- Page 2 Operating Instructions Sartorius Genius Series ME and SE Models Electronic Analytical and Semi-microbalances 98648-008-84 Artisan Technology Group - Quality Instrumentation ... Guaranteed | (888) 88-SOURCE | www.artisantg.com...
-
Page 3: Intended Use
Intended Use Genius is a high-resolution balance of Genius balances save work and speed Symbols special accuracy for extremely precise up both simple and complex routine The following symbols are used in these measurement of mass. The Genius applications through: instructions: series covers a range between 0.001 mg and 610 g. -
Page 4: Table Of Contents
Contents 2 Intended Use 105 Extra Functions 105 Second Tare Memory 3 Contents 107 Individual Identification Codes 111 Saving Values Manually in M+ 4 Warning and Safety Instructions 112 Changing the Resolution 114 Product Data Memory 5 Operating Design 116 SQmin Function 118 DKD Uncertainty of Measurement 9 Getting Started 120 Combining Applications... -
Page 5: Warning And Safety Instructions
Sartorius equip- Do not operate in a hazardous ment and for any connections of cables area/location or equipment not supplied by Sartorius and must check and, if necessary, Make sure that the voltage rating correct these modifications and connec- printed on the AC adapter is identical to tions. -
Page 6: Operating Design
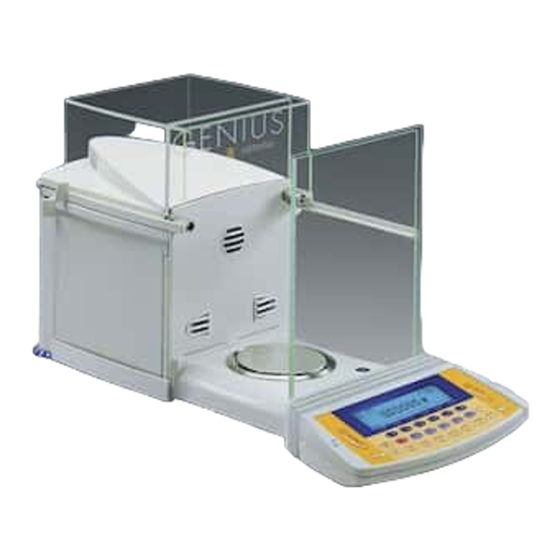
Operating Design The Genius balance consists of a weighing ME215/235/254/414/415/614: cell, a draft shield and a display and control unit. In addition to the choice of power supply, via AC adapter or external rechargeable battery pack, your balance also has interface ports for connecting additional devices, such as a printer, computer, or universal remote control switch, etc. - Page 7 Operating Design Function Keys (Soft Keys) Operation Bar Graph: The current function of soft keys is The bar graph indicates how much of the indicated in the bottom line of the display balance’s capacity is “used up” by the Display for Weights and (footer).
- Page 8 Tare Memory, Calculated Values: Display for Menu Parameter To set a parameter: The symbols displayed here indicate when Settings (Setup) Press the soft key repeatedly there is a value in one of the tare This display is divided into three sections. until the desired setting is selected memories or when the value shown is a (displayed inversely)
- Page 9 To assign a bar code scanner or The response to an operator error is keyboard input to a function, press one In addition to Sartorius printers (such as identical in all operating modes. See of the following soft keys: the YDO03-0CE), you also have the the chapter entitled “Error Codes”...
-
Page 10: Getting Started
Getting Started Storage and Shipping Conditions Allowable storage temperature: +5 ...+40°C | +41 ... +104°F The packaging has been designed to ensure that the balance will not be damaged even if it is dropped from a height of 80 centimeters (about 32 inches). Do not expose the balance to extreme temperatures, jolts, impact, vibration or moisture. -
Page 11: Installation Instructions
$ For information on longer cables, please see the “Accessories” section $ If you wish to use a longer cable, it must be installed by authorized Sartorius service technicians Artisan Technology Group - Quality Instrumentation ... Guaranteed | (888) 88-SOURCE | www.artisantg.com... - Page 12 ME5, SE2: Setting Up the ME5 or SE2 Balance § Place the components below on the weigh cell base in the order given: – Shield disk – Weighing pan Please note: after placing the weighing pan on the base, turn the pan slightly towards the left then the right while pressing down on it to lock.
-
Page 13: Connecting The Balance To Ac Power
Sartorius office or dealer Use only – Original Sartorius AC adapters and power cords – AC adapters with a registered approval rating from a national testing laboratory $ To use a main feeder cable from the ceiling or to mount a CEE plug, have a certified electrician install it $ To use an external rechargeable battery pack, refer to the “Accessories”... -
Page 14: Warmup Time
Changes or modifications not expressly approved by Sartorius AG could void the user‘s authority to operate the equipment. -
Page 15: Leveling The Balance
Antitheft Locking Device To fasten an antitheft locking device, use the lug located on the rear panel of the balance. § Secure the balance at the place of installation, e.g., with a chain or a lock ME215/235/254/414/415/614: Leveling the Balance Purpose: –... -
Page 16: Configuring The Balance
Configuring the Balance Purpose Setting the Language You can configure your Genius balance You can choose from 5 languages for to meet individual requirements by the information display: entering user data and setting parameters in the Setup menu. – German –... -
Page 17: Navigating In The Setup Menu
Navigating in the Setup Menu (Examples): Example: Adapt the balance to “Extreme vibration” by selecting this setting Step Press key(s) (or follow instructions) Display | Printout 1. Select Setup menu 2. Confirm “Balance/scale functions” soft key 3. Select menu item “Adapt filter” soft key, then and confirm soft key... -
Page 18: Entering The Time And Date
Example: Entering the time and date Step Press key(s) (or follow instructions) Display | Printout s, then 1. Select Setup menu; select “Device parameters” soft keys 2. Set clock press repeatedly, then press 1 1 . 1 2 3. Enter the time . -
Page 19: Setting The Balance Functions
BAL.FUNC. Setting the Balance Functions ( Purpose Preparation Extra Functions § Exit the Setup menu: This menu item enables you to Show available balance functions: configure the balance functions, i.e., press the soft key § Select Setup menu: press the s key to meet individual requirements by >... - Page 20 Balance Functions (Overview) ο factory setting √ user-defined setting(s) Setup Calibration | Cal | isoTST External calibration | adjustment** with Balance Adjustment key function factory-defined calibration weight functions External calibration | adjustment**; user-defined weight Internal calibration | adjustment Internal linearization Cal key blocked reproTEST ο...
- Page 21 ο Grams | g Setup – Weight unit 1 Balance Kilograms | kg* functions Carats | ct Pounds | lb* Ounces | oz* Troy ounces | ozt* Hong Kong taels | tlh* Singapore taels | tls* Taiwanese taels | tlt* Grains | GN* Pennyweights | dwt* # Milligrams | mg...
-
Page 22: Setting The Device Parameters
Device Setting the Device Parameters ( Purpose Preparation Entering or Changing a Password This menu item enables you to Display available device parameters configure the balance, i.e., to meet – Let’s assume that a password with 8 § Select the Setup menu: individual requirements by selecting characters max. - Page 23 Extra Functions § New password: Enter the numbers and/or letters for the new password § Exit the Setup menu: (8 characters max.) press the soft key If “none” is displayed, this means no password has been assigned > Restart the application To delete the user password: Press .
- Page 24 Device Parameters (Overview) ο factory setting √ user-defined setting(s) Setup – Device parameters ο Same function Draft shield Keys Left/right key Separate function ο Off Automatic mode Close –> function –> open Close –> perform function ο Show all decimal places Weight resolution Do not show last decimal place...
- Page 25 Setup – Device parameters Interfaces Serial YDP01IS printer YDP02 see YDP03 (not with 19,200 baud) ο YDP03 ο 1200 baud (PRINTER) Baud rate 2400 baud 4800 baud 9600 baud 19,200 baud Parity Space ο Odd Even Handshake Software handshake ο Hardware handshake, mode 1 character after CTS YDP01IS Label...
- Page 26 Setup – Device parameters ο Print key p Interfaces Function: external switch Tare key Calibration key F1 function key (Right soft key) Clear function key c F2 function key (2nd soft key from the right) Bar code scanner/ extra keyboard Ionizer key Right draft shield key Left draft shield key...
-
Page 27: Setting The Application Parameters
Application Setting the Application Parameters ( Purpose Preparation Extra Functions § Exit the Setup menu: This menu item enables you to Display available application configure the balance, i.e., adapt the parameters: press the soft key § Select the Setup menu: balance to your individual requirements press the s key by selecting from a list of parameter... - Page 28 Application Parameters (Overview) ο factory settings √ user-defined setting(s) ο Off (weighing only) Setup – Application 1 Application (Basic settings) ο Grams /g parameters Toggle wt. units Weight unit 1 Kilograms /kg* Carats /ct Pounds /lb* Ounces /oz* Troy ounces /ozt* Hong Kong taels /tlh* Singapore taels /tls* Taiwanese taels /tlt*...
- Page 29 * = How to run this application is described in detail in our Masterpro “LA….” Installation and Operating Instructions. Request your copy directly from Sartorius or download it from the Internet (www.sartorius.com; see “download”) Artisan Technology Group - Quality Instrumentation ... Guaranteed | (888) 88-SOURCE | www.artisantg.com...
- Page 30 Setup – Application 1 Calculation Decimal places in None Application (Basic settings) calculated result 1 decimal place ο 2 decimal places parameters 3 decimal places 4 decimal places 5 decimal places 6 decimal places 7 decimal places Density Method Density of liquid ο...
- Page 31 * = How to run this application is described in detail in our Masterpro “LA….” Installation and Operating Instructions. Request your copy directly from Sartorius or download it from the Internet (www.sartorius.com; see “download”) Artisan Technology Group - Quality Instrumentation ... Guaranteed | (888) 88-SOURCE | www.artisantg.com...
- Page 32 * = How to run this application is described in detail in our Masterpro “LA….” Installation and Operating Instructions. Request your copy directly from Sartorius or download it from the Internet (www.sartorius.com; see “download”) Artisan Technology Group - Quality Instrumentation ... Guaranteed | (888) 88-SOURCE | www.artisantg.com...
- Page 33 Setup – Application 3 Statistics Automatic storage o Off Application (Data records) On, first value at stability parameters On, last value at stability On, value 70% – 130% at stability Minimum load for None automatic storage 10 digits o 20 digits 50 digits 100 digits 200 digits...
- Page 34 ο Off Setup – Extra Functions Application F4 key ο No parameters Extra Functions 2nd tare memory Container tare weight F5 key Automatic printout Net value Tare/preset tare ο Off Identification Printout Automatic, if configured Once after pressing p/r codes (IDs) if configured ο...
-
Page 35: Selecting The Printout Function
Printout Selecting the Printout Function ( Purpose Preparation Extra Functions This menu item enables you to Display available printout parameters § Exit the Setup menu: configure the printout to meet your § Select the Setup menu: individual requirements by selecting press the soft key press s... - Page 36 Printout Parameters (Overview) ο factory setting √ user-defined setting(s) SETUP Application- Stability parameter Without stability Printout defined output o With stability Print on request, then tare o Off Auto print upon initialization o All values (of the application) Only main values Configured printout See own chapter starting on the next page...
-
Page 37: Printout Configuration
Printout Configuration Purpose Features You can turn off automatic printout This menu item enables you to – Maximum items in a data record: 60 generation in the Setup menu configure individual printout formats. [Application parameters: With the formulation, totalizing and –... - Page 38 Example: Configure an Individual Printout for Counting Application to Include Dotted Line, Date/Time, Piece Count and Net Weight Settings (changes in the factory settings required for this example): Setup: Application parameters: Application 1: Counting Exit the Setup menu: press the soft key Then call Setup again: Printout: Application-defined output: Configured printout Step...
-
Page 39: Device Information
Device Information Purpose Factory Settings § Print device information: This menu item enables you to have Each parameter category has a factory Press the /r key information displayed about the specific setting. In the Setup menu, you can > Printout (Example) balance (“device”). -
Page 40: Operating The Balance
Use forceps or a similar utensil that is The balances of the Genius Series have been designed to counteract this phenom- appropriate to place your sample care- enon: the glass surfaces of the draft shield fully on the pan. -
Page 41: Below-Balance Weighing
To exit this screen: press the soft key $ Call your nearest Sartorius Service Center to schedule a maintenance appointment $ To tare the balance, if desired, press t > The S symbol is displayed when a verified balance is zeroed or tared (±0.25 digit) - Page 42 For Service: Additional Functions Calibration Using Verified Balances as Legal Press the soft key Measuring Instruments in the EU. In addition to the functions: This balance is not allowed to be used – alphanumeric input > See the section on “Calibration/Adjust- for weighing goods intended for direct –...
- Page 43 Example W2 Enter “ABC123” as the sample ID Note: – The sample ID generally applies to one weighing operation only – The ID is deleted after data output Step Press key(s) (or follow instructions) Display/Output Initial state (balance unloaded) Max 210 g d=0.01mg 100% (ID can also be entered while...
-
Page 44: Device Parameters
Device Parameters Opening and Closing This function can be deactivated. – A lower weight resolution is possible the Draft Shield K If not, the draft shield doors will close when the draft shield doors are open. automatically if the balance has not –... - Page 45 Preparation Turn on the balance: press e > The Sartorius Logo is displayed Configure the draft shield function in the Setup menu: press s Select “Device parameters”: press the soft key, then the soft key Draft shield Select : press the soft key ο...
-
Page 46: Static Electricity Eliminator (Ionizer)
ME215/235/414/415/614 Models: Password Interfaces N.I.C.E. Static Electricity Eliminator You can enter a password to block access (Ionizer) i to the menu parameter settings and to ID Purpose code and exact calibration weight inputs. This item enables you to set the Purpose See the detailed description in the chapter parameters for the following interfaces:... - Page 47 Control Port Function Display Keys You can connect either a checkweighing You can assign different functions to the c key for deleting input and display or an external universal switch to You can configure the display for your the serial communications port on the individual needs.
-
Page 48: Calibration, Adjustment, Linearization
Calibration, Adjustment, Linearization Purpose Features You can have the calibration/adjustment Calibration is the determination of You can configure whether the results documented in an ISO/GLP- the difference between the weight calibration mode compliant printout; see page 131. readout and the true weight (mass) of –... - Page 49 Preparation Releasing Access to Select the balance function for “calibration/adjustment”: press s External Calibration Remove the cover plate from the back Balance/scale functions To select the : press the soft key of the balance housing Calibration/adjustment Select : press the soft key Move switch 1 in the direction of the arrow...
- Page 50 Example: Set the parameters for calibration and adjustment; e.g., with manual calibration/adjustment, isoCAL off Step Press key(s) (or follow instructions) Display/Output 1. Switch on the balance, Sartorius logo and self-test if not already on Max 210 g d=0.01mg 100% 000000 2.
- Page 51 Step Press key(s) (or follow instructions) Display/Output 9. Confirm calibration and soft key adjustment sequence = last setting selected 10. Select other settings, if desired soft keys and confirm (e.g., Calibration with manual adjustment) 11. Exit Cal./adjustment sequence soft key 12.
- Page 52 Selecting the Calibration/Adjustment – Internal calibration/adjustment: – External calibration/adjustment with a Internal cal./ Parameter calibration weight determined by the Selection mode adjustment The setting user: Ext. cal./adj.; must be selected in the Setup menu user-defined wt. (factory setting). After pressing the –...
- Page 53 Internal Calibration/Adjustment Internal Linearization Internal First set either In the Setup menu (Balance/scale func- cal./adjustment tions: Calibration/adjustment: CAL key Selection mode (factory function), you need to have set Internal linearization setting) in the Setup menu Selection (Balance/scale functions: or select this using the mode Calibration/adjustment: CAL key (factory setting).
- Page 54 Calibration and Adjustment Sequence External Calibration/Adjustment with In the Setup menu, you can configure a User-Defined Calibration Weight the balance so that: In the Set up menu (Balance/scale – calibration is always followed functions: Calibration/adjustment: automatically by adjustment CAL key function), you need to set Ext.
- Page 55 Define the Calibration Weight Step Press key(s) (or follow instructions) Display/Output 1. Select Setup menu 2. Select “Balance/scale functions” soft key 3. Select “Calibration/adjustment” soft key 4. Select parameter for external soft key 5 x weight soft key 5. Select “Cal./adj. wt.” soft key 100.00000 = last setting selected 2 0 0 .
- Page 56 – The balance Setup mode is not active (e.g., equation for calculation) (exept for ME614S-0CE)**: – This is done after Sartorius Customer – No number or letter input is active – The load has not been changed within Service has modified the balance the last 2 minutes –...
- Page 57 -------------------- Calibration/Adjustment Printout GLP header 13.03.2000 09:17 SARTORIUS Data Block Printout Model ME215S You can have the results of a calibration/ Ser. no. 60419914 adjustment procedure printed out. You Ver. no. 01-41-02 can configure whether the printout is generated as soon as the procedure is...
-
Page 58: Repeatability Test
The “reproTEST” function automatically determines the repeatability (also called Definition “reproducibility”) of results (based on > The Sartorius logo is displayed Repeatability is the ability of the balance 6 individual measurements). In this way, to display identical readouts when it is... -
Page 59: Application Programs
Application Programs Restoring the Factory Settings Soft Key Functions Each parameter has a factory setting. Start In the Setup menu, you can choose to Start application have the following performed after Weighing confirming with Toggle to the basic – Restore all factory settings in the Setup weighing function menu (Factory settings) -
Page 60: Toggle Between Two Weight Units
Toggle between Two Weight Units, Purpose Preparation With this application, you can switch Balances used as legal measuring instruments in the EU*: grams, carats and the display of a weight value back and milligrams are the only weight units available forth between two weight units by pressing a soft key. - Page 61 Additional Functions Toggling to the Next Application In addition to the functions for: Press d – alphanumeric input, > See the section on the – taring (not during corresponding application program for alphanumeric input), further instructions – printing (NUM print; S ID), Setup (Setting Parameters) you can also access the following Press s...
-
Page 62: Counting
Counting Purpose Features Factory Settings of the Parameters With this application, you can determine – Optional balance configuration in Accuracy when calculating piece weight: Display accuracy the number of pieces of approximately Setup for automatically initializing equal weight. this application and loading the most recent reference sample quantity “nRef”... - Page 63 Turning Off the Balance $ Turn on the balance: press e Press e > The Sartorius logo is displayed > The balance shuts off Select the Counting application in the Setup menu: press s > The display goes blank, then...
- Page 64 Example Determining an Unknown Piece Count; Weighing-In the Preset Reference Sample Quantity Settings (changes in the factory settings required for this example): Setup: Application parameters: Application 1: Counting: Average piece weight updating: Manual Setup: Application-defined output: Auto print upon initialization: All values Step Press key(s) (or follow instructions) Display/Output...
-
Page 65: Weighing In Percent
Weighing in Percent Purpose Features Factory Settings of the Parameters This application allows you to obtain – Reference percentage “pRef” loaded weight readouts in percent that are in from long-term memory when you Storage parameter: Display accuracy proportion to a reference weight. turn on the balance Alternatively, you can have the value dis- played as a difference in percent... - Page 66 § Press the soft key Turn on the balance: press e > See “Calibration/Adjustment” > The Sartorius logo is displayed for further instructions Select the Weighing in Percent application (“Percent weigh”) in the Setup menu: press s Toggling to the Next Application §...
- Page 67 Examples Weighing in Percent with Reference Weight Taken from Weight on Balance Settings (changes in the factory settings required for this example): Setup: Application parameters: Application 1: Percent weigh. Setup: Printout: Application-defined output: Auto print upon initialization: All values Step Press key(s) (or follow instructions) Display/Output 1.
-
Page 68: Calculation
Calculation Purpose Features Factory Settings of the Parameters With this application you can calculate – You can store an equation and Decimal places in calculated result: 2 decimal places a weight value using an algebraic equation. configure the Setup menu to initialize This can be used, for example, to deter- this program automatically with the mine the weight per unit area or “gsm”... - Page 69 Turn on the balance: press e In addition to the functions for: – alphanumeric input, > The Sartorius logo is displayed – taring (not during alphanumeric input), Select the Calculation application program in the Setup menu: press s – printing,...
- Page 70 Example Calculate the weight per unit area (grammage or gsm weight) of paper: determine the gsm of a sheet of A4 paper with the dimensions 0.210 m x 0.297 m = 0.06237 m . The gsm weight is a product of the division of the weight by the surface area. Settings (changes in the factory settings required for this example): Setup: Application parameters: Application 1: Calculation Step...
-
Page 71: Density Determination
Density Determination Purpose Features Factory Settings of the Parameters Buoyancy With this application you can determine – Choose from 2 methods for determining Method: the density and volume of solid, pasty, liq- density of solids: Water uid or powdered samples. –... - Page 72 Equations Used to Determine Density Buoyancy: Rho = (Wa · (Rhofl – LA)) / ((Wa – Wfl) · Corr) + LA For the buoyancy method, a factor of 0.99983 (factory setting) is used to allow for the buoyancy caused by the bars of the sample holder of the YDK 01 (LP) Density Determination Kit.
- Page 73 Turn on the balance: press e In addition to the functions for: – alphanumeric input, > The Sartorius logo is displayed; the self-test is performed – taring (not during alphanumeric input), Select the Density application in the Setup menu: press s –...
- Page 74 Example Buoyancy: Determine the Density of Samples of a Solid Using the Buoyancy Method. Reference Liquid: Water Settings (changes in the factory settings required for this example): Setup: Application parameters: Application 1: Density Step Press key(s) (or follow instructions) Display/Output 1.
- Page 75 Step Press key(s) (or follow instructions) Display/Output Vol. 9. Display volume of sample soft key Max 210 g d=0.01mg 100% DENSITY: calculated volume Param. Weigh Start Weigh 10. Display weight soft key Max 210 g d=0.01mg 100% 1324084 DENSITY: buoyancy Param.Densit Start Start...
-
Page 76: Differential Weighing
Differential Weighing Purpose Features – Special display page for statistics lets This application enables you to compare – 4 different sequences for measuring the you define whether lot statistics are samples before and after a given treat- tare weights, initial sample weights and dependent on backweight, loss, or ratio ment (such as drying or ashing) and the backweights (backweighing result):... - Page 77 Differential Weighing: Defining the 3. Combined Weighing Factory Settings of the Parameters Weighing Sequence The tare and initial weight, in that Weighing sequence: Group weighing You can choose from among four order, of each sample is measured first, sequences for measuring tare then the backweight of each sample is weights, initial sample weights and measured.
- Page 78 Printout for Differential Weighing The following printout is generated: Generating Printouts Backweighing Printout Automatically (Example) The configured backweighing printout is generated automatically after -------------------- Dotted line backweighing, if one of the following 16.11.1999 14:55:12 Date/time settings is selected Setup: Application 1: CH12345 Lot ID Differential weighing: Generate print-...
- Page 79 Wg. seq key option is set to > The Sartorius logo is displayed; a self-test is performed “No” Select the Differential Weighing application in the Setup menu: press s ) The last value with the stability...
- Page 80 Equations Direct Selection of Lot/Sample/Value Backweight in %: backweight / initial weight · 100% When the measured values are displayed, you can enter numbers and Loss in weight: backweight – initial weight letters to: – change the lot and sample directly (dis- Loss in %: (backweight –...
- Page 81 List Function for Differential Weighing The list function has 4 display pages: one each for lots, samples, values and results. Display Page for Lots The display page for lots shows all of the lots that have already been created, as well as the LOTS: 792 Smpl.avail.
- Page 82 Selecting Display Pages in the List Function for Differential Weighing Create [alphanum] Create lot Display page for lots Rename lot Delete Delete lot Samples Delete Omit [numeric] Delete sample Include Omit sample Samples Display page for samples (Omit) Include sample Values Result [numeric]...
- Page 83 View and Print Display Pages You can manually print the display page Omit or Include Sample You can use the manual mode to for statistics when it is shown on the Activate the display page for samples print display pages (for lots, samples, balance values and results).
- Page 84 Example Differential weighing: Consecutive individual weighing; select lot, determine the difference in weight between initial weights and backweights of two samples; generate and printout statistics; do not generate any individual and backweighing printouts Settings (changes in the factory settings required for this example): Setup: Application parameters: Application 1: Differential weighing: Weighing sequence: Consecutive individual weighing Setup: Application parameters: Application 1: Differential weighing: Save statistics: Yes Setup: Application parameters: Application 1: Differential weighing: Generate printout: No...
- Page 85 Step Press key(s) (or follow instructions) Display/Output 8. Measure 1st tare weight Place 1st empty container Max 210 g d=0.01mg 100% on balance/scale 7202512 CONS.IND.W: CH1234 #1 avail. Wg.seq Wvgen Tare Tare 9. Save tare value soft key Max 210 g d=0.01mg 100% 000000...
- Page 86 Step Press key(s) (or follow instructions) Display/Output Tare 18. Save tare weight soft key Max 210 g d=0.01mg 100% 000000 CONS.IND.W: CH1234 #2 T Stat. Wg.seq Wvgen Tare 19. Unload the balance Remove the empty container Max 210 g d=0.01mg 100% 000000 CONS.IND.W: CH1234 #2 T...
- Page 87 Step Press key(s) (or follow instructions) Display/Output Stat. 28. Activate statistics display soft key STATISTICS: Lot:CH1234 29. Select type of statistics soft keys Date,time: 17.11.1998 15:44:56 and confirm soft key Statistics on: OResidueo No.of values: (in this case: statistics on R (*)) Mean values: Mean 78.29 %...
-
Page 88: Air Buoyancy Correction
Air Buoyancy Correction Purpose Features Air Density Determination: This application enables you to correct Buoyancy correction: weighing errors that occur due to air – Automatic initialization of this – To determine the air density, use the buoyancy when you work with weights application and loading the density of a special weight set, YSS45, which is of various densities. - Page 89 Factory Settings of the Parameters Air Buoyancy Correction Air density determination: Diagram for Air Buoyancy Correction Change steel/aluminum references: Correction of the mass Dm ρ = 0.8 ——– Soft Key Functions (milligrams) Diff. Display the difference between the value measured and the specification for ρ...
- Page 90 Turn on the balance: press e In addition to the functions for: – alphanumeric input, > The Sartorius logo is displayed; a self-test is performed – taring (not during alphanumeric input), Configure the Air Buoyancy Correction application in the Setup menu: press s...
- Page 91 Example To determine the correct weight of a sample, enter the density of this sample. In this example, use the air density saved in the balance. Settings (changes in the factory settings required for this example): Setup: Application parameters: Application 1: Air buoyancy correction: Air buoyancy determination: On Step Press key(s) (or follow instructions) Display/Output...
- Page 92 Air Density Determination Equations for Air Density Determination The balance uses the equation below to calculate the air density for steel and aluminum based on the reference weights supplied: · W – · W = ––––––––––––––– – – –––––––––––––––– · W ·...
- Page 93 Example Determination of the Air Density by Weighing, Using the Reference Weights Supplied for Steel and Aluminum Settings (changes in the factory settings required for this example): Setup: Application parameters: Application 1: Air buoyancy correction: Air buoyancy determination: Yes Air buoyancy correction: Change steel/aluminum references: Yes Step Press key(s) (or follow instructions) Display/Output...
- Page 94 Step Press key(s) (or follow instructions) Display/Output 9. Confirm values entered soft key 10. Exit display page for Softkey parameters Start 11. Start measurement of soft key reference weights 12. Place steel ref. weight on Load balance Max 210 g d=0.01mg 100% the balance...
-
Page 95: Diameter Determination
Param. and metallic filaments. This program Begins input of diameter and > The Sartorius logo is displayed is used, for example, to determine the length § Configure the “Density detemination” diameter of filaments for light bulbs. - Page 96 Param. 2. Toggle to the parameter soft key display a ... 3. Enter name for COMPANY (in this example, Sartorius) See also page 42 4. Confirm input soft key 5. Enter density of filament soft key 1 9 . 2 5,...
- Page 97 Step Press key(s) (or follow instructions) Display/Output 8. Place tungsten filament on pan, Load balance, Max 5100mg d=0.001mg 100% Close draft shield 0406 DD: RhoW=19.25 l=20.00mm ProDat Param. Weigh. 9. Print weight 1.123 mm (If necessary, weigh several times and print) ProDat 10.
-
Page 98: Time-Controlled Functions
Time-Controlled Functions Purpose Features Factory Settings of the Parameters With this application, you can configure – Time-controlled activation of balance Function after time interval: Automatic printout the balance to perform certain functions functions: of values (such as automatic printout of values, store –... - Page 99 Turn on the balance: press e In addition to the functions for: – alphanumeric input, > The Sartorius logo is displayed – taring (not during alphanumeric input), Select the Time-Controlled Functions application in the Setup menu: press s – printing,...
- Page 100 Example Document the evaporated amount of a sample with defined surface, temperature and air pressure at preset intervals of 1 minute, 30 seconds. Settings (changes in the factory settings required for this example): Setup: Application parameters: Application 2: Time-controlled functions Setup: Balance/scale functions: Taring: Without stability Setup: Printout: Application-defined output: Stability parameter: Without stability Step...
-
Page 101: Statistics
Statistics Purpose Features – Press the soft key to delete the last With this application, you can have – Storage of weight values and calculated value added to the totalizing memory. weight values and calculated values values The transaction counter value is totalized and statistically evaluated. - Page 102 Factory Settings of the Parameters Soft Key Functions Printout of Statistics Automatic storage: Add weight values or application The transaction or component counter is values to the total in the totaliz- printed in front of each measured value Minimum load for automatic storage: ing memory.
- Page 103 Additional Functions Turn on the balance: press e In addition to the functions for: – alphanumeric input, > The Sartorius logo is displayed – taring (not during alphanumeric input), Select the Statistics application in the Setup menu: press s – printing,...
- Page 104 Example: Animal Weighing with Statistics (Averaging) Let’s suppose that you need to determine each weight of 7 very small animals and statistically evaluate and print them. Settings (changes in the factory settings required for this example): Setup: Application parameters: Application 1: Animal weighing: Printout: No Setup: Application parameters: Application 3: Statistics: Automatic storage: On, first value at stability Setup: Application parameters: Application 3: Statistics: Minimum load for automatic storage: 100 digits Setup: Application parameters: Application 3: Statistics: Evaluated values: Calculated...
- Page 105 Step Press key(s) (or follow instructions) Display/Output The balance delays starting the When this criterion is met, the Max 210 g d=0.01mg subweighing operation until subweighing series begins 100% three successive subweights lie 8888000g within the range defined for ANIMAL WEIG.: m = an “active”...
-
Page 106: Extra Functions
Turn on the balance: press e – Store a numeric value in the second tare > The Sartorius logo is displayed; a self-test is performed memory (input using the numeric keys) Select Extra function (F4) or Extra function (F5) in the Setup menu: Net1 –... - Page 107 Example Determine the Contents of Bottles: Bottle weight = 100 g. Settings (changes in the factory settings required for this example): Setup: Application parameters: Extra function (F4): 2nd tare memory: Automatic printout: Tare/preset tare Step Press key(s) (or follow instructions) Display/Output 1.
-
Page 108: Individual Identification Codes
Individual Identification Codes (ID) Purpose – Each ID value can have up to Factory Settings of the ID Names With this function, you can assign 20 characters. ID1: IDs to values for documentation and ID2: printouts. – Access 1 of the 4 IDs directly using the ID3: numeric keys. - Page 109 Preparation Turn on the balance: press e > The Sartorius logo is displayed Select Extra function (F4) or Extra function (F5) in the Setup menu: press s Application parameters Select : press the soft key 2 x, then the soft key once...
- Page 110 Example Include company address and sample lot number on the printout. Each ID line begins with the name. Print this ID for each net value. Settings (changes in the factory settings required for this example): Setup: Application parameters: Extra function (F4): Identification codes Setup: Input: ID1: Company Setup: Input: ID2: Location Setup: Input: ID3: Street...
- Page 111 8. Save settings, exit the Setup menu soft key and select input mode for IDs soft key a ... 9. Enter name of company (such as Sartorius) see also page 42 10. Confirm input soft key 11. Repeat steps 10 and 11 for LOCATION: GOETTINGEN...
-
Page 112: Saving Values Manually In M
This extra function enables you to load weight values and calculated results directly from Application 1 (such as > The Sartorius logo is displayed counting, weighing in percent) or Select Extra function (F4) or Extra function (F5) in the Setup menu: press s... -
Page 113: Changing The Resolution
To change the resolution of the weighing result. This enables quicker weighing at a lower resolution. > The Sartorius logo is displayed § Select Extra function (F4) or Extra function (F5) in the Setup menu: press s Features – Weights can be displayed with a §... - Page 114 Example Quick determination of the weights of a few consecutive samples with reduced resolution. Presettings (different from the factory settings): Setup: Application parameters: Additional function (F5): Change resolution Step Press key(s) (or follow instructions) Display/Output 1. Switch on the balance if necessary and enter the presettings as shown above 2.
-
Page 115: Product Data Memory
In the standby mode, the data memory uses the power supply. Preparation Turn on the balance: press e > The Sartorius logo is displayed Select Extra function (F4) or Extra function (F5) in the Setup menu: press s Application parameters Select... - Page 116 Example Create a new product base data record for initializing the checkweighing program, including: target value, minimum, maximum Settings (changes in the factory settings required for this example): Setup: Application parameters: Extra function (F4): Product data memory Setup: Application parameters: Application 2: Checkweighing Step Press key(s) (or follow instructions) Display/Output...
-
Page 117: Sqmin Function
To display the allowable minimum sam- ple quantity “SQmin” in accordance with the United States Pharmacopeia > The Sartorius logo is displayed (USP). According to USP guidelines, the § Select Extra function (F4) or Extra function (F5) in the Setup menu: press s uncertainty of measurement may not exeed 0.1 % of the sample quantity... - Page 118 Example Determining the weights of samples while monitoring the minimum sample quantity (here: SQmin: 30 mg) Presettings (different from the factory settings): Setup: Application parameters: Additional function (F4): SQmin Step Press key(s) (or follow instructions) Display/Output 1. Switch on the balance if necessary and enter the presettings as shown above 2.
-
Page 119: Dkd Uncertainty Of Measurement
§ Turn on the balance: press e Display of the dynamic uncertainty of measurement in conformance with the specifications listed on the DKD > The Sartorius logo is displayed Calibration Certificate. § In the Setup menu, select “Extra functions (F4)” or “Extra functions (F5)”: press s... - Page 120 Example Perform a weighing procedure with the “DKD uncertainty of measurement” application Settings: Setup: Application parameters: Extra function (F4): DKD uncertainty of measurement: Display: PA (process accuracy) Setup: Application parameters: Extra function (F4): DKD uncertainty of measurement: Print: PA (process accuracy) Setup: Application parameters: Extra function (F4): DKD uncertainty of measurement: Display: Input: 3.00000 (factory setting) Step Press key(s) (or follow instructions)
-
Page 121: Combining Applications
Combining Applications The following table summarizes the possibilities for combination of the application programs described here. Each line stands for one combination. The weighing function is generally available, and does not have to be combined with a calculating function. Application 1 Application 2 Application 3 (data records and (basic settings) -
Page 122: Practical Combination Of Several Applications (Example)
Practical Combination of Several Applications Example: Density determination with statistical evaluation Density determination of a solid sample using the displacement method with water and statistical evaluation of 10 measurements Settings (changes in the factory settings required for this example): Setup: Application parameters: Application 1 (basic settings): Density: Method: Displacement Setup: Application parameters: Application 1 (basic settings): Density: Decimal places for disp. - Page 123 Step Press key(s) (or follow instructions) Display/Output 7. Determine the weight of the Max 210 g d=0.01mg 100% sample in liquid: 3409313 place sample in the sample holder DENSITY: Temp=+20.0 Param. 8. Store weight in liquid; soft key Max 210 g d=0.01mg 100% the density of the sample...
-
Page 124: Data Output Functions
Data Output Functions There are 3 options for data output: – Output to the display and control unit – Output to a printer (generate a printout) – Output to a peripheral device (e.g., computer) via the interface port Output to the Display and Control Unit The display is divided into 9 sections. - Page 125 Line for Measured Values This line shows: 1250é – The current weight value – Calculated values (such as piece counts) =W*18.3*0.9 – User input (such as a lot number or equation) Weight Unit Display This section shows: – The current weight unit (such as kg) –...
-
Page 126: Interfaces
– The serial communications port has a Features 25-contact D-Sub female connector as – In the xBPI mode, the serial – Genius series balances have two serial a standard feature. This connector can communications port can operate interface ports: be exchanged for either of the two independently of the serial printer port –... - Page 127 Serial communication: Configuring the Interfaces Turn on the balance: press e YDP03 Serial printer: > The Sartorius logo is displayed; a self-test is performed Printout: Output to interface ports: serial Configure the interfaces : press s communicaton (PERIPHERALS): Application-defined output...
- Page 128 Configuring a Printout Turn on the balance: press e Printout Select : press the soft key 3 x, then the soft key once Printout Application-defined Stability Without stability ο output parameter After stability ο Print on request, then tare Auto print ο...
-
Page 129: Printouts
Printouts Purpose Output to the Interface Ports This function enables you to print out Print Mode Trigger Operating mode: PERIPHERALS weights, other measured values and IDs. You can format the printout to meet PERIPHERALS xBPI different requirements. ESC P not possible (PERIPHERALS) Features Line format: you can configure a data... - Page 130 Generating Printouts Acceptable for Legal Metrology: You can configure the Setup menu of the balance to generate data records that are acceptable for legal metrology on a Sartorius printer: – YDP02 – YDP03 – YDP01IS – YDP01IS Label – YDP02IS –...
- Page 131 p/r (Print) Key Examples Pressing this key causes the current value +153.00000 g Weight in grams shown on the display to be printed out + 58.56234 ozt Weight in Troy ounces (weight with unit, calculated value, 253 pcs Piece count alphanumeric readout) 88.23 % Percentage...
- Page 132 +153.00000 g Auto Print Net weight S ID 12345678901234 You can have the weight readout printed Sample ID Stat automatically . This printout can be Display blank Stat generated after a certain number of display Display underload Stat updates ; you can also configure whether Display overload or not the auto-print function is dependent on the stability parameter...
- Page 133 Always on Weighing series no. (lot) Internal calibration Calibration (lot) adjustment mode Start: manual The record is output to a Sartorius Start mode for calibration/adjustment Diff. + 0.06365 g YDP03-0CE Data Printer or a computer. Difference after calibration/adjustment Internal adjustment...
-
Page 134: Serial Communications Port
Automatic print mode Without stability, at stability, when weight changes manufacturers often have incorrect pin Data output format assignments for use with Sartorius bal- of the balance: 16 characters, 22 characters ances. Be sure to check the pin assign- ment against the chart before connect-... - Page 135 Output Format (Line Format) The following characters can be output, depending on the characters displayed on the balance: You can output the values displayed in the line for measured values and the weight Normal Operation unit with or without a data ID code Position 10 11 12 13 14 15 16 Example: Without data ID code...
- Page 136 Example: output weight of + 111.25507 mg ID code characters I Position 10 11 12 13 14 15 16 Stat Status CR LF Identification (identifier) L ID Weighing series no. (lot) Position 1: Plus + or minus sign – or space W ID Weight set number Position 2:...
- Page 137 Data Input Format Esc: Escape You can connect a computer to your balance to send commands via the balance interface Command character port to control balance functions and applications. Number &: Number or letter The commands sent are control commands and may have different formats; e.g., control Underline (ASCII: 95) commands can have up to 26 characters.
- Page 138 Synchronization Handshake Transmitting Device: During data communication between the The balance interface (Sartorius Balance Once XOFF has been received, it prevents balance and an on-line device (computer), Interface = SBI) has transmit and receive further transmission of characters. messages consisting of ASCII characters are buffers.
-
Page 139: Pin Assignment Charts
Pin Assignment Charts Female Interface Connector: 25-position D-Submini, DB25S, with screw lock hardware for cable gland Male Connector Used (please use connectors with the same specifications): Pin Assignment Chart, 25-contact Female Connector, RS-232: 25-pin D-Submini, DB25S, Pin 1: Signal Ground with integrated shielded cable clamp Pin 2: Data Output (TxD) assembly (Amp type 826 985-1C) and... - Page 140 Pin Assignment Chart, 12-contact Round Female Connector, RS-485 (Optional): Pin A: F2 Function Key / Control Output 3 “Heavier” Pin B: RS-485: RxD – TxD – N; RS-232: TxD Pin C: RS-485: RxD – TxD – P; RS-232: RxD Pin D: RS-485: Not Connected; RS-232: DTR Pin E: Signal GND Pin F: + 5 V Pin G: Left Draft Shield Key / Control Output 1 “Lighter”...
-
Page 141: Cabling Diagram
Cabling Diagram – Diagram for interfacing a computer or other peripheral device to the balance using the RS-232/V24 standard and cables up to 15 m (50 ft.) long Balance Peripheral Device (PC) 25-pin 9-pin Type of cable: AWG 24 specification Artisan Technology Group - Quality Instrumentation ... -
Page 142: Error Codes And Messages
Cal./adj. interrupt be completed within a certain time again and repeat the adjustment process Err 06 Built-in calibration weight Contact your local Sartorius Service Center Int. wt. defective is defective Err 07 Function not allowed in balances Contact your local Sartorius... - Page 143 Turn the balance off, then back on again. RAM lost data If this error remains displayed, Factory settings deleted please contact your local Sartorius Service Center Err 341 Battery needs to be recharged Leave the balance power on for at least 10 hours...
- Page 144 No net initial wts. In serial and combined weighing, Measure initial weights available no initial weights found If any other errors occur, contact your local Sartorius Service Center! Artisan Technology Group - Quality Instrumentation ... Guaranteed | (888) 88-SOURCE | www.artisantg.com...
-
Page 145: Care And Maintenance
Cleaning the Weighing Chamber on ME215/235/254/414/415/614 § Slide the draft shield doors back as far Service Regular servicing by a Sartorius as they will go technician will extend the service life of your balance and ensure its continued weighing accuracy. Sartorius can offer... -
Page 146: Recycling
– the AC adapter has been stored for a relatively long period under unfavorable conditions In any of these cases, notify your nearest Sartorius Service Center or the International Technical Support Unit based in Goettingen, Germany. Maintenance and repair work may only... -
Page 147: Overview
Overview General Views of the Balance: Models ME215/235/254/414/415/614 Pos. Designation Spare Part Order No. Pos. Designation Spare Part Order No. 1 Draft shield door grips 16 On/off key 2 Weighing pan 69 ME0001 17 Toggle key for alphabetic input 3 Shield disk 69 ME0002 18 Function keys 4 Level indicator... - Page 148 Overview General Views of the Balance: Models ME5 and SE2 Pos. Designation Pos. Designation Weighing pan Key for opening the draft shield counterclockwise Filter pan, 50 mm Print key Interior draft shield (only for SE2) Info key for displaying device information Optional filter pan, 75 mm CF key (clear function) Shield ring...
- Page 149 Specifications Standard Models Model ME415S ME235S ME215S ME235P ME215P Readability 0.01 0.01 0.01 0.01/0.02/0.05 0.01/0.02/0.05 Weighing capacity 60/200/410 60/230 60/210 60/110/230 60/110/210 Tare range (subtractive) –410 –230 –210 –230 –210 <±mg Repeatability 0.015/0.025/ 0.015/0.025 0.015/0.25 0.015/0.04/ 0.015/0.04/ 0.035 0.04 0.04 Linearity <±mg 0.15...
- Page 150 Specifications Standard Models Model ME614S ME414S ME254S Readability Weighing capacity Tare range (subtractive) –610 –410 –250 <±mg Repeatability 0.07 Linearity <±mg 0.15 Sensitivity drift within –6 <±/K +10 to +30 °C (50 to 86 °F) 1·10 Response time (average) < 2.5 <...
- Page 151 Specifications Standard Models Model ME5-F SE2-F Readability µg Weighing capacity Tare range (subtractive) <±µg Repeatability 0.25 0.25 Linearity <±µg Sensitivity drift within –6 –6 –6 –6 <±/K +10 to +30 °C (50 to 86 °F) 1· 10 1·10 1·10 1·10 Response time (average) <10 <10...
- Page 152 ) = With the isoCAL function deactivated, the verified balance can be used only within the limited temperature range (can be modified only by the Sartorius Service Center): For balances of accuracy class k: +15°C to +25°C (59 to 77°F) * = according to Council Directive 90/384/EEC on non-automatic weighing instruments used within the European Economic Area Artisan Technology Group - Quality Instrumentation ...
- Page 153 ) = With the isoCAL function deactivated, the verified balance can be used only within the limited temperature range (can be modified only by the Sartorius Service Center): For balances of accuracy class k: +15°C to +25°C (59 to 77°F) * = according to Council Directive 90/384/EEC on non-automatic weighing instruments used within the European Economic Area Artisan Technology Group - Quality Instrumentation ...
- Page 154 ) = With the isoCAL function deactivated, the verified balance can be used only within the limited temperature range (can be modified only by the Sartorius Service Center): For balances of accuracy class k: +15°C to +25°C (59 to 77°F) * = according to Council Directive 90/384/EEC on non-automatic weighing instruments used within the European Economic Area Artisan Technology Group - Quality Instrumentation ...
-
Page 155: Accessories (Options)
Accessories (Options) Product Order No. Printer YDP03-0CE > with date/time, statistical data evaluation and transaction counter functions and LCD (AC adapter required) > can be used in legal metrology External rechargeable battery pack YRB05Z > with battery-level indicator (LED); can be recharged using the AC adapter (time it takes to charge the discharged battery pack: 15 hours);... - Page 156 Product Order No. SartoWedge data transfer software YSW01L enables you transfer the data recorded by your balance to any PC application program (e.g., Excel). Memory-resident software (5 KB) for all IBM-compatible computers that are equipped with a serial interface and run DOS and Windows. This application kit includes: –...
-
Page 157: Declarations Of Conformity
Member Conformity for weighing instruments that States of the European Union and the have been verified by Sartorius for use as Signatories of the Agreement on the legal measuring instruments and that have European Economic Area. - Page 158 Artisan Technology Group - Quality Instrumentation ... Guaranteed | (888) 88-SOURCE | www.artisantg.com...
- Page 159 Artisan Technology Group - Quality Instrumentation ... Guaranteed | (888) 88-SOURCE | www.artisantg.com...
- Page 160 Artisan Technology Group - Quality Instrumentation ... Guaranteed | (888) 88-SOURCE | www.artisantg.com...
- Page 161 Artisan Technology Group - Quality Instrumentation ... Guaranteed | (888) 88-SOURCE | www.artisantg.com...
-
Page 162: Plates And Markings
Plates and Markings Artisan Technology Group - Quality Instrumentation ... Guaranteed | (888) 88-SOURCE | www.artisantg.com... - Page 163 Artisan Technology Group - Quality Instrumentation ... Guaranteed | (888) 88-SOURCE | www.artisantg.com...
-
Page 164: Index
Index Page Page Page Accessories (options) Data block printout of calibration/ Parameter settings Acoustic signal adjustment data Password Adapt filter (to ambient conditions) 19 Data input format Password, entering or changing Adjustment Data output format Pin assignment charts Adjustment, automatic Data output functions Plates and markings Adjustment, external... - Page 165 Artisan Technology Group - Quality Instrumentation ... Guaranteed | (888) 88-SOURCE | www.artisantg.com...
-
Page 166: Entering The General Password
Entering the General Password Enter/Change Password § Select password setting: Press the soft keys repeatedly § Select the Setup menu: , until Press the s key Password: > is displayed, together SETUP > is displayed with the current password setting §... - Page 167 Artisan Technology Group - Quality Instrumentation ... Guaranteed | (888) 88-SOURCE | www.artisantg.com...
- Page 168 Artisan Technology Group - Quality Instrumentation ... Guaranteed | (888) 88-SOURCE | www.artisantg.com...
- Page 169 Sartorius AG Weender Landstrasse 94–108 37075 Goettingen, Germany Phone +49.551.308.0 Fax +49.551.308.3289 www.sartorius.com Copyright by Sartorius AG, Goettingen, Germany. All rights reserved. No part of this publication may be reprinted or translated in any form or by any means without the prior written permission of Sartorius AG.