
Summary of Contents for FALKER hidroFarm HFM3030
- Page 1 Manual Digital Soil Moisture Meter hidroFarm HFM3030 Revision A 06/2023 MAN_HFM3030...
- Page 2 Copying by any means of this document or part of it without prior written authorization is expressly prohibited. Falker reserves the right to make changes to this document or to the equipment without prior notice. The information contained in this document is the most current at the time of publication and is provided to facilitate the use of the equipment.
-
Page 3: Table Of Contents
5.4 Data visualisation..................20 5.5 Manage.....................21 5.6 Bluetooth....................23 5.7 Settings....................24 5.8 Internal GPS....................24 5.9 Screens.....................25 5.10 Falker Water - Data Visualization and Analysis.........27 5.11 Data transfer...................28 6 Basic maintenance...................29 6.1 Battery charging..................29 6.2 Device cleaning..................29 6.3 Software atualization................29 6.4 Another questions..................30 7 Technical specifications...................31... -
Page 4: Introduction
This manual covers all aspects related to the use of the equipment and guidelines for starting to use the Web Application and Falker Water App, which allows the visualization and analysis of collected data. However, this... -
Page 5: The Equipment
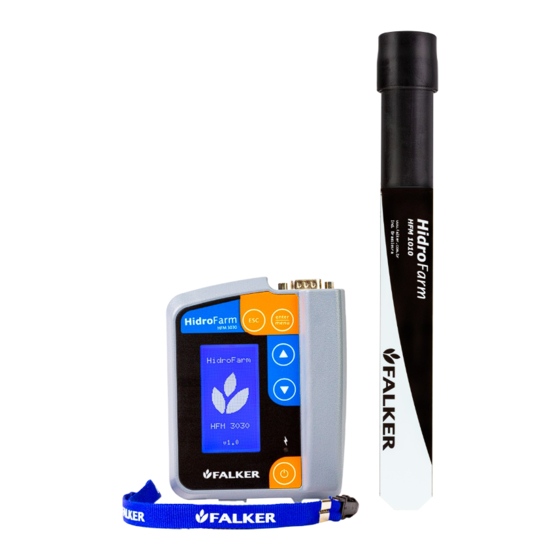
HFM3030 Digital Soil Moisture Meter 2 The Equipment The equipment is supplied in a canvas case, suitable for use in the field. The following items are provided: Electronic equipment HFM3030 • 1 HFM1010 Sensor • Connection cable with HidroFarm Sensor •... -
Page 6: Accessories
HFM3030 Digital Soil Moisture Meter 2.1 Accessories In addition to the items that come with the equipment, the following codes can be used to purchase accessories or replacement items. Tabela 1: Accessories Commercial Codes FLK9020 USB-A - USB-C Cable FLK9030 USB-A Output Socket Charger HidroFarm Sensor Connection Cable HFM8200... -
Page 7: Basic Concepts
– Aplicações HidroFarm NAP_HFM2010_001, available on the Falker website. It is quite usual to manage irrigation systems with the use of these attributes, triggering the systems before the soil reaches the PMP content and turning off when the field capacity humidity is reached, reducing water... - Page 8 HFM3030 Digital Soil Moisture Meter Figure 2: Soil texture classes triangle The graph of Figure 3 shows the soil texture classes and their respective average CC and PMP points for most volumetric moisture content cultures read in HidroFarm. 8 de 31...
- Page 9 HFM3030 Digital Soil Moisture Meter Figura 3: Moisture content ranges for soil classes. Subtitle – Field Capacity: Maximum humidity for soil water storage. Range of available soil water to plants. – Permanent Withering Point: Humidity in which the plant dies from dehydration. 9 de 31...
-
Page 10: Measurement Range
HFM3030 Digital Soil Moisture Meter 3.3 Measurement range The value reported by the meter refers to the average soil volumetric moisture present at a distance of 15 cm from the sensor and along its 20 cm length. See section 8 for more details. Figure 4: Example of the area of coverage of the waves emitted by the sensor. -
Page 11: Sensor Life
HFM3030 Digital Soil Moisture Meter Sensor life The sensor is made from materials resistant to time exposure, mainly based on fiberglass. When permanently installed in the ground, it must be maintained with the protective cap. The biggest cause of sensor wear is the installation process and its friction with the ground. -
Page 12: Insertion Using Auxiliary Tool
HFM3030 Digital Soil Moisture Meter To drill the ground with the sensor, grasp it with one hand in an upright position and then press it down with the other hand, without making lateral movements or exerting impacts on it. This method is most appropriate when the instantaneous measurement of data is required, since the soil structure is little affected. - Page 13 HFM3030 Digital Soil Moisture Meter If it is not possible to drill the ground with the sensor itself, use a cutting tool (cutting blade, knife) to create only an incision, a "tear" in the ground, facilitating sensor entry. This method presents lower initial precision because it changes the soil structure around the sensor.
-
Page 14: Using And Installing The Extender
HFM3030 Digital Soil Moisture Meter Note: The longer the sensor remains installed at the same point, the greater its accuracy due to the accommodation of the soil in its surroundings. Therefore, if feasible, keep the sensor installed at the same point and perform the measurements over time without changing the sensor position. -
Page 15: Connection Between Meter And Sensor
HFM3030 Digital Soil Moisture Meter Figure 10: Sensor and extender installed and ready for measurement. Place the cap that was used on the sensor at the end of the extender, aiming at protecting the connector. Note: Soil moisture located in the layer immediately above where the sensor is located does not interfere with the measurement.. -
Page 16: Operation
HFM3030 Digital Soil Moisture Meter 5 Operation 5.1 Basic Operation To turn on the device, press the on/off located on the down side of the panel. To turn off, hold down the on/off button at least for five seconds. When using the HFM3030 for the first time, the language and local operating time of the equipment are defined.. -
Page 17: Basic Operation
HFM3030 Digital Soil Moisture Meter 5.2 Basic operation Figure 12: User interface The operation of the device is done with the following buttons and the screen, where the measurement values, warnings and user information as the state of charge, memory occupation and GPS signal are displayed. -
Page 18: Data Acquisition
HFM3030 Digital Soil Moisture Meter Figure 13: Main screen In the main screen, there are 5 options: Acquire: menu used to acquire new data. • View: menu used to visualize acquired.. • Gerenciar: menu que permite definir referência, adicionar, editar ou •... - Page 19 HFM3030 Digital Soil Moisture Meter After selecting the desired work, the following screen will be displayed: Figure 15: “New day” or “Continue” screen There is the option to continue one day work or start a new day. After selection, the calibration screen will open.
-
Page 20: Data Visualisation
HFM3030 Digital Soil Moisture Meter The data obtained in the measurement, as well as its attributes, are automatically stored in the equipment's memory. If the data was obtained in error, the user can erase it and redo the measurement. On the measurement screen, using the directional arrows, four features can be accessed. -
Page 21: Manage
HFM3030 Digital Soil Moisture Meter Figure 19: View point measurements In “Measurement”, the identification of the humidity measurement carried out at the point in question is presented. In “Humidity” the humidity value of that measurement is displayed. The reference and measurement date are shown at the bottom.. - Page 22 HFM3030 Digital Soil Moisture Meter Figura 21: Telas definir referência By clicking on the “Add work” menu, the screen for choosing the name of the new work will open. To choose the letters, use the directional arrows. To confirm the letter, use the enter key. After choosing the name, the screen for choosing the number of points that will compose the new work is opened.
-
Page 23: Bluetooth
HFM3030 Digital Soil Moisture Meter Figure 23:Delete measurements By choosing the “delete work” menu, it is possible to delete the entire structure of a previous work. The first screen that opens tells you what the operation will do and requires confirmation to proceed. On the second screen, the work to be deleted must be chosen. -
Page 24: Settings
HFM3030 Digital Soil Moisture Meter 5.7 Settings When selecting the settings menu, the following screen opens. Figure 26: Settings In “Backlight” option it is possible to change the intensity of the equipment screen brightness. In “About” it is possible to check information about how many measurements are stored in the memory, the battery charge level and the battery temperature. -
Page 25: Screens
HFM3030 Digital Soil Moisture Meter 5.9 Screens The chaining of the screens is mainly done by the keys. Following the screen navigation scheme presented below, in addition to carrying out the moisture index measurements, we can also view these measurements and configure equipment settings. - Page 26 HFM3030 Digital Soil Moisture Meter 26 de 31...
-
Page 27: Falker Water - Data Visualization And Analysis
It also allows the generation of measurement reports for presentation. Note: The Falker WATER System for transferring and analyzing data on the computer is constantly evolving. Follow the directions directly in the system. The System also allows customizing and exporting reports to present the measurement results, including graphs, parameters and attributes of the collected data. -
Page 28: Data Transfer
Data transfer can be done in two ways: – Data transfer can be done in two ways. The data must then be uploaded to the Falker Water web system via a computer. Windows will open a directory called, ''HFM2BOOT" where the file will be available to be copied. -
Page 29: Basic Maintenance
6.3 Software atualization The equipment's embedded software, which controls its operation, can be updated by the user himself with files provided by Falker. To do this, you must enter the mode called “Bootloader”. With the equipment turned off and disconnected from the charger, keep the keys pressed . -
Page 30: Another Questions
CAUTION: Do not attempt to update using files that you are not sure have been supplied by Falker and are suitable for your device version. Attempting to update with unlisted files may lead to maintenance at Falker. -
Page 31: Technical Specifications
Communication USB and Bluetooth App/Software Falker Water Factors such as soil salinity, texture and pH can interfere with this value. A specific calibration after installation can be done to increase accuracy Where 0% completely dry soil and 60% total porosity completely filled with water For subsurface installation, extension cables are required. -
Page 32: Dimensional Information
HFM3030 Digital Soil Moisture Meter 7.1 Dimensional information Equipment dimensions are shown in the figure. Figure 29: Dimensions in mm 7.2 Anatel homologation for equipment HFM3030i This product contains the Bluetooth card approval code 05118-16-10070. 7.3 CE and FCC marking for equipment HFM3030i This product is in conformity with the 2014/53/EU –...