Sony Ericsson P1i User Manual
Sony ericsson p1i: users guide
Hide thumbs
Also See for P1i:
- Troubleshooting manual (25 pages) ,
- Test instruction, mechanical (13 pages) ,
- Specification sheet (3 pages)
Table of Contents
Advertisement
Congratulations on your purchase of the Sony Ericsson
P1i. Enjoy efficient email tools, the 3.2 megapixel
camera and high-speed Internet on the go. In addition to
your pre-installed multimedia content, a lot more is
waiting for you at www.sonyericsson.com/fun.
Also check out the Sony Ericsson Application Shop at
www.sonyericsson.com/applicationshop and learn how
to get the most out of your P1i.
And if you register at www.sonyericsson.com/register,
you get an exclusive offer. Go now and don't miss out.
This is the Internet version of the User's guide. © Print only for private use.
Advertisement
Table of Contents

Related Manuals for Sony Ericsson P1i


Summary of Contents for Sony Ericsson P1i
- Page 1 Congratulations on your purchase of the Sony Ericsson P1i. Enjoy efficient email tools, the 3.2 megapixel camera and high-speed Internet on the go. In addition to your pre-installed multimedia content, a lot more is waiting for you at www.sonyericsson.com/fun. Also check out the Sony Ericsson Application Shop at www.sonyericsson.com/applicationshop and learn how...
- Page 2 Added dimensions – Accessories from Sony Ericsson Music remote control MRC-60 Listen to music with hi-fi sound quality and adjust music settings with a remote control. Bluetooth™ Car Speakerphone HCB-120 A handsfree solution with caller display. For use in the car, office or home.
-
Page 3: Table Of Contents
Ericsson does not guarantee the accuracy, integrity or quality of any additional content or any other third party content. Under no circumstances will Sony Ericsson be liable in any way for your improper use of additional content or other third party content. - Page 4 Bluetooth™ is a trademark or registered trademark of Bluetooth SIG Inc. Real is a trademark or a registered trademark of RealNetworks, Inc. RealPlayer® for Mobile is included under license from RealNetworks, Inc. Copyright 1995-2007, RealNetworks, Inc. All rights reserved. Adobe® Photoshop® Album Starter Edition and Adobe®...
-
Page 5: Getting Started
Getting started Welcome Thank you for purchasing the Sony Ericsson P1i. Before you start to use your new phone please read the information in the Getting started chapter carefully. Instruction symbols The following appear in the User guide: Note A service or function is network- or subscription-dependent. -
Page 6: Phone Overview
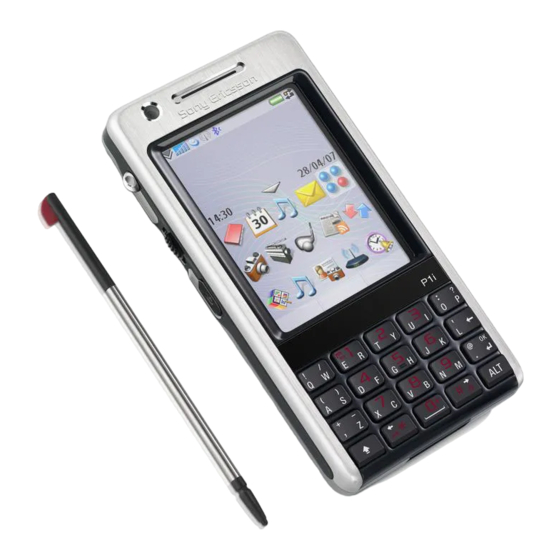
This is the Internet version of the User's guide. © Print only for private use. If your package does not include all the listed items then contact your retailer. Phone overview Extra stylus Documentation package CD with Sony Ericsson PC Suite for Smartphones 11 10 On/off button Front camera Screen... -
Page 7: Before Using Your Phone
Shortcut button Infrared port Earspeaker Loudspeaker Antenna connector Connector for charger and accessories Indicator light Microphone Back button Jog Dial Rear camera Strap holder Stylus Photo light Before using your phone Battery You need to charge the battery when the indicator light on the base of the phone flashes red or when the low battery message appears on the screen. - Page 8 SIM card You receive a SIM (Subscriber Identity Module) card when you register with a network operator. The SIM card keeps track of your phone number, the services included in your subscription and phonebook information. A PIN code is supplied with the SIM card and must be entered, if requested, when you turn on your phone for the first time.
- Page 9 To switch on your phone 1 Press and hold down the On/off button. 2 Select Phone 3 Select a language. 4 Enter your PIN, if requested. 5 Select Done. If you make a mistake when you enter your PIN code, you can delete the number by pressing wrong PIN code three times in a row, the SIM card is blocked.
-
Page 10: Getting To Know The Phone
Getting to know the phone Turning the phone on and off Your phone has two modes of operation: • Phone on – full functionality. • Flight mode – limited functionality with network and radio functions switched off. You can use flight mode where mobile phones are prohibited, such as in hospitals and aircrafts. -
Page 11: Using The Applications
Navigation To navigate menus and select items, you can use the Jog Dial, Back button, stylus, keyboard navigation keys, touch options and your fingertips. Jog Dial You can rotate the Jog Dial to scroll lists up and down, adjust Inwards sound volume. -
Page 12: Task Manager
To close an application • Press and hold saved. Task manager Task manager helps you switch between applications. Leaving an application via Task manager rather than closing it, lets you return to the application in the state that you left it. This is useful, for example, when cutting and pasting text from one application to another. -
Page 13: Importing Phone Book Entries
Predictive text activated Ring volume set to zero Signal strength in phone mode, GPRS available Silent mode SMS notification SMS overflow Speakerphone activated Status bar menu Task manager Voicemail notification Wireless LAN activated and connected Wireless LAN activated but not connected Status bar menu You can use the status bar menu to quickly access extra settings:... -
Page 14: Main Menu Overview
Main menu overview Multimedia Camera More applications RSS feeds PlayNow™ Picture gallery Phone Phone Call log Speed contacts Video phone Office Quickoffice Pdf+ Notes Tasks Business card scanner * Some menus are operator-, network- and subscription-dependent. Getting to know the phone This is the Internet version of the User's guide. -
Page 15: Connecting Accessories
Memory Stick Micro Your phone comes with a Memory Stick which can be used as extra storage space for pictures, music, applications, and so forth. You can rename and format the Memory Stick. You can also transfer data to and from the Memory Stick. -
Page 16: Update Software
Update software When an improved software version for your phone is introduced, you can update your phone using the Sony Ericsson Update Service on www.sonyericsson.com/support. The Web page has further instructions and will guide you through the process. Text entry Text can be entered in several different ways. - Page 17 To use the on-screen keyboard • Select the on-screen keyboard symbol located in the status bar. To change language of the on-screen keyboard • Select > Setup and select a language. Handwriting recognition Handwriting recognition translates stylus gestures written directly on the screen into letters, numbers or other characters, and displays these characters as text.
- Page 18 To write numbers • Write numbers above the arrow. To write accented letters 1 Write the basic letter. 2 Write the accent above the arrow to form the accented letter. Predictive text You can use text prediction in all text entry methods.
- Page 19 To add words to My words dictionary 1 Select More > Text options > My words. 2 Select Add. 3 Write the new word and select Done. 4 Select Save. To add a symbol 1 Select More > Text options > Add symbol to launch the symbols and punctuation marks table.
-
Page 20: Calling
Calling Networks Network coverage To make or receive a phone call your phone must be within range of a network. Home network When you turn your phone on, it automatically selects your home network if it is within range. Roaming If your home network is not within range, you may use another network that is accepted by your operator. -
Page 21: Receiving A Call
2 Scroll to an empty position and press the Jog Dial. 3 Select a contact in the list and select Save. To make a call to a speed contact 1 From Standby press one of the keys 1 to 9 that corresponds to the stored speed contact. -
Page 22: Handling Two Or More Calls
Handling two or more calls You can handle multiple calls at the same time: • Put an ongoing call on hold and start a new one, or answer an incoming call. • Start a conference call during an ongoing call (operator-dependent). •... -
Page 23: Call Log
Zoom You can zoom the outgoing video feed captured with the rear camera. There are four zoom levels. To zoom the video feed • Use the button to zoom out and the button to zoom in. Pause picture If the video feed is stopped, a pause picture is sent to the other person. -
Page 24: Using Contacts
More features Some other features that your phone offers are: • Accept calls – caller filter. • Add to contacts – add contact data from the last call. • ALS – line settings, if your SIM card supports two lines. •... -
Page 25: Editing Contacts
4 Select Save. If you save your contacts’ phone numbers in the international number format, starting with +, you can call directly from Contacts when you are abroad. Editing contacts To add a field to a contact 1 From Standby select Main menu >... - Page 26 To copy contacts to the SIM card 1 From Standby select Main menu > Contacts. 2 Mark the desired entries in Contacts. 3 Select More > Add to > To copy contacts from the SIM card 1 From Standby select Main menu >...
-
Page 27: Messaging
Messaging Before you use Messaging Before you can send or receive any messages (except for SMS text messages) you need to set up the necessary accounts. You can use the Internet and Email wizards provided in the phone to download settings or do this manually. - Page 28 • Outbox – contains messages ready to be sent. • Drafts – contains messages that are not ready to be sent. When you are creating a message, and exit the message before sending it, you will be asked if you want to save it. If you select Yes, the message will automatically be stored in this folder.
- Page 29 An overview of MMS Select template Picture Text Scribble Sound Video Record sound Select Menu options. You can select a template or what you want to add to the message, for example a picture or sound. (If the menu is not open, select Add.) Entry field (on the detail tab) where you can create your...
- Page 30 Email Before you use email To use email you require an Internet account and will need to download the necessary email settings. You can use the Email wizard available in the phone under Main menu > Control panel > Messaging > Email wizard operator is not supported by this wizard, do this manually.
-
Page 31: More About Messaging
To forward an email message 1 From your email account Messaging scroll to the message you wish to forward. 2 Select More > Forward. Large attachments increase the size of an email and the connection time needed to send it. It is possible to choose whether to forward the attachment. - Page 32 Saving contact details When you receive a message, you can save the contact details of the person who sent the message. To save a sender’s contact details 1 Select the sender’s phone number, name or email address in the details tab or From: in the address tab.
- Page 33 2 Select the Basic tab. 3 Select IMAP Connection 4 Mark the Push email check box. 5 In Email accounts select Always On push email. 6 Mark the Always On check box. 7 Select Save. For more information on push email contact your operator or your service provider.
-
Page 34: Imaging
Imaging Camera The 3.2 megapixel camera can take both still pictures and video clips. You can store them in the phone or send them as MMS. Exposure control is automatic and in bad light conditions you can use the camera light. To take a picture or a video clip 1 Press the camera button to activate the camera. - Page 35 Changing the camera settings Press to see how you can use the keypad keys as shortcuts for some of the most frequently used settings. Press the key again to remove the description. Most of the settings you make will remain until you change them, even if you have switched the camera or your phone off.
- Page 36 Microphone – only for recording video clips: Select to turn off sound recording. Effects – set and view different effects before you take a picture. Quality – select a quality level. Night mode – increases the exposure time for conditions where the lighting is poor.
-
Page 37: Picture Gallery
Picture gallery In Picture gallery you can view, send and use pictures saved in your phone or on a Memory Stick. To use a picture 1 From Standby select Main menu > Multimedia > Picture gallery. 2 Select a picture. 3 Select More >... -
Page 38: Entertainment
Entertainment PlayNow™ PlayNow™ is an entertainment download service. You can preview content before purchase. This service is not available in all countries. Before you use PlayNow™ To use PlayNow™ you need an Internet connection. See Setting up Internet, email and MMS in the Web guide. - Page 39 Tuning and memory presets To search for radio channels • When FM radio is open select To tune manually 1 When FM radio is open select frequency. 2 Enter the frequency using the keys, or tune using the Jog Dial. 3 You can also select and hold to change the frequency in 0.1 MHz steps.
-
Page 40: Music Player
To identify a song on the radio • When the radio is open, select TrackID™. To identify a song with the Sound recorder 1 From Standby select Main menu > Entertainment > Sound 2 Hold the phone close to the sound source and select TrackID™. - Page 41 when you remove tracks from the playlist, the actual sound files are not deleted. To create a playlist • From Standby select Main menu > Entertainment > Music player > Playlists > New playlist. To add songs to a playlist 1 Select one ore more tracks.
- Page 42 To resume playback from a bookmark 1 Select a video clip. 2 Select Resume. The Web browser supports both frames and JavaScript™. You can switch between portrait and landscape view, and change from normal to full screen presentation. Before you use Web To use Web you need an Internet connection.
-
Page 43: Rss Feeds
RSS feeds RSS (Really Simple Syndication) feeds allow you to see when Web sites have added new content. You can, for example, get the latest headlines without having to visit the Web site. You can add feeds directly in the RSS reader. -
Page 44: Connectivity
Connectivity Bluetooth™ wireless technology To turn on Bluetooth™ connection 1 From Standby select Main menu > Control panel > Connections > Bluetooth. 2 Select the Settings tab Bluetooth on check box. Pairing For all tasks, except for a single file transfer, it is necessary to set up a permanent and trusted relationship between your phone and the other... -
Page 45: Connections Manager
you are within range of a WLAN network. The type of WLAN network will decide what type of WLAN account your phone will use. WLAN network types • Hot spot – a temporary account is automatically created. • Non-configured network – the network is un-known to your phone. -
Page 46: File Transfer
To reset logs 1 From Standby select Main menu > Tools > Connections mgr. 2 Select the log you want to reset. 3 Select More > Reset log. Connecting to other devices You can exchange information between your phone and another device using a Bluetooth device or a USB cable. -
Page 47: Computer Modem
Mobile Networking Wizard For other applications, use the file transfer mode. To use the phone mode 1 Computer: Install the Sony Ericsson PC Suite for Smartphones before connecting the USB cable to the computer. 2 Computer: Start the Sony Ericsson PC Suite for Smartphones. -
Page 48: Wap Push
2 Phone: Select Phone mode phone. 3 Computer: Select Start/Programs/ Sony Ericsson/Sony Ericsson PC Suite for Smartphones. The application starts. 4 Computer: Wait until your phone is connected which it is when the Synchronize Now button lights green. 5 Computer: Click Synchronize Now. -
Page 49: More Features
More features Business card scanner With Business card scanner you can scan a business card and add the contact details to your contacts. To scan a business card 1 From standby select Main menu > Office > Business card 2 Select Capture to activate the camera. -
Page 50: Master Reset
(including, for example, backgrounds, ringtones and pictures), will be deleted and factory settings restored. If you back up your user data using the Sony Ericsson PC Suite for Install. Smartphones, you can restore it after a master reset. -
Page 51: Power Save
Shortcut button The shortcut button opens the phone browser. It can also be set to open: • Main menu • Music player • Sound recorder • Standby • Task manager • Video telephony To personalize the shortcut button • From Standby select Main menu >... -
Page 52: Important Information
• Global and local websites providing support. • A global network of Call Centers. • An extensive network of Sony Ericsson service partners. • A warranty period. Learn more about the warranty conditions in this User guide. - Page 53 France 0 825 383 383 Germany 0180 534 2020 Greece 801-11-810-810 210-89 91 919 (from mobile) Hong Kong 8203 8863 Hungary +36 1 880 4747 India 1800 11 1800 (toll free number) 39011111 (from mobile phone) Indonesia 021-2701388 Ireland 1850 545 888 Italy 06 48895206 Lithuania...
-
Page 54: Guidelines For Safe And Efficient Use
Never alter the cord or plug. If the plug does not fit into the outlet, have a proper outlet installed by a qualified electrician. Use only Sony Ericsson branded original chargers intended for use with your mobile phone. Other... -
Page 55: Emergency Calls
The battery should only be charged in temperatures between +5°C (+41°F) and +45°C (+113°F). Use only Sony Ericsson branded original batteries intended for use with your mobile phone. Using other batteries and chargers could be dangerous. - Page 56 15 mm from the body without any metal parts in the vicinity of the phone or when used with the original Sony Ericsson accessory intended for this phone and worn on the body. Use of other accessories may not ensure compliance with FCC RF exposure guidelines.
-
Page 57: Disposing Of The Battery
MATERIAL FROM THE PHONE MEMORY DOES NOT ENSURE THAT SAID INFORMATION CANNOT BE RECOVERED BY A SUBSEQUENT USER. SONY ERICSSON DOES NOT WARRANT AGAINST A SUBSEQUENT USER OF THE DEVICE ACCESSING YOUR INFORMATION AND DOES NOT ASSUME ANY RESPONSIBILITY FOR... -
Page 58: End User License Agreement
Communications AB and its affiliated companies (“Sony Ericsson”) and its third party suppliers and licensors (“Software”). As user of this Device, Sony Ericsson grants you a non-exclusive, non-transferable, non-assignable license to use the Software solely in conjunction with the Device on which it is installed and/or delivered with. - Page 59 Sony Ericsson Product such as downloads, calendar and contacts before handing in your Sony Ericsson Product for repair or replacement. CONDITIONS 1 This Limited Warranty is valid only if the original...
-
Page 60: Fcc Statement
Product is sold in such country by an authorized Sony Ericsson distributor. To find out if your Product is sold in the country you are in, please call the local Sony Ericsson Call Center. Please observe... -
Page 61: Declaration Of Conformity
Declaration of Conformity We, Sony Ericsson Mobile Communications AB of Nya Vattentornet SE-221 88 Lund, Sweden declare under our sole responsibility that our product Sony Ericsson type FAD-3022015-BV and in combination with our accessories, to which this declaration relates is in conformity with the appropriate standards 3GPP TS 51.010-1,... -
Page 62: Index
Index Auto capitalization ... 17 Back button ... 9 Backup of phone data ... 45 Battery ... 5 Bluetooth™ wireless technology ... 42 Business card scanner ... 47 Call log ... 21 Camera ... 32 Certificates ... 46 Connections manager ... 43 Contacts ... - Page 63 On/off ...8 Pairing ...42 PC Suite ...45 Phone overview ...4 Picture editor ...35 Picture gallery ...35 Playlists ...38 PlayNow™ ...36 Power save ...49 Predictive text ...16 Protected files ...47 Push email ...30 Remote screen ...35 RSS feeds ...41 Screen ...8 Screen saver ...49 Shortcut button ...49 SIM card ...6...