
Related Manuals for Sony MSAC-US5


Summary of Contents for Sony MSAC-US5
- Page 1 Memory Stick Reader/Writer Operating Instructions Mode d’emploi MSAC-US5 2000 Sony Corporation 3-065-562-11 (1)
- Page 2 CAUTION You are cautioned that any changes or modifications not expressly approved in this manual could void your authority to operate this equipment. 2-GB Declaration of Conformity : SONY : MSAC-US5 : 1 Sony Drive, Park Ridge, NJ, 07656 USA...
- Page 3 Note: This equipment has been tested and found to comply with the limits for a Class B digital device, pursuant to Part 15 of the FCC Rules. These limits are designed to provide reasonable protection against harmful interference in a residential installation. This equipment generates, uses, and can radiate radio frequency energy and, if not installed and used in accordance with the instructions, may cause harmful interference to radio communications.
- Page 4 PNotes • When using a Macintosh, you cannot use the scroll function since the mouse for the Macintosh does not have left and right buttons. • When accessing the “Memory Stick” on this unit, your personal computer cannot access other “Memory Stick” devices at the same time. Remove the “Memory Stick”...
- Page 5 “Memory Stick”-compatible device. Note, that, in this case all data stored on the “Memory Stick” will be lost. • “Memory Stick” formatted on a Macintosh sometimes cannot be used on “Memory Stick”-compatible device. Do not format “Memory Stick” on the Macintosh. are trademarks of Sony Corporation. 5-GB...
-
Page 6: Table Of Contents
Installing the USB driver software ... 14 Operation Using the Reader/Writer For Windows ... 15 For Macintosh ... 16 For users of SONY digital HandyCam and Cyber-shot ... 17 Using the mouse ... 18 Additional Information Troubleshooting ... 20 Specifications ... 22 Recommended connections ... -
Page 7: Checking The Accessories
BBefore You Begin Checking the accessories Make sure that you have all the accessories below. If some of the accessories are missing, contact the store or purchase of a Sony dealer or local authorized Sony service facility. • Memory Stick Reader/Writer (1) •... -
Page 8: Parts Identification
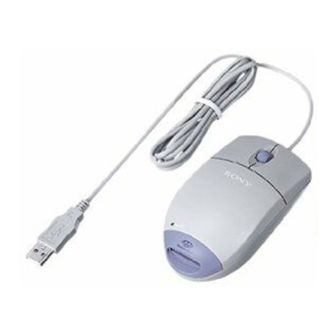
Parts identification USB port Insert the connector on this unit into the USB port on the personal computer (into any USB port on the personal computer if the personal computer has more than one USB port). PNotes • The access lamp lights when you access data on “Memory Stick.” When the access lamp is lit, never remove the “Memory Stick”, turn off the power of your personal computer or disconnect the connector. -
Page 9: For Windows
Do not connect this unit to the personal computer at this time. Turn on your machine to start up Windows, and insert the USB driver software CD-ROM (supplied) into the CD-ROM drive. Open “My Computer.” Open the CD-ROM drive (Sony USB Driver (ex: [D:])). Start up Setup.exe. 9-GB... - Page 10 For Windows (continued) Click “Next.” This starts installation of the USB driver. Follow the on-screen instructions until the end to install the USB driver software. After the USB driver software has been installed, reboot your personal computer. Follow the on-screen instructions to reboot your personal computer. After your personal computer has rebooted, remove the CD- ROM.
-
Page 11: Installing The Mouse Driver Software
Installing the mouse driver software Make sure that a “Memory Stick” is not in this unit. If you connect the USB port on the personl computer to this unit with a “Memory Stick”inserted, the “Memory Stick” driver software installation on page 13 will be carried out after the mouse driver software installation has been completed. - Page 12 For Windows (continued) Select “Search for the best driver for your device (Recommended)” and click “Next.” Click “Next” without changing the checkbox settings. Follow the on-screen instructions until the end to install the mouse driver software. The “Add New Hardware Wizard” starts twice. Follow the on- screen instructions until the end to install the mouse driver software.
-
Page 13: Installing The "Memory Stick" Driver Software
• Before disconnecting this unit with the “Memory Stick” inserted from the personal computer or removing the “Memory Stick” after installation on Windows® 2000 has completed, click the “Disconnect or remove hardware” icon on the personal computer's scroll bar, and click “Stop Sony Peripheral drive (ex: [G:]).” 13-GB... -
Page 14: For Macintosh
Drag the following two Mac driver files in the window opend in step 4 onto the System Folder in the window opened in step 5. (Drag and Drop): • Sony Peripheral USB Driver • Sony Peripheral USB Shim The message “Place files in Extensions Folder?” is displayed. -
Page 15: Using The Reader/Writer For Windows
BOperation Using the Reader/Writer For Windows When you turn on your personal computer, make sure that the “Memory Stick” is not in this unit. If the “Memory Stick” is in this unit, you may not be able to start up your personal computer. -
Page 16: For Macintosh
“Memory Stick.” • When using a Window®2000, click the “Disconnect or remove hardware” icon on the personal computer’s scroll bar, and click “Stop Sony Peripheral drive (ex: [G:])” before disconnecting the personal computer from this unit with the “Memory Stick”... -
Page 17: For Users Of Sony Digital Handycam And Cyber-Shot
USB driver software has been installed. For details on how to use SONY digital HandyCam or Cyber-shot, refer to the manual for your digital HandyCam or Cyber-shot. “Memory Stick” data made on a SONY digital HandyCam or Cyber-shot is stored to the following file names in the following folders. -
Page 18: Using The Mouse
Using the mouse This unit has the following three scroll functions: 1. Scroll Easy up/down scroll Auto up/down scroll 2. Auto panning 3. Zooming PNotes • The scroll and zoom functions are not supported on the Macintosh. • You may not be able to use the scroll function according to the application software. - Page 19 Auto panning Press the scroll button down. The auto panning icon appears on the scroll bar. When the icon appears, move this unit in the direction you want to scroll. This scrolls large amounts of data to the left, right, up or down. To return the cursor to its original position, either press the scroll button again, or click the left or right button.
-
Page 20: Additional Information
BAdditional Information Troubleshooting If you run into any problem using this unit, use the following table to troubleshoot the problem. If the problem persists, contact your Sony dealer. Symptom You cannot install the USB driver software. You cannot install the “Memory Stick”... - Page 21 Symptom You cannot scroll or zoom. You cannot access the “Memory Stick.” Your personal computer cannot recover from standby state or sleep state. Cause/Solution •You are using the software that is not supported for scroll and zoom functions. t Refer to the operating instructions for your software.
-
Page 22: Specifications
Specifications Mouse Interface: USB interface Sensor: Optical Transfer rate: Max. 1.5 Mb/s Resolution: 400 cpi Switch: Left/Right button, scroll button Power consumption: Action Max. 100 mA Reader/Writer Interface: USB interface Transfer rate: Max. 12 Mb/s Power consumption: Action Max. 100 mA 4.75V to 5.25V (BusPower) Operating voltage: Approx. -
Page 23: Recommended Connections
Recommended connections Operation when connected as follows has been confirmed. When this unit is connected to the USB port on the personal computer, and nothing is connected to the other USB port: When a USB keyboard is connected to the USB port on the personal computer, and this unit is connected to the other port: PNotes... - Page 24 Français Avant d’utiliser cet appareil, lisez attentivement ce mode d’emploi et conservez-le pour toute référence ultérieure. Pour les clients au Canada Cet appareil numérique de la class B est comforme à la norme NMB-003 du Canada. Cet appareil est un lecteur/enregistreur de Memory Stick. Il est doté d’une souris optique.
- Page 25 • La capacité de reconnaissance diminue si la souris est utilisée sur les surfaces suivantes: - Surfaces réflexives, comme les miroirs ou le verre, ou surfaces à motifs extrêmement contrastés (texte, graphiques, photographies, couleur). - Surfaces à motifs similaires continus ou surfaces extrêmement irrégulières. •...
- Page 26 Stick” seront perdues. • Un “Memory Stick” formaté sur un Macintosh peut être utilisable sur un périphérique compatible avec le “Memory Stick”. Ne pas formater de “Memory Stick” sur un Macintosh. 4-FR sont des marques de fabrique de Sony Corporation.
- Page 27 Installation du pilote USB ... 13 Fonctionnement Utilisation du lecteur/enregistreur Windows ... 14 Macintosh ... 15 Pour les utilisateur des HandyCam et Cyber-shot numériques SONY ... 16 Utilisation de la souris ... 17 Informations supplémentaires En cas de problème ... 19 Spécifications ... 21 Raccordements conseillés ...
-
Page 28: Vérification Des Accessoires
Vérification des accessoires Assurez-vous d’être en possession de tous les accessoires indiqués ci- dessous. Si certains manquent, contactez votre revendeur ou un service après-vente agréé Sony. • Lecteur/Enregistreur de Memory Stick (1) • CD-ROM (pilote USB SPVD-003) (1) (pour Windows et Macintosh) •... -
Page 29: Identification Des Éléments
Identification des éléments Port USB Insérez le connecteur de cet appareil dans le port USB de l’ordinateur (dans n’importe quel port USB si l’ordinateur en a plusieurs). PRemarques • Le voyant d’accès s’allume lorsque l’ordinateur accède aux données du “Memory Stick”. Lorsque le voyant d’accès est allumé, ne jamais retirer le “Memory Stick”, éteindre l’ordinateur ni débrancher le connecteur. -
Page 30: Windows
Ne raccordez pas encore l’appareil à l’ordinateur. Allumez votre ordinateur pour démarrer Windows et insérez le CD-ROM contenant le pilote USB (fourni)à dans le lecteur de CD-ROM. Ouvrez “My Computer”. Ouvrez le lecteur de CD-ROM (Pilote USB Sony (ex: [D:])). Démarrez Setup.exe. 8-FR... - Page 31 Cliquez sur “Next”. L’installation du pilote USB commence. Suivez les instructions qui apparaissent à l’écran jusqu’à la fin pour installer le pilote USB. Lorsque le pilote USB a été installé, redémarrez l’ordinateur. Suivez les instructions qui apparaissent à l’écran pour redémarrer l’ordinateur.
-
Page 32: Installation Du Pilote De La Souris
Windows (suite) Installation du pilote de la souris Assurez-vous que l’appareil ne contient pas de “Memory Stick”. Si cet appareil contient un “Memory Stick” lorsque vous le raccorder au port USB de l’ordinateur, l’installation du pilote de “Memory Stick” (page 12) sera exécutée après l’installation du pilote de souris. Raccordez le port USB de l’ordinateur à... - Page 33 Sélectionnez “Search for the best driver for your device (Recommanded)” et cliquez sur “Next”. Cliquez sur “Next” sans changer les paramètres à cocher. Suivez les instructions qui apparaissent à l’écran jusqu’à la fin pour installer le pilote de souris. L’assistant “Add New Hardware Wizard” démarre deux fois. Suivez les instructions qui apparaissent à...
-
Page 34: Installation Du Pilote De "Memory Stick
• Avant de débrancher cet appareil avec un “Memory Stick” de l’ordinateur ou de retirer le “Memory Stick” après l’installation sur Windows® 2000, cliquez sur l’icône “Disconnect or remove hardware” sur la barre de défilement de l’ordinateur, puis cliquez sur “Stop Sony Peripheral drive (ex: [G:])”. 12-FR... -
Page 35: Installation Du Pilote Usb
à l’étape 4 pour les déposer dans le dossier Système se trouvant dans la fenêtre ouverte à l’étape 5. (Tirez et déposez): • Sony Peripheral USB Driver • Sony Peripheral USB Shim Le message “Place files in Extensions Folder?” s’affiche. -
Page 36: Utilisation Du Lecteur/Enregistreur Windows
BFonctionnement Utilisation du lecteur/enregistreur Windows Lorsque vous allumez votre ordinateur, assurez-vous que le “Memory Stick” n’est pas dans cet appareil. S’il s’y trouve, vous ne pourrez peut-être pas démarrer l’ordinateur. Dans ce cas, redémarrez l’ordinateur après avoir retiré le “Memory Stick” de cet appareil. -
Page 37: Macintosh
• Lorsque vous utilisez Windows®2000, cliquez sur l’icône “Disconnect or remove hardware” dans la barre de défilement de l’ordinateur, puis cliquez sur “Stop Sony Peripheral drive (ex: [G:])” avant de débrancher l’ordinateur de cet appareil lorsqu’il contient un “Memory Stick”. -
Page 38: Pour Les Utilisateur Des Handycam Et Cyber-Shot Numériques Sony
SONY, reportez-vous à leurs modes d’emploi. Les données de “Memory Stick” obtenues avec un HandyCam ou Cyber- shot numérique SONY sont stockées dans les fichiers et dossiers suivants. Selon le système d’exploitation utilisé les écrans peuvent être différents. Mode d’enregistrement Image fixe Image animée... -
Page 39: Utilisation De La Souris
Utilisation de la souris La souris présente les trois fonctions de défilement suivantes: 1. Défilement Défilement haut/bas facile Défilement haut/bas automatique 2. Autopan 3. Zoom PRemarques • Les fonctions de défilement et de zoom de la souris ne sont pas supportées par le Macintosh. - Page 40 Utilisation de la souris (suite) Autopan Appuyez sur la roulette. L’icône d’autopan apparaît dans la barre de défilement. Lorsque l’icône apparaît, déplacez la souris dans la direction souhaitée. Une grande quantité de données défile vers la gauche, la droite, le haut ou le bas.
-
Page 41: Informations Supplémentaires
BInformations supplémentaires En cas de problème En cas de problème, reportez-vous au tableau suivant pour le résoudre. Si vous n’y parvenez pas, contactez votre revendeur Sony. Symptôme Impossible d’installer le pilote USB. Impossible d’installer le pilote de “Memory Stick”. L’icône de “Memory Stick”... - Page 42 En cas de problème (suite) Symptôme Défilement ou zoom impossible. Impossible d’accéder au “Memory Stick”. Votre ordinateur personnel ne se remet pas en marche après une mise en attente ou en veille. 20-FR Cause/Solution •Vous utilisez un logiciel qui ne supporte pas les fonctions de défilement et de zoom.
-
Page 43: Spécifications
Spécifications Souris Interface: Interface USB Capteur: Optique Vitesse de transfert: Max. 1,5 Mb/s Résolution: 400 cpp Commutateur: Bouton gauche/droite, roulette Consommation: Fonctionnement: Max: 100 mA Veille: Max: 500 µA Lecteur/Enregistreur Interface: Interface USB Vitesse de transfert: Max. 12 Mb/s Consommation: Fonctionnement: Max: 100 mA Veille: Max: 500 µA Tension de fonctionnement: Approx. -
Page 44: Raccordements Conseillés
Raccordements conseillés Le fonctionnement est garanti lorsque l’appareil est raccordé de la façon suivante. Cet appareil est raccordé au port USB de l’ordinateur et rien n’est raccordé à l’autre port USB: Le clavier USB est raccordé au port USB d’un ordinateur et cet appareil est raccordé... - Page 48 Sony Electronics Inc.: Customer Support If you have any questions/comments related to this product, please visit our Customer Support website at http://www.sony.com/service (If you do not have internet access, please call 1-800-22 SONY.) Sony Corporation Printed in Japan...