
Related Manuals for Whirlpool DS202NF


Summary of Contents for Whirlpool DS202NF
- Page 1 Installation Guide and Online Warranty Registration Information 產品安全指引、使用說明安裝指南及網上登記保養資料 Model 產品型號 DS202N F DS242N F...
-
Page 2: Table Of Contents
您 為您 您的 惠而浦抽濕 , 。 。 感 查 、 , , 。 產 , , 。 產 產 概 產 產 查 抽濕模式 第 6 感智能模式 乾衣模式 夜間模式 功能 前置過濾網 負離子功能 負離子功能 18 -1 9 20-21... - Page 3 安全注意事項 安全標誌 在使用本產品前,請仔細閱讀本使用說明書。使用此產品時,應遵照本說明書的要 求,以減少火災 電擊及受傷風險。 、 請妥善保存此說明書以便日後查閱。 此標誌的內容是必 此 標 誌 的 內 容 表示不允許做 是 必 須 禁 止 的 須禁止的行為, 否 的禁止事項。 行 為, 否 則 可 則可能會導致產品 警告的損壞及導致 能 會 導 致 受 傷 警告 注意 死亡或重傷。 及財物損失。...
- Page 4 安全注意事項 警告 · 使用時 監顧人必須確保兒童不能將此產品當成玩具使用。 · 確保在移動或不使用此產品前 ,把水箱內的水倒掉。 切勿飲用在水箱內的水。 · 切勿將此產品排出的水供人或寵物作飲用 ,可能會對身體有害。 · 切勿站立或斜靠在此產品上。 否則本機會移動或傾倒而導致受傷。 · 此產品的操作溫度為攝氏 5 至 35 度之間。 · 在維修前,必須把插頭拔出。 · 在移動此產品前 ,必須將水箱的水倒掉。 · 每次進行產品清潔前 ,必須將產品電源完全關掉。 產品內置的風扇會以高速運轉 , 會引致受傷。 · 若長時間不使用此產品,請確保產品拔掉插頭及把水箱內的水倒掉 。 否則 , 可能引致短路或發生火警等危險。 · 每次使用後,請把水箱內的水倒掉,以免細菌滋生。 ·...
- Page 5 安全注意事項 注意事項 · 使用時 請檢查房間尺寸,確定此產品是否有足夠的抽濕能力。當壓縮機變得異常地發 熱時,壓縮機會自動停止以防止意外發生。如出現過熱情況,請把插頭從電源 拔出,並等待約 45 分鐘後,再次啟動產品。 · 切勿將此產品用於一些需要儲存在常溫保存物品的地方,例如藝術珍品或學 術資料等。 · 若沒有裝上生產商指定的前置過濾網,切勿使用此產品。 · 切勿於存有化學物品的地方使用此產品 ,例如醫院、 實驗室、 工廠等等 ,否 則可導致燃燒及發生火警等危險。 · 切勿使用易燃清潔劑清洗此產品 ,例如汽油。 · 當可燃氣體泄漏時,切勿使用此產品,否則可導致燃燒及發生火警等危險。 · 切勿使用輪子將此產品放在不平坦的地面上移動。 在不平坦的地面上移動此 產品時,請把此產品身抬高,避免損壞滑輪或地板。在厚地毯上移動時,請 抬起機身,否則滑輪可能會在地板或地毯上留下痕跡。 · 切勿令機身翻倒或使其掉落。切勿在機身一側儲存物品或用力移動。否則可 導致產品損壞或漏水或短路等情況。 · 切勿在高處 ( 如桌子上) 使用此產品, 否則可導致此產品跌落造成傷害或損壞。 ·...
- Page 6 安全注意事項 注意事項 使用時 · 此產品必須保持直立狀態 ,不可傾斜或翻側。 為免產品受損壞,必須將產品放 置於平穩的地方 · 請時常確保產品附近有足夠空間 ( 建議空間與產品距離 : 機頂 50 厘米或以上 ; 機身 50 厘米或以上 ; 機背 50 厘米或以上 ,機則 50 厘米或以上 ) · 當使用連續排水時 ,確保排水管完全插入排水孔內,以避免漏水情況出現,否則 可導致產品及週邊物品損壞。 · 當使用連續排水時,確保排水管沒有堵塞及受阻,否則可導致產品損壞。 · 請定期 檢查 及每兩星期清潔背板 及前置過 濾網。 若通風不良, 會影響產品抽濕之 能力...
-
Page 7: 產 概 產
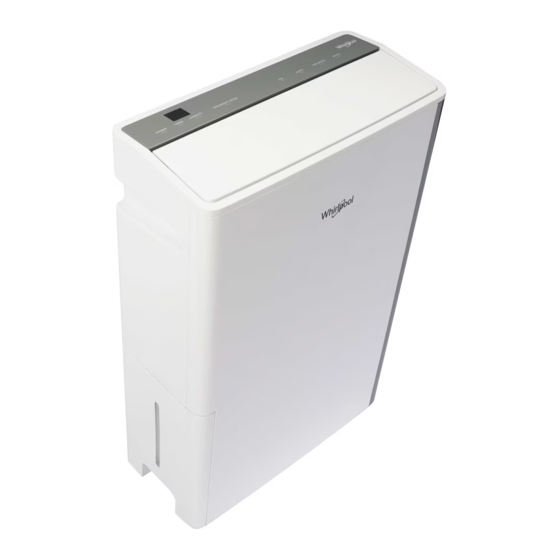
產 品特點 此產品備有抽濕及乾衣功能,全年適用。 第 6 感智能模式 – 透過 智能濕度感測功能 , 來感測周 邊環境濕度的改變;使風扇可即時調節適當的風速。 抽濕模式 – 通過個人設置來進行調整風速及運行時間。 乾衣模式 – 以最高的風速來進行乾衣 , 適用於潮濕的 季節 , 亦適合於全年使用。 夜間模式 – 風速以低速 運行 , 造就一個寧靜和舒適的 環境 。... - Page 8 產品簡圖 主機 ( 正面 ) 1. 導風板 5. 水箱蓋 6 . 水箱 把 手 2. 操作面板 3. 風擺左右撥輪 7. 水箱 8. 水位顯示 4. 隱藏式把手...
- Page 9 產品簡圖 主機簡圖 ( 背面 ) 1. 連續排水孔及水塞 背板及前置過濾網 2. 繞線板 濕度感應器 3. 電源線...
- Page 10 操作面板 號 碼 按 鍵 / 項 目 內 容 相 關 內 容 開 / 關按鍵 電源開/關 設定所需操作時間 ( 小時 )。 時間按鍵 頁 頁 濕度按鍵 設定所需的室內濕度 選擇 4 種不同模式包括 模式按鍵 12-14 頁 抽濕模式 夜間模式 當“%”燈亮起時 ,屏 會 幕 顯示目前大約的濕度; 當“hr”燈亮起時,...
- Page 11 控制面板 號 碼 按 鍵 / 項 目 內 容 相 關 內 容 啟 頁 亮起, 。 頁 清 燈亮起, 頁 。 12-14 頁 , 。 16頁 , 。 ( ) – 。 清 清 ( DEFROST ) – 自動除...
- Page 12 使用準備 拆除包裝 · · 警告 · 檢 檢查水箱 啟動主機 · 水箱必須正確安裝,否則將無法 。 注意事項 : 由於出廠前會進行水箱檢驗,可能會有水遺留在水箱,這並不是故障。 安裝位置 · 抽濕機必須垂直放置。 · 擺放於一個穩定,平坦地面上。若放置在地毯上,可能會導致翻倒。 · 確保產品附近有足夠空間 ( 建議的 產品距離 : 機頂 50 厘米或以上 ; 機身 50 厘 米或以上 ; 機背 50 厘米或以上,機側 50 厘米或以上 ; 機側 ( 水箱面 5 ) 0 厘米或以上 ) ·...
- Page 13 使用準備 操作條件 · 操作環境溫度 5℃ - 35℃ 警告 : 以下地方並不適合使用 : · 操作環境相對濕度 RH% >30% · 被陽光直射 地方 · · 只適合 220V 電源插座 室外戶外地方 · 狹窄的空間環境,如衣櫃內 · 將電源插頭插入電源座 · 充滿大量蒸汽或油,如廚房 - 抽濕機發出“嗶”一聲,代表已連上電源。 注意事項: - 此時操作面板上的 LED 燈未有亮起。 · 室內相對濕度高於80%時 , 會...
-
Page 14: 抽濕模式
操作方法 抽濕模式 1. 按下”開 / 關”鍵,開啟產品,開 / 關燈 亮起。 幕會顯示周邊的濕度。 屏 3. 如首次使用,模式會自動依當前濕度自動切換風速及導風板擺動角度為廣角。 如不是首次使用,按下“模式”鍵,直至“抽濕模式 燈亮起。 5. 按“風速”鍵,以選擇所需的風速。 最高風速 中度風速 低風速。 6. 按“導風板擺動”鍵,以選擇導風板擺動角度。 廣角 向上 向前 * 注意 1: 當每次選擇不同的導風板擺動角度時,導風板會先擺到 " 廣角 " 最大角度,然後停留約 10 秒才會 再次擺動到所選的導風板擺動角度。 2: 當選擇導風板廣角角度後,然後再按一次導風板擺動鍵,導風板會停頓並固定於當前位置。 7. 時間設定 ,再... -
Page 15: 第 6 感智能模式
操作方法 第 6 感智能模式 啟產品,開 / 2 按下 選擇 。 3 如 於首次開機,約 5 秒內,風速會設定為 低風速。約 5 秒後,依當前濕度,自動 。 , , 濕度大於 75 最高風速。 • 為 至 70 之間 為 中度風速。 • • 風速濕度小於 50 為 5 按下 導風板擺動 鍵,選擇所需的擺動角度 廣角... -
Page 16: 夜間模式
操作方法 夜間模式 1 按下 開 關 鍵,開啟產品,開 關燈亮起 按下 模式鍵 直至 夜間模式 燈 亮起 3 在 夜間模式 下,風速設置為最低風速。 導風板則設定為向上 運行 1 分鐘後,空氣質素 指示燈便會關上及所有顯示及顯示屏燈會變暗 4 按下 導風板擺動 鍵,選擇所需的擺動角度。 廣角 向上 向前 注意 1: 當每次選擇不同的導風板擺動角度時,導風板會先擺到 廣角 最大角度,然後停留約 10 秒才會 再次擺動到所選的導風板擺動角度。 2 當選擇導風板廣角角度後,然後再按一次導風板擺動鍵,導風板會停頓並固定於當前位置 5 如有需要,可按... - Page 17 操作方法 排水提示 FULL 當“ ”燈亮起時,表示水箱 已滿( 約5.4L)。抽濕機會自動停止運作。 1 . 從抽濕機左側及其底部取出水箱,水箱設有把手, 能輕易將其提取。 排水口 排水口 可從 排水口清理積水,直至將水箱清空。 3. 確認水箱蓋好, 並將儲水箱放回此抽濕機的原來位置。 4. 當儲水箱放回此產品的原來位置後,提示燈“ ” 便會消除 。 注意事項 : 當抽濕機運作剛剛結束時 ,可能還有殘餘的水流到水箱,請避免立即把水箱拉出,以免有餘水流到機殼。...
- Page 18 操作方法 導風板設定 1. 按下 “導風板擺動”鍵,選擇導風板的擺動角度。 當處於廣角角度下, 再次按下“導風板擺動”鍵,數秒後顯示燈熄滅, 可固定導風板於當 前位置。 廣角搖擺 向上搖擺 向前搖擺 3. 亦可人手調節風擺的左右撥輪, 以調節左右的風擺方向。 * 注意 : 當每次選擇不同的導風板擺動角度時,導風板會先擺到“廣角”最大角度, 然後停留約 10 秒,才 會再次擺動到所選的導風板擺動角度。 連續排水 水塞 打開水塞 插入水管 1. 關閉抽濕機之電源及從電源插座拔下插頭。 打開水塞 。 3. 插 入水管 。 如要拆除及收納水管,請以相反次序進行。 注意事項 : •排水喉內徑 10 毫米,外徑為15毫米, 長度大約為1米。 •確保排水管牢牢接駁到排水孔,以避免滲漏。...
-
Page 19: 前置過濾網
負離子功能 前置過濾網 此抽濕機設有前置過濾網能過濾空氣中的塵埃及毛髪。 前置過濾網附有納米銀離子塗層能有效阻隔空氣中體積較大的粒子及污染物,更有高效 抗菌作用,特別是對金黃葡萄球菌及大腸桿菌。 負離子淨化 使用高電壓以負離子(電荷)的空氣分子,使空氣中的分子變為正或負離子。負離 子淨化功能被用來減少空氣中的微塵數量。對於負離子淨化功能的操作,請參考 14 . 頁 前置過濾網 及銀離子過 濾網(*設於 後蓋上) - Page 20 保養及維修 清潔前置過濾網 清 1.當“ ”提示燈亮起時,表示需要 洗前置過濾網 。 2. 打開 主機背板 ,而前置過濾網則貼於 過濾網框 內方。 , 置過濾網 用水清 洗的 將其徹底吹乾。 3. 取出前 將主機背板連同前置過濾網放回此機上。 提示燈“ ”仍然會亮著。長按“ ”鍵直至燈滅(約8秒以上)。 警告 過濾網是可用水清 洗的。 清洗後從新裝上 過濾網, 必 須將其徹底吹乾。 • 前置 前置 • 前置過濾網附有納米銀離子塗層, 顏色為銀色。 如果經常清洗,顏色可能會有所改 變(如黑色或灰色)。 除霜功能 ”燈亮起...
- Page 21 保養及維修 內部乾燥 1. 關機後,風扇會以高風速連續運行約 10 秒,把機內水份吹乾,以防止霉菌滋生。 背蓋 (前置濾網) 1. 除了前置過濾網外,灰塵亦可能被困於背板內。建議每兩周清潔背板一次。 2. 打開背板 ,用吸塵機輕輕地去除背板上多餘的灰塵。 水箱 1. 每次使用此產品後 ,必須清空水箱內的剩餘水份。 水箱蓋 水箱蓋 2. 除去水箱蓋 ,用軟抹布擦乾水箱。 3. 將水箱蓋裝回水箱上及放回其原本的位置。 主機 建議定期清潔抽濕機的機身。 1. 清潔前,必須拔掉電源插頭。 2. 使用濕的軟布或中性洗滌劑擦進行清潔,再用乾布抹乾。 3. 若長時間不使用此產品,建議拔掉電源插頭,清潔包裝此產品及存放於乾燥及沒有 陽光直接照射的地方。 警告 皂 •切勿使用沸水,去污劑,酸性或鹼性洗潔劑,肥 ,研磨粉,汽油,稀釋劑,酒精,苯有機 溶液和刷子清潔抽濕機。 • 切勿用噴水沖洗方式去清洗抽濕機。...
- Page 22 故障與排除 在聯絡客戶服務 前,請先檢查是否出現以下情況,從而找出解決方案。若問題仍未能 解決,請勿自行拆開機殼及進行維修。應立即停止使用此產品,與客戶服務聯絡。 問題 疑難排除 · 抽濕機產生熱風 當使用第 6 感智能、夜間、抽濕及乾衣模式時,會產生 熱風,這是正常現象,並不是故障。 · 檢查電源是否連接;電壓是否過低 ; 電源插頭是否緊緊插上。 抽濕機不能正常運作 · 檢查環境溫度是否處於攝氏 5℃至 35℃之間。 因為此產品 的操作溫度是設定於攝氏 5℃至 35℃之間。 · 檢查周邊環境相對濕度是否大於 30%。 因為此產品的 操作環 境相對濕度必須大於 30%。 · 檢查是否已裝上水箱。若沒有裝上水箱,此產品將無 法正常工作,另檢查水箱是否放置在適當的位置。 · 檢查水箱是否已滿。若是,請清空水箱 頁 ) · 檢查空氣入口和出口是否被堵塞。若是,請除去...
- Page 23 故障與排除 問題 疑難排除 · 聲音是由於抽濕機於高風速運行所產生,音量會因環境而 產品發出噪音 有所變化,此產品性能是不受影響的。 · 壓縮機運行時亦會產生聲音,屬正常現象,這不是故障。 · 聲音的音量是取決於導風板的角度。 · 檢查此產品是否放置在平面上。 · 檢查背板是否正確地裝上。 · 檢查空氣入口和出口是否被堵塞。 若是, 請除去障 礙,並確保 有此 ( 10頁 ) 產品有足夠的空間使用。 · 檢查是否需要清洗前置過濾網 。 頁 ) · 檢查水箱是否放置在平面上。 漏水 · 檢查此產品是否處於在水平的表面上。 · 在連續排水的情況下,檢查排水管是否正確地接至排水孔。 · 是否水箱剛剛拉出清空,引致機內殘餘的水流到機殼。 · 抽濕機顯示的濕度為現行位置的濕度,可能與其他位置的...
- Page 24 規格表 產品型號 DS202 F 電源 220V/ 50Hz 220V/ 50Hz 容量 ( 升 /日) 12 升 14 升 ℃ ( 溫度 : 26.7 ; RH 60%) 容量 ( 升 /日) 20 升 24 升 ℃ ( 溫度 : 30 ; RH 80%) 耗電量...
- Page 26 Dear User, Thank you for choosing our products. We are sure you will find your new appliance please to use. Before using this appliance, we highly recommend you read through this operation instruction carefully and retain for future reference. Design and specifcation may change due to product development, no prior notice will be given.
- Page 27 Safety Instructions Safety mark Please read all instructions carefully before using this product. When using the appliances, should always follow this instruction to reduce the risk of fire, electric shock, and injury to person. Please keep this manual. This mark indicates This mark indicates Prohibit t h e b e h a v i o r s i s...
- Page 28 · Do not attempt to repair, dismantle or modify the unit. This may cause electric shock or fire. Please contact Whirlpool customer service centre. Do not unplug the power cord without power “OFF” the appliance as it could injury ·...
- Page 29 Safety Instructions CAUTION · Check that the room where the unit is to operate is not too small. When its compressor overheats, it cuts out automatically to prevent accidents. Should this happen, unplug the appliance, rectify the problem, wait for about 45 minutes and then restart the unit.
- Page 30 Safety Instructions CAUTION During Usage · This unit sho uld always keep in an upright position. To avoid damage, this unit should be located on a flat and stable surface. · Always have plenty of room around the main unit(Recommended space: Upper 50cm;...
- Page 31 Product Features This product comes with independent dehumidifying and laundry functions, suitable for usage in all seasons. 6th Sense mode – It detects the ambient humidity changes through it’s intelligent humidity sensors, and reacts to make a prompt adjustments on the Fan speed.
- Page 32 Product Overview Product outlook (Front view ) 1. Louver 5. Water tank lid 6. Water tank handle 2. Control panel 7. Water tank 3. Horizontal louver slider 8. Water level indicator 4. Recess handle...
- Page 33 Product Overview Product outlook ( view ) 1. Outlet of continuous drainage Back cover with Pre-filter and water plug 5. Humidity sensor 2. Power cable stand 3. Power plug...
- Page 34 Product Overview Function Referring page Power key On / Off the unit Set the duration for operating hour P.36 Timer key Set your desire humidity level P.36 Humidity key Select 4 different operation mode includes MODE · · P.36 - P.38 Dehumidifying Laundry ·...
- Page 35 Product Overview Function Referring page Ion Key Activate ionizer function P.38 · Child lock is activated when the light is on. Child Lock / P.38 · After cleaning the filter, reset is necessary P.42 Reset key when the light is on . P.36 Fan Speed key There are 3 fan speed for selection.
- Page 36 Before Use Unpacking Unpack all the packaging materials , including carton box,foams,plastic bag,stickers,etc.. Keep children away from the packaging since the folded packing and plastic bag may cause suffocation. WARNING Please check the accessories inside the package according to packing list. Check Water Tank ·...
- Page 37 Before Use Operating Condition WARNING Do not use the unit in the Operating ambient temperature 5°C - 35°C · following places: Under direct sunlight · · Operating ambient humidity RH% >30% · Outdoor 220V AC power supply only · Narrow space environment such as ·...
- Page 38 Using your Dehumidifer Dehumidfying Mode 1. Press “POWER” key to turn on the dehumidifer, lights up 2. LED displays the ambient humidity 3. In the first time, the mode will base on current humidity to change the fan speed automatically. And set the swing angel as the maximum lights up.
- Page 39 Using your Dehumidifer 6th Sense Mode 1. Press “POWER” key to turn on the dehumidifer, lights up 2. Press 6th sense “ MODE” key until lights up. 3. In the first time, the fan speed will set as Low in 5 seconds, after that, it will base on current humidity to adjust the fan speed automatically.
- Page 40 Using your Dehumidifer Night Mode 1. Press “POWER” key to turn on the dehumidifer, lights up. 2. Press “ DEHUMIDITY MODE ” key until lights up. 3. Under Night mode, fan speed operates at low speed . Louver will set at front-up. After 1 minute operation, the Air Quality Indicator will turn off,...
- Page 41 Using your Dehumidifier Drainage When the “FULL" indicator lights up, it means the water tank is full (around 5.4L) , the unit will be stoppped automatically. 1 . Take out the water tank gently. There is a handle at the the top of water tank.
- Page 42 Using your Dehumidifer Louver Setting 1.Press “SWING” key to select the vertical louver swing angle. 2.Press “SWING” until the light is off, the louver will stop at the angle as is. Vertical Vertical Vertical z i r louver swing louver swing louver swing can be operated manually in wide angle...
- Page 43 Ionizing System Pre-Filter This dehumidifier comes with a washable pre-filter which can be used to filtrate dust and hair in the air. Such pre-filter also comes with Nano-Silver ion coating which is able to filtrate dust in the air and effective on anti-bacterial activies,especially for MRSA and E.coli Ionizer Uses high voltage to ionize (electric charge) air molecules, such that the air molecules become positive or negative c harges.
- Page 44 Care and Maintenance Clean the pre-filter 1. When “ ” light up, it is necessary to clean the pre-filte 2. Take off the back cover of main unit , pre-filter is integrated into the back cover. Wash and clean the pre-filter. Return the back cover to the main unit.
- Page 45 Care and Maintenance Inter nal Drying 1. When power off , the fan will continue to operate for 10 seconds at high fan speed to dry out the internal moisture for anti-mildew purpose . At this moment , the light"DEFORST" will light up. That's mean the internal drying function is in progress. Back Cover (Pre-filter) 1.
- Page 46 Trouble shooting Please check the below phenomenon to find out the solution before contact customer services. If the problem still cannot be solved, please do not dismantle the machine. You should stop using the machine and contact customer services to solve the problem. Problem Possible Cause &...
- Page 47 Trouble shooting Problem Possible Cause & Solution • The sound is generated due to the air flow especially in high fan speed. The sound level varied with the environment but the efficiency is not affected. • S ound will be generated when starts up. It is due to the operation of compressor.
- Page 48 Specifcation DS202NF DS242NF Model 220V/ 50Hz 220V/ 50Hz Power Supply Capacity (L/day) ( Temp: 26.7℃; RH 60% ) Capacity (L/day) ( Temp: 30℃; RH 80% ) Power Consumption ( kWh/day ) 13.9 Net Weight (kg) Dimension 400 x 590 x 175...
- Page 49 Register your product online 網上登記新產品保養 Save the planet and register your product warranty online! Enjoy extra 1-month free warranty upon online registration. 「惠」環保出力,減少用紙!於網上登記產品更可獲額外多一個月保養。 https://rebrand.ly/WPwarranty...