Table of Contents
Advertisement
Quick Links
Safety • Setup • Adjustments • Operation • Maintenance • Troubleshooting • Parts Lists • Warranty
OPERATOR'S MANUAL
IMPORTANT:
READ SAFETY RULES AND INSTRUCTIONS
CAREFULLY BEFORE OPERATING EQUIPMENT.
PRINTED IN U.S.A.
20" Rotary Mower — Model Series 020
MTD Products Ltd., P. O. Box 1386, KITCHENER, ONTARIO N2G 4J1
769-04639
12.04.08
Advertisement
Table of Contents

Related Manuals for MTD Yard Machines 020 Series


Summary of Contents for MTD Yard Machines 020 Series
- Page 1 Safety • Setup • Adjustments • Operation • Maintenance • Troubleshooting • Parts Lists • Warranty OPERATOR’S MANUAL 20” Rotary Mower — Model Series 020 IMPORTANT: READ SAFETY RULES AND INSTRUCTIONS CAREFULLY BEFORE OPERATING EQUIPMENT. 769-04639 MTD Products Ltd., P. O. Box 1386, KITCHENER, ONTARIO N2G 4J1 12.04.08 PRINTED IN U.S.A.
-
Page 2: Table Of Contents
This Operator’s Manual is an important part of your new equipment. It will help you assemble, prepare and maintain the unit for best performance. Please read and understand what it says. Table of Contents Slope Gauge............3 Operating Your Lawnmower ......12 Safe Operation Practices ........4 Maintainence and Storage .......14 Safety Symbols ...........6... -
Page 3: Slope Gauge
Use this page as a guide to determine slopes where you may not operate safely. Do not operate your lawn mower on such slopes. Slope Gauge WARNING Do not mow on inclines with a slope in excess of 15 degrees (a rise of approximately 2-1/2 feet every 10 feet). -
Page 4: Safe Operation Practices
WARNING: Engine Exhaust, some of its constituents, and certain vehicle components contain or emit chemicals known to the State of California to cause cancer and birth defects or other reproductive harm. DANGER: This machine was built to be operated according to the rules for safe operation in this manual. As with any type of power equipment, carelessness or error on the part of the operator can result in serious injury. - Page 5 3. Always be sure of your footing. A slip and fall can cause serious 13. To reduce fire hazard, keep mower free of grass, leaves, or personal injury. If you feel you are losing your balance, release other debris build-up. Clean up oil or fuel spillage and remove the blade control handle immediately, and the blade will stop any fuel soaked debris.
-
Page 6: Safety Symbols
This page depicts and describes safety symbols that may appear on this product. Read, understand, and follow all instructions on the machine before attempting to assemble and operate. Symbol Description READ THE OPERATOR’S MANUAL(S) Safety Read, understand, and follow all instructions in the manual(s) before attempting to assemble and operate Symbols DANGER —... - Page 7 NOTES...
-
Page 8: Setup And Adjustments
It is suggested that this manual be read in its entirety before attempting to assemble or operate. Keep this manual in a safe place for future reference and for ordering replacement parts. NOTE: Locknuts cannot be threaded onto a bolt by hand, a wrench is required for assembly. This type of nut is used where vibrations occur. - Page 9 Attaching Lower Handle (Hardware A) • Raise the rear of the deck and place it on a block securely. • Place the lower handle over the deck aligning the Setup and lower two holes in the handle with the corresponding holes on the deck.
- Page 10 Attaching the Blade Control Handle NOTE: If the blade control handle got displaced either during shipping or during assembly of other two handles, reassemble it now. If the blade control handle is firmly secured in place, you may proceed to the next assembly. Setup and •...
- Page 11 Attaching Wheels (Hardware E) NOTE: The holes provide three cutting heights for your mower. Use the same hole location for all four wheels when assembling. For example, if you desire the lowest Setup and cutting position, assemble each wheel at the highest hole on the deck.
-
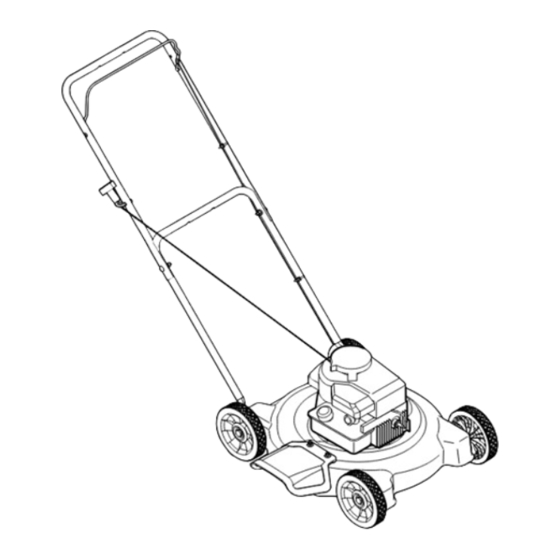
Page 12: Operating Your Lawnmower
Know Your Lawn Mower Operating Your Lawn Mower WARNING Read, understand, and follow all instruc- tions and warnings on the machine and Figure 5-1 in this manual before Blade Control Handle operating. The blade control handle is located on the upper handle of the mower. - Page 13 To Stop Engine Operating Tips 1. Release the blade control handle to stop the engine 1. For best results, do not cut wet grass. and blade. 2. New grass, thick grass, or wet grass may require a narrower cut. WARNING: The blade continues to rotate for a few seconds after the 3.
-
Page 14: Maintainence And Storage
4. The spark plug should be cleaned and the gap reset once a season. Spark plug replacement is recommended at the start of each mowing season; check engine manual for correct plug type and gap specifications. NOTE: This spark ignition system meets all requirements Maintenance of the Canadian Interference-Causing Equipment Regula- tions. - Page 15 Off-Season Storage 4. Remove blade and adapter from the crankshaft. The following steps should be taken to prepare your lawn 5. The blade may be resharpened by removing it and mower for storage. either grinding or filing the cutting edge keeping 1.
-
Page 16: Trouble Shooting
Problem Cause Remedy 1. Engage blade control handle. Engine fails to start 1. Blade control handle disengaged. 2. Connect wire to spark plug. 2. Spark plug wire disconnected. 3. Fuel tank empty or stale fuel. 3. Fill tank with clean, fresh gasoline. Trouble 4. -
Page 17: Warranty
Damage resulting from the installation or use of any part, accessory or attachment not approved by MTD for use with the product(s) covered by this manual will void your warranty as to any resulting damage. - Page 19 PART N° DE N° DE RÉF PIÈCE DE SCRIP TION DE SCRIP TION 710-0654A Hex Wash HD Tap Scr 3/8-16 x .88 Vis autotaraudée 3/8-16 x 0,88 782-0048 20" Deck w/sprig logo Pla teau de coupe 20 po avec/logo sprig (brin d’herbe) 787-01602 20"...